Custom Object Associations allow you to connect records across different data types, helping you track relationships, organize information, and build more powerful workflows. This feature enables you to link contacts with custom objects or connect custom objects with each other for better data visibility and management.
TABLE OF CONTENTS
What Are Custom Object Associations?
Custom Object Associations let you define relationships between records using labels. These relationships help you understand how different records are connected and allow you to manage interactions more effectively.
You can:
Associate contacts with custom objects
Associate custom objects with other custom objects
Use labels to define relationship types
View and manage relationships directly from record details
All associations are many-to-many, meaning multiple records can be linked together.
Creating Associations
To start using associations, you first need to create a relationship structure between objects.
This screen shows where to open the Associations tab for a selected object.
What to do: Navigate to Settings → Custom Objects, select your object, and click on the Associations tab.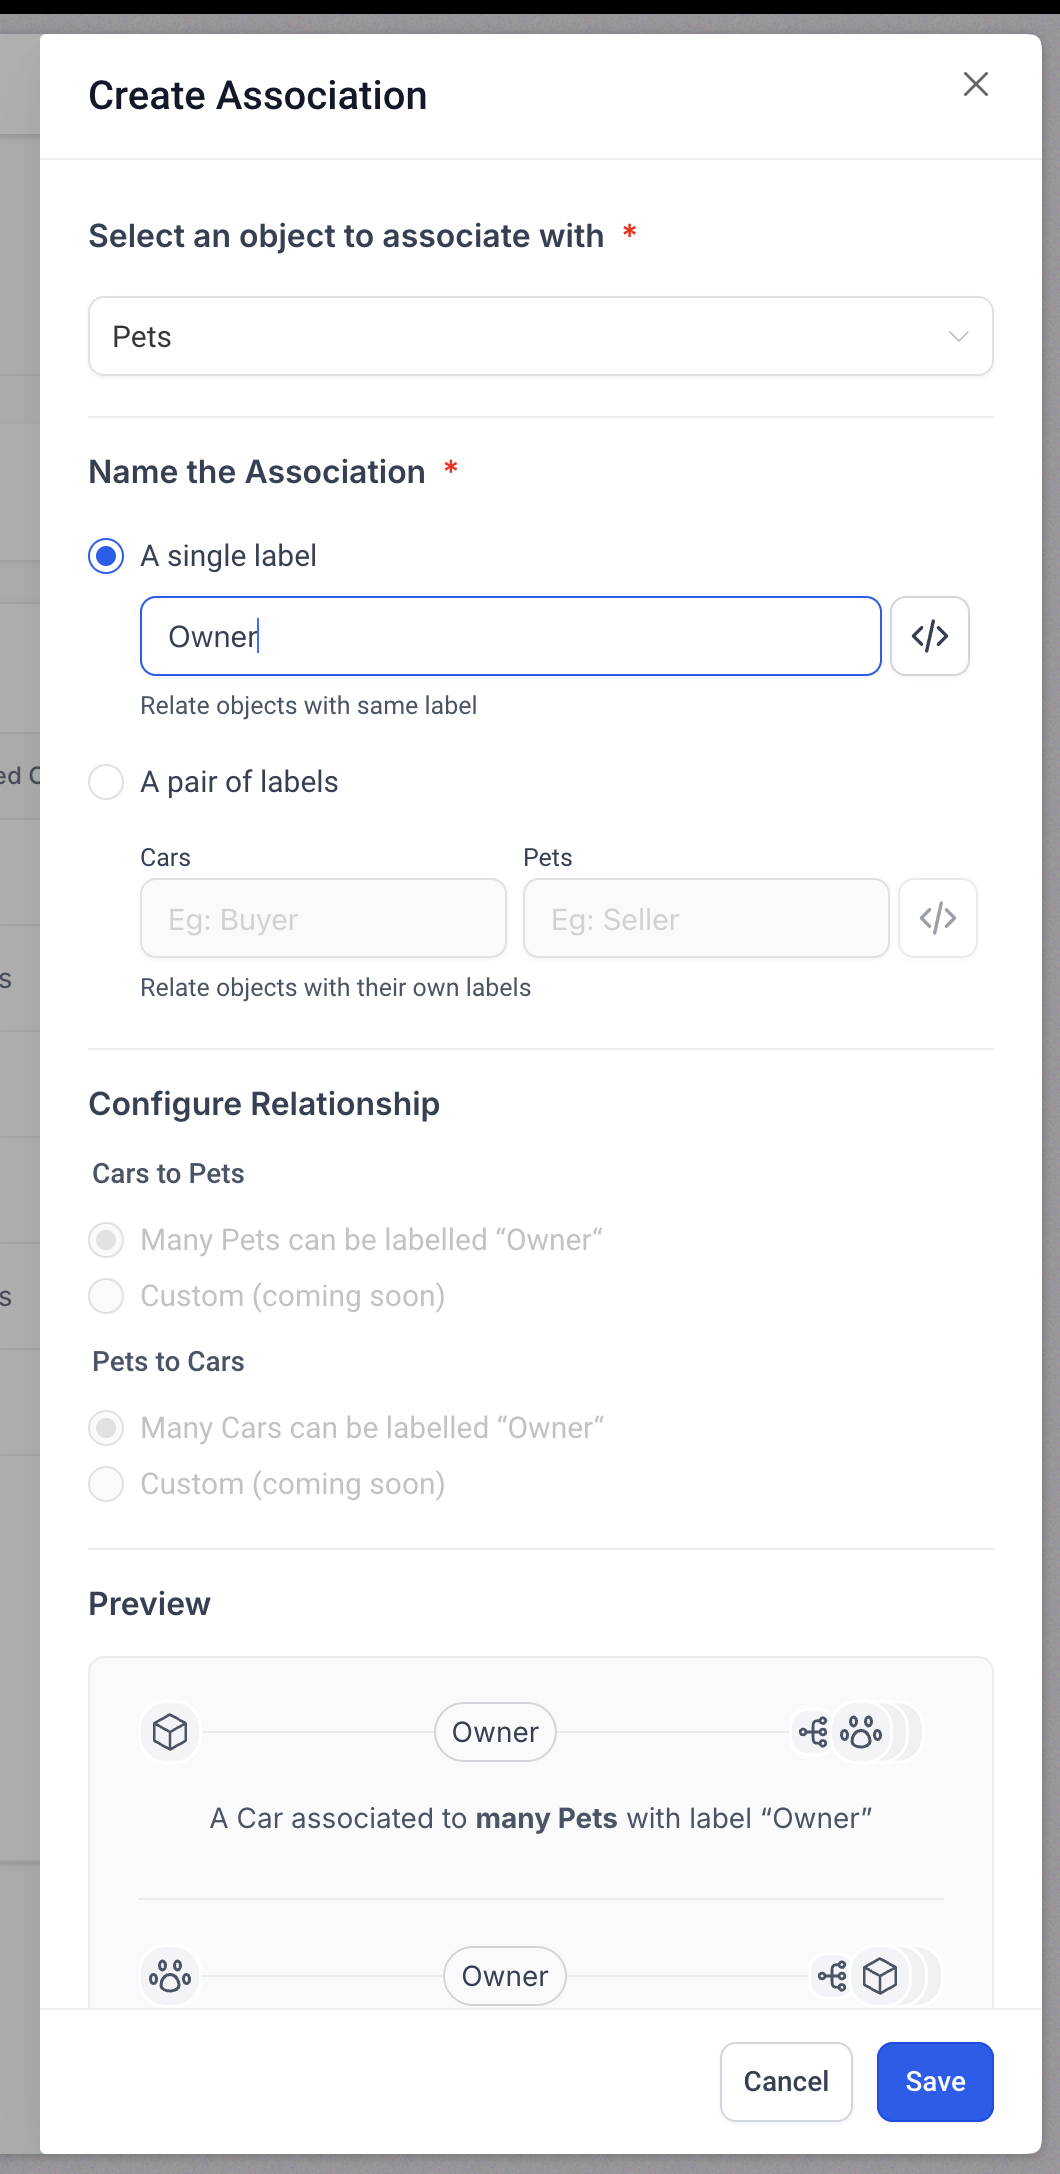
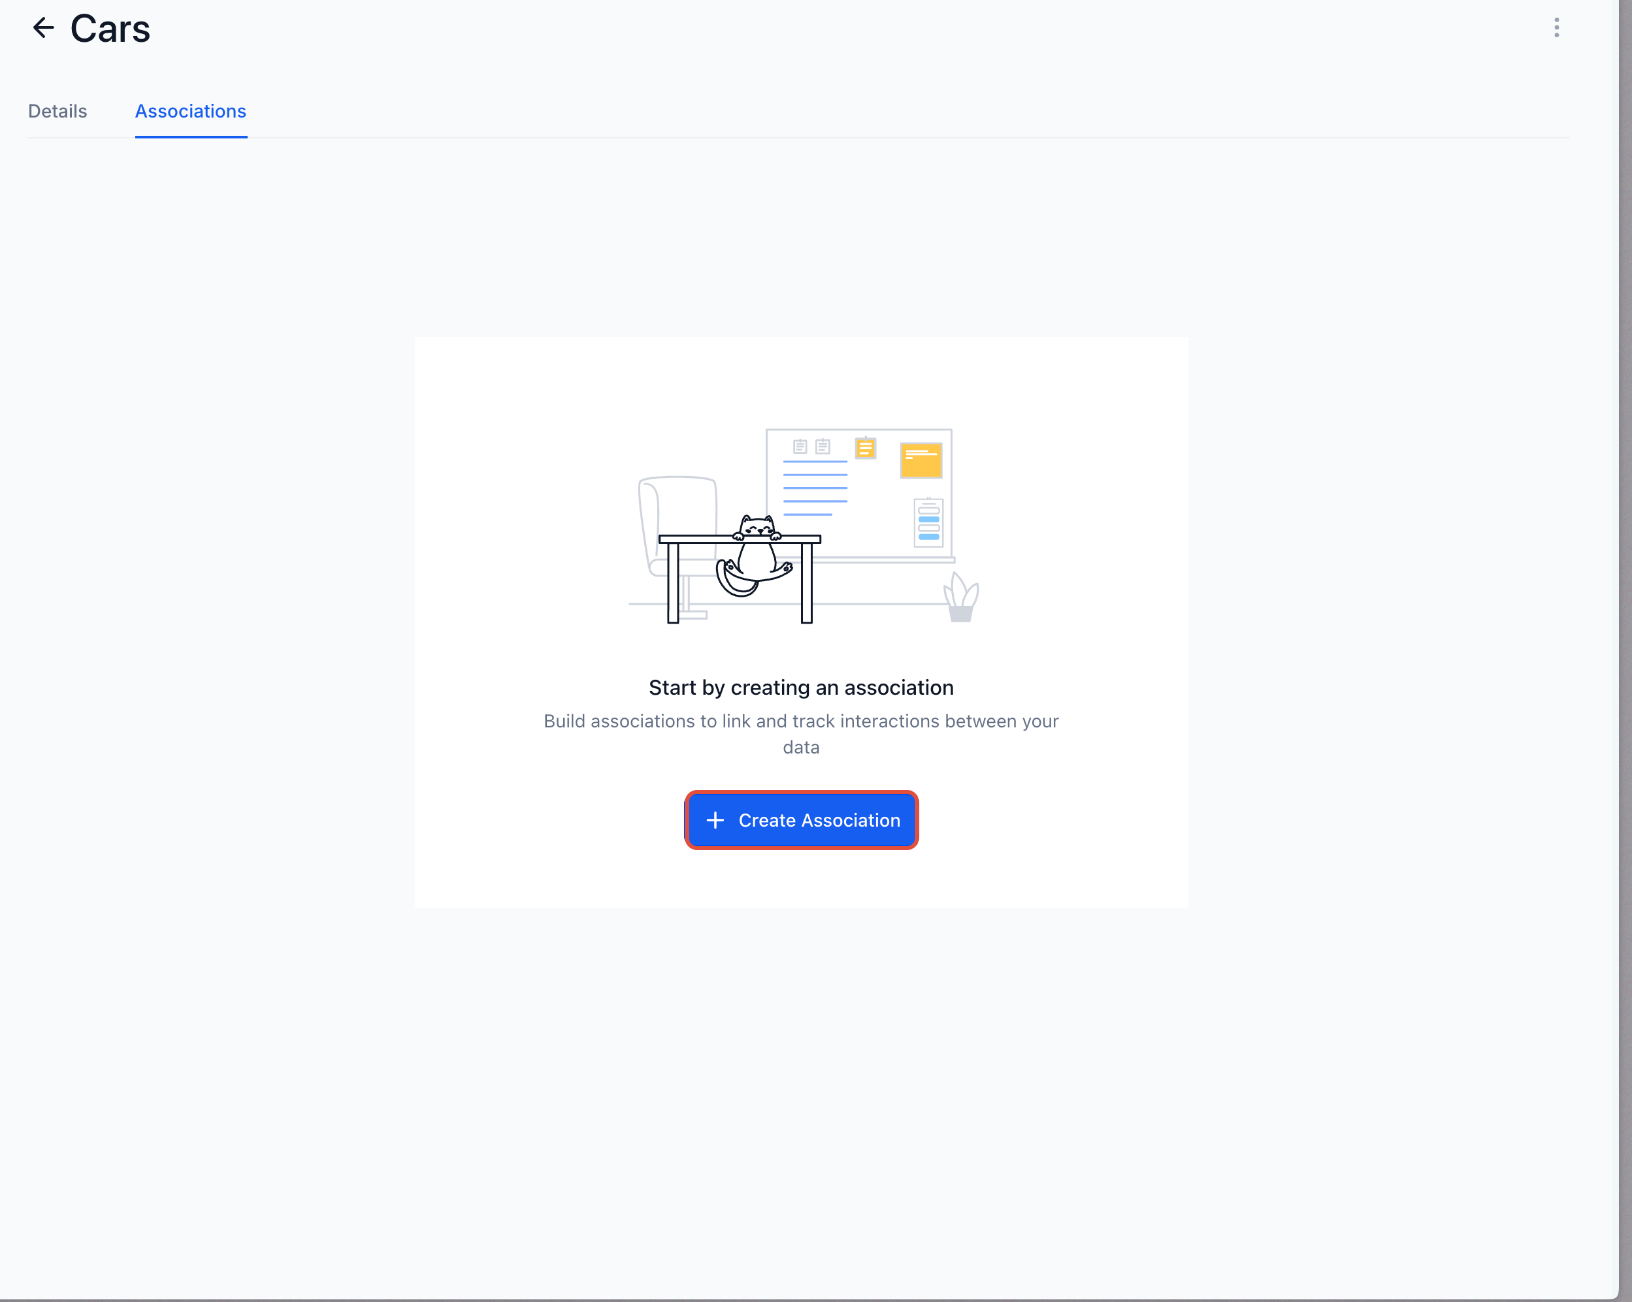
This screen shows the option to create a new association.
What to do: Click Create Association to begin setting up a relationship between objects.
Set Up Association Labels
You can define how records relate using labels:
Single label: Same relationship on both sides (e.g., “Owner”)
Pair of labels: Different relationship names for each side (e.g., “Buyer” and “Seller”)
This screen shows how to name labels and configure relationships.
What to do:
Choose single or paired labels
Enter label names
Review the relationship preview
Click Save
Key Notes
All associations are many-to-many
You can create up to 10 labels per object relationship
Labels define how records are connected and displayed
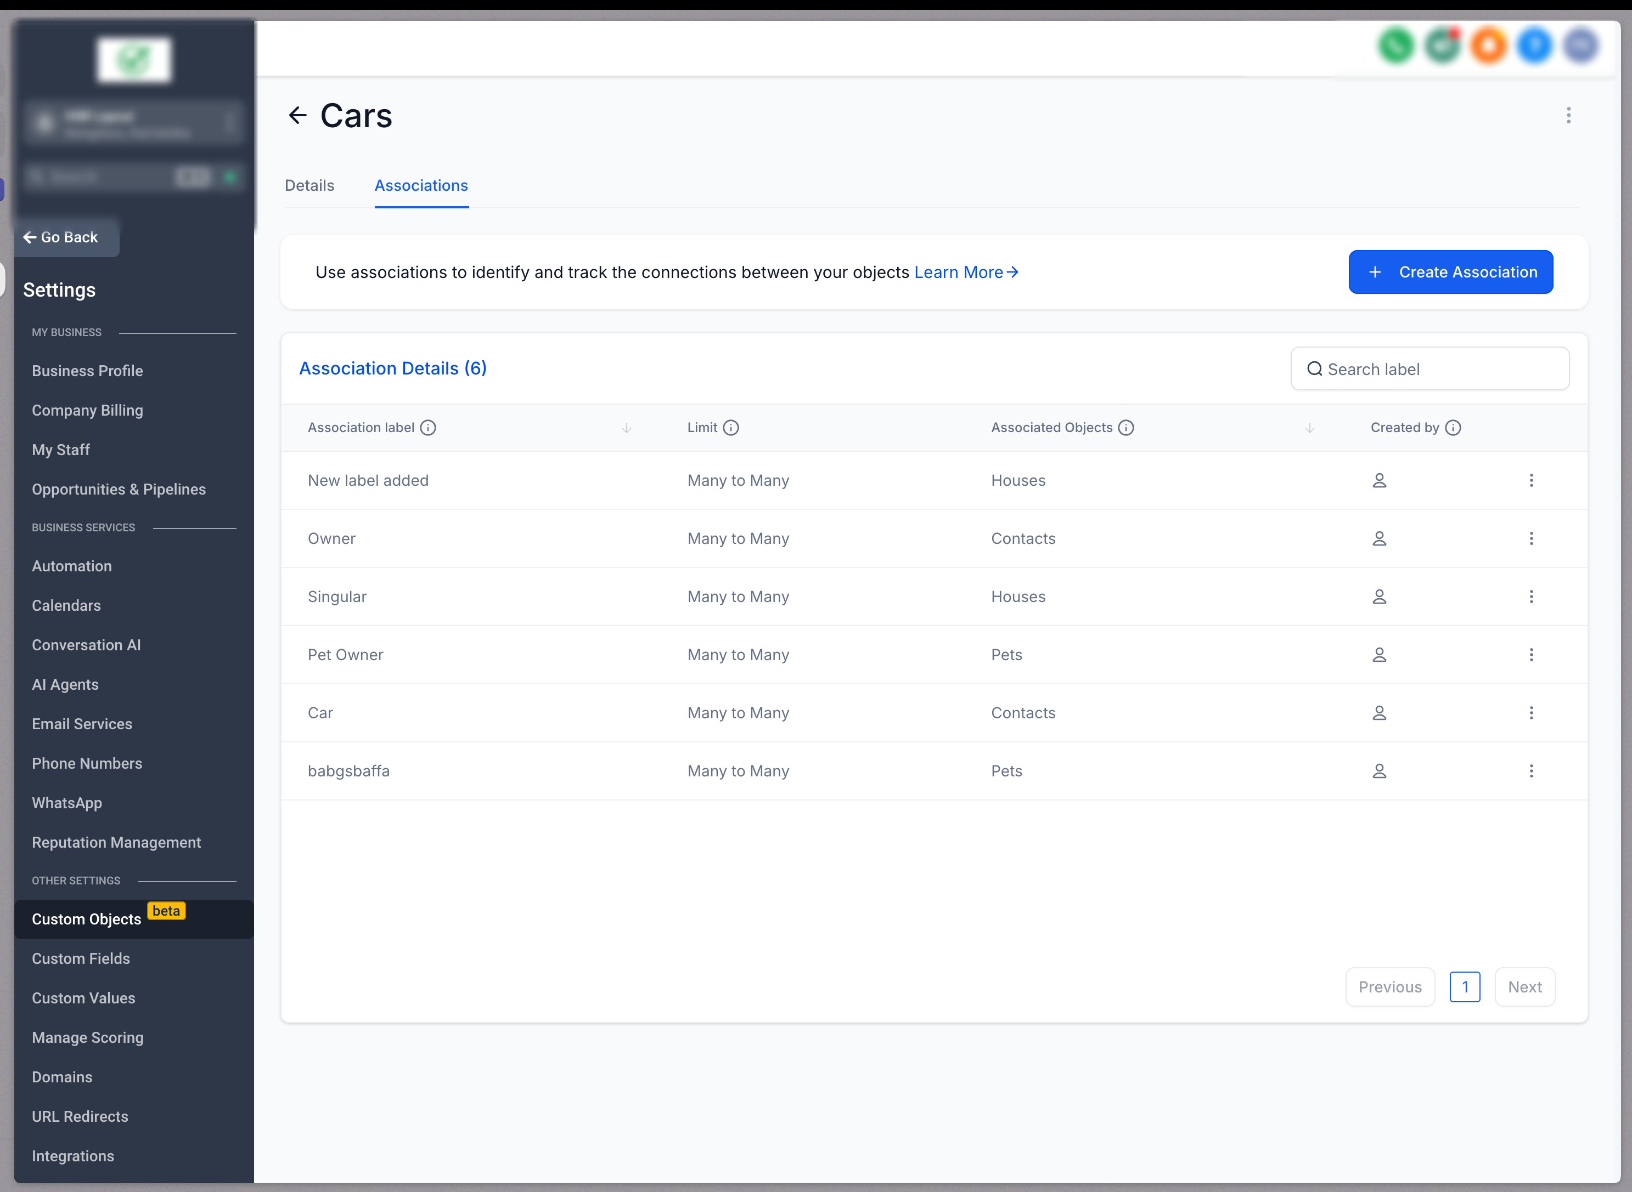
Managing Associations
Once associations are created, you can view, edit, or delete them.
This screen shows all created associations and their linked objects.
What to do: Review association labels, connected objects, and relationship types from this list.
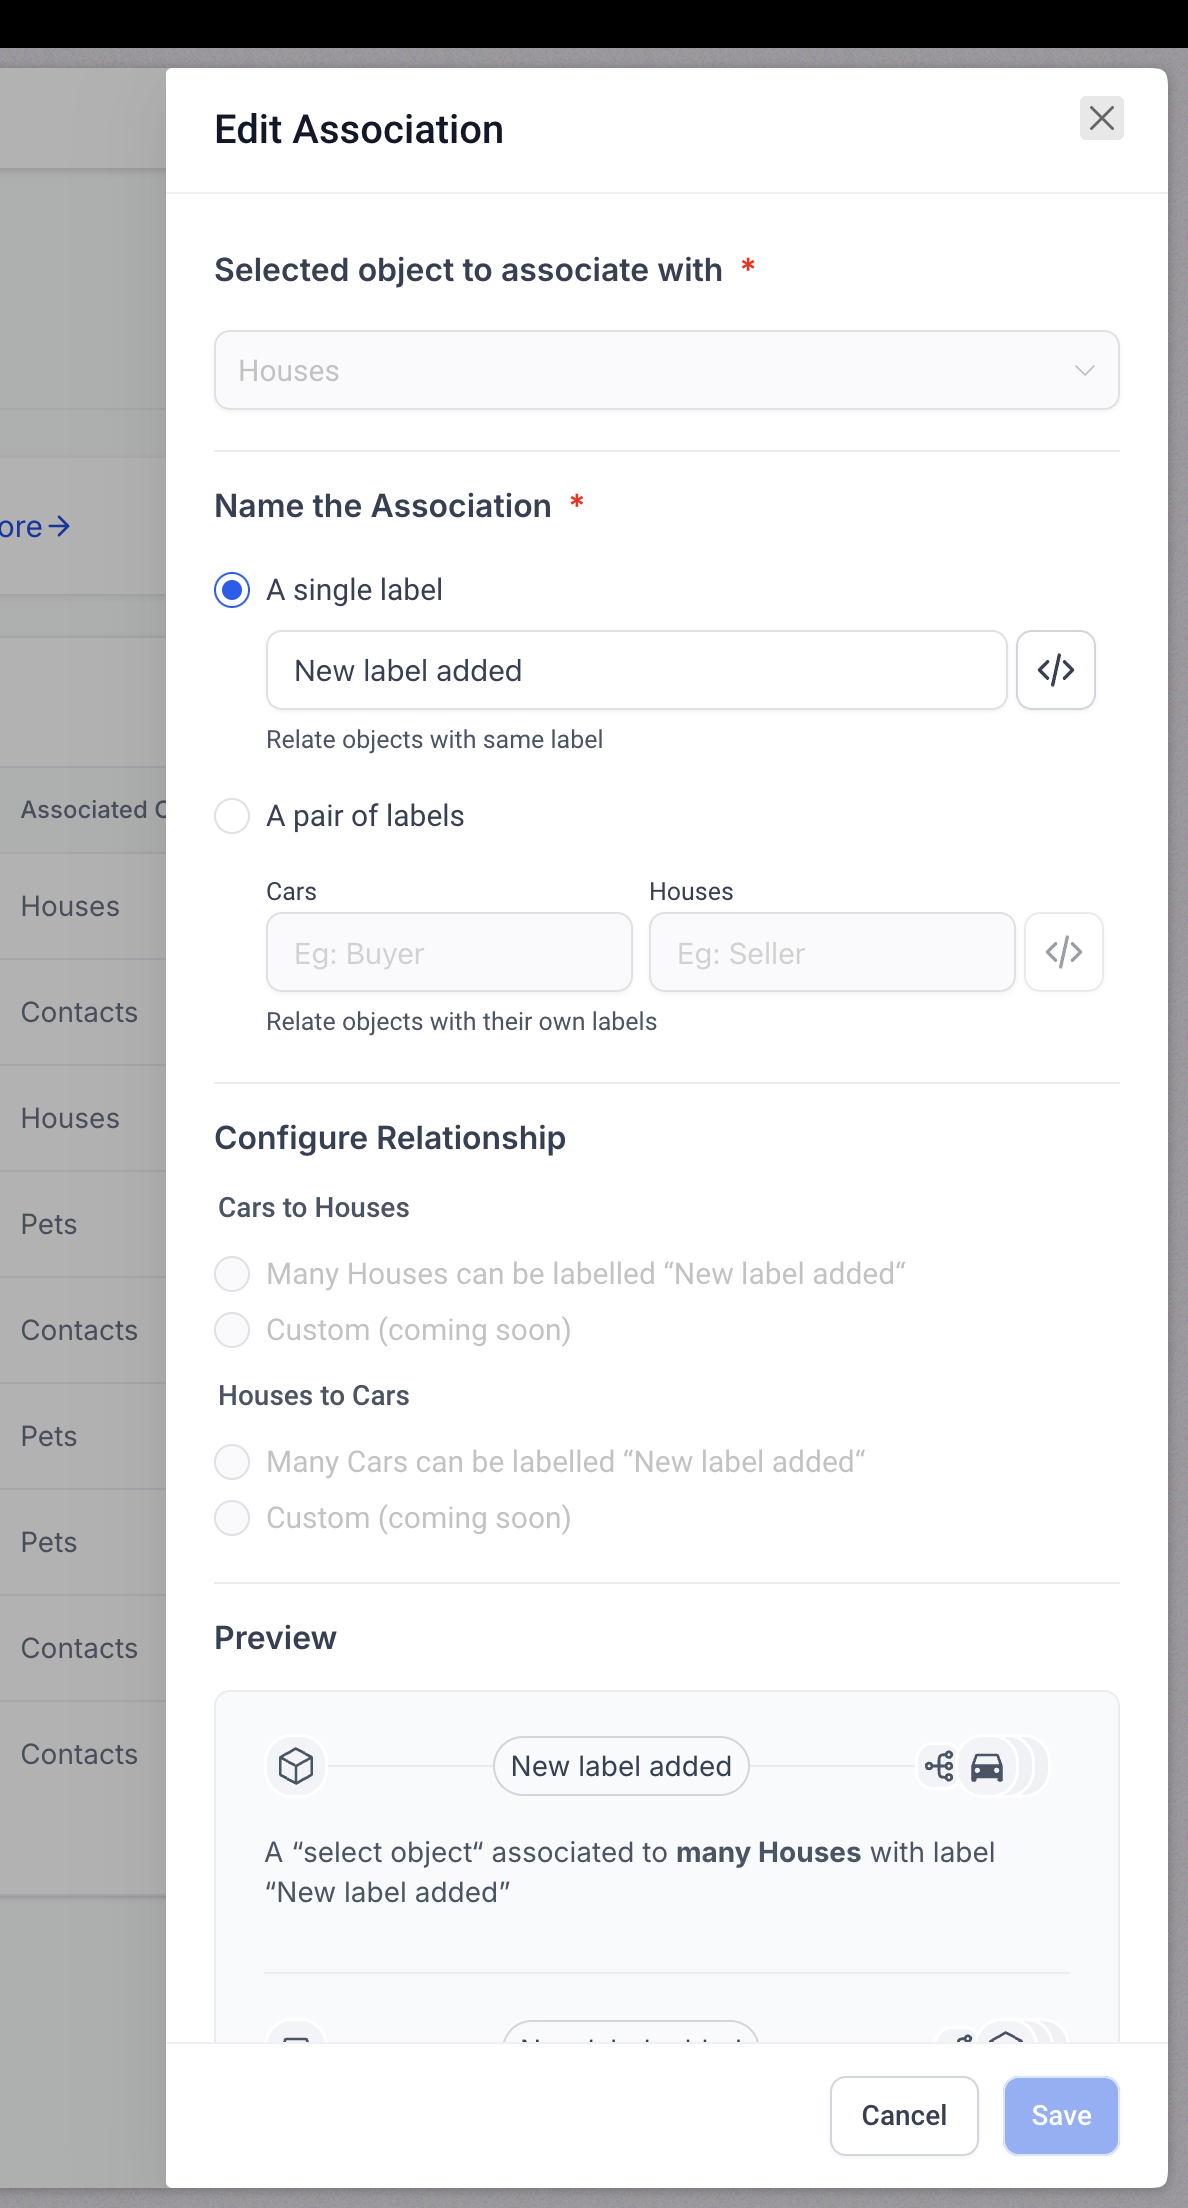
Editing Associations
You can update label names if needed.
What to do:
Click the three-dot menu next to an association
Select Edit
Update the label name
Save changes
Note: Internal names cannot be modified.
This screen shows how to modify an existing association label.
What to do: Update the label name and save your changes.
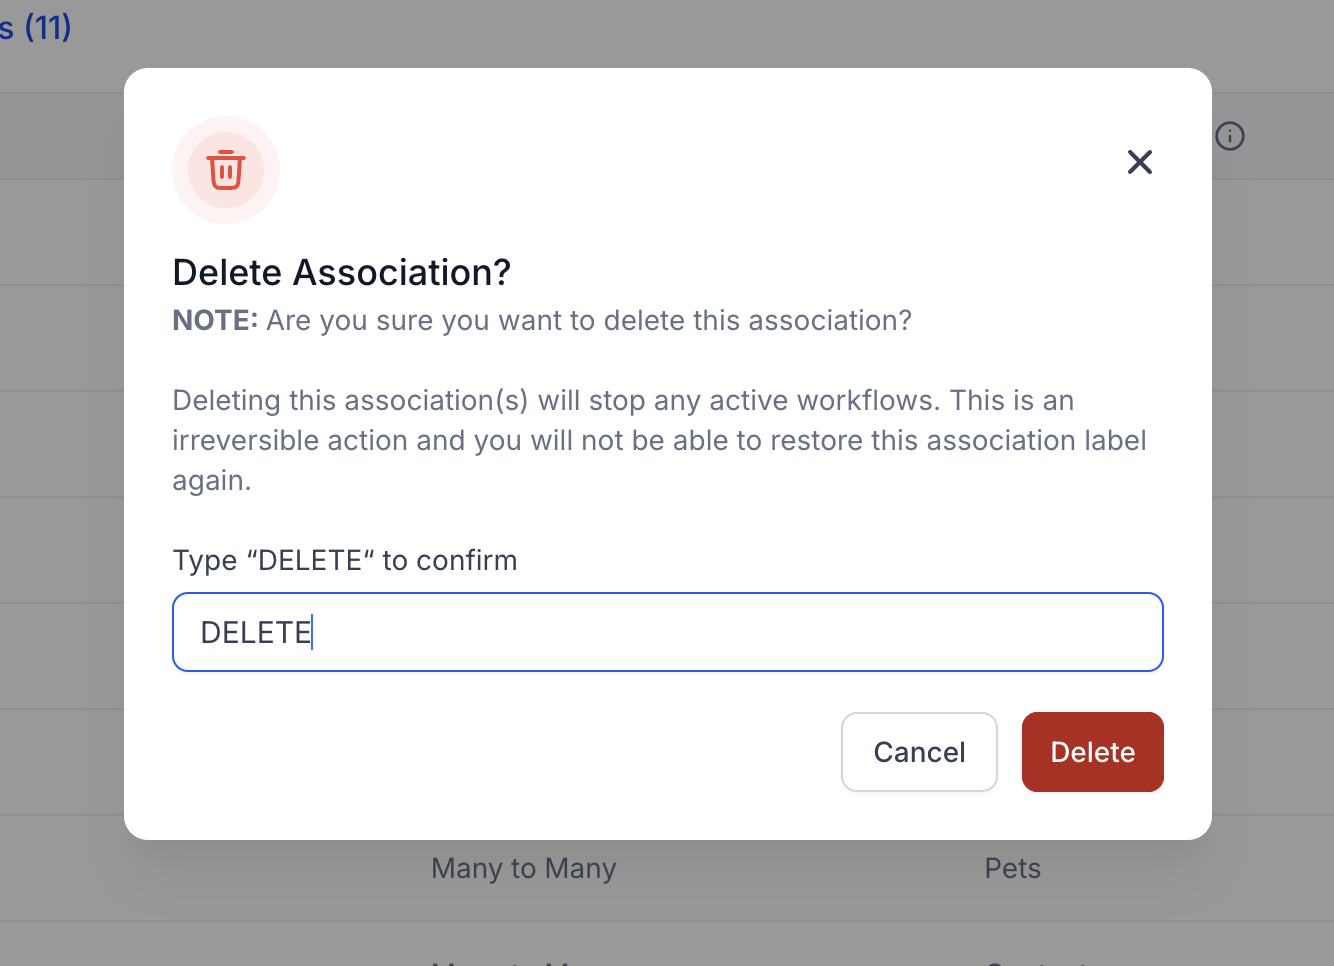
Deleting Associations
Associations can be removed if no records are currently linked.
This screen shows the delete confirmation process.
What to do:
Click delete from the menu
Type DELETE to confirm
Click Delete
Important:
This action is irreversible
Associations must not be in use to be deleted
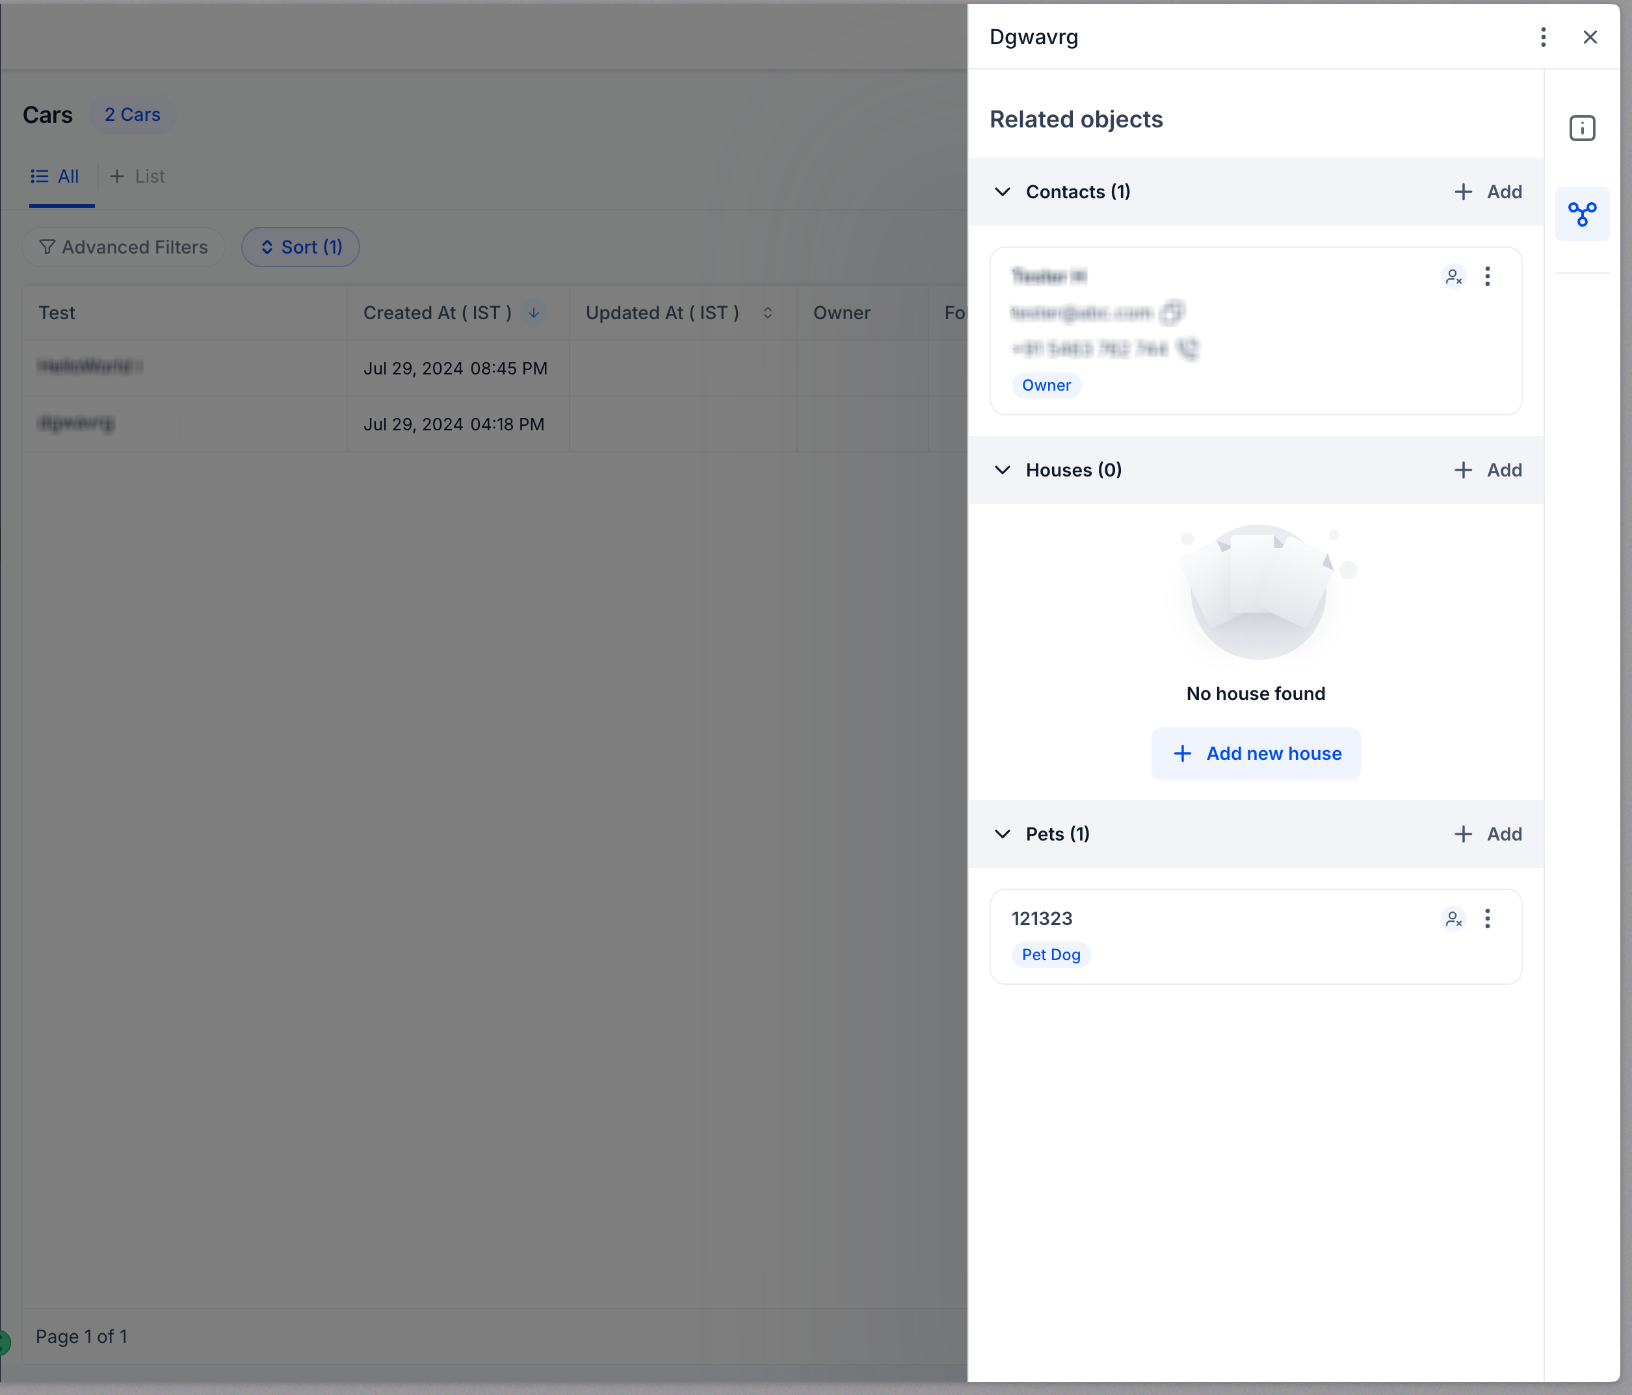
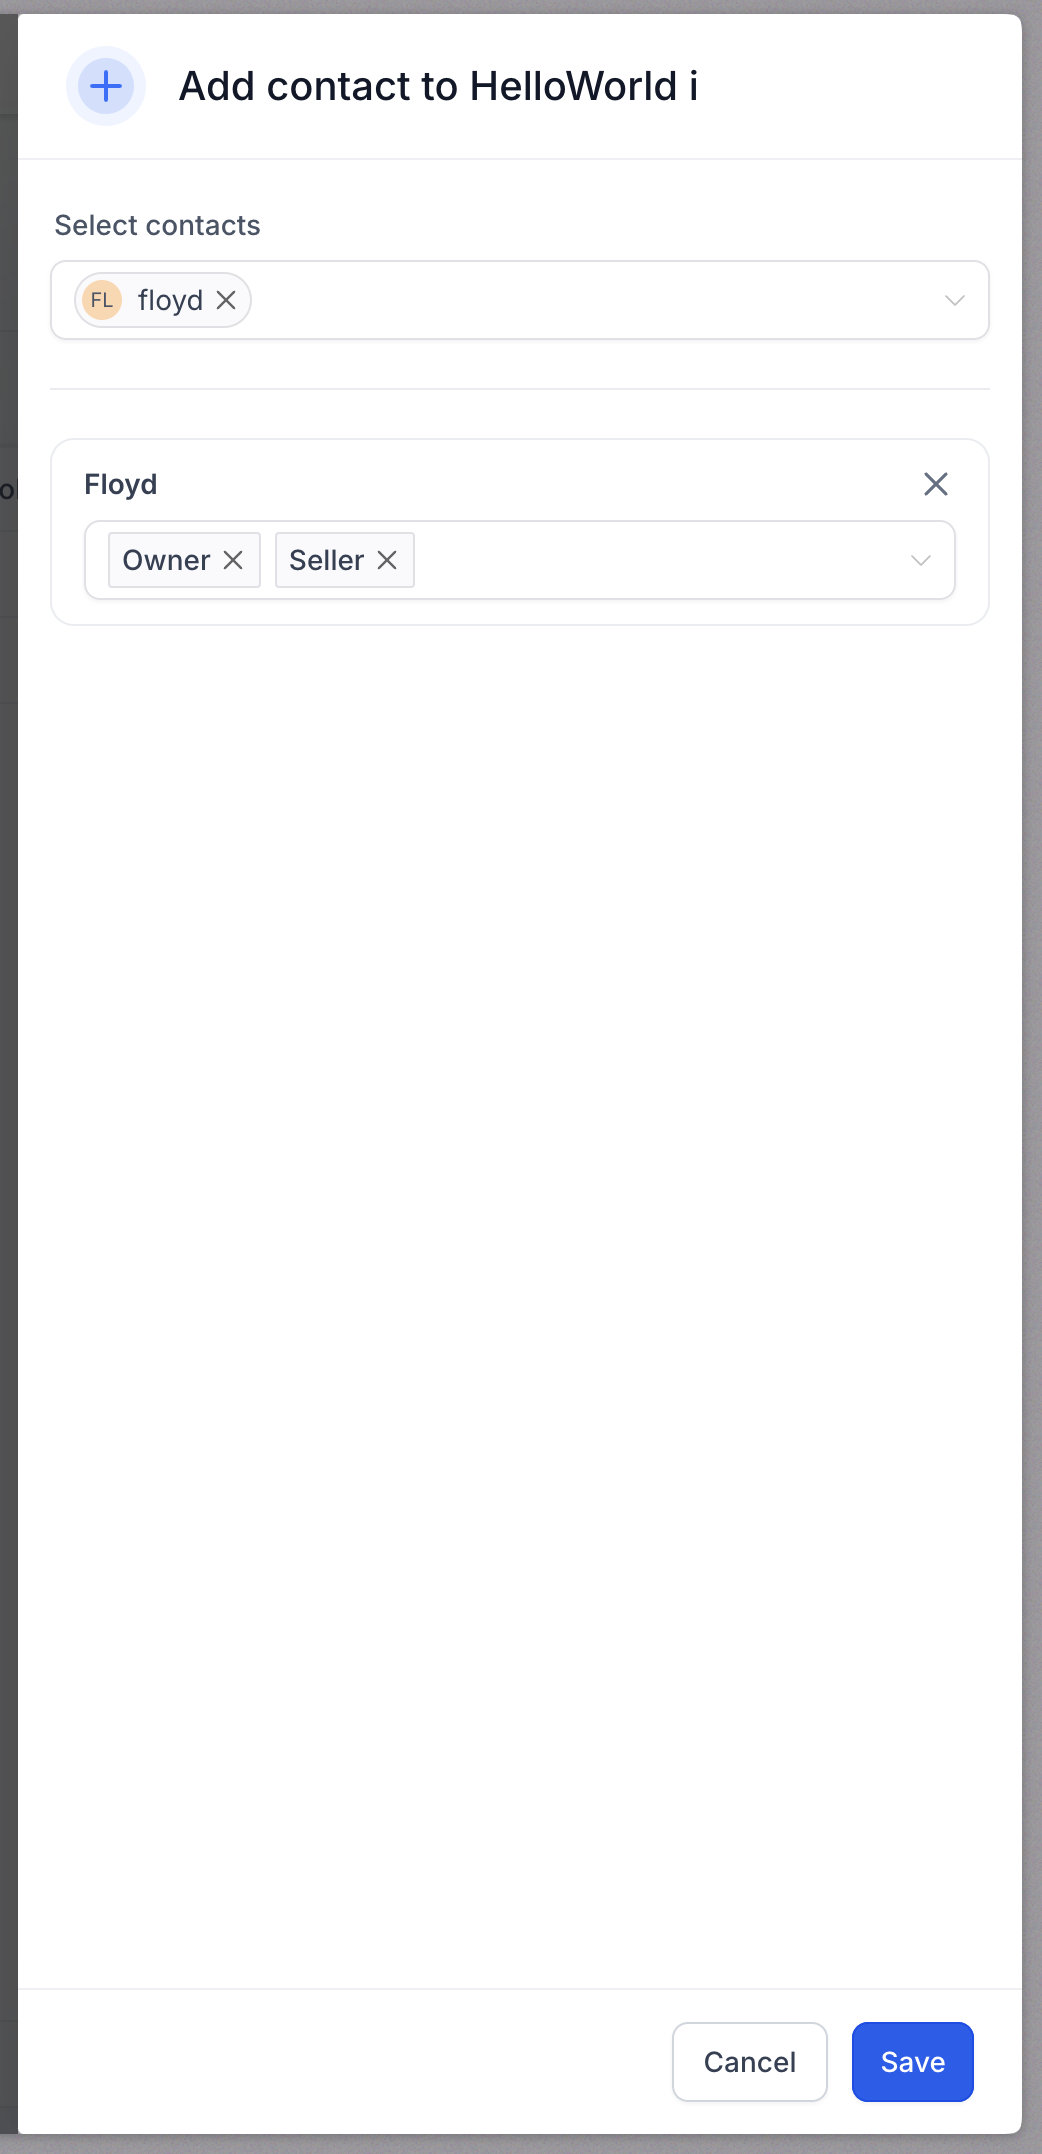
Associating Records
After creating association labels, you can link records together.
This screen shows how to add associations to a record.
What to do:
Open a record
Locate the Related Objects section
Click the association icon or Add button
Select the object to associate
Choose one or more labels
Click Save
What Happens Next
The association appears in the Related Objects panel
You can click linked records to view details
Associations help track relationships across your data
Using Multiple Labels
You can assign more than one label between the same records.
Example:
A contact can be both Owner and Buyer of a record
Multiple labels provide more flexibility in defining relationships
Important Limits and Rules
Each label can associate up to 1,000 records
Associations are always many-to-many
Labels must be created before linking records
Deleting labels requires removing all existing relationships
Best Practices
Keep your associations clean and effective by following these guidelines:
Use clear and meaningful label names
Avoid creating unnecessary duplicate labels
Regularly review and clean unused associations
Use pair labels when relationships differ between objects
Keep your structure simple and easy to understand
Frequently Asked Questions
Q: Can I associate multiple records together?
Yes. Associations support many-to-many relationships, allowing multiple records to be linked.
Q: Can I use more than one label between records?
Yes. You can apply multiple labels to define different types of relationships.
Q: Can I delete an association label anytime?
No. You must first remove all existing relationships using that label before deleting it.
Q: Can I edit association labels after creating them?
Yes. You can update the label name, but not the internal configuration.
Q: Where can I view associated records?
You can find them in the Related Objects section inside each record.
Need More Help
If you need assistance with creating or managing associations, open the Help Center and search for “Custom Objects” or “Associations.” You can also contact support for further guidance.