
Learn how to create Contact Associations, choose single or paired labels, link and remove related records, configure association limits, and use associations in supported workflows.
2. Key Benefits of Contact Associations
3. Prerequisites and Limitations
4. Where to View Contact Associations
5. How To Set Up Contact Associations
6. How To Link Contacts Using Associations
7. How To Manage Associations
8. How To Configure Association Limits
9. How To Use Associations in Workflows
10. Frequently Asked Questions
11. Need Help?
What Are Contact Associations?
Contact Associations create structured relationships between CRM records. Instead of keeping related contacts or objects disconnected, associations let you link them and use labels to explain how the records relate.
Common examples include:
- Spouse
- Colleague
- Parent and Child
- Manager and Employee
- Buyer and Seller
Contacts can also be associated with supported Custom Objects, allowing businesses to connect people with records such as properties, vehicles, policies, projects, or other business-specific objects.
Types of Association Labels
Association labels identify the relationship between linked records and determine whether both sides use the same relationship name or different roles.
- Single Label: Uses the same label for both sides of the relationship, such as Colleague.
- Pair of Labels: Uses a different label for each side, such as Manager ↔ Employee.
Key Benefits of Contact Associations
Associations keep connected CRM data organized while preserving the business context between related records.
- Organize Related Records: Keep family, business, ownership, and other relationships connected inside the CRM.
- Add Relationship Context: Use custom labels to explain how one record relates to another.
- Connect Contacts and Custom Objects: Link contacts to records such as properties, vehicles, projects, or policies.
- Support Automation: Use association labels in supported workflows that work across Contacts, Companies, and Custom Objects.
- Control Relationship Size: Configure limits to prevent records from being associated beyond your defined relationship rules.
Prerequisites and Limitations
Create the records, objects, and association definitions your team needs before linking records or using associations in automation.
- Association definitions are managed from the sub-account's Settings → Objects area.
- Contact-to-contact associations support single labels and paired labels.
- Contacts can be associated with supported Custom Objects and other available CRM objects.
- Available relationship types depend on the associated objects and label configuration.
- Configured association limits are enforced per label.
- Workflow actions targeting associated records require the applicable records and associations to already exist unless the workflow action itself is creating the association.
Where to View Contact Associations
Association definitions and individual linked records are managed in different areas so you can control relationship rules separately from the records using them.
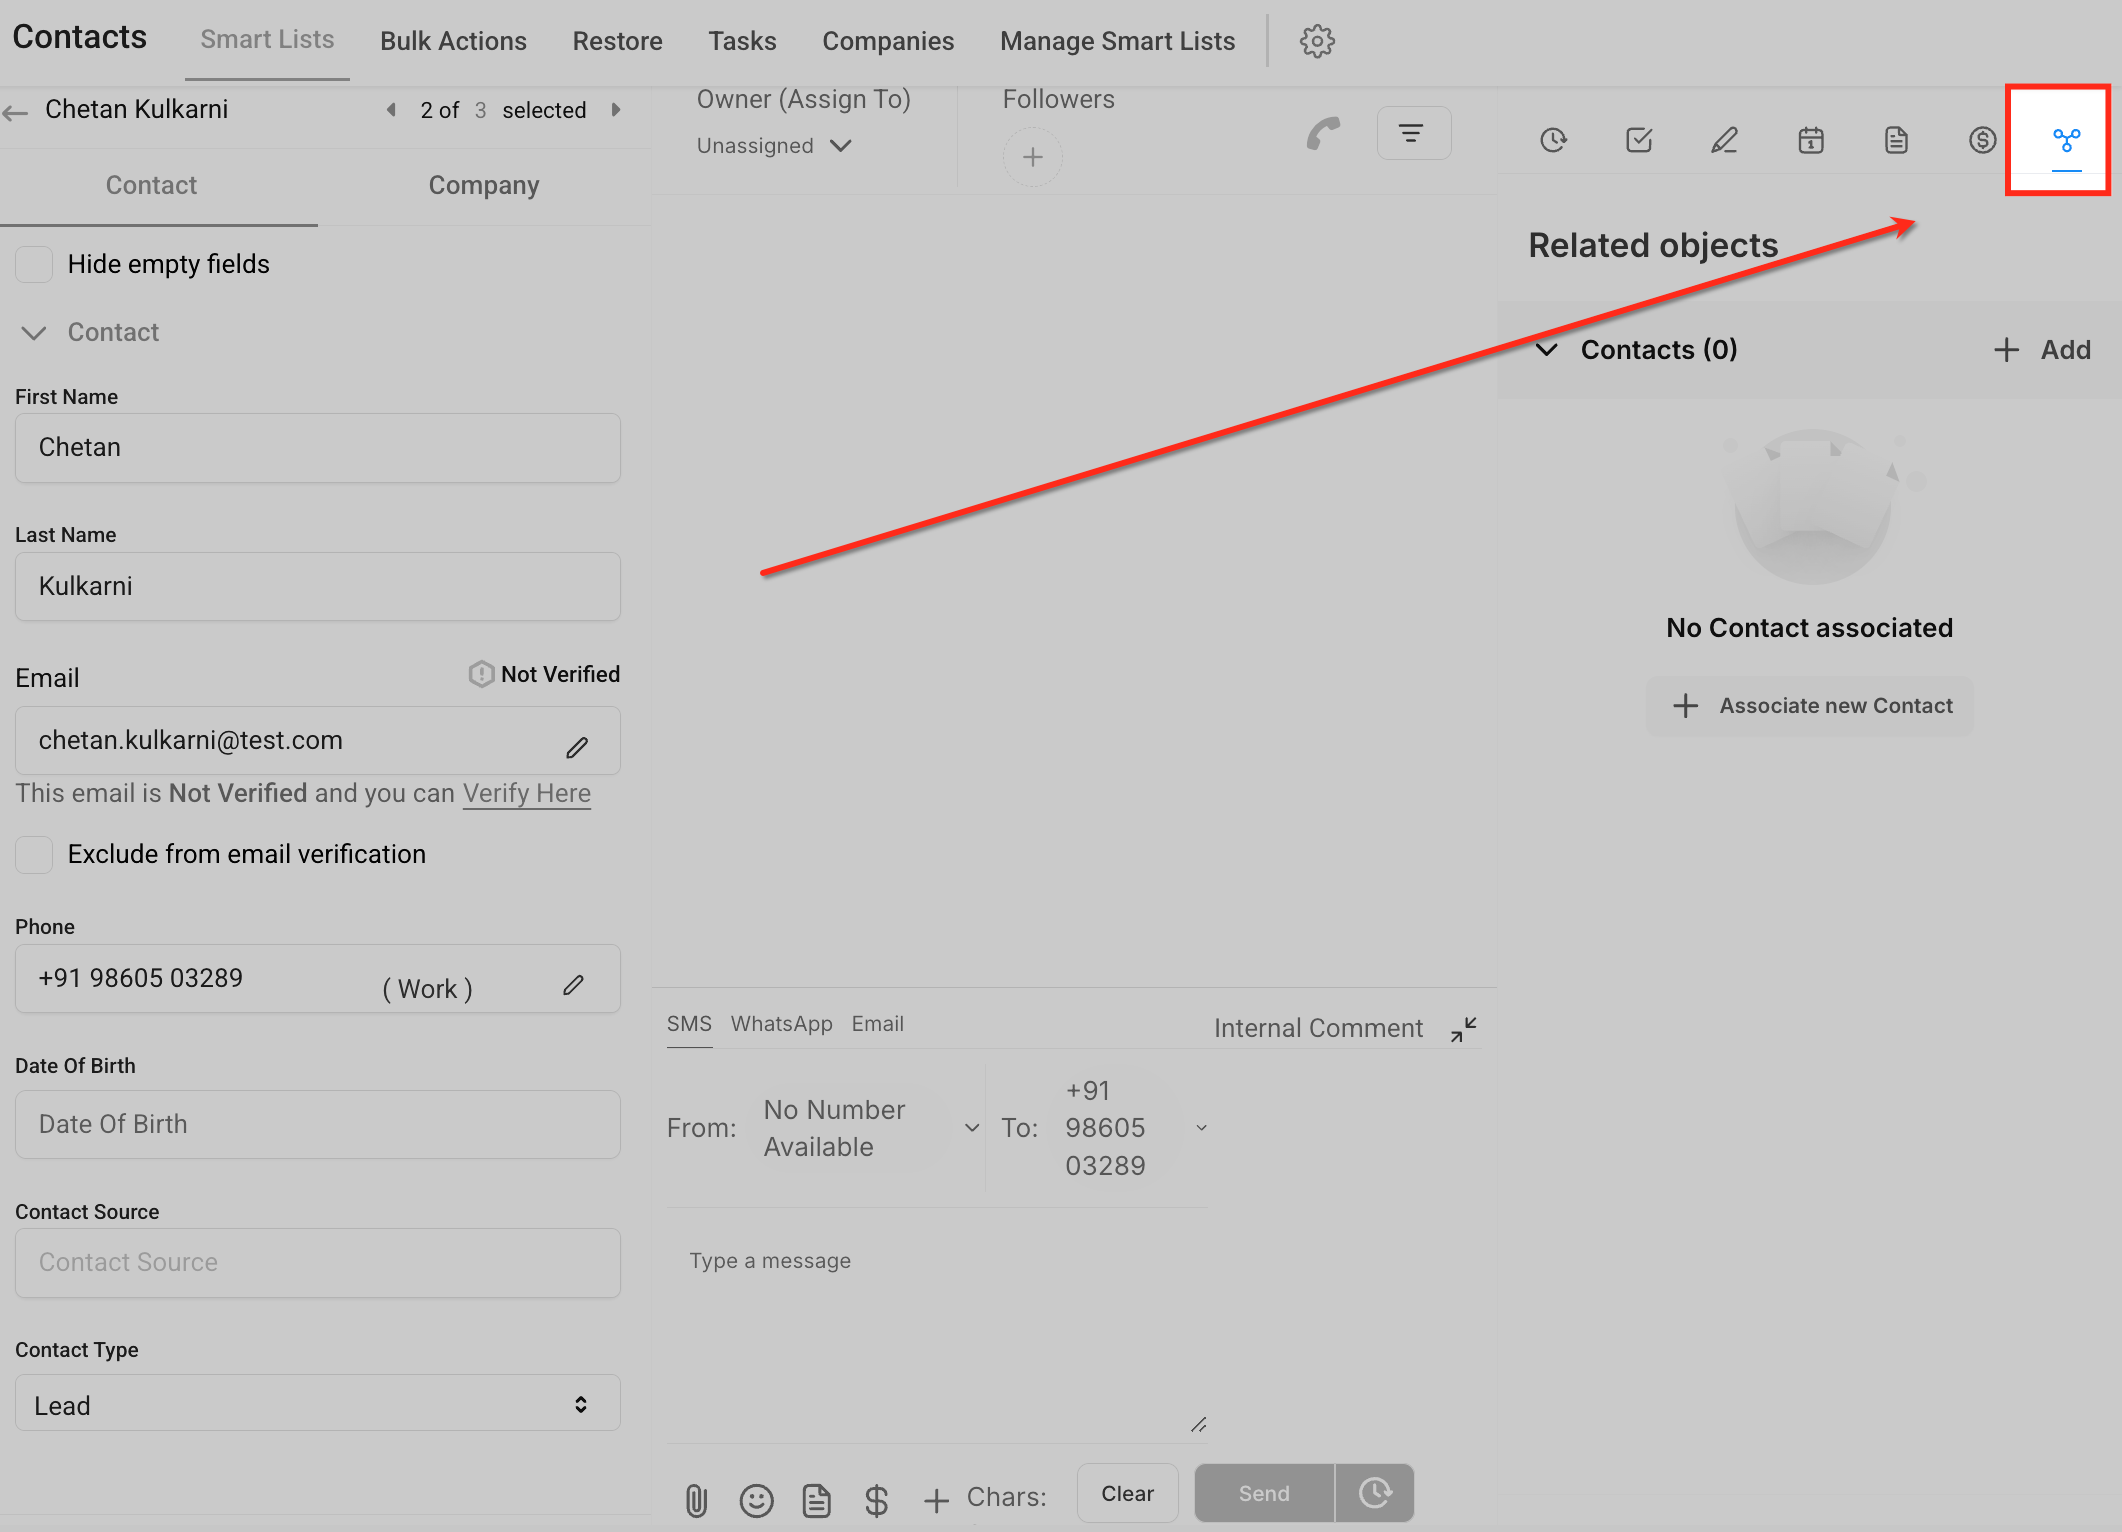
- Contact Record: Open a contact and use the Associations or Related Objects area to view and manage linked records.
- Object Settings: Go to Settings → Objects to create and manage association definitions, labels, and relationship rules.
How To Set Up Contact Associations
Create the association definition before linking individual records. The definition determines which objects can be connected, which labels identify the relationship, and what relationship limits apply.
Step 1: Open Contact Object Settings
Contact object settings contain the association definitions that determine how Contact records can connect to other records.
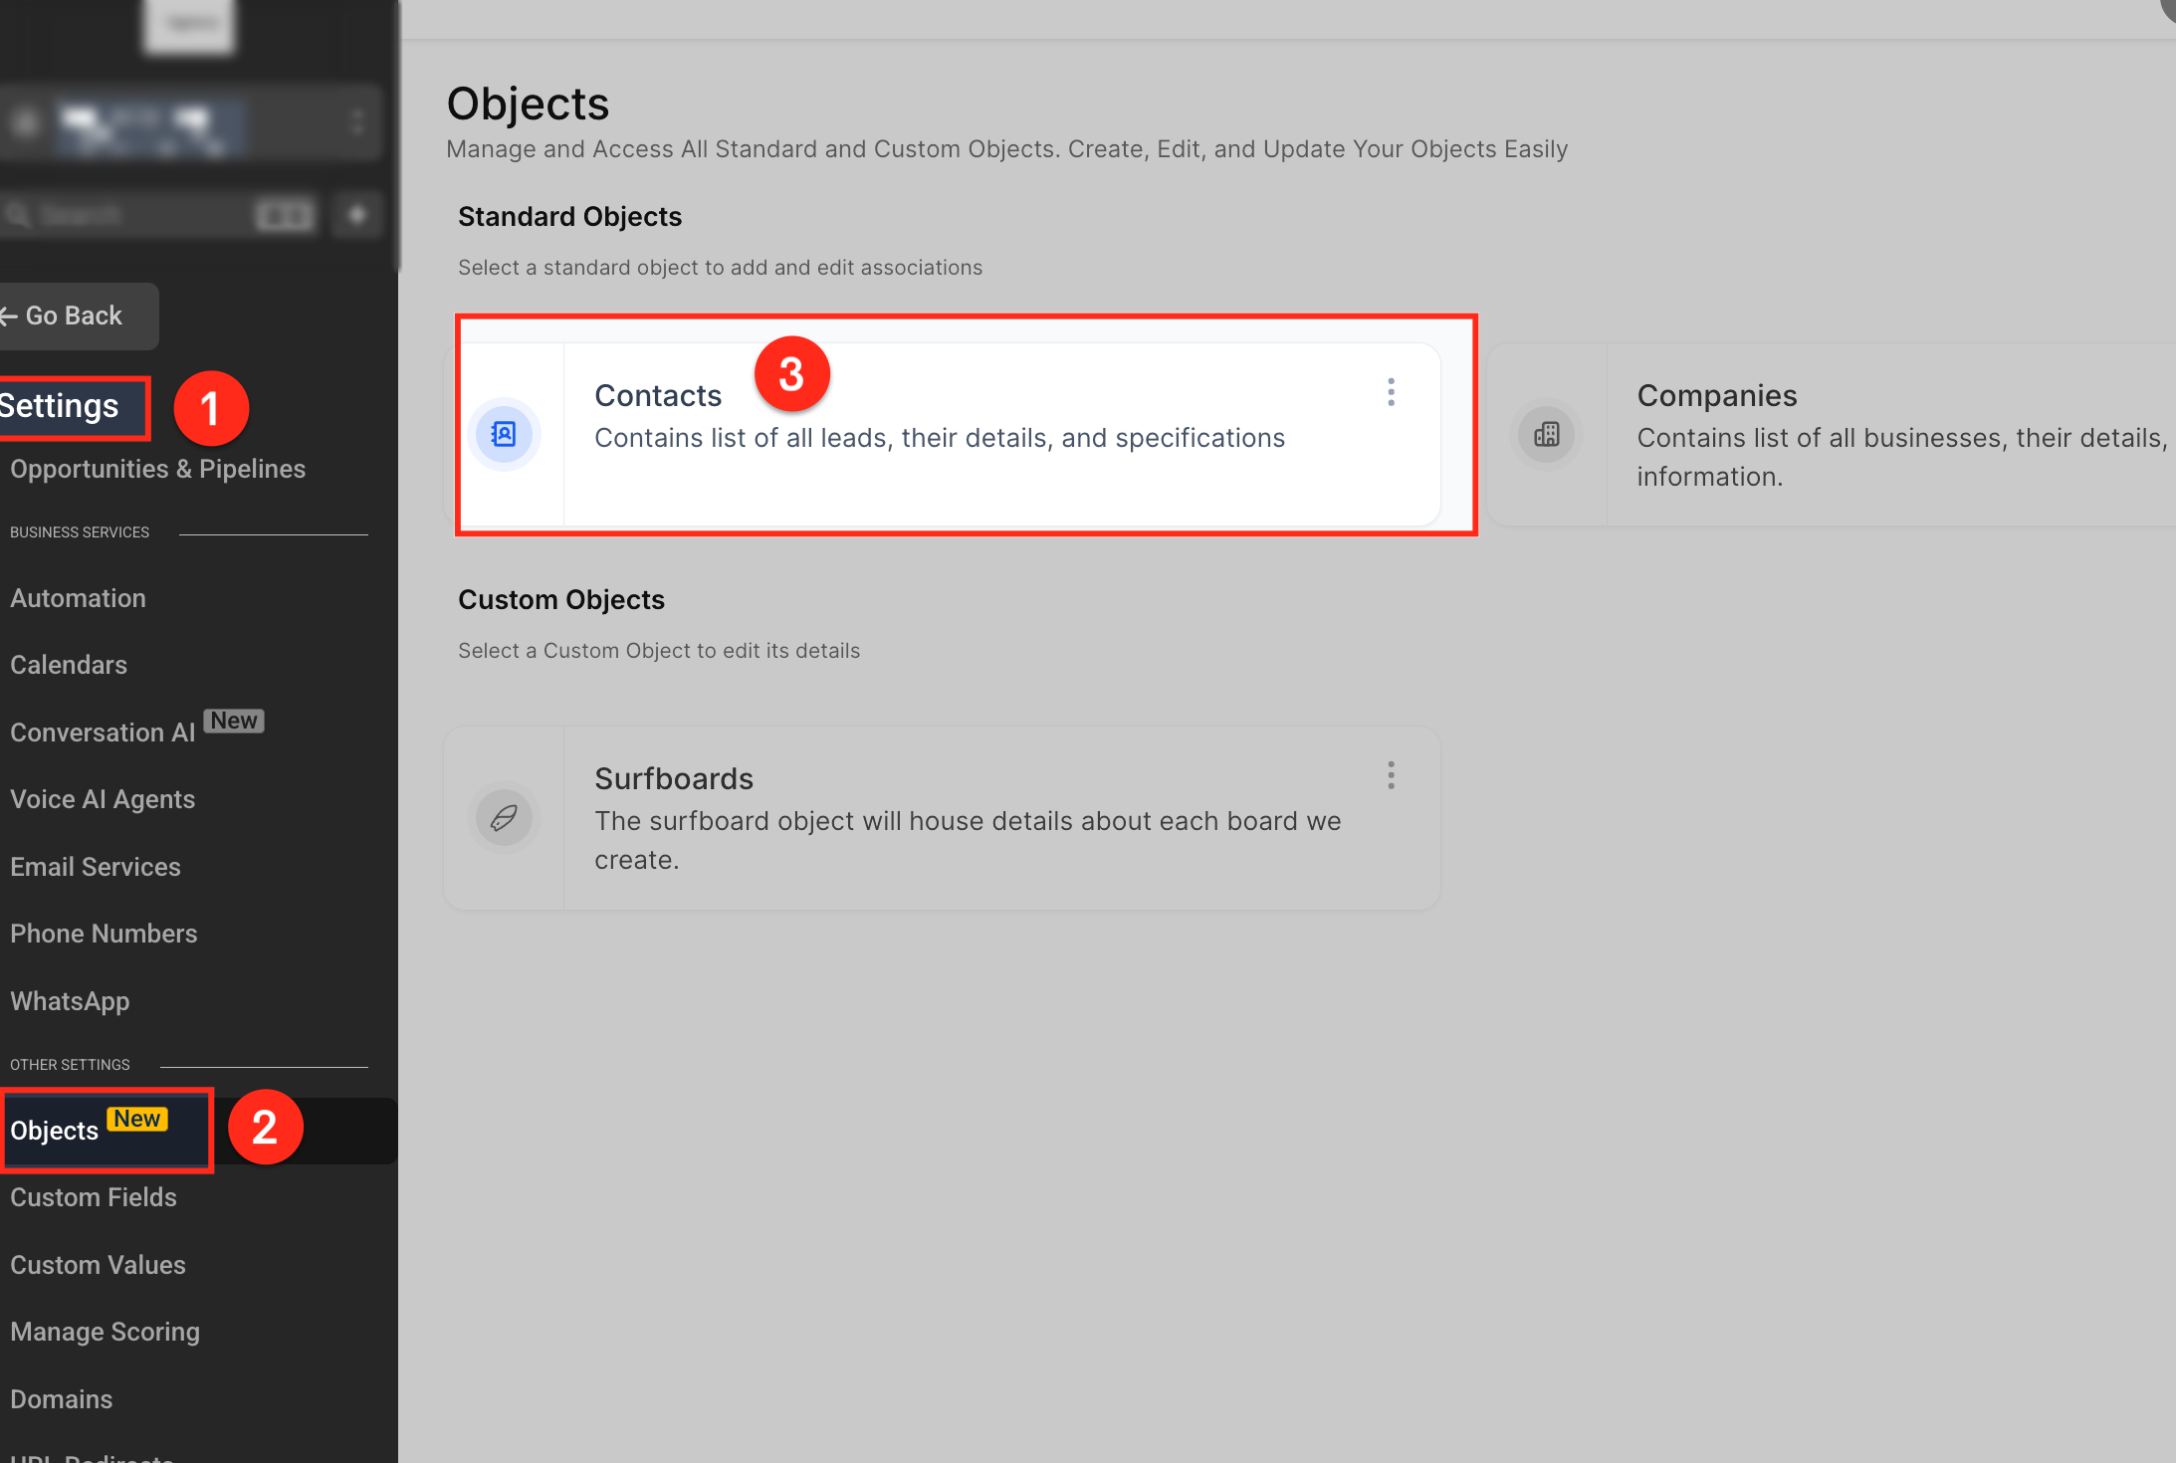
- Open the applicable sub-account.
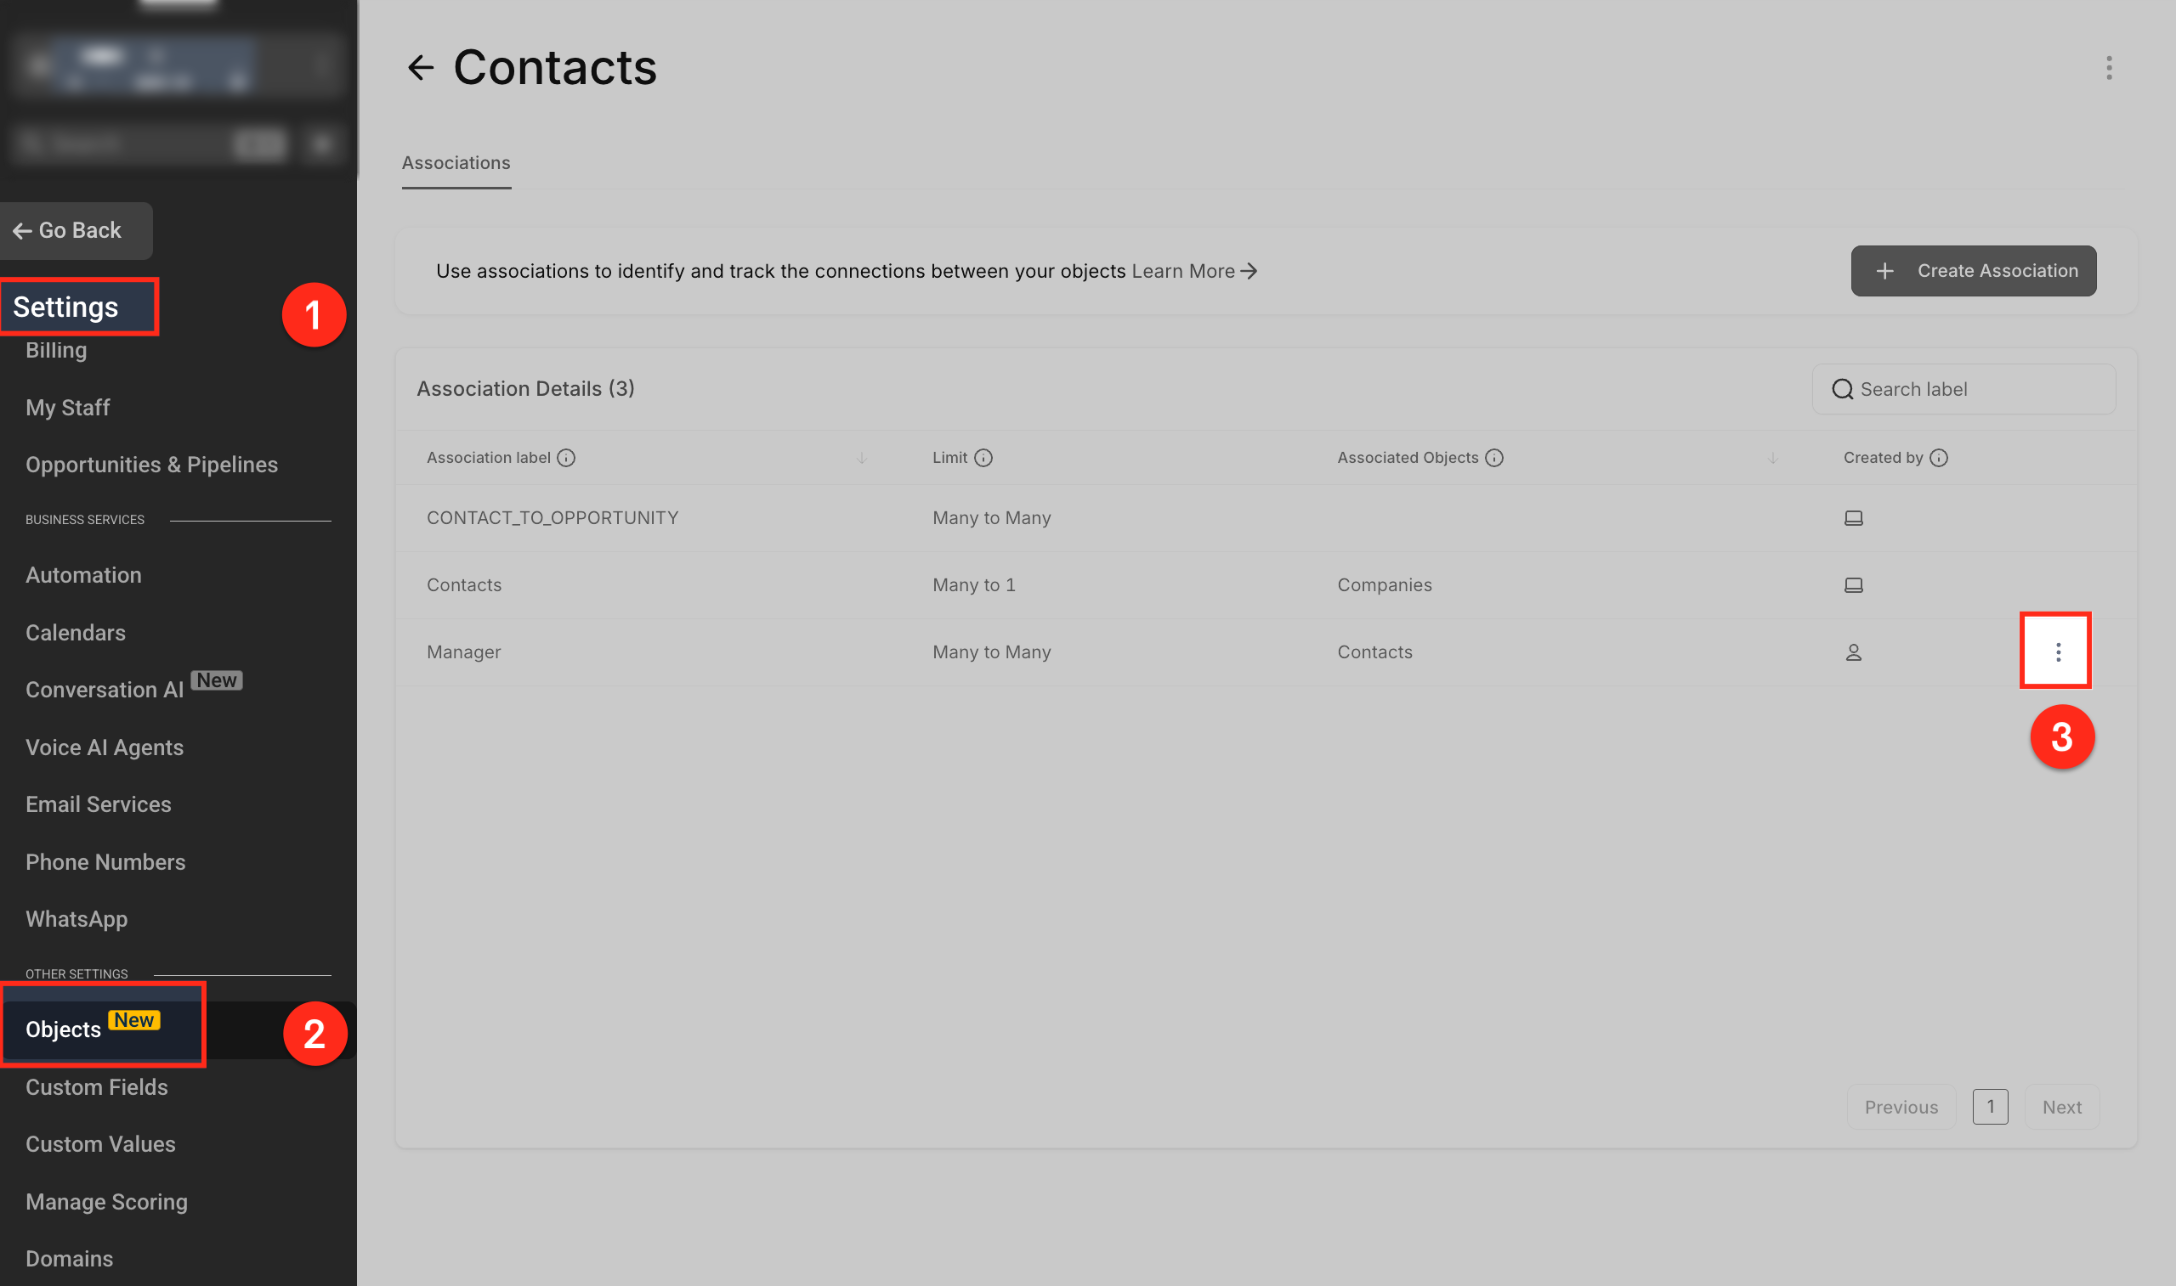
- Go to Settings → Objects.
- Locate Contacts.
- Open the Contact object settings and select Associations.
Step 2: Create the Association
Creating an association defines the relationship that users can later apply between individual CRM records.
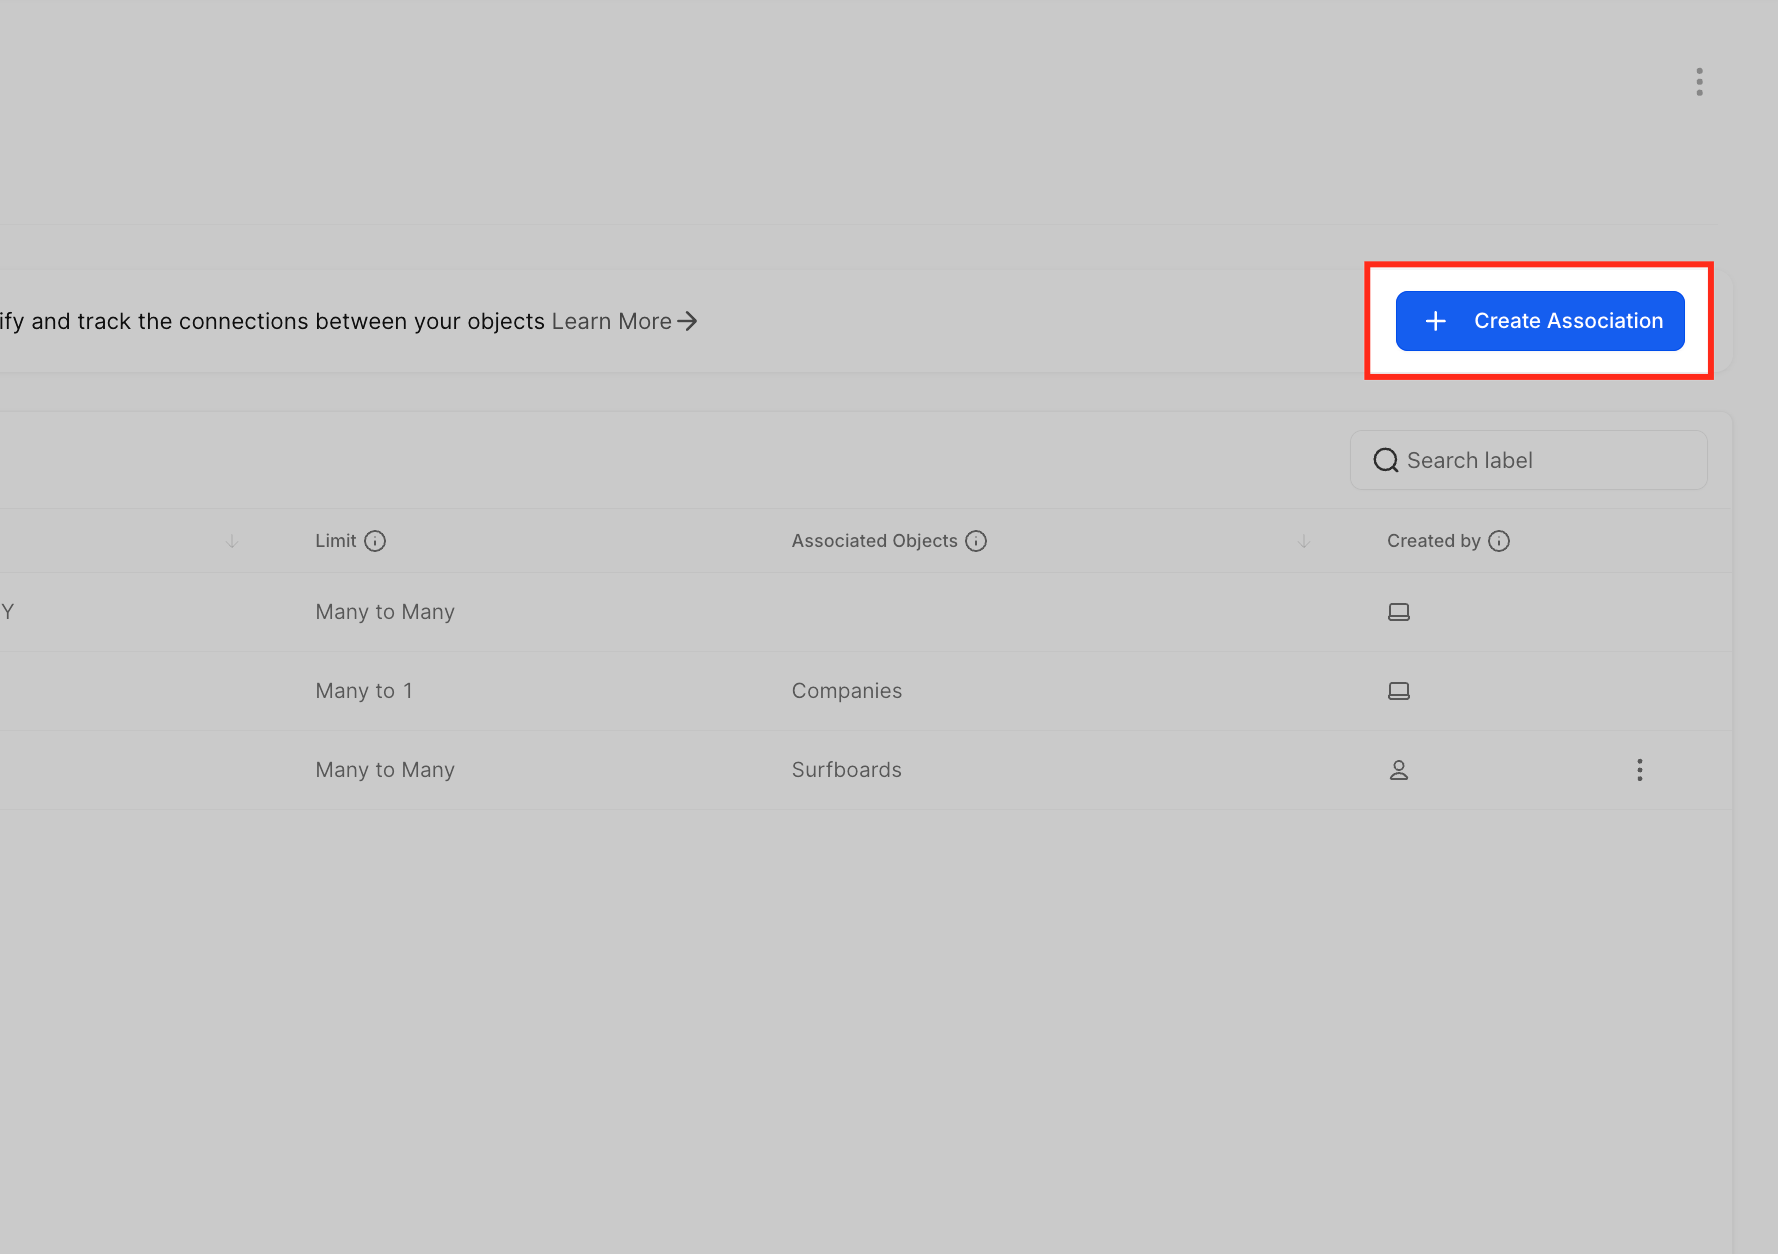
Click Create Association to define a new relationship.
Step 3: Choose the Associated Object
The associated object determines what type of CRM record can be linked to a Contact through this association.
Depending on your CRM configuration, available options can include:
- Another Contact
- A Company
- An Opportunity
- An available Custom Object
Step 4: Select the Label Type
Label type determines whether both records share the same relationship name or use different labels that describe each side.
- Single Label: Use when both sides should have the same relationship name, such as Colleague.
- Pair of Labels: Use when each side needs a different relationship name, such as Manager ↔ Employee.
Step 5: Configure the Relationship
Relationship configuration determines how many records can connect on either side of an association and helps enforce consistent CRM structure.
Pair-label and supported multi-label relationships can include:
- One-to-One
- One-to-N
- One-to-Many
- N-to-Many
- Many-to-Many
For single-label contact-to-contact associations, supported options include One-to-One, Many-to-Many, and configurable N-to-N relationships.
Tip: Review the relationship Preview before saving so you can confirm how many records each side can associate.
Step 6: Save the Association
Saving makes the association definition available when users link individual records.
Review the associated object, labels, relationship type, and limits, then click Save.
How To Link Contacts Using Associations
Once an association definition exists, individual records can be linked so users can see the relationship directly from the Contact record.
- Go to Contacts and open the contact you want to manage.
- Open the Associations or Related Objects area.
- Click Add for the object you want to associate.
- Search for and select the related record.
- Choose the appropriate association label.
- Confirm the association.
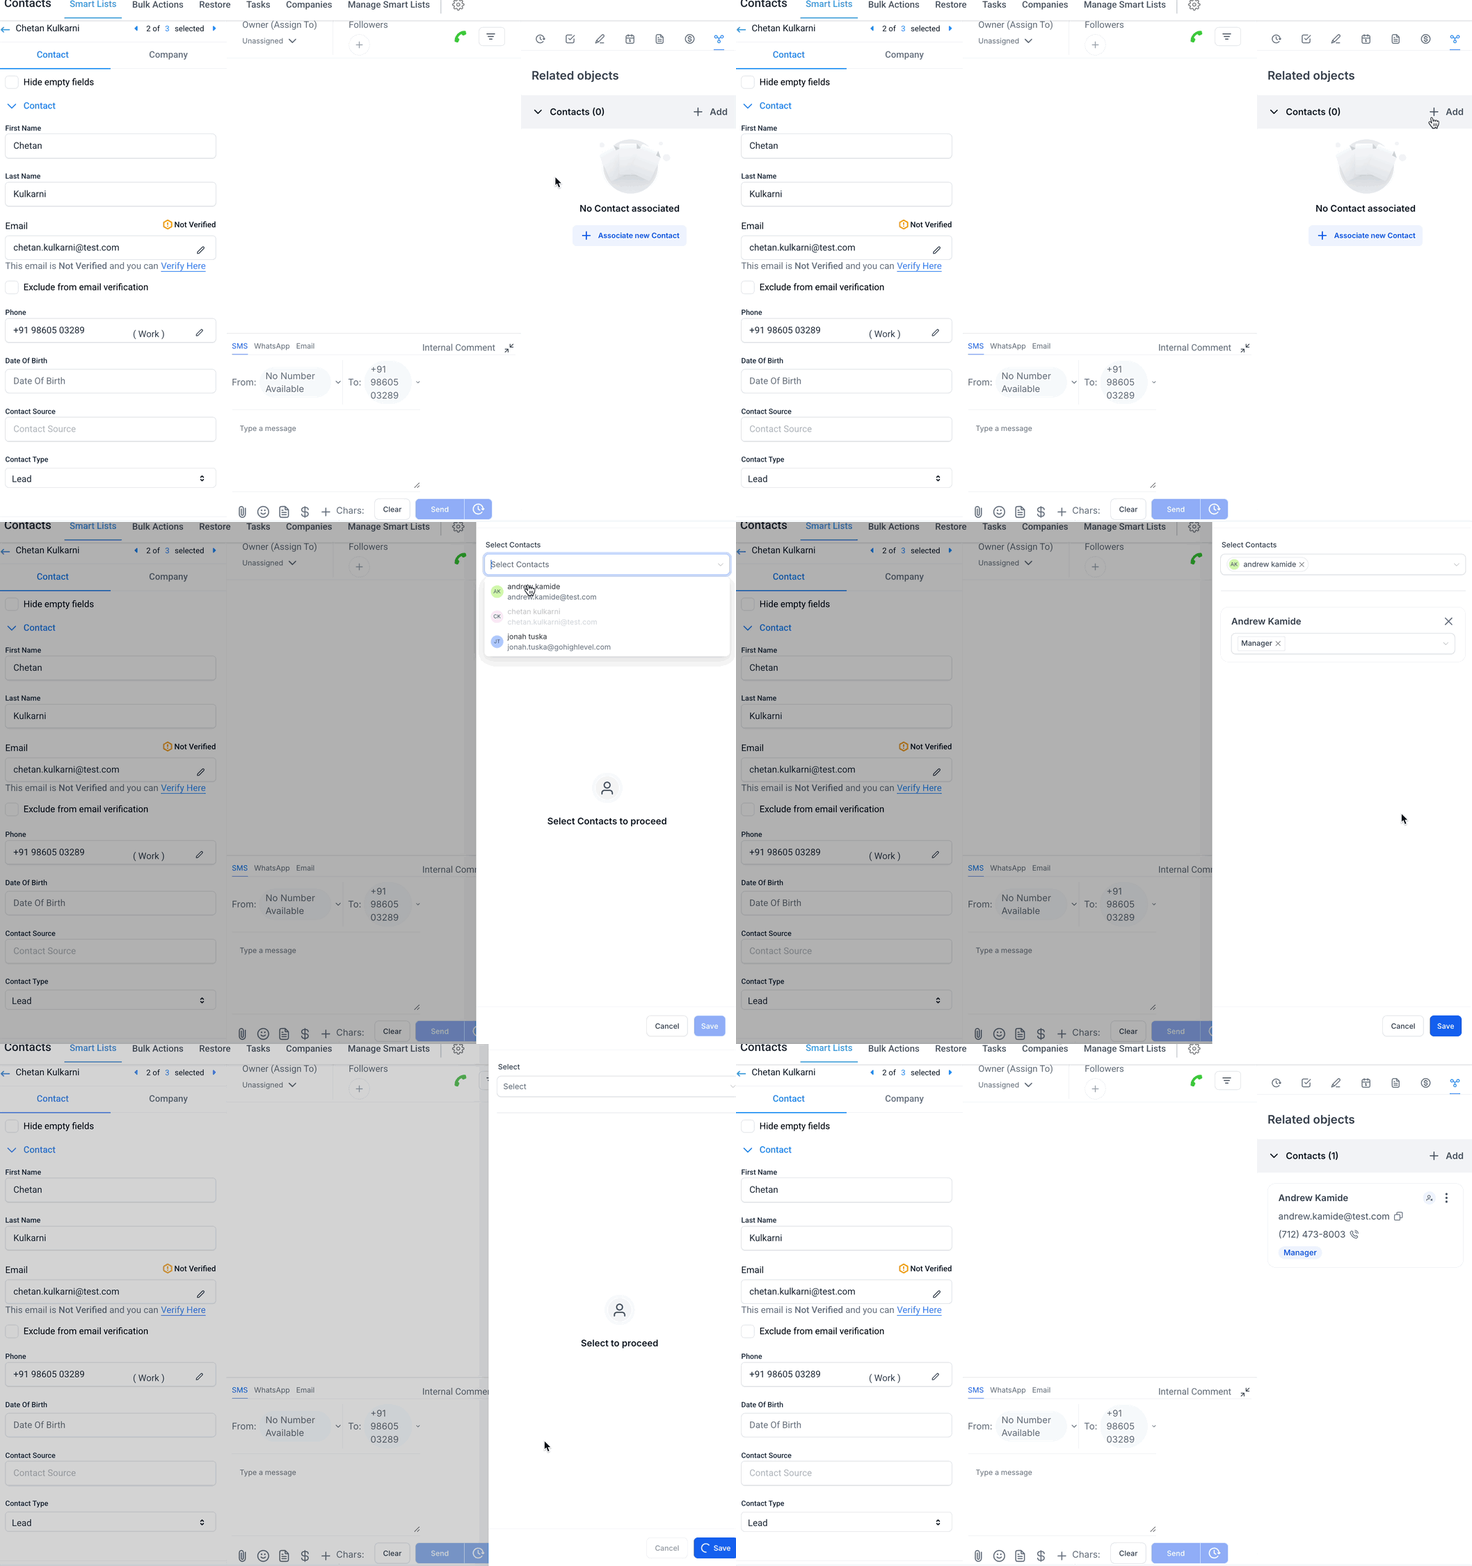
The linked record appears in the contact's Associations or Related Objects area. For paired relationships, the corresponding paired label is reflected on the other record.
How To Manage Associations
Association definitions control the relationship rules, while individual record associations control which records are actually linked.
Edit an Association Definition
Edit the association definition when the relationship settings or limits need to be adjusted without removing the underlying CRM records.
- Go to Settings → Objects.
- Open the applicable object.
- Select Associations.
- Locate the association.
- Open the three-dot menu (⋮).
- Edit the available settings.
- Click Save.
Remove an Association Between Records
Remove a record-level association when two records should no longer be connected while keeping both CRM records intact.
- Open the applicable contact or object record.
- Open the Associations or Related Objects area.
- Locate the associated record.
- Select the option to remove the association.
- Confirm the change.

Important: Removing an association only removes the relationship. It does not delete either contact or object record.
How To Configure Association Limits
Association Limits control how many records can be linked through a specific label. Limits help prevent over-association and keep CRM relationships aligned with your business rules.
- Open the applicable sub-account.
- Go to Settings → Objects.
- Locate Contacts or the applicable Custom Object.
- Open the object and select Associations.
- Create a new association or edit an existing one.
- Choose a Single Label or Pair of Labels.
- Under Configure Relationship, select the relationship type.
- Define the applicable limits.
- Review the relationship in the Preview area.
- Click Save.
When a limit is reached: The platform prevents additional records from being associated beyond the configured limit and displays a warning.
How To Use Associations in Workflows
Supported workflow actions can use existing association labels to enroll, remove, or automatically associate related records across Contacts, Companies, and Custom Objects.
Add Associated Records to Another Workflow
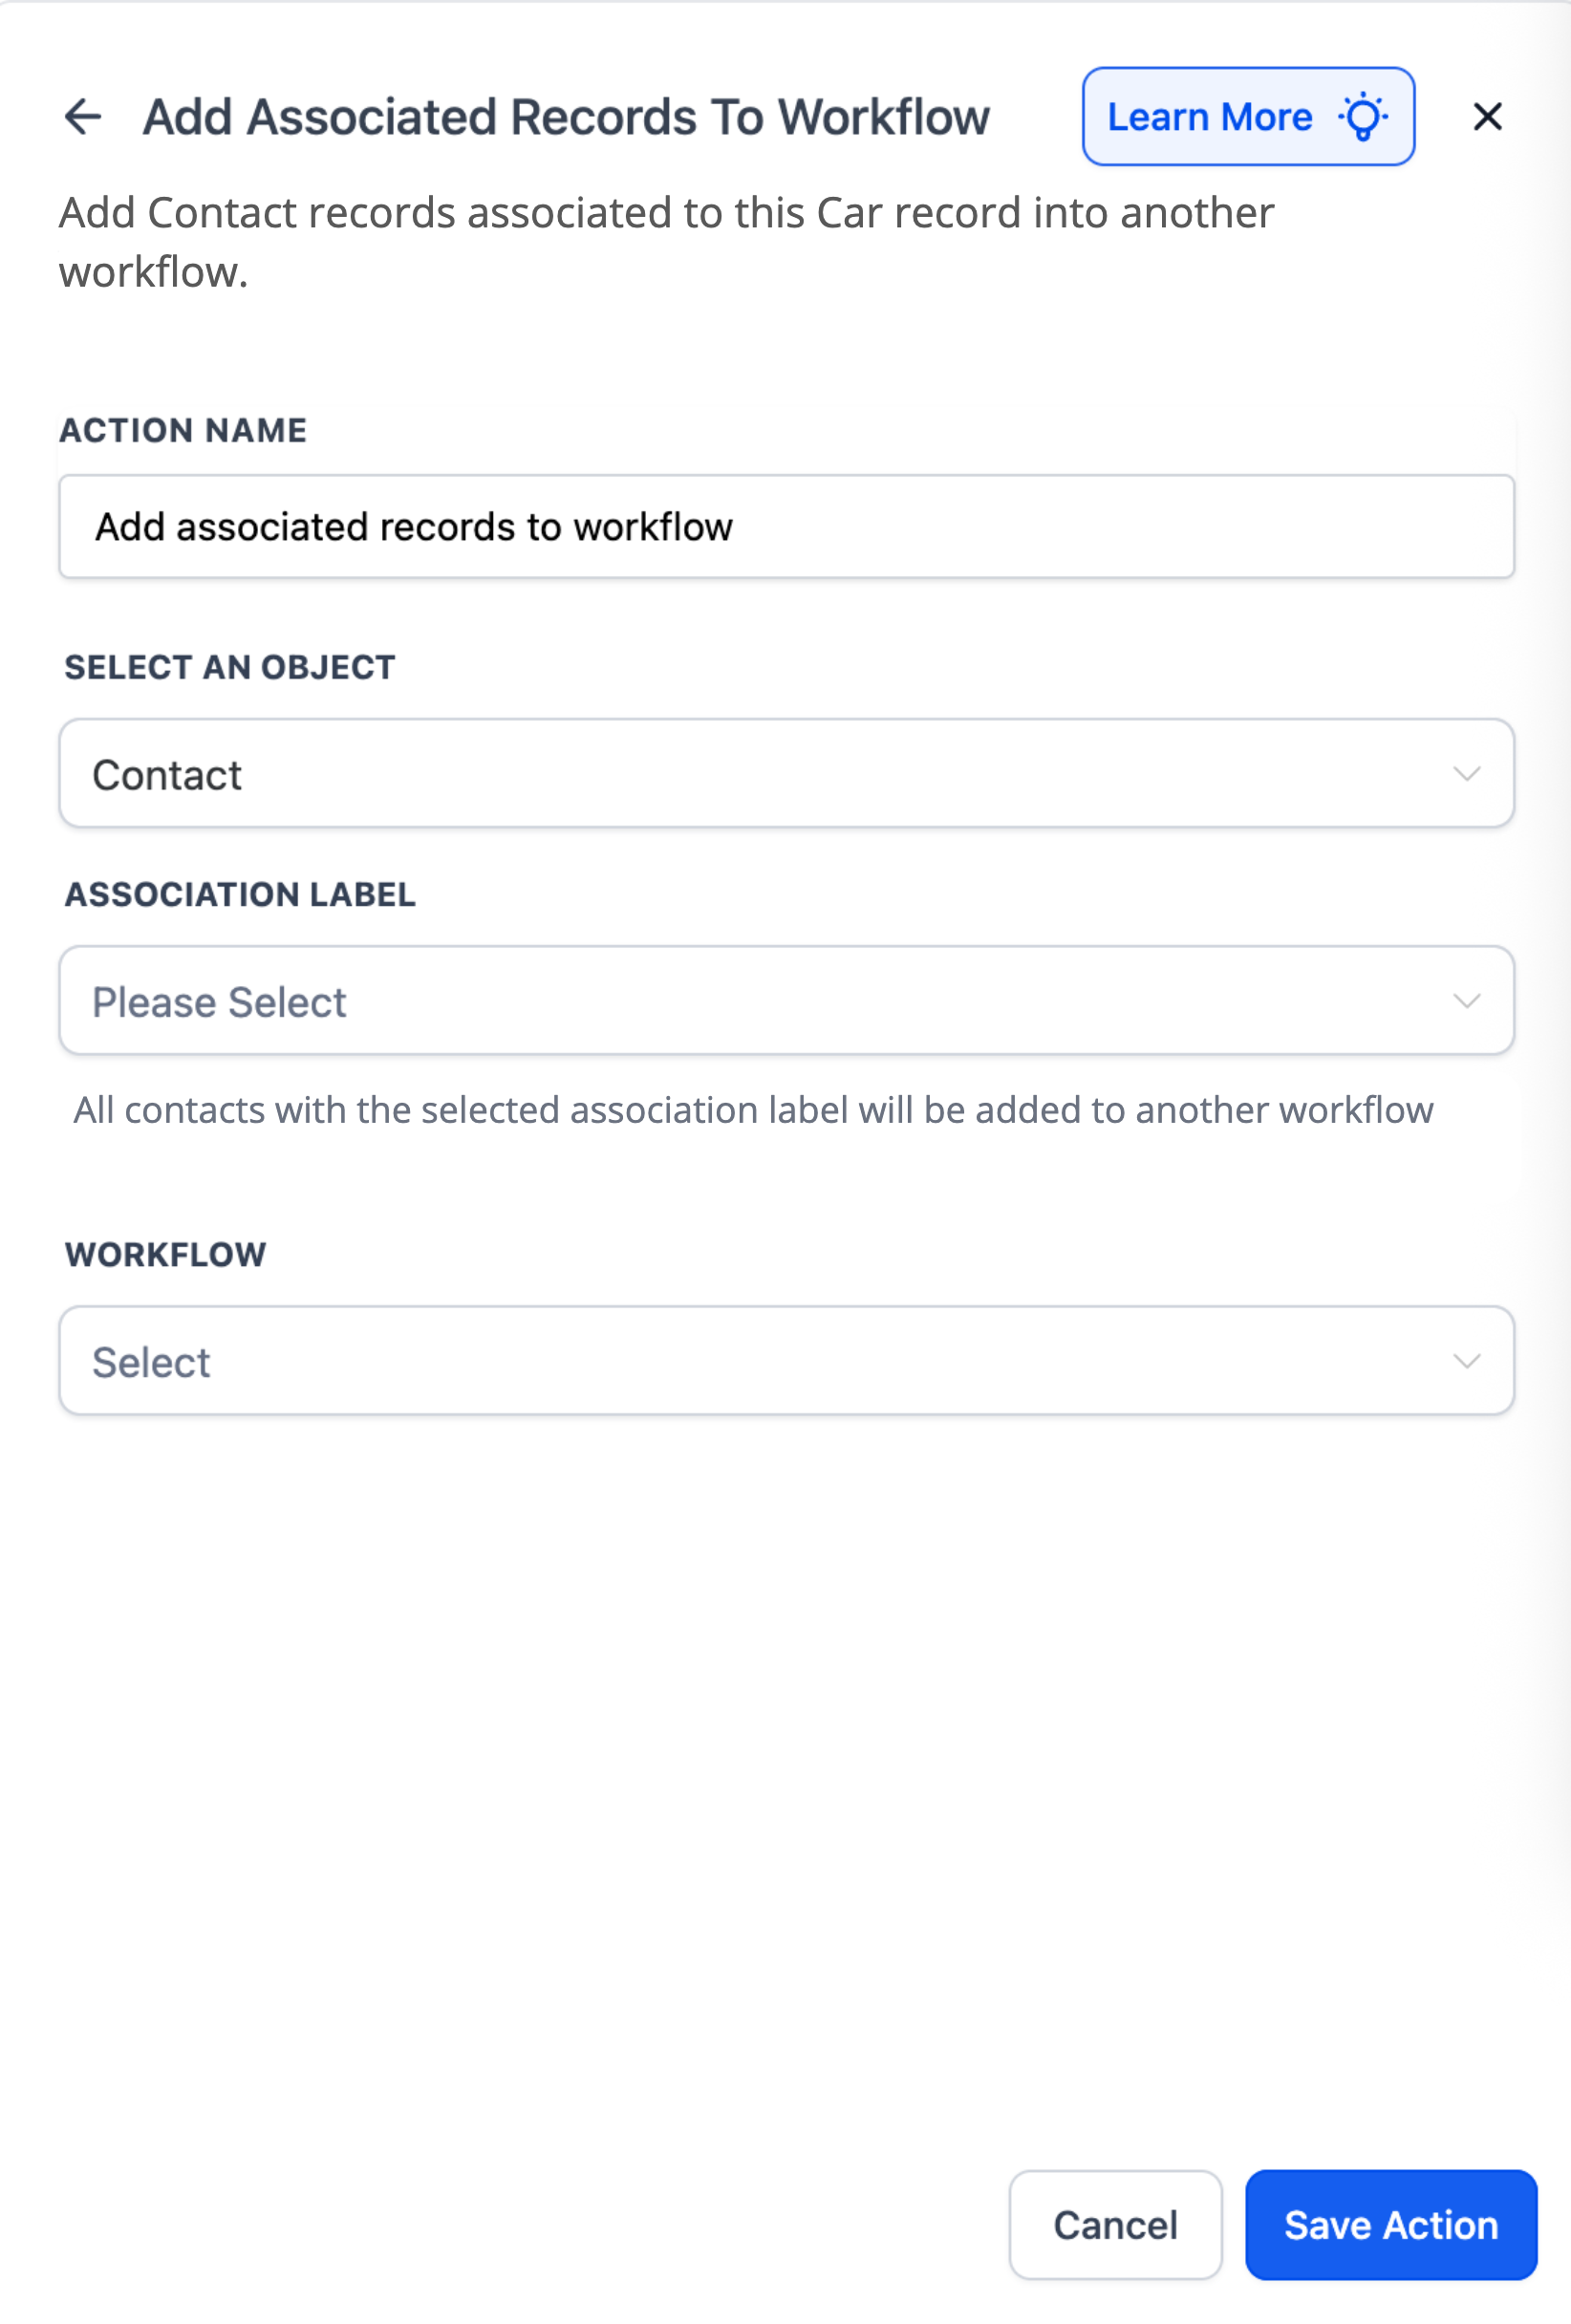
Use Add Associated Records to Workflow when records linked to the trigger record should automatically enter another workflow.
- Go to Automation → Workflows.
- Open an existing workflow or create a new one.
- Click the + icon to add an action.
- Select Add Associated Records to Workflow.
- Select the associated object type.
- Select the applicable Association Label when required.
- Select the workflow where the associated records should be enrolled.
- Save the action.
Remove Associated Records from a Workflow
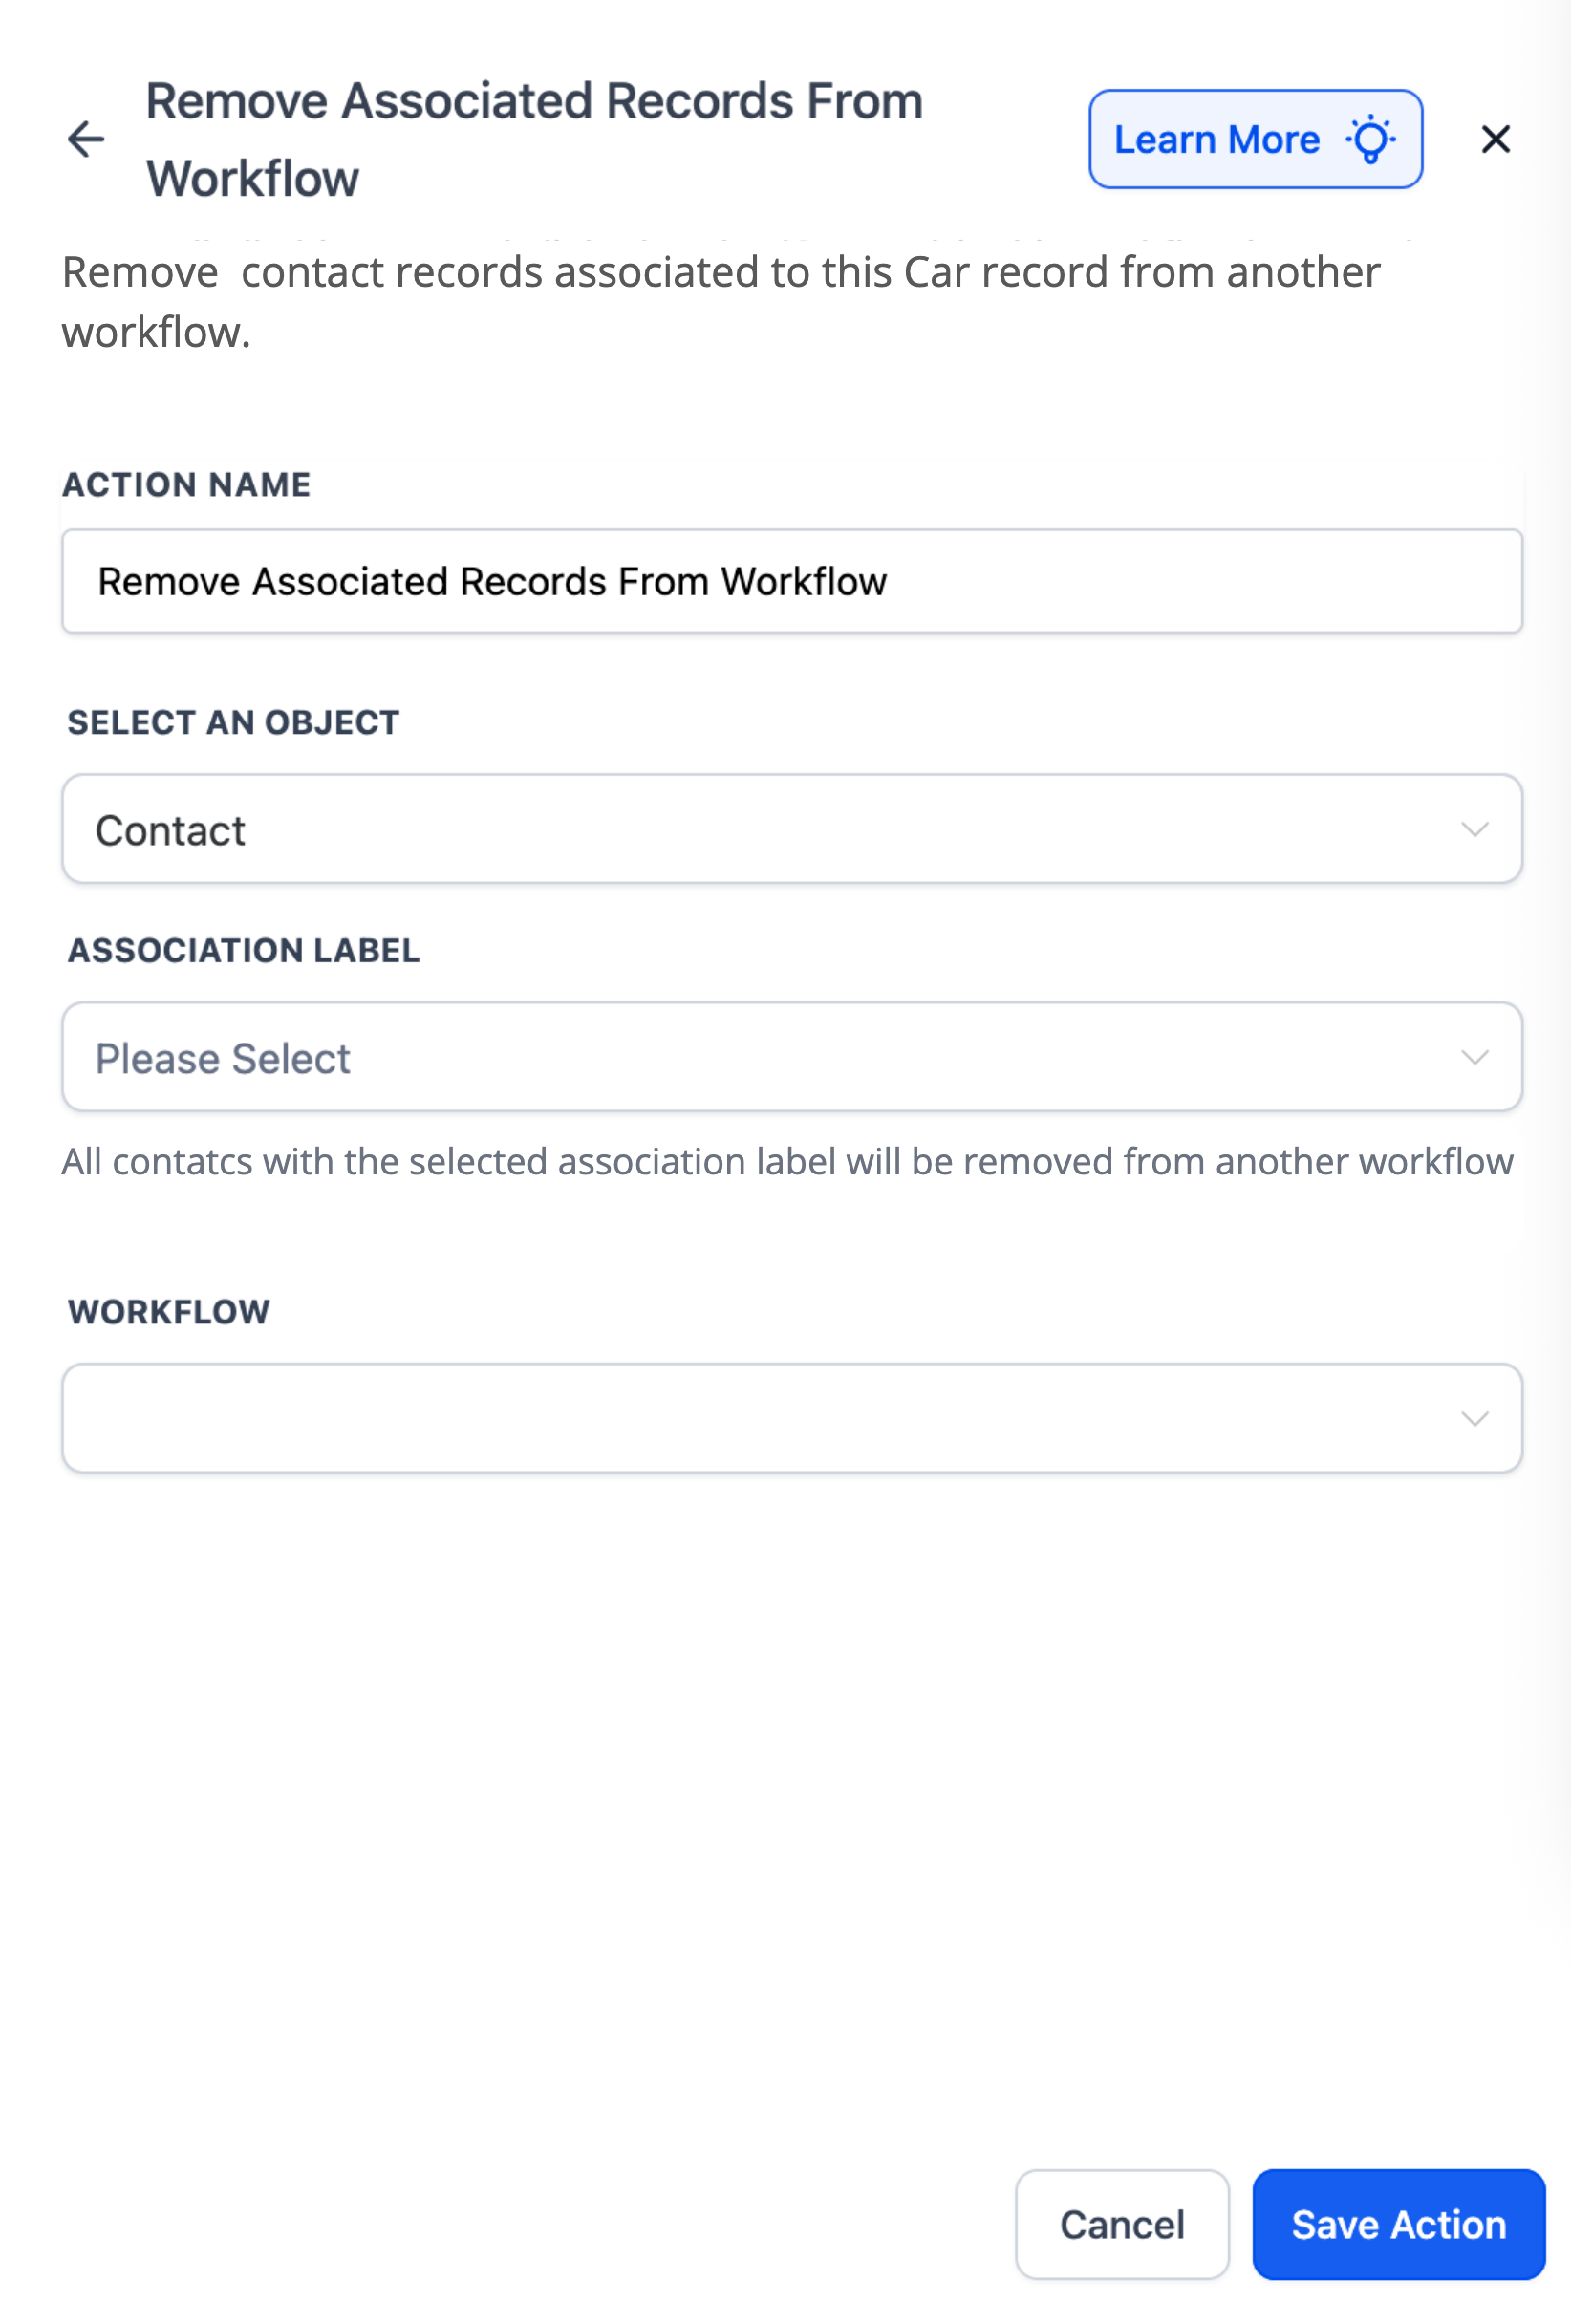
Use Remove Associated Records from Workflow when related records should stop participating in another automation.
- Add the Remove Associated Records from Workflow action.
- Select the associated object type.
- Select the applicable Association Label when required.
- Select the workflow from which the records should be removed.
- Save the action.
Associate Records Automatically
The Associate Records workflow action can find matching records using configured filters and automatically create associations with existing association labels.
Beta: Associate Records is currently available as a Labs feature. Go to Settings → Labs and enable Associate Records - Workflow Action before using it.

When configuring automatic associations, review your matching filters and association labels carefully so the workflow links the intended records.
Frequently Asked Questions
Need Help?
- An association label is missing: Go to Settings → Objects and confirm the association definition exists for the applicable objects.
- A record cannot be linked: Check the configured relationship type and association limits.
- The association limit has been reached: Review the association definition and increase the supported limit if the business relationship requires it.
- An associated record is not entering a workflow: Confirm the records are linked with the correct association label and that the workflow action references the intended object and workflow.
- Associate Records is unavailable: Check Settings → Labs and confirm Associate Records - Workflow Action is enabled where available.