Note: Changes to Shopify connection setup
Shopify is updating how new integrations connect to third-party apps and moving to an OAuth-based setup. Here's what this means for you:

1. Already connected your Shopify store to GHL: No action needed. Your integration will continue to work as-is.
2. New Shopify store without the custom app option or for new connections: Shopify no longer shows this option on some newer stores (specifically from Jan 1, 2026). Our new OAuth-based connection flow will make setup easier for you.

What's new: We've rolled out a new OAuth-based Shopify connection which is more secure, faster to set up, and aligned with the Shopify's latest standards.
Connect via Shopify OAuth App
There are two ways to connect your Shopify store. For every new connection, use the OAuth App method. If you previously connected Shopify using a custom app, your existing integration continues to work. See the note below for guidance.
| OAuth App (Recommended) | Custom App (Legacy) | |
|---|---|---|
| Setup effort | Low. one-click install from Shopify | Requires manual API token creation |
| Who it's for | All new connections | Existing integrations set up before the OAuth app was available |
| Security | OAuth 2.0. No API tokens to manage | Requires storing Admin API access token manually |
| Availability | Available now | Still supported for existing accounts |
If you already connected Shopify using a custom app, your integration is not affected. You do not need to switch. The OAuth App is the recommended path for any new Shopify connections going forward.
The Shopify OAuth App lets you connect in a few steps and requires no custom app creation, no API tokens and no manual configuration in Shopify's developer settings.
Steps to Connect Using the OAuth App:
- Open the sub-account and go to Settings > Integrations > Shopify.
- Click Connect.
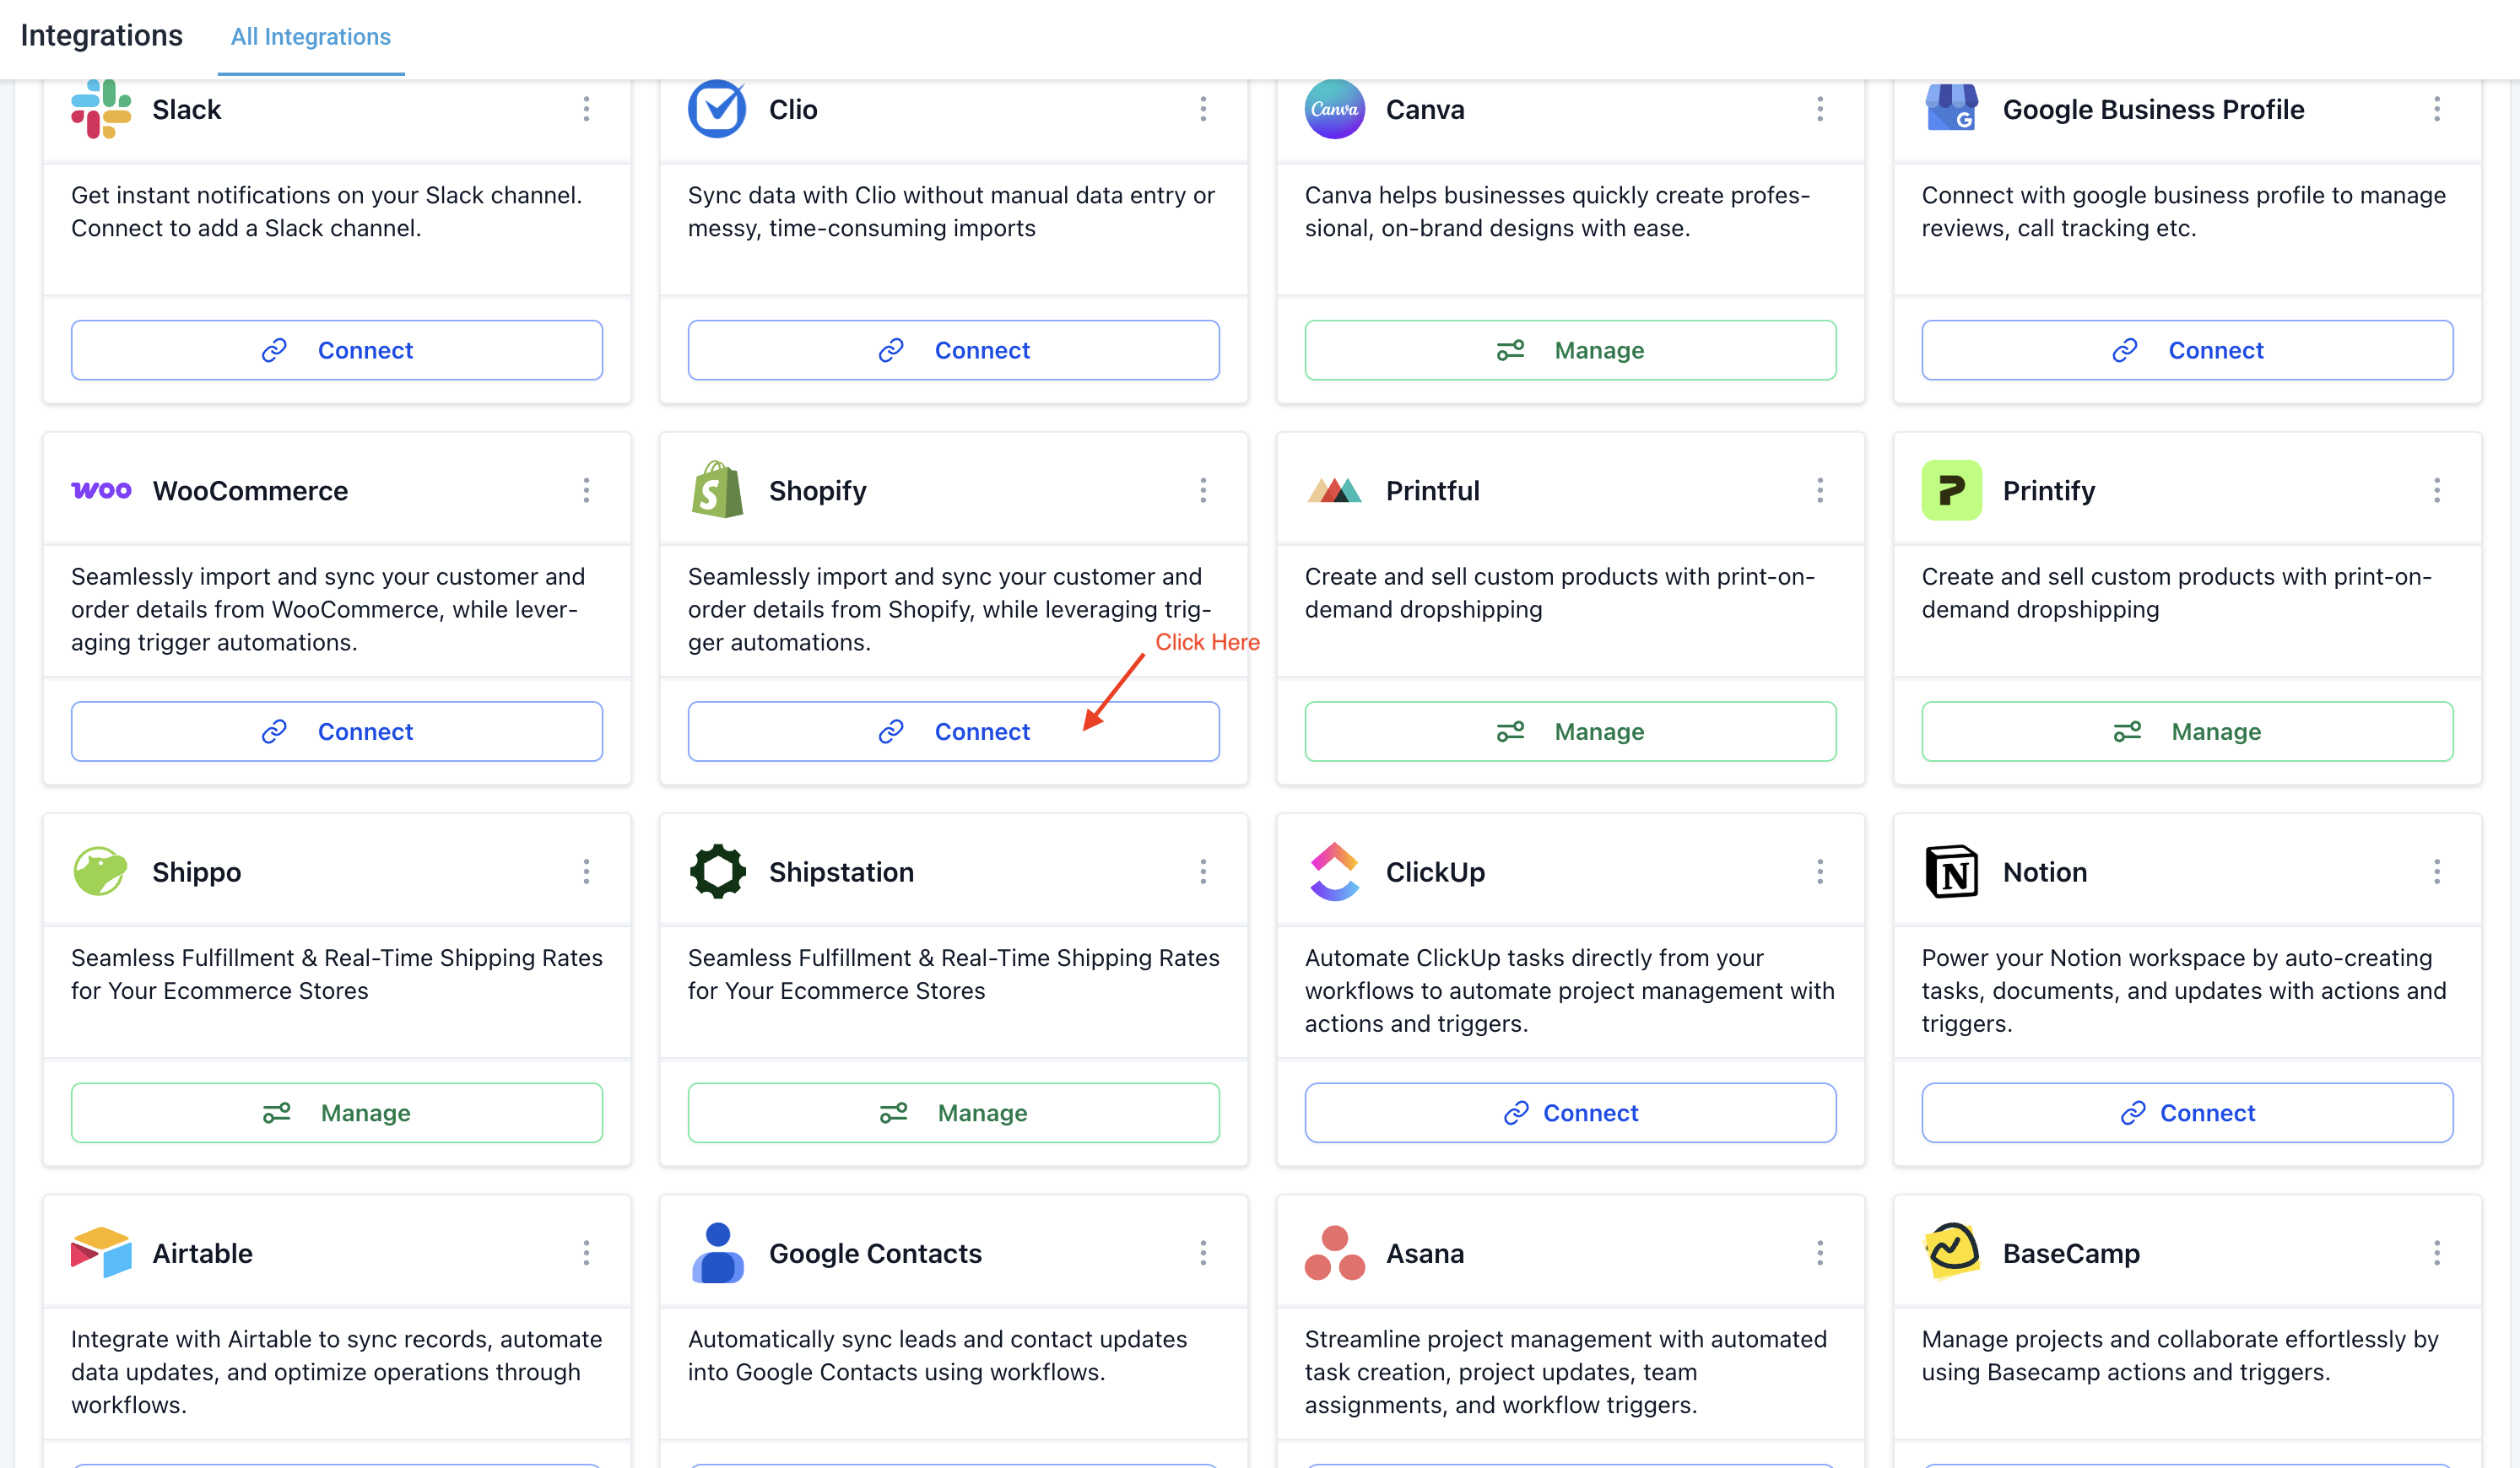
- Enter your Shopify store URL or store name and click Next.
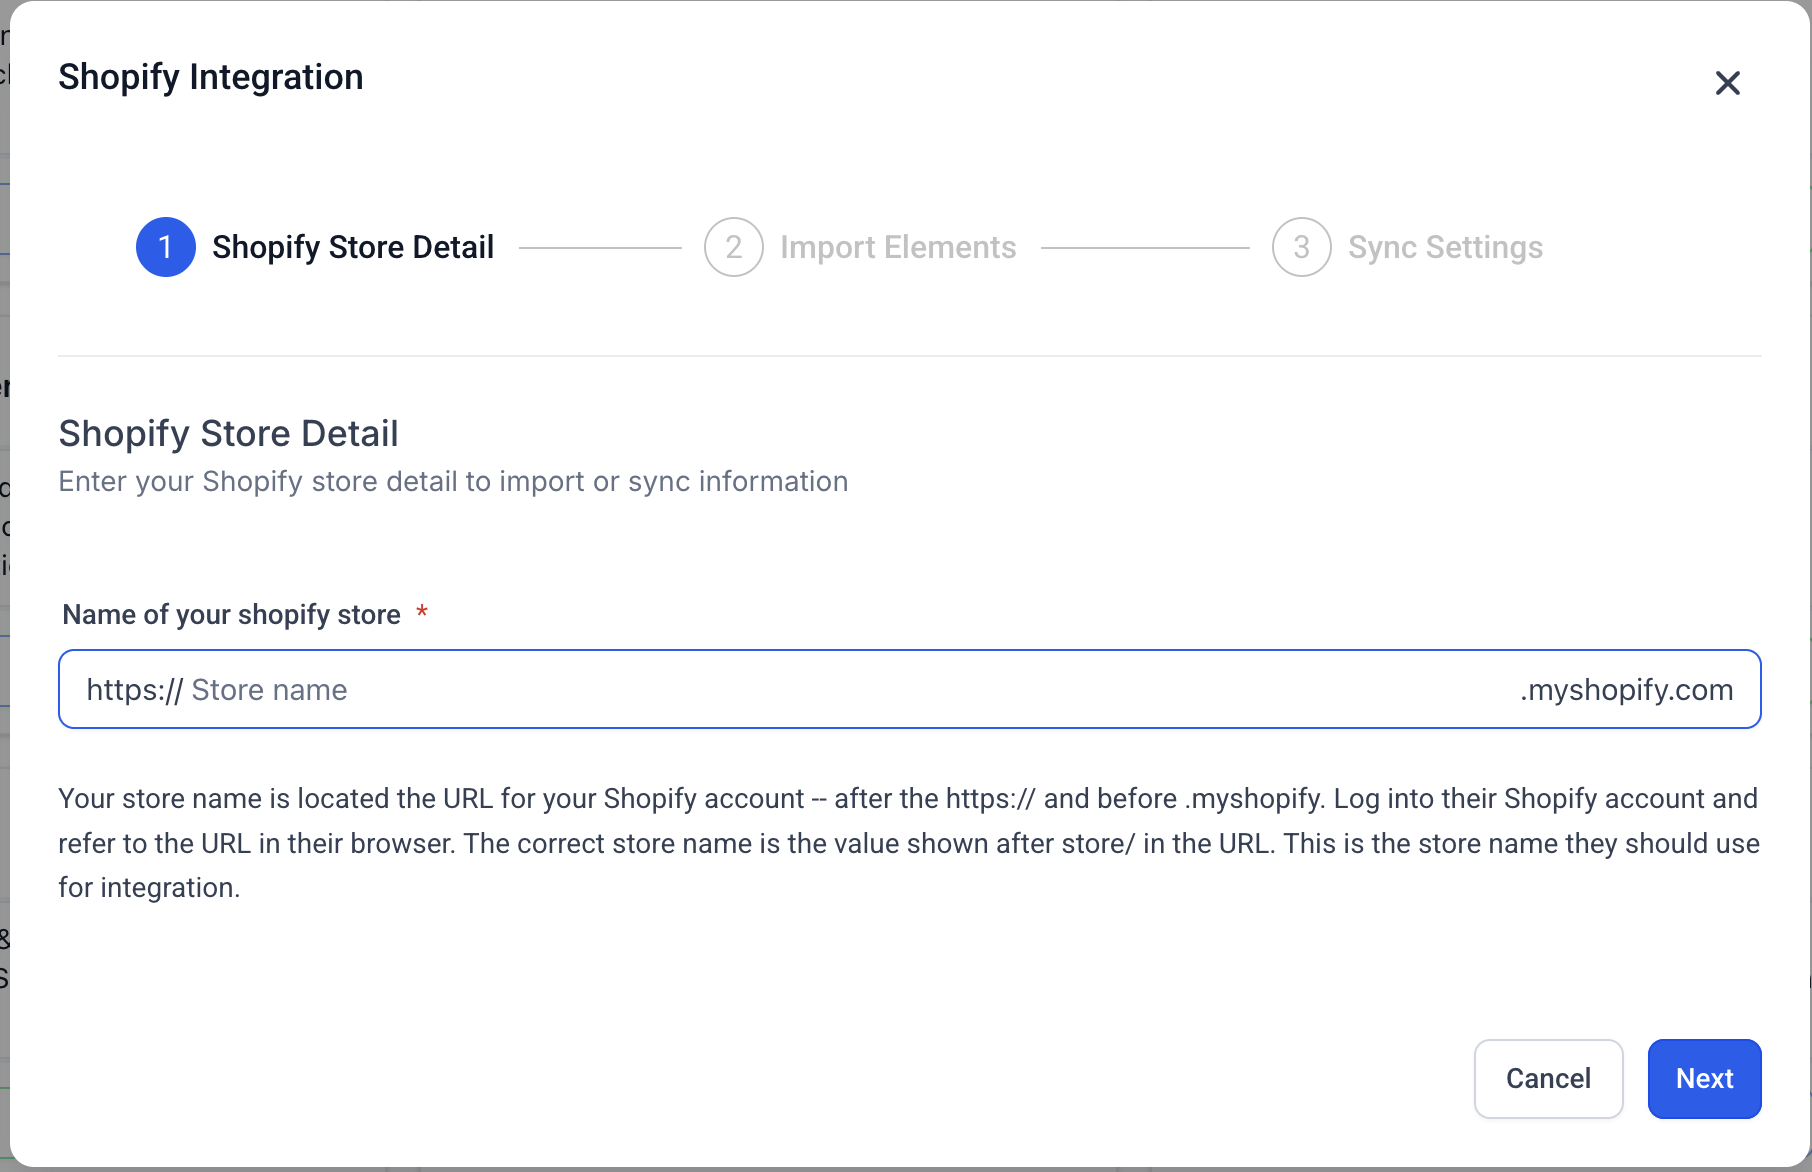
- On the Import Elements screen, select the Shopify data you want to import as a one-time historical import:
- Contact Import
- Order Import
- Transaction Import
- Product Import
- Collection Import
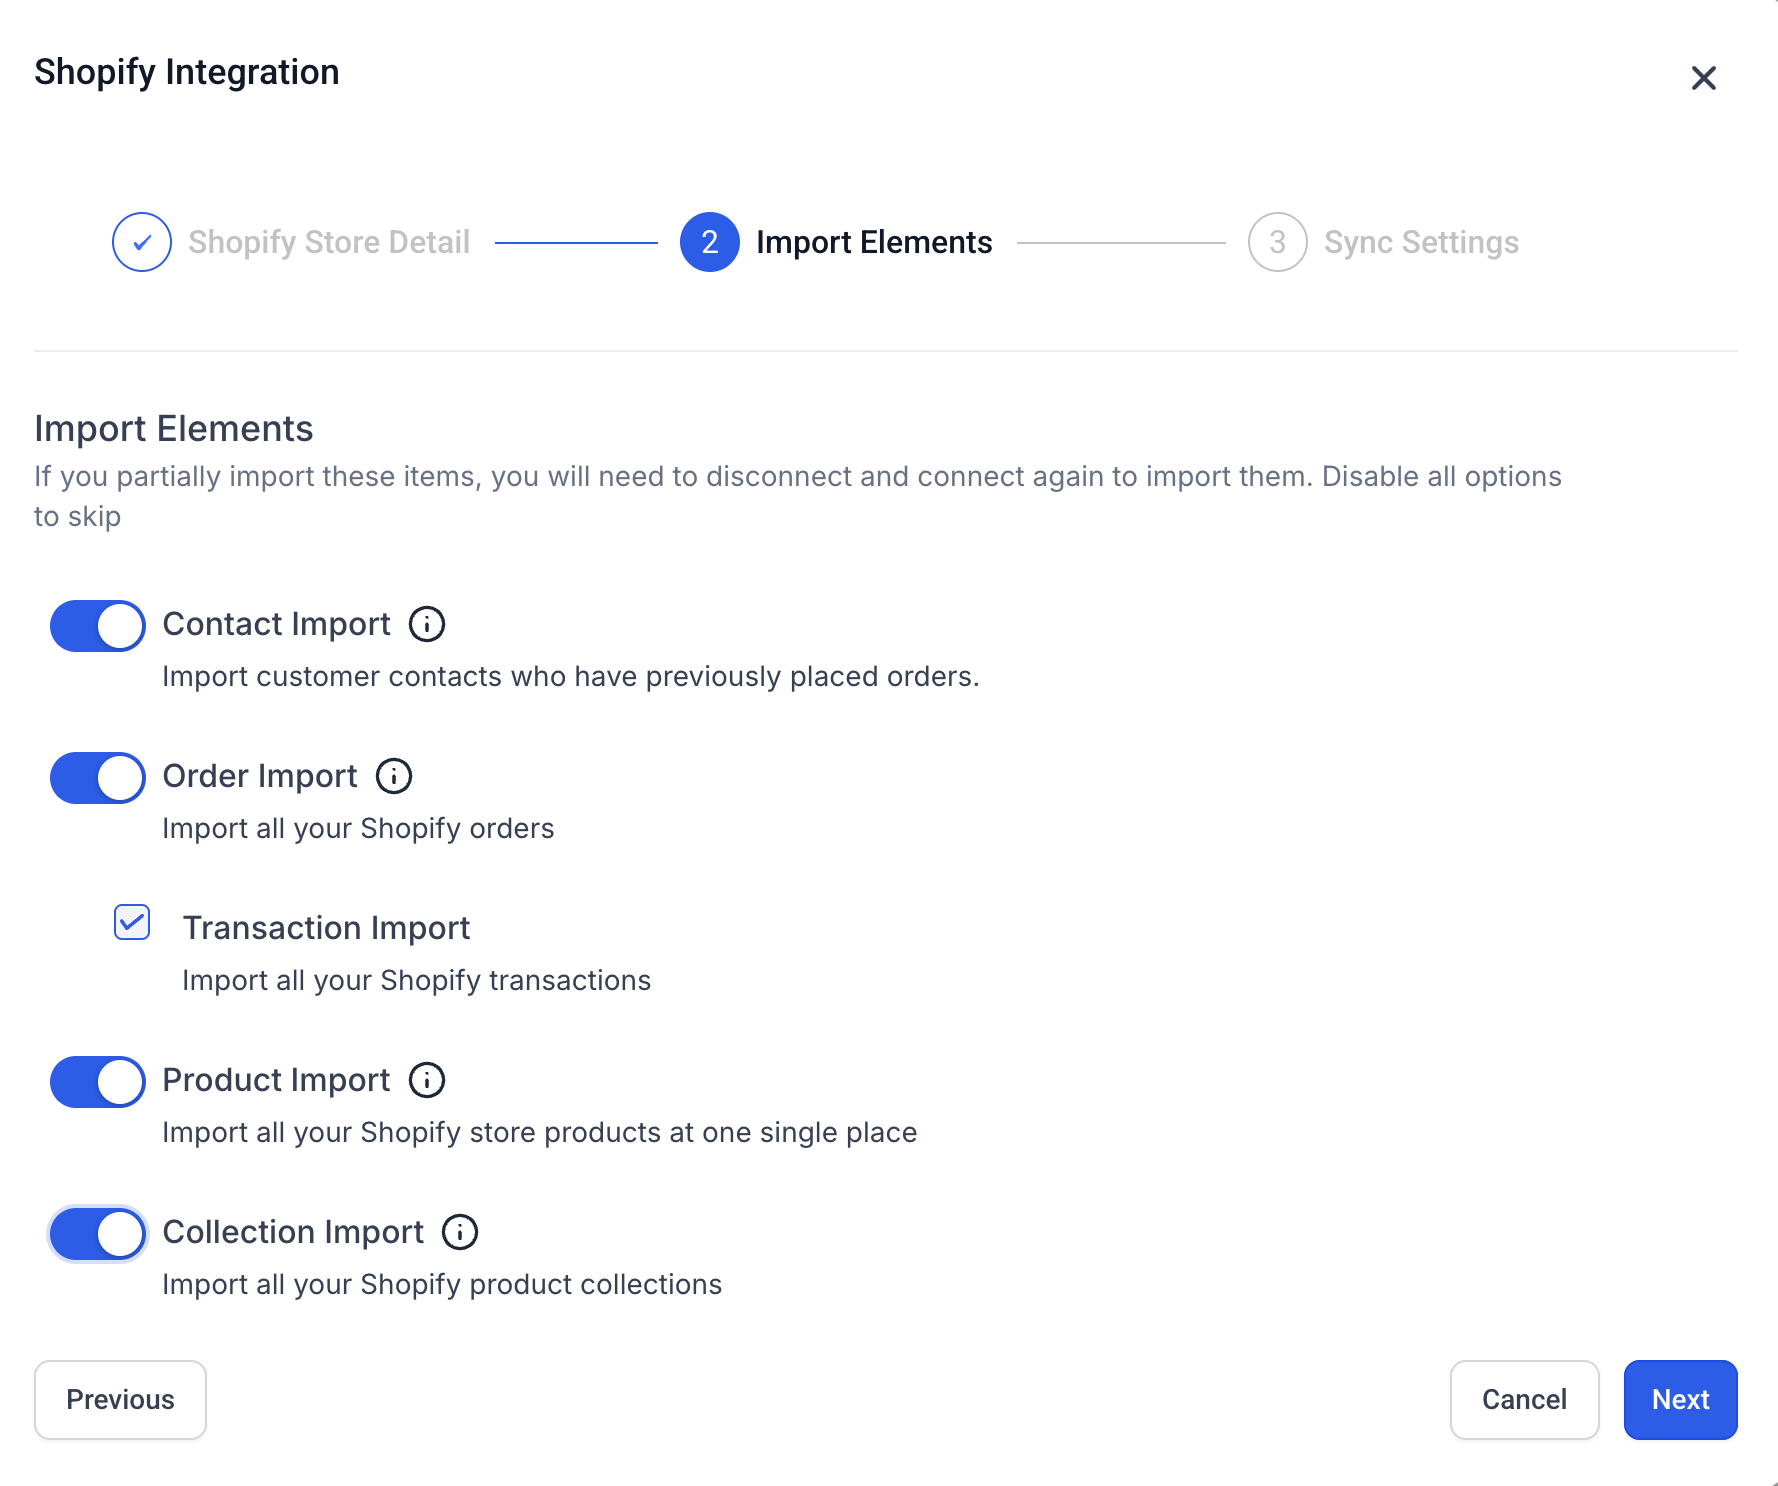
- Click Next to proceed to the Sync Settings screen. Select the data and triggers you want to keep syncing going forward:
- Contact Sync
- Order Sync
- Order Received Trigger
- Transaction Sync
- Payment Received Trigger
- Product Sync
- Collection Sync
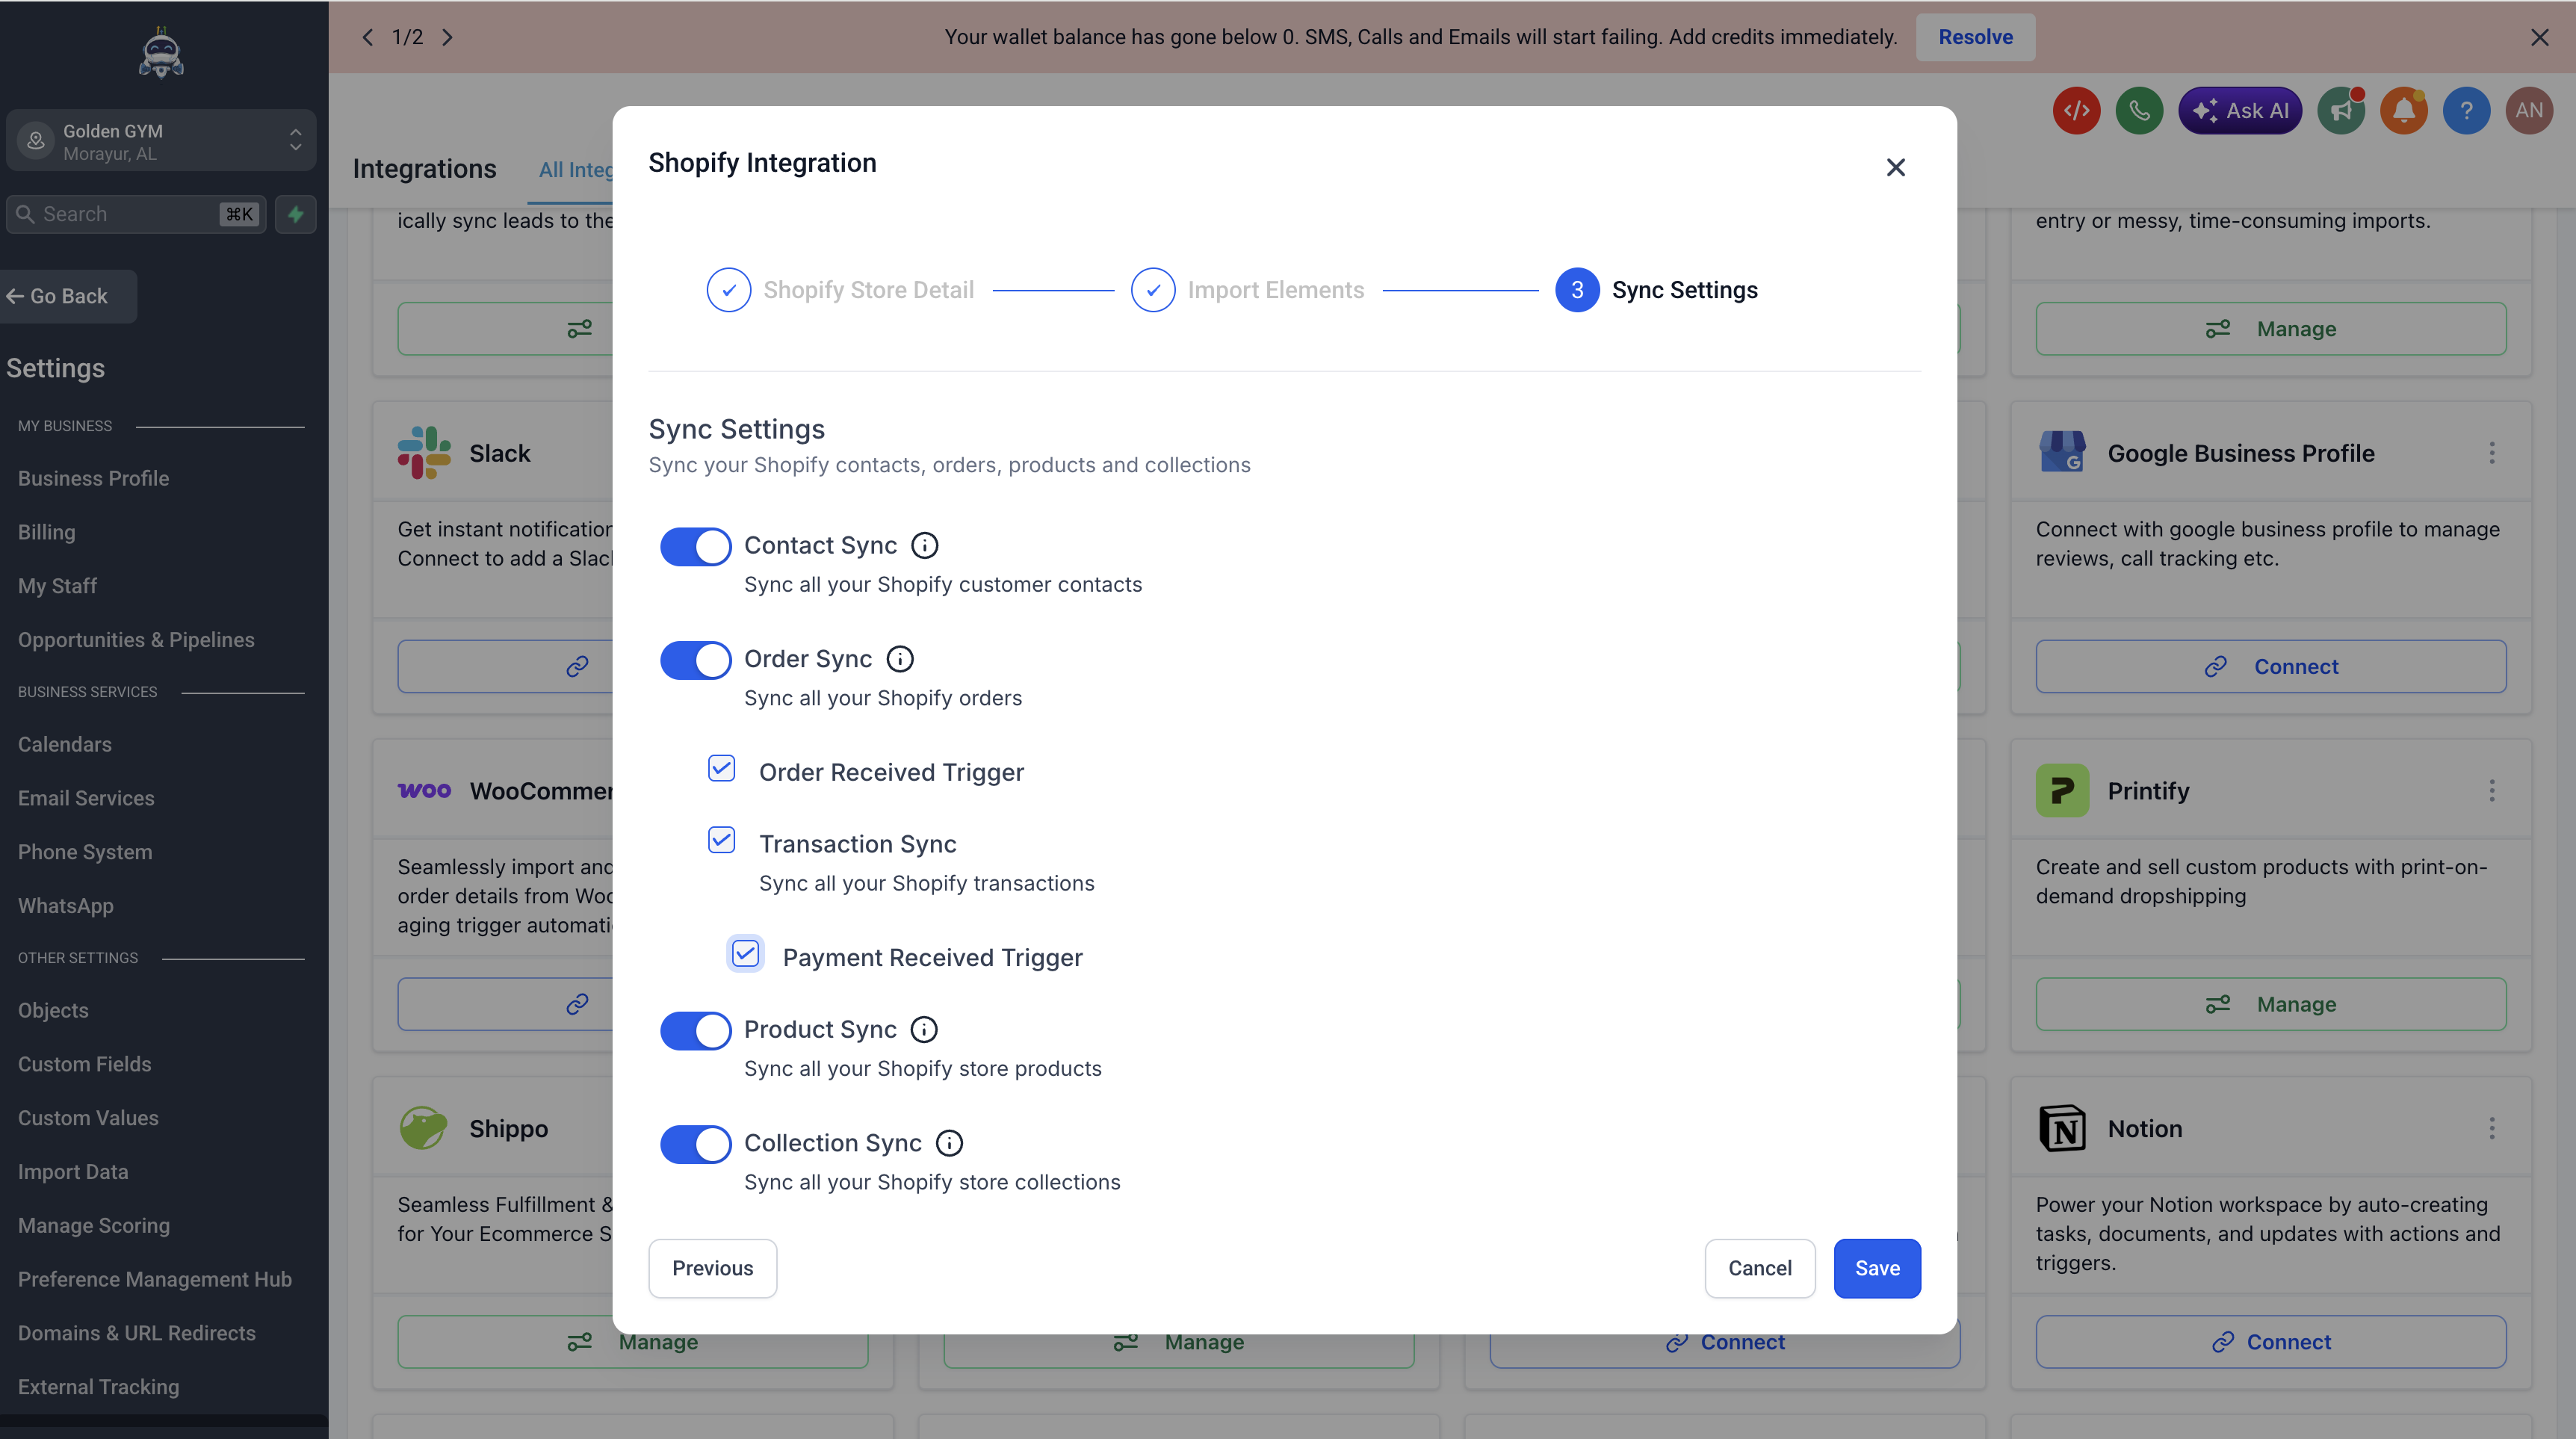
- Click Save. This will initiate the OAuth authorization flow and redirect you to Shopify.
- On the Shopify Install app screen, review the permissions requested and click Install.
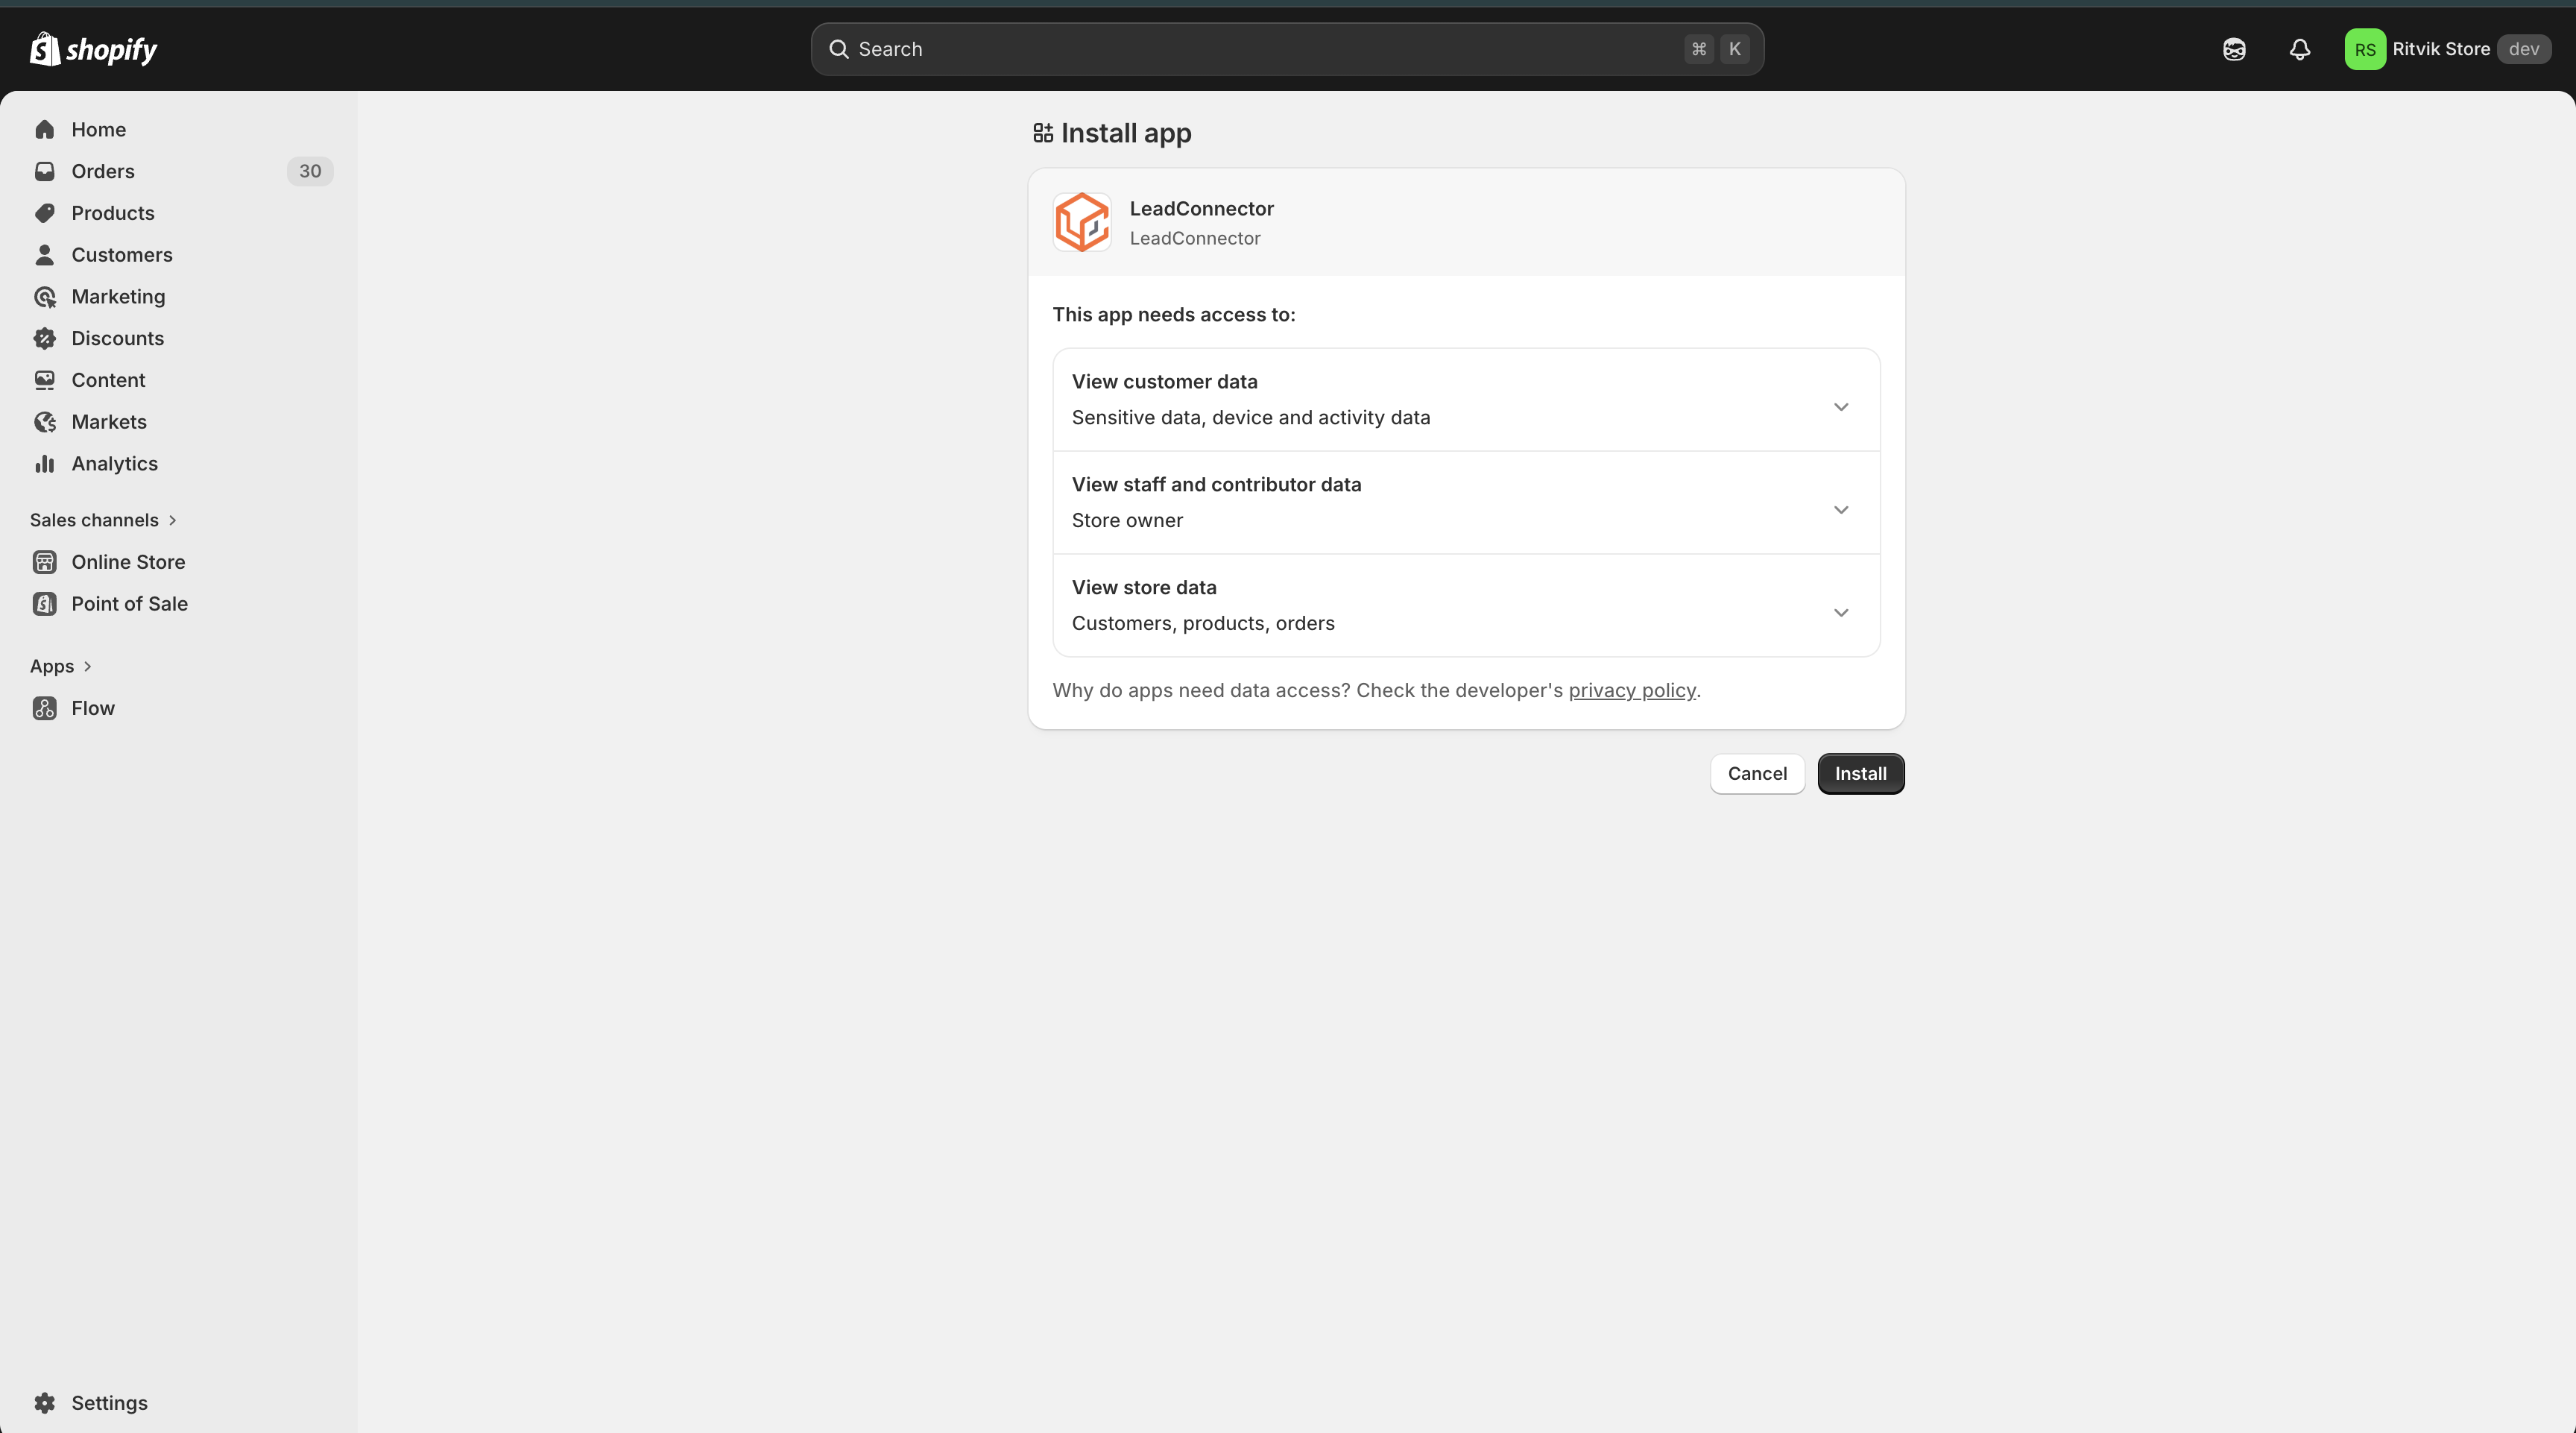
- Once approved, you will be redirected back and your Shopify store will be connected.
Tip: For a full Shopify store migration, select all available import and sync options unless your migration plan requires only specific data types. This helps ensure supported historical data is imported and future Shopify activity continues syncing.
- Taxes are not mapped in Products while importing or syncing the Products.
- For each order, only one transaction is created in your sub-account.
- Order statuses are marked as "Completed" or "Cancelled" when synced with Shopify.
- Merged contacts in Shopify will have the primary contact updated in Sub-account.
- If there are no changes to the SEO details in Shopify (default SEO settings), the data will be received as null in Sub-account.
Frequently Asked Questions

Q1: Why aren't my contacts syncing from Shopify?
Ans: Due to a Shopify API update, the Basic plan no longer provides access to customer PII (customer names, emails, addresses, phone numbers). This data is required to create Contacts in the platform.
Note: To sync contacts, you must upgrade to Shopify Advanced or Plus plan.
Reference: https://community.shopify.com/c/shopify-discussions/no-more-customer-pii-in-custom-app-integrations-for-shopify/m-p/2496209


Q2: What Shopify data can sync on the Basic plan?
Ans: On the Basic plan, you can still Import and sync:
- Products
- Collections
But you cannot sync:
- Contacts
- Orders
- Transactions


Q3: It used to work before. Why did it stop now?
Reference: https://community.shopify.com/c/shopify-discussions/no-more-customer-pii-in-custom-app-integrations-for-shopify/td-p/2496209
Admin APIs have these restrictions, and even the webhook calls that we receive have stopped returning the customer data
We previously used an older Shopify API that allowed PII access on all plans. That API is now deprecated. As we migrate to the new API, these restrictions will apply across the board.


Q4: Where can I check or manage app permissions?
Manage your Shopify app configuration here: Shopify App Configuration


Q5: Where can I find my Shopify Store name?
If you don't know your Shopify store name, you can find it by logging into your Shopify account. Once you login to Shopify, you can find your store name by looking at the URL at the top of the page - your store name is the name or combination of letters and numbers to the right of "store/". In this example, the store name would be ef760-ef.

