Integrating Shopify with your sub-account is a 2 step process:
- Create a Custom App in your Shopify Store
- Connect Shopify to your Account
Step-1: Create a Custom App in your Shopify Store
Before we setup integration we need to create a custom app in your Shopify store.
1.1 Login to your Shopify store and click on "Apps" in your dashboard

1.2 Then, click on "Develop apps" on the top of the screen highlighted in the below picture

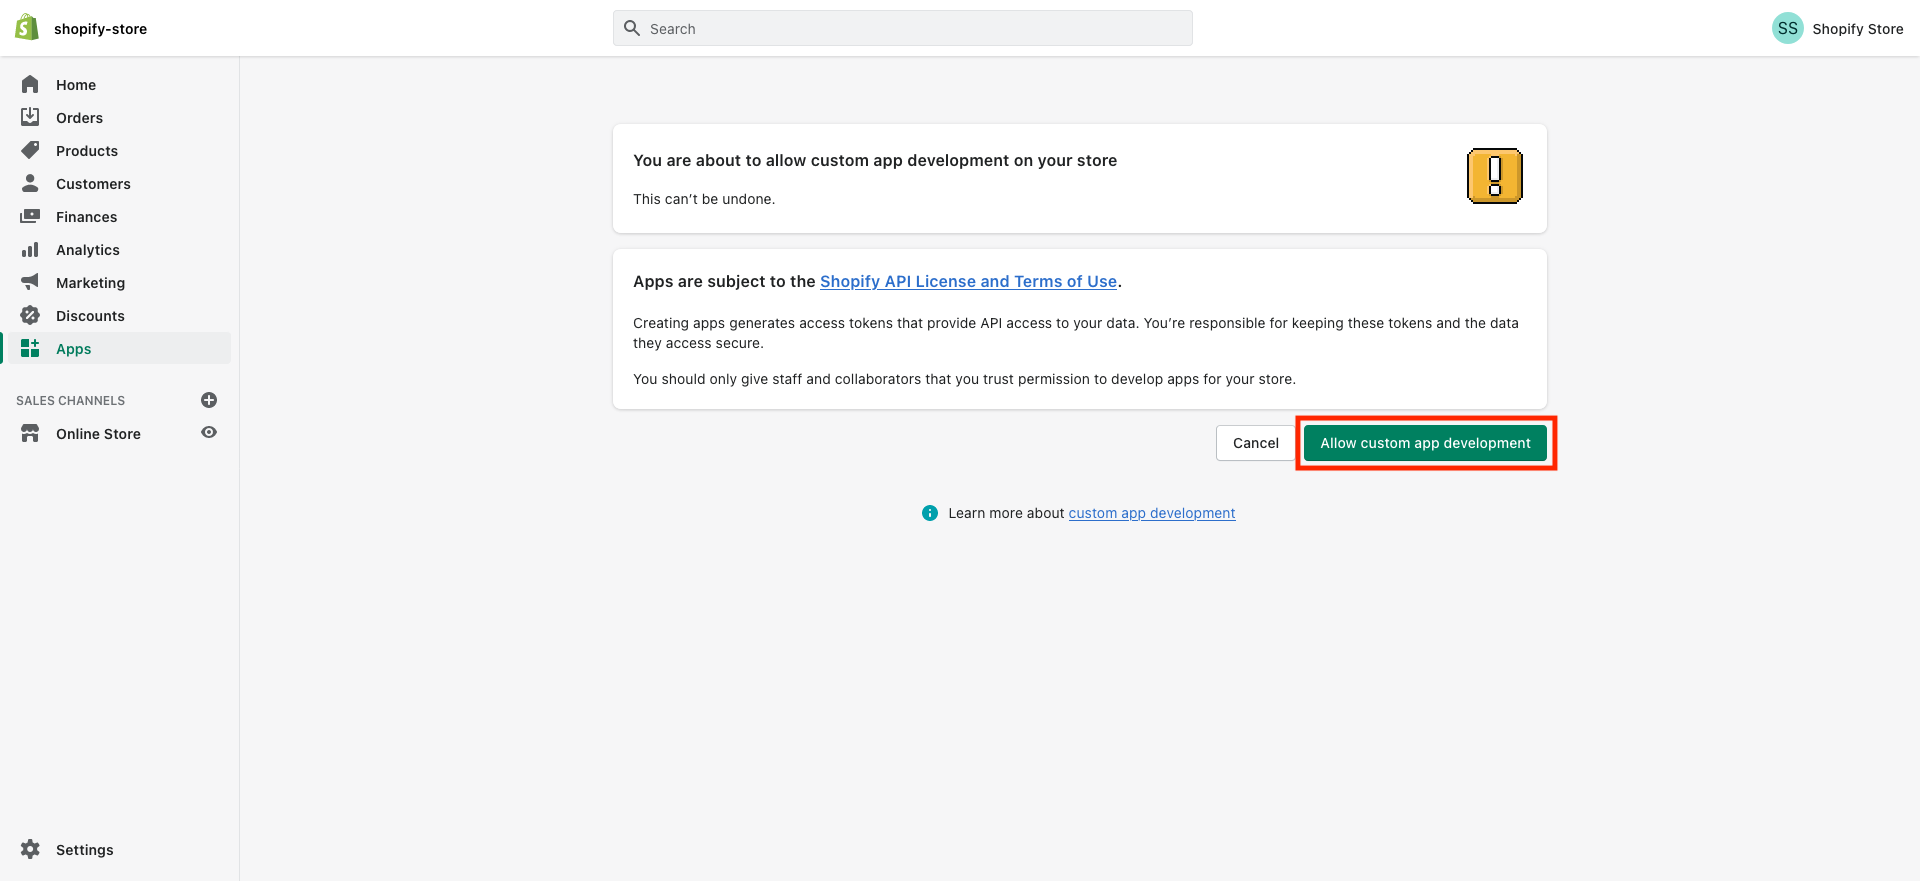
1.3 Then, click on "Allow custom app development" (if you have already enabled this permission then Shopify
will take you to Step-1.5)

1.4 In the next screen, click on "Allow custom app development"
1.5 Then, click on "Create an app"

1.6 Enter a name for the app (for example "Marvel's App"), select your email under App developer
and click on "Create app"

1.7 Then, click on "Configure Admin API scopes" to configure Admin API integration

1.8 Search/scroll down to the "Orders" and You will need to enable at the very
least "read_orders" access

1.9 Add the "read_customers" scope. In configuration edit the "Admin API Integrations". In this section under
customers, select the "read_customers" tick box.


1.10 Then, Search/scroll down to the "Products" and You will need to enable at the very
least "read_products" access

1.11 Then, Search/scroll down to the "Inventory" and You will need to enable at the very
least "read_inventory" access

1.12 Once you've enabled read access on "Orders, Product, Customer, and Inventory", save the app by clicking on the
"Save" button on the top right

1.13 After saving click on the "Install app" as in the image below

1.14 Then, click on "Install" from the pop up as in the image below

and voilà your App is ready to be integrated now!
1.15 After installing, the "Admin API access token" that you need for the Shopify integration can
be found under the API credentials section, click on "Reveal token once" to get access to the token

1.16 Copy the "Admin API access token" by clicking on the clipboard icon

Step-2: Connect Shopify to your Account
- Access the Integration:Shopify integration can be found within a sub-account at:Settings > Integration > Shopify.

- Connect the Shopify Store:Users can click on "connect" button to begin the setup. A modal will appear where users must enter Admin API access Token and a valid Shopify store URL as the first step.

- Select Data to Import:In the second step, users will be directed to the Import Elements screen, where they can select which data to import from their Shopify store. The available options for import are:Contacts, Orders, Transactions, Products, Collections.
Reimporting Data: If users wish to reimport data, they can disconnect and reconnect the integration, allowing them to reimport any data they may have missed during the initial import.
- Configure Syncing Settings:The third and final step takes users to the Sync Settings screen, where users can choose which data to continuously sync from Shopify to LC in future. The options for syncing include:Contacts, Orders, Transactions, Order submitted trigger, Payment received trigger, Products, Collections.

- Completing the Setup:After selecting the desired elements to import and sync, clickSave. The import and sync process may take some time to complete.
- Manage Settings:Once the Shopify integration is successfully connected, users can enable or disable the elements they want to sync for future orders from the Shopify store.

- Taxes are not mapped in Products while importing or syncing the Products.
- For each order, only one transaction is created in your sub-account.
- Order statuses are marked as "Completed" or "Cancelled" when synced with Shopify.
- Merged contacts in Shopify will have the primary contact updated in Sub-account.
- If there are no changes to the SEO details in Shopify (default SEO settings), the data will be received as null in Sub-account.
Frequently Asked Questions

Q1: Why aren't my contacts syncing from Shopify?
Ans: Due to a Shopify API update, the Basic plan no longer provides access to customer PII (customer names, emails, addresses, phone numbers). This data is required to create Contacts in the platform.
Note: To sync contacts, you must upgrade to Shopify Advanced or Plus plan.
Reference: https://community.shopify.com/c/shopify-discussions/no-more-customer-pii-in-custom-app-integrations-for-shopify/m-p/2496209


Q2: What Shopify data can sync on the Basic plan?
Ans: On the Basic plan, you can still Import and sync:
- Products
- Collections
But you cannot sync:
- Contacts
- Orders
- Transactions


Q3: It used to work before. Why did it stop now?
Reference: https://community.shopify.com/c/shopify-discussions/no-more-customer-pii-in-custom-app-integrations-for-shopify/td-p/2496209
Admin APIs have these restrictions, and even the webhook calls that we receive have stopped returning the customer data
We previously used an older Shopify API that allowed PII access on all plans. That API is now deprecated. As we migrate to the new API, these restrictions will apply across the board.


Q4: Where can I check or manage app permissions?
Manage your Shopify app configuration here: Shopify App Configuration


Q5: Where can I find my Shopify Store name?
If you don't know your Shopify store name, you can find it by logging into your Shopify account. Once you login to Shopify, you can find your store name by looking at the URL at the top of the page - your store name is the name or combination of letters and numbers to the right of "store/". In this example, the store name would be ef760-ef.

