Connecting an external store lets you bring customer, order, and payment data into one place so you can manage sales activity and automate follow-up more efficiently. This integration also supports order-based workflow triggers, making it easier to send messages, update records, and build automations around purchase activity.
This guide explains how to connect the store, choose what to import, configure future syncing, and use order and payment triggers in workflows.
TABLE OF CONTENTS
- What This Integration Does
- Order and Payment Triggers
- Important Notes
- Frequently Asked Questions
- Need Help
What This Integration Does
This integration allows you to connect an external ecommerce store and bring store data into your account. Once connected, you can import existing records and keep selected data synced moving forward.
Supported data types include:
Contacts
Orders
Transactions or payments
The integration also supports workflow automation using purchase-related triggers so you can respond automatically when an order is submitted or when a payment is received.
Before You Begin
Before starting the connection process, make sure you have access to the store admin area and the correct store URL.
The store URL should:
Use the full secure format
Not include a trailing slash
Be the main live store address
You should also decide in advance whether you want to import historical data, enable future syncing, or both.
Connect the Store
Open the integration settings inside your account and start a new store connection. Enter the store URL when prompted and continue to the import step.
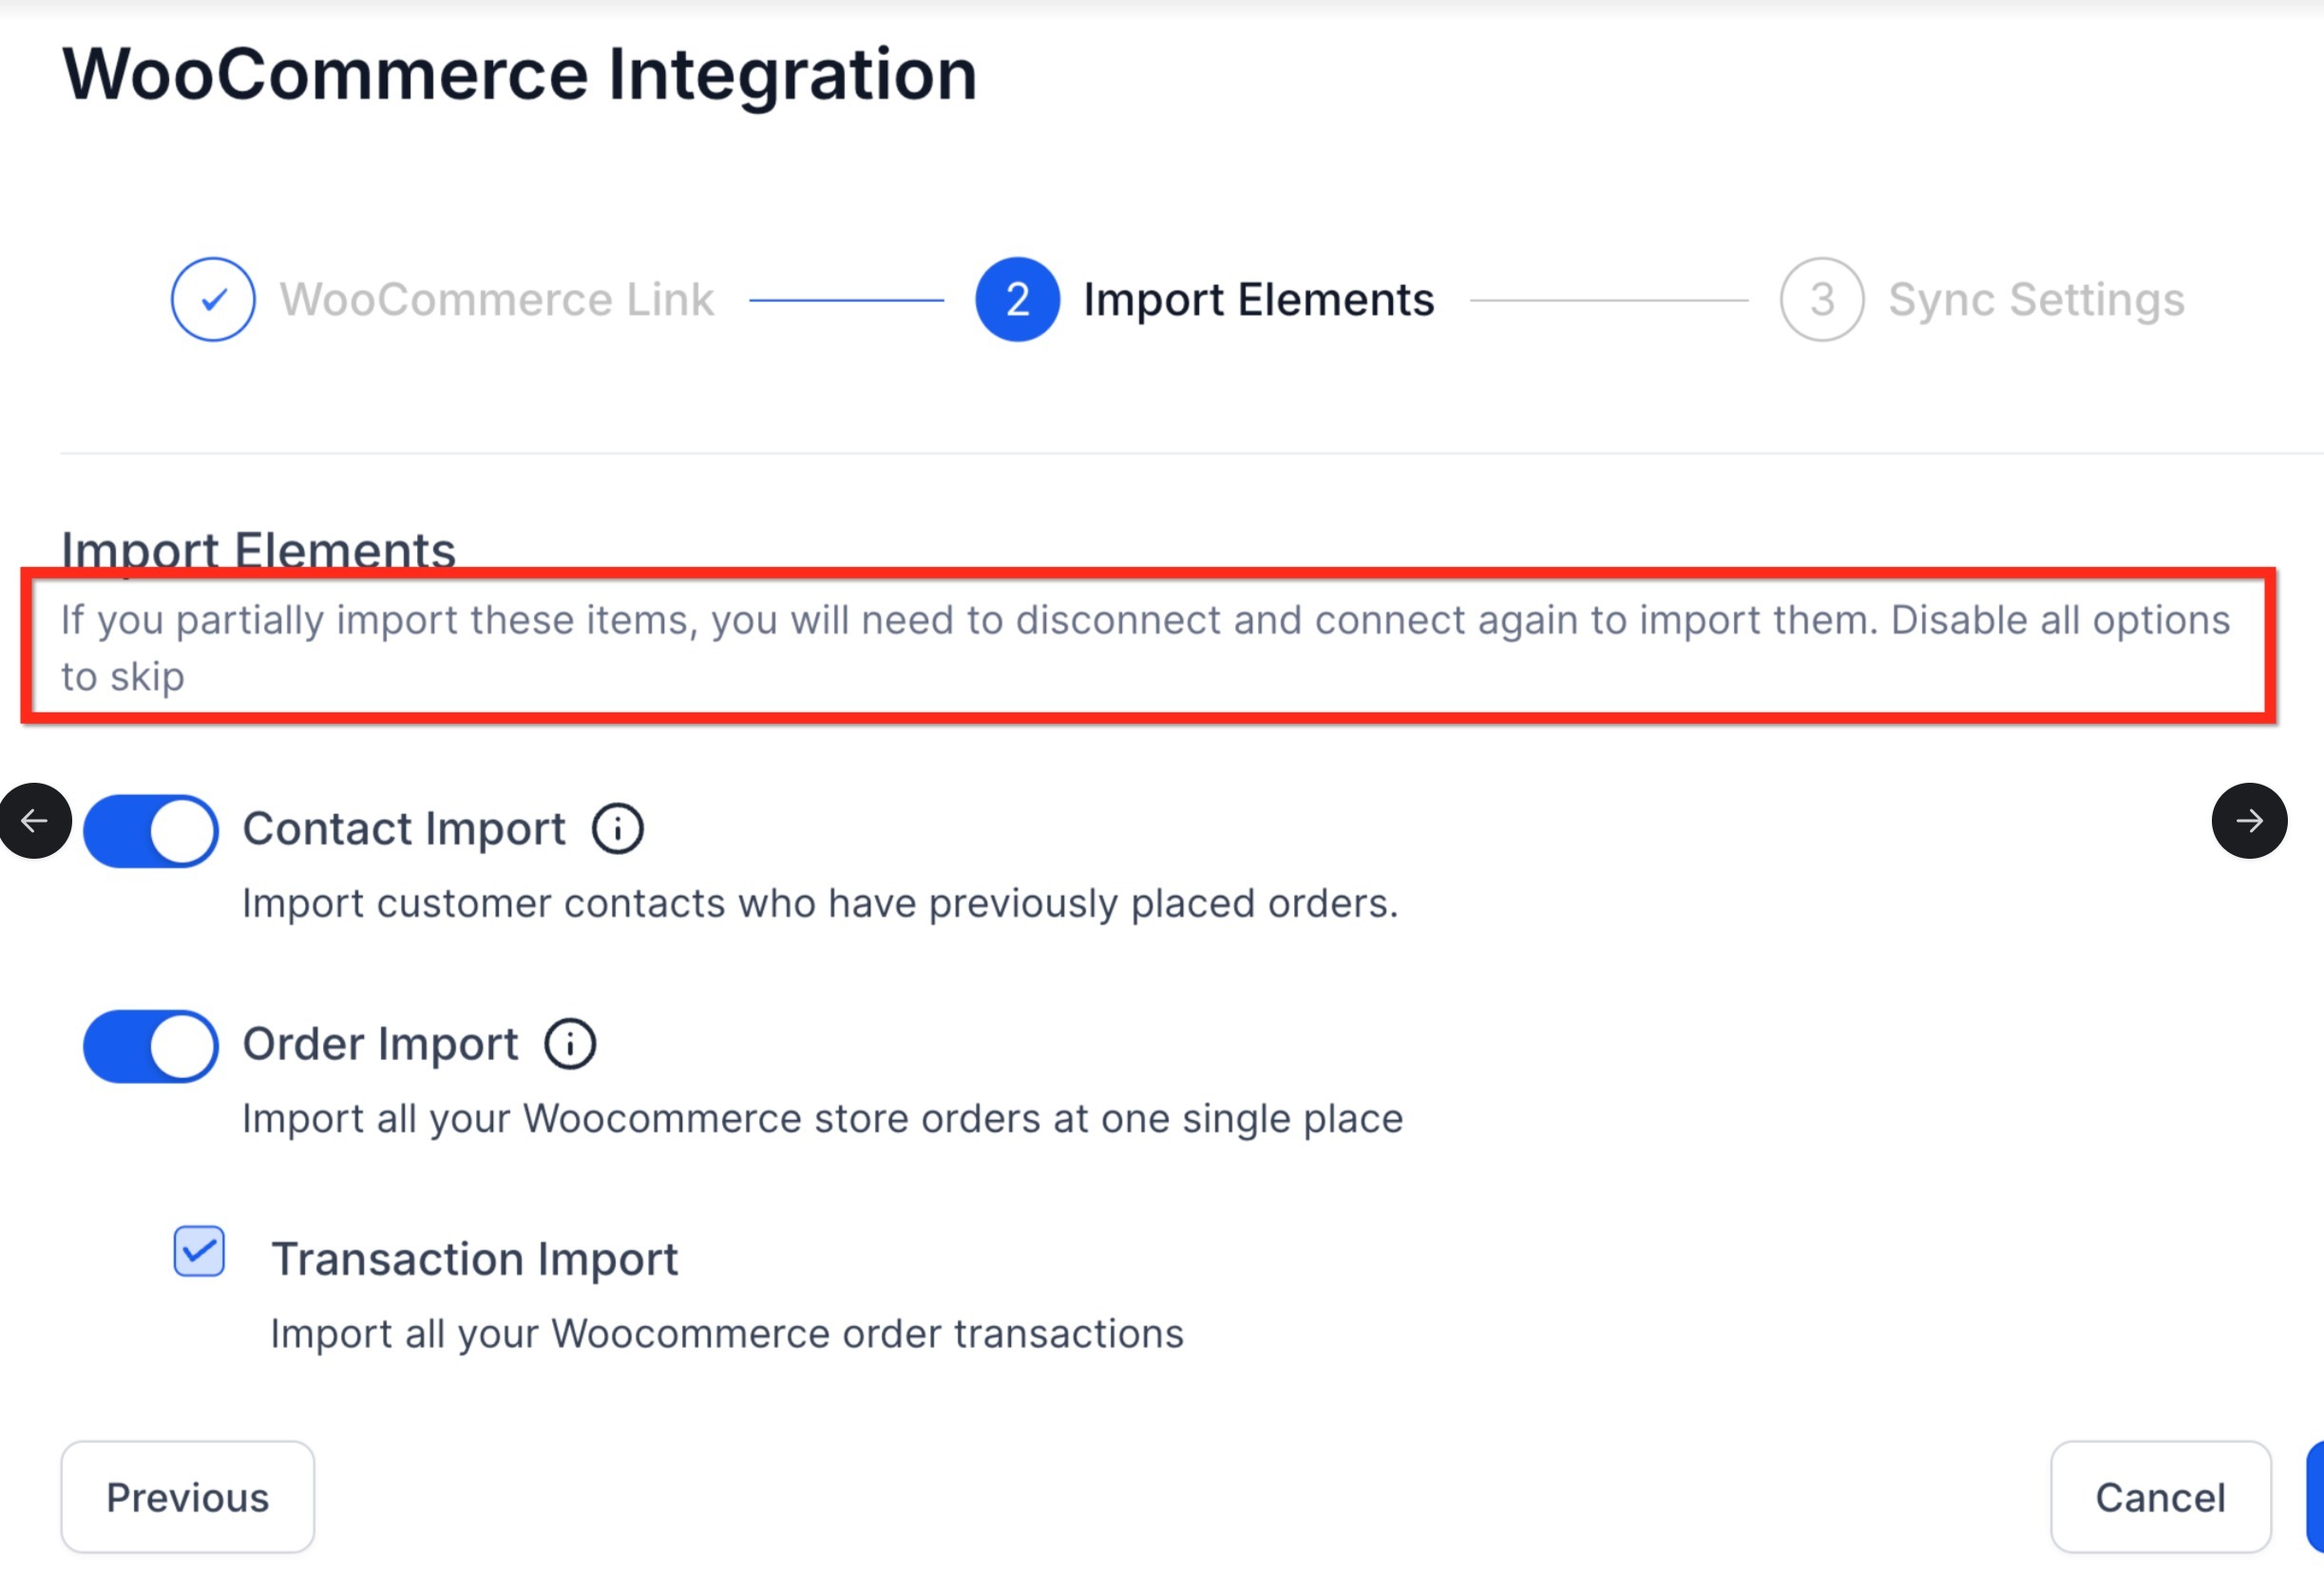
This screen appears during setup after the store link is entered. Review the import options shown and decide whether to bring in contacts, orders, and transactions. The note at the top explains that if you only import some items now, you may need to disconnect and reconnect later to reimport skipped items.
Choose What to Import
During setup, you can choose which types of historical data to import from the connected store.
Common import options include:
Contact Import: imports existing customers who previously placed orders
Order Import: imports historical store orders
Transaction Import: imports payment transaction records related to store orders
Choose only the data you want to bring in immediately. If you skip certain items during the first import, reimporting them later may require reconnecting the integration.
Configure Future Sync Settings
After selecting the initial import data, configure which items should continue syncing in the future. This gives you control over what new store activity should keep updating automatically.
Future sync options may include:
Contacts
Orders
Transactions
Order submitted trigger support
Payment received trigger support
Once your selections are complete, save the configuration and allow time for the import and sync process to finish.
Manage Imported Data and Reimporting
After the connection is complete, you can return to the integration settings to adjust future sync preferences. This is helpful if you want to enable or disable syncing for certain record types later.
If you need to bring in data that was skipped during the original setup, disconnect the integration and reconnect it again. This starts a fresh import flow and gives you another chance to choose the missing data types.
Order and Payment Triggers
This integration can be used with automations so order and payment activity can trigger workflow actions.
Set Up an Order Submitted Trigger
Use this trigger when you want a workflow to start as soon as a store order is submitted.
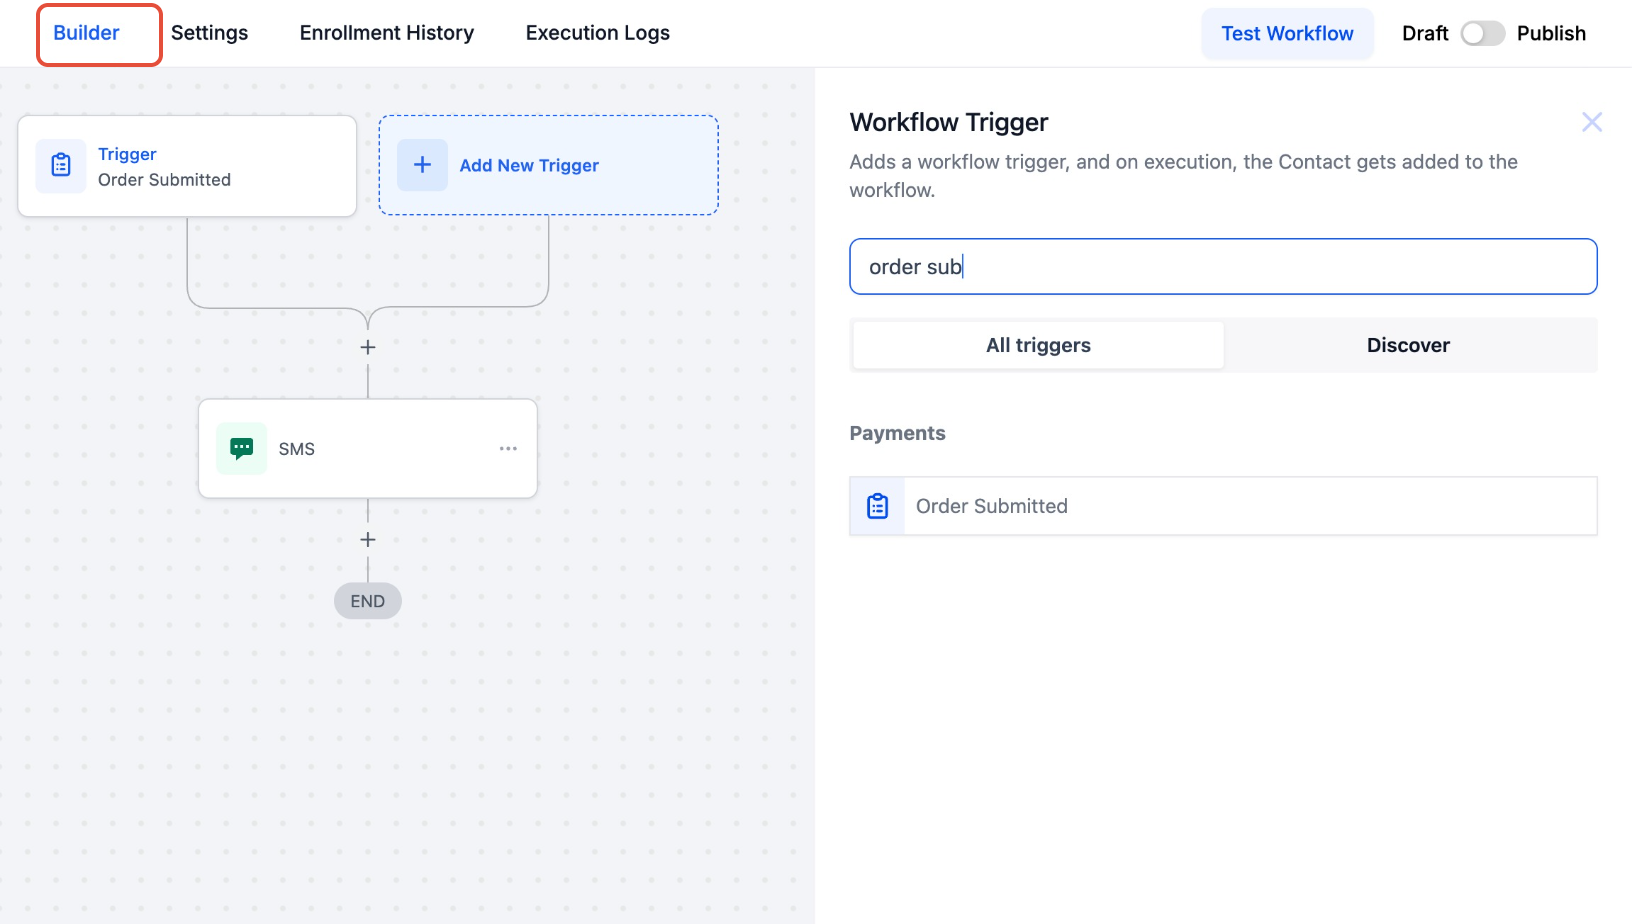
This screen shows the workflow trigger search panel. Search for Order Submitted and select it to start building an automation based on new order activity.
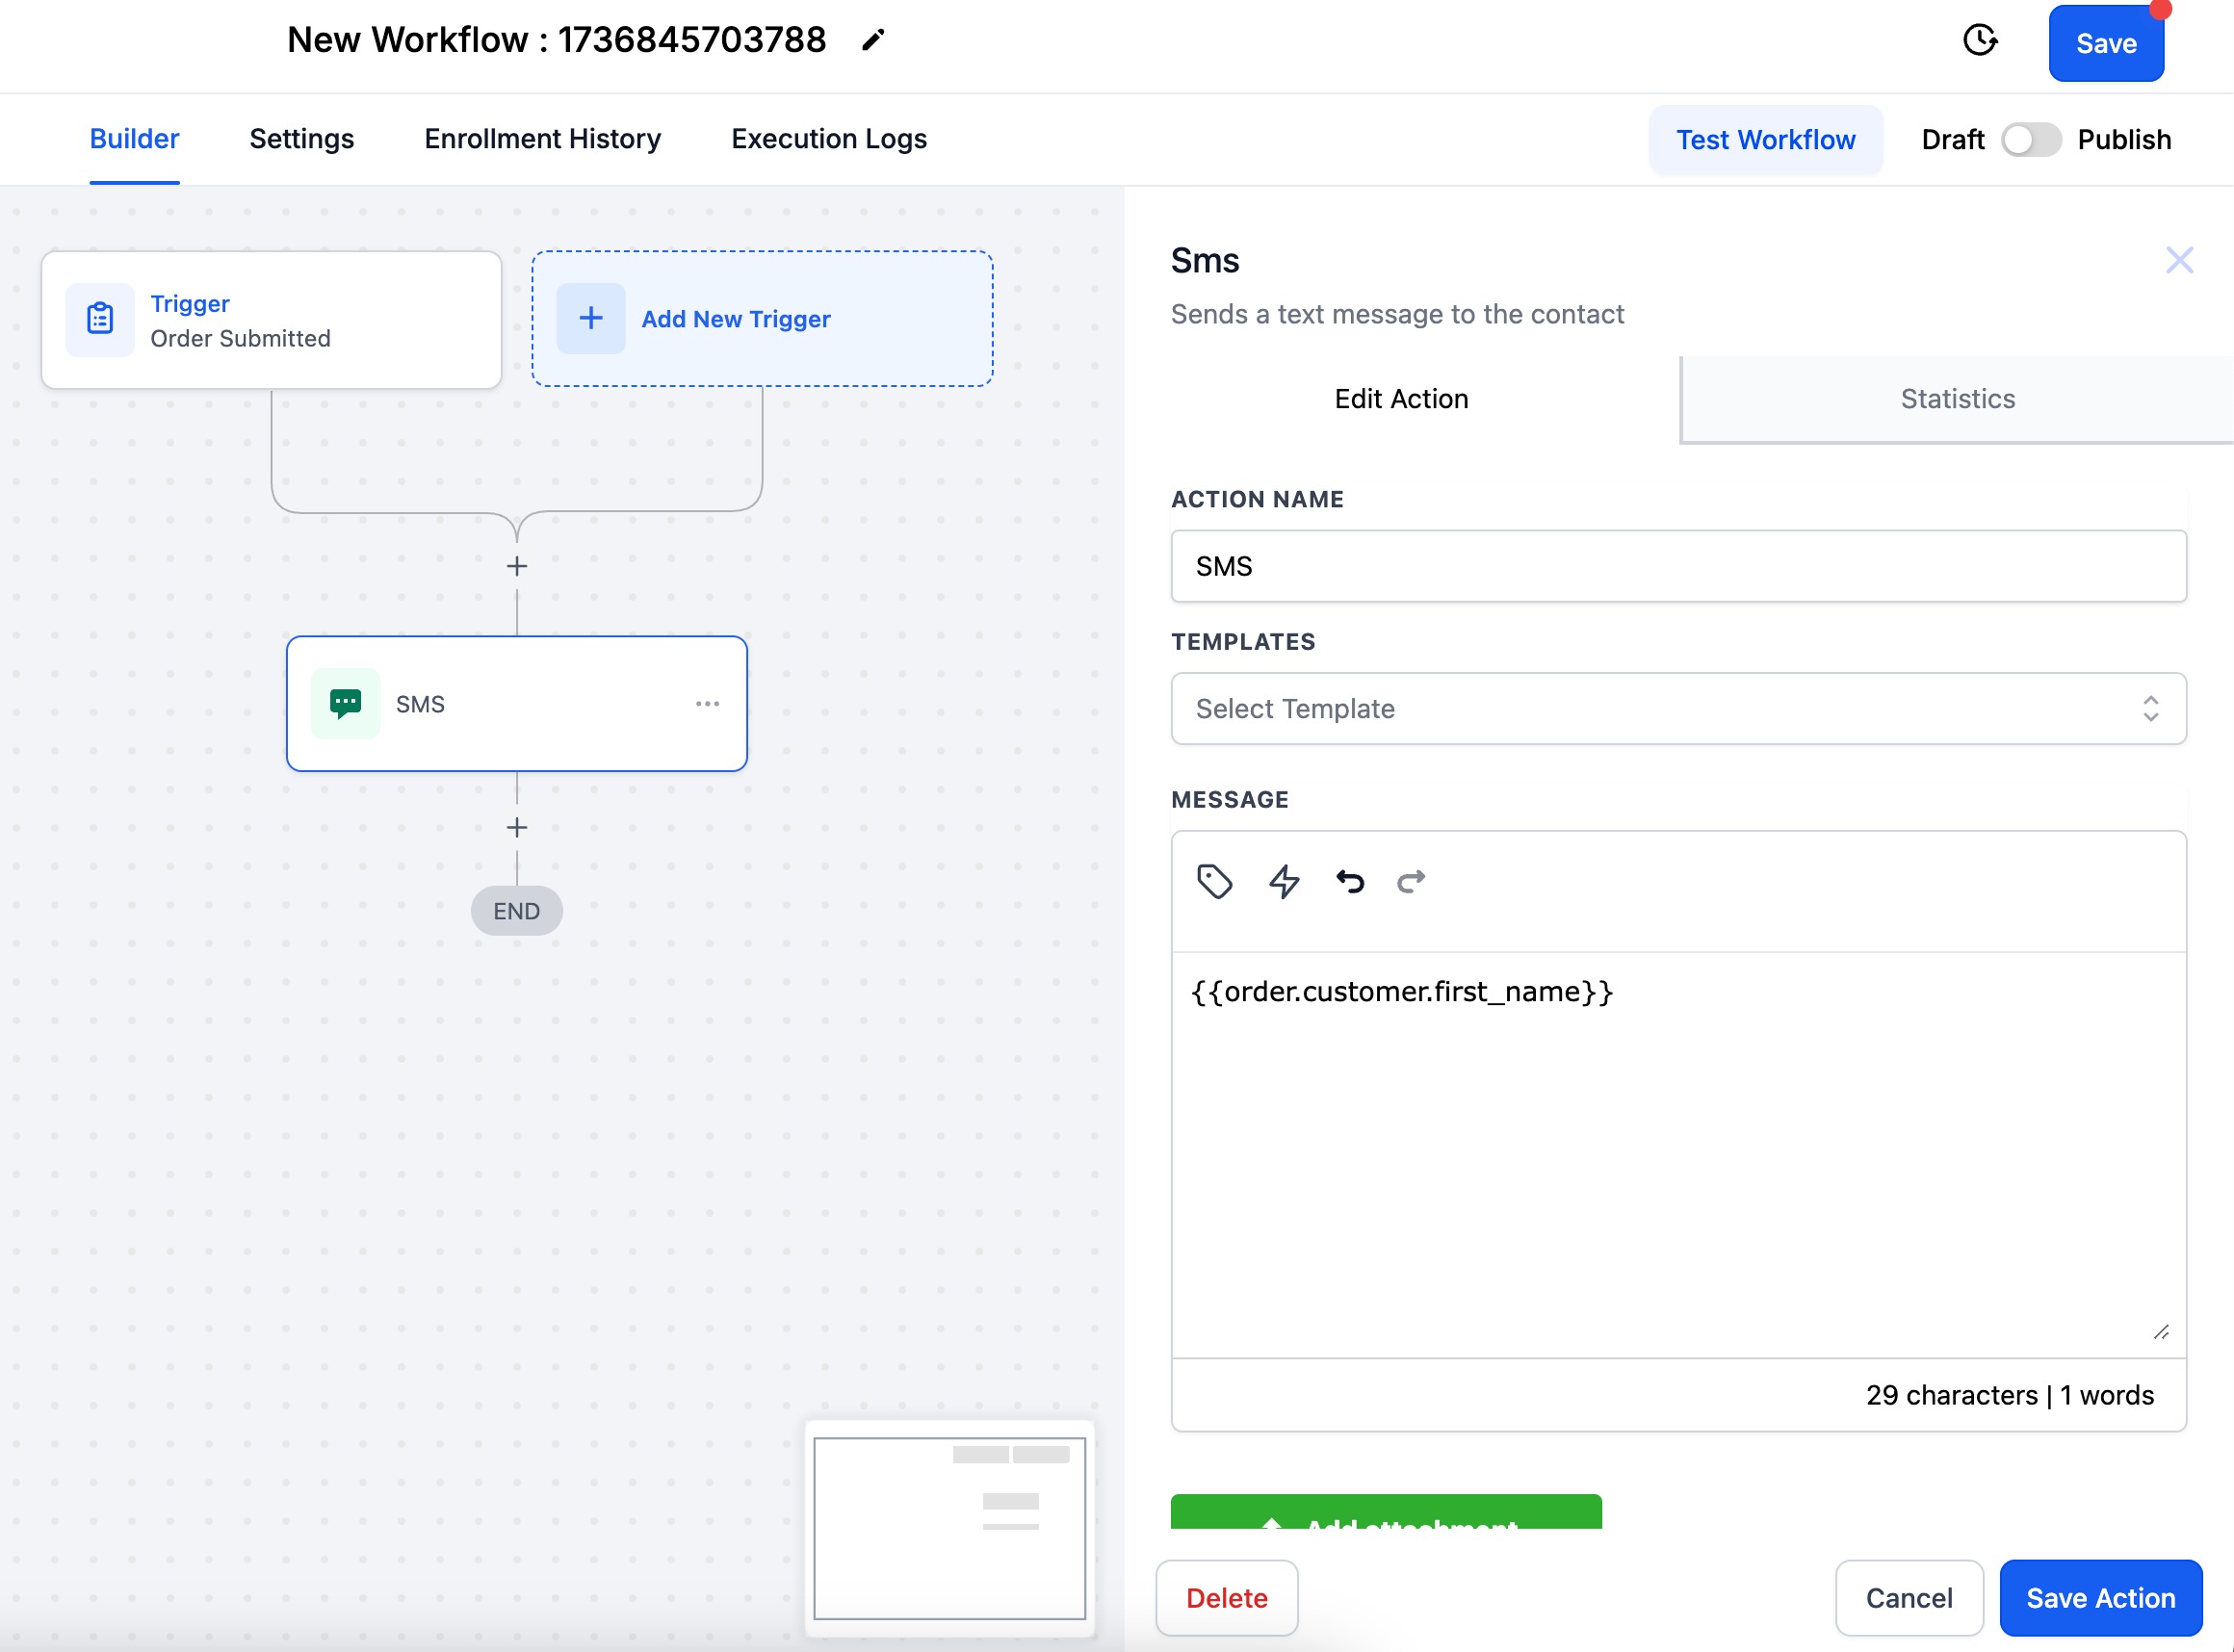
This screen shows an action being added to a workflow after the trigger is selected. Use this step to create follow-up actions such as sending a message, updating a record, or assigning the order to a process.
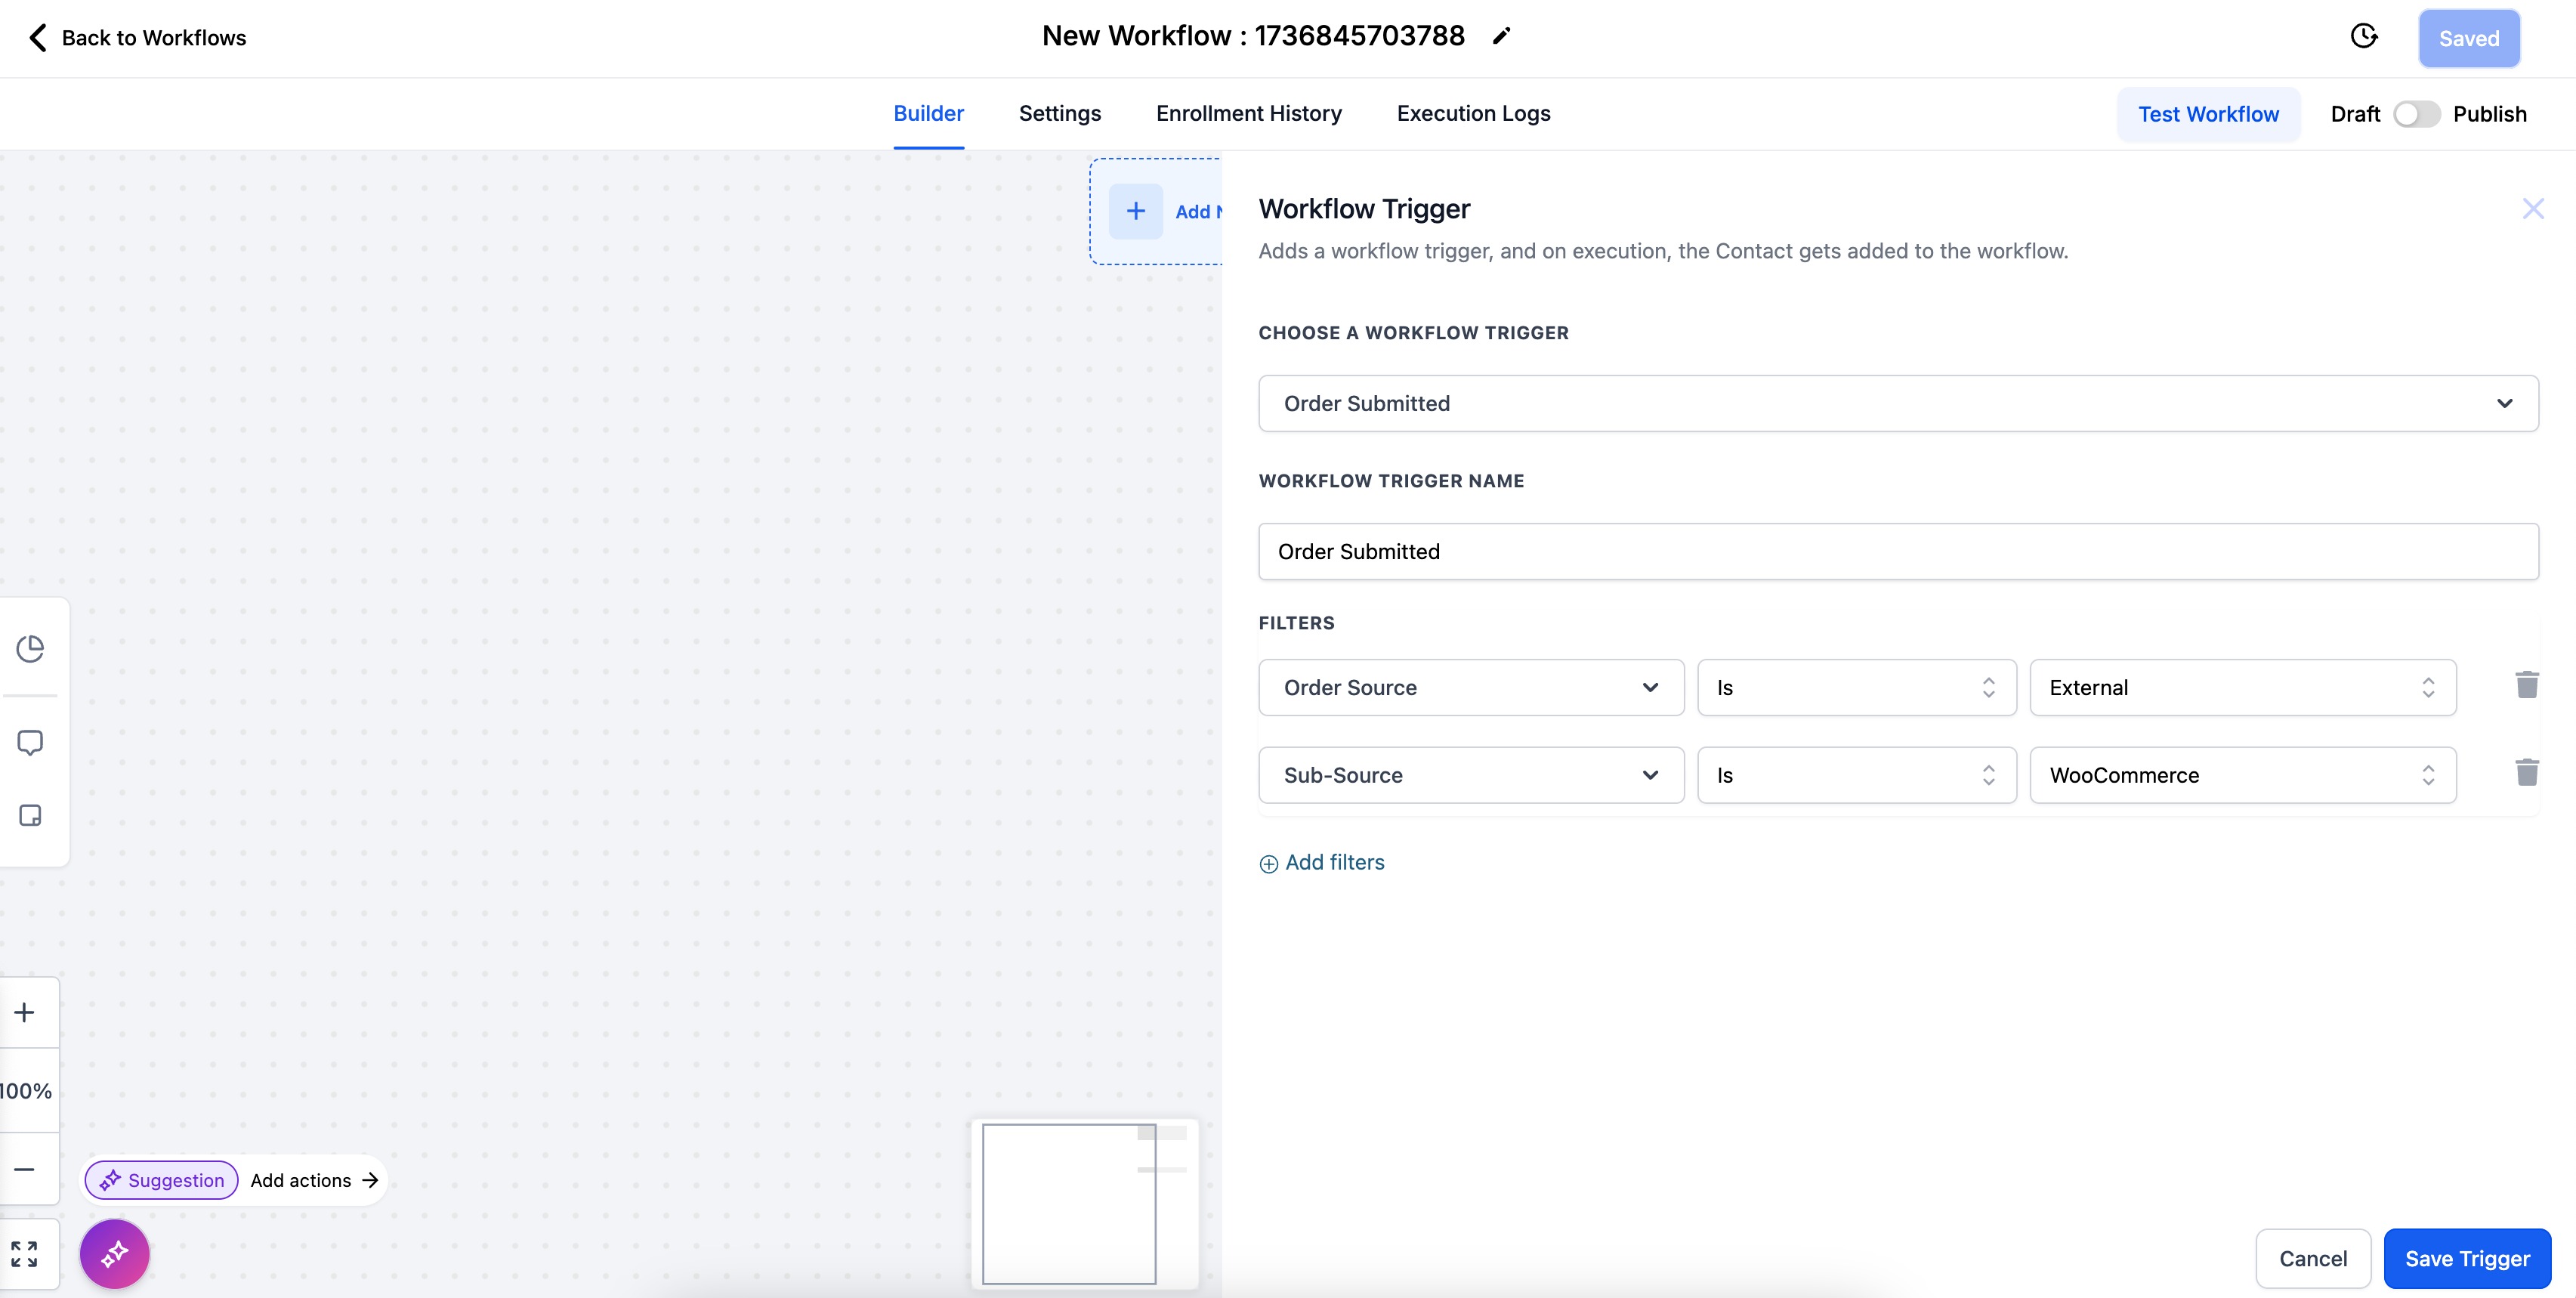
This screen shows the trigger filters. Use filters to make sure the workflow runs only for the connected external store source and not for other payment or order sources.
Set Up a Payment Received Trigger
Use this trigger when you want a workflow to start after payment is successfully received for an order.
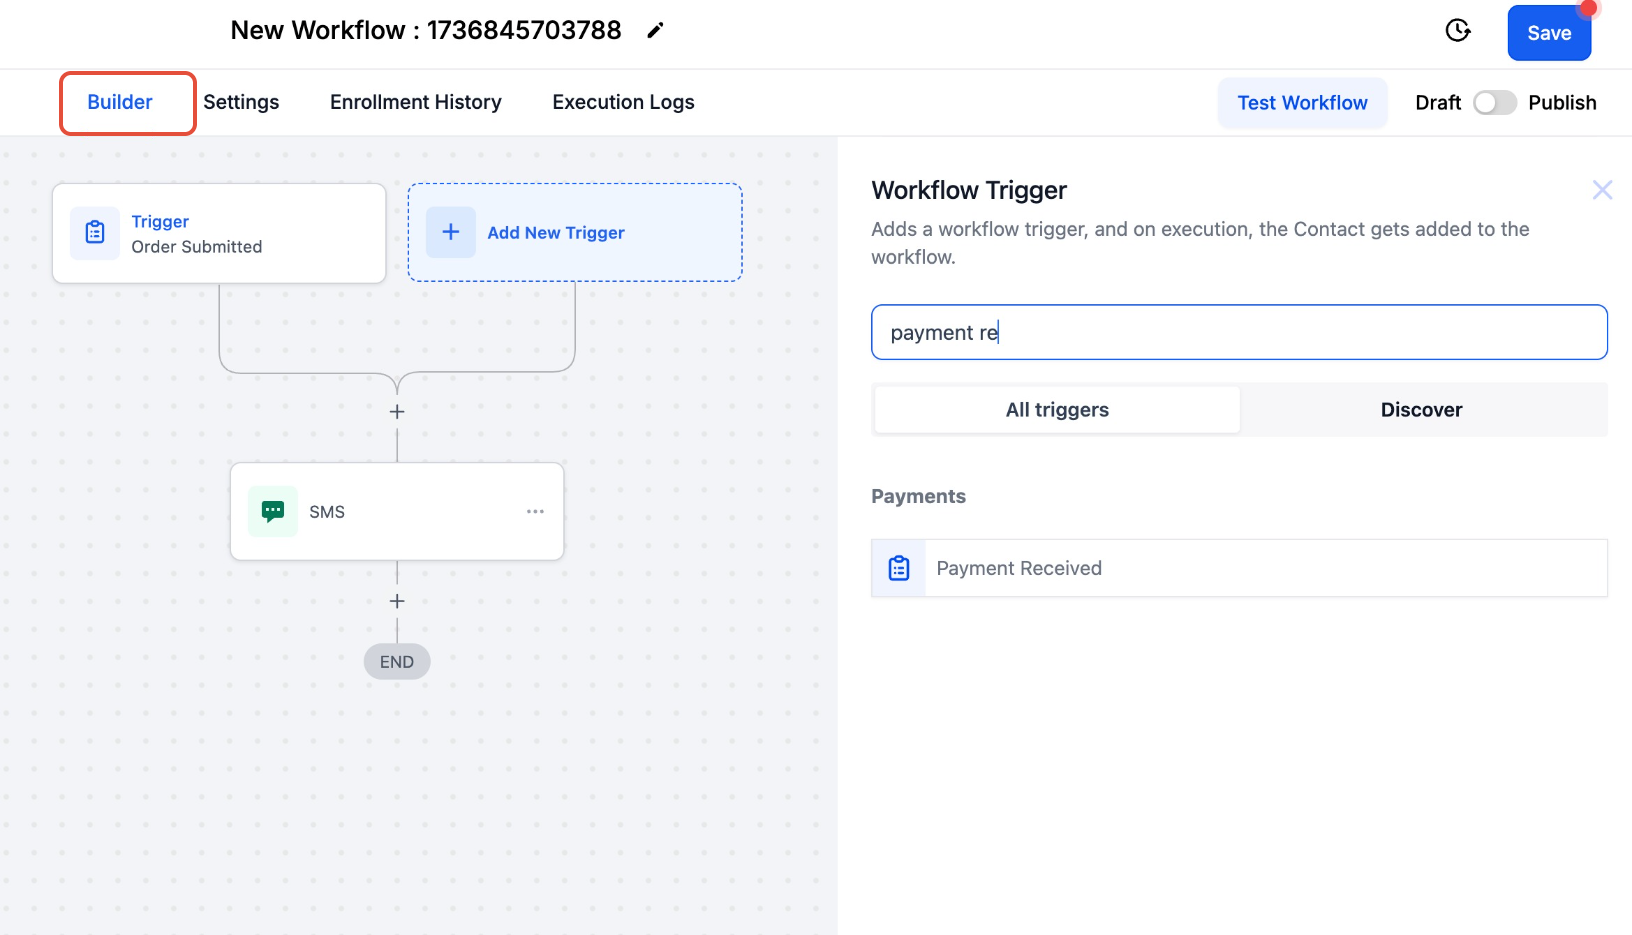
This screen shows the workflow trigger search panel for payment events. Search for Payment Received and select it to create an automation based on successful payment activity.
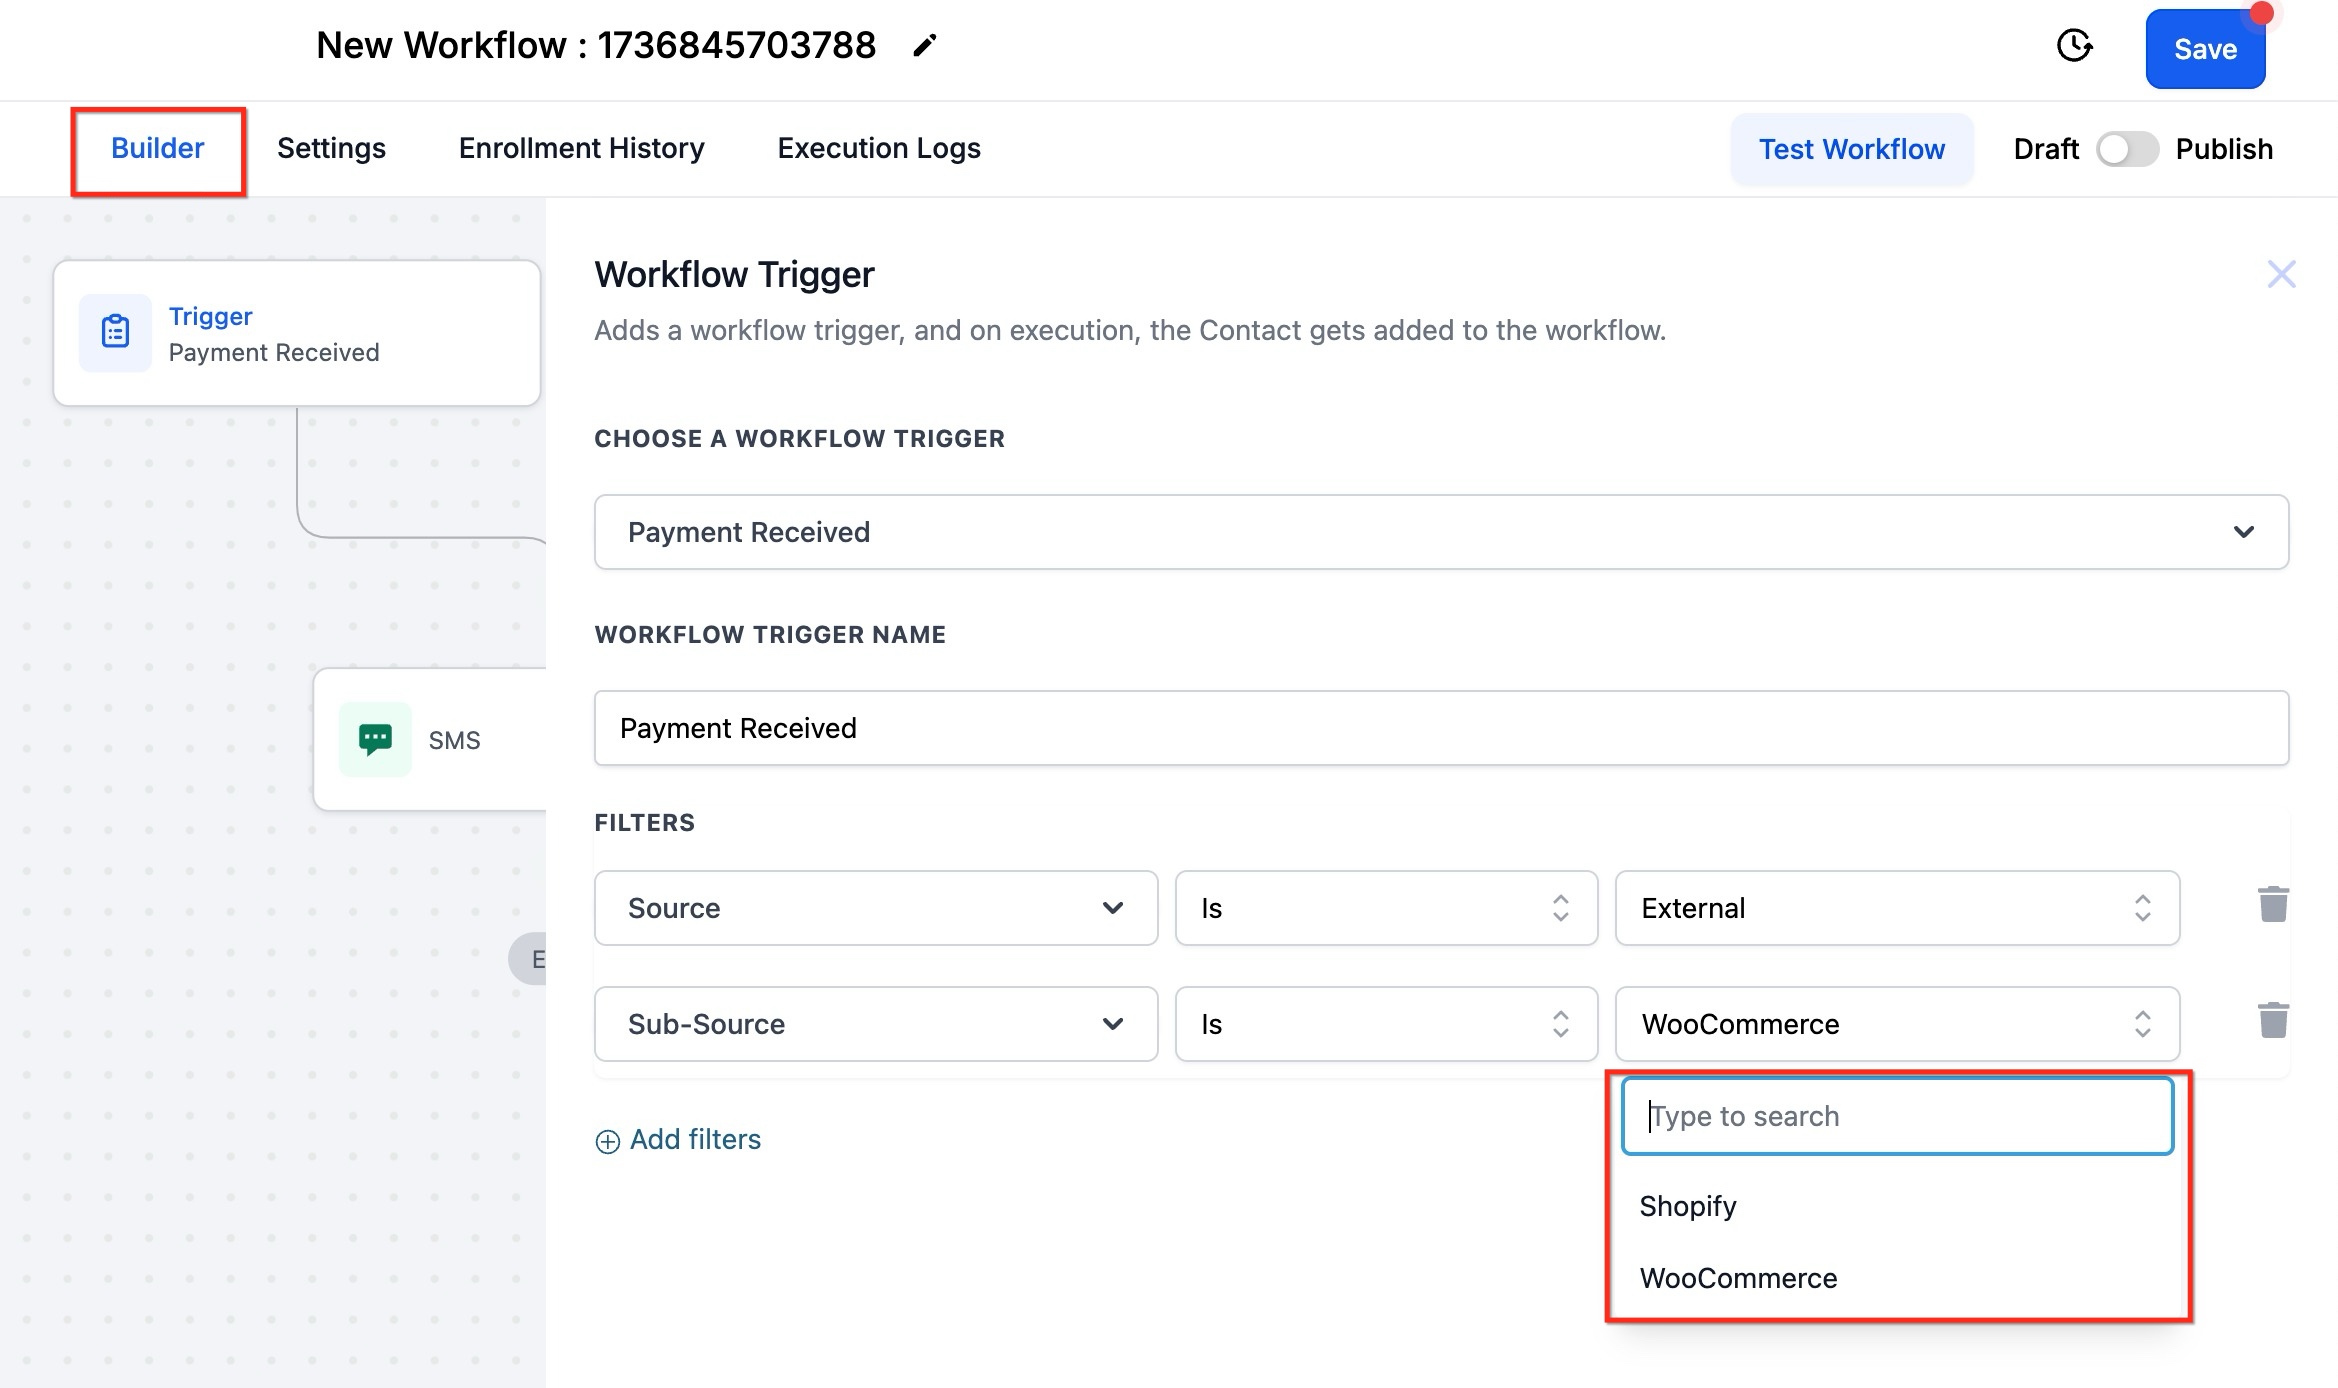
This screen shows the payment trigger filters. Confirm the source and sub-source values so the workflow runs only for payments coming from the connected external store.
Important Notes
Keep these behavior details in mind when using the integration:
Customers with supported purchasing roles can be imported during contact import.
If contact syncing is turned off but order syncing remains on, contact records may still be created when needed for related orders.
Guest checkout customers may be created as contacts, but future syncing and ongoing updates may not apply to those guest records.
Historical import choices matter. If you skip certain items during the first import, bringing them in later may require disconnecting and reconnecting the integration.
Order statuses from the external store may be converted into equivalent internal order states during syncing. Some statuses may be grouped into broader final states such as completed, canceled, or pending.
Frequently Asked Questions
Q: Can I import contacts, orders, and transactions separately?
Yes. During setup, you can choose which data types to import. You can enable one, two, or all available options.
Q: Can I change what syncs after the integration is already connected?
Yes. After connection, you can return to the settings and enable or disable future syncing options for supported data types.
Q: What happens if I disable contact sync but keep order sync turned on?
Contact records may still be created when needed to support related order records.
Q: Can guest checkout customers be created as contacts?
Yes. Guest checkout records can still create contacts, but future syncing and updates may not continue for those guest records.
Q: What should I do if I forgot to import some historical data during setup?
Disconnect the integration and reconnect it to run the import flow again and choose the missing data.
Q: Can I use workflows with this integration?
Yes. You can build automations using order-based and payment-based triggers.
Need Help
If the store does not connect or the import does not behave as expected, check the following before trying again:
Confirm the store URL is correct and does not include a trailing slash
Make sure the integration connection was fully authorized
Review the selected import options and future sync settings
Verify the workflow trigger filters are set to the correct external source
Reconnect the integration if historical data was skipped during the first import
If the issue continues, gather the store URL, the data type that is missing, and any trigger settings you configured before contacting support.