This guide explains how to create and configure products for your online store. You will learn how to add product information, configure pricing, manage variants, assign collections, and publish products for customers.
Creating products allows you to organize your offerings, control pricing structures, manage inventory, and improve how items appear in your online storefront.
TABLE OF CONTENTS
- Access the Products Area
- Start Creating a New Product
- Organize Products with Collections
- Configure Product Taxes
- Set Product Pricing
- Configure Recurring Pricing
- Add Product Variants
- Save and Publish the Product
- Best Practices for Product Setup
- Frequently Asked Questions
- Need Help
Access the Products Area
To begin creating a product, navigate to the Products section from the Payments area.
This section allows you to view existing products, import products in bulk, or create new ones manually.
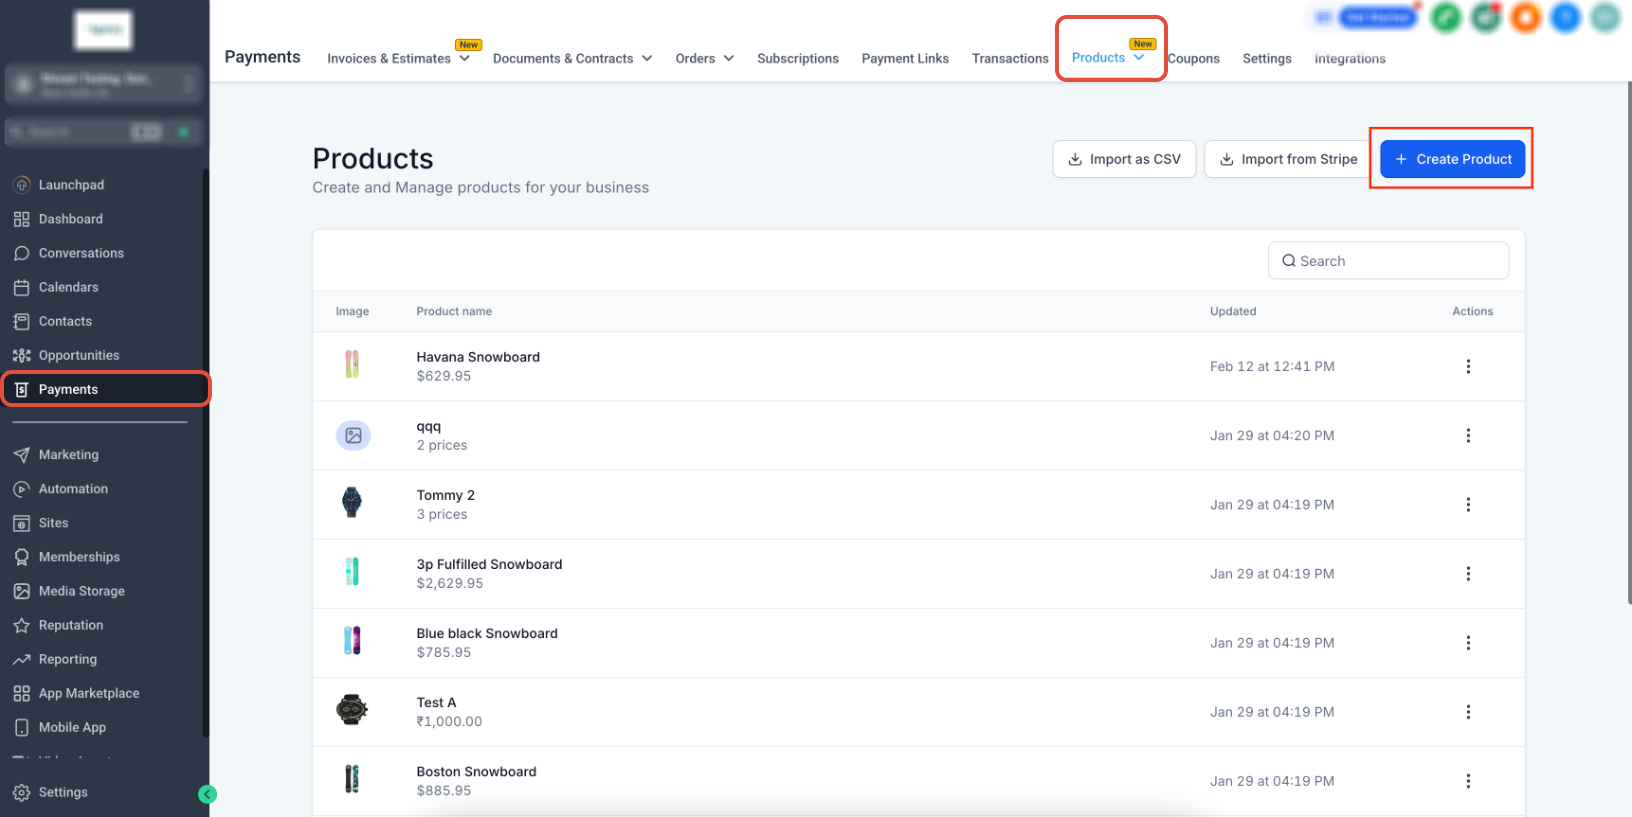
This screen shows the Products page where you can manage your store inventory. To create a new product:
Navigate to Payments in the main navigation.
Click Products.
Select Create Product in the upper-right corner.
This opens the product configuration page.
Start Creating a New Product
Once the product editor opens, you can begin entering the details for your product.
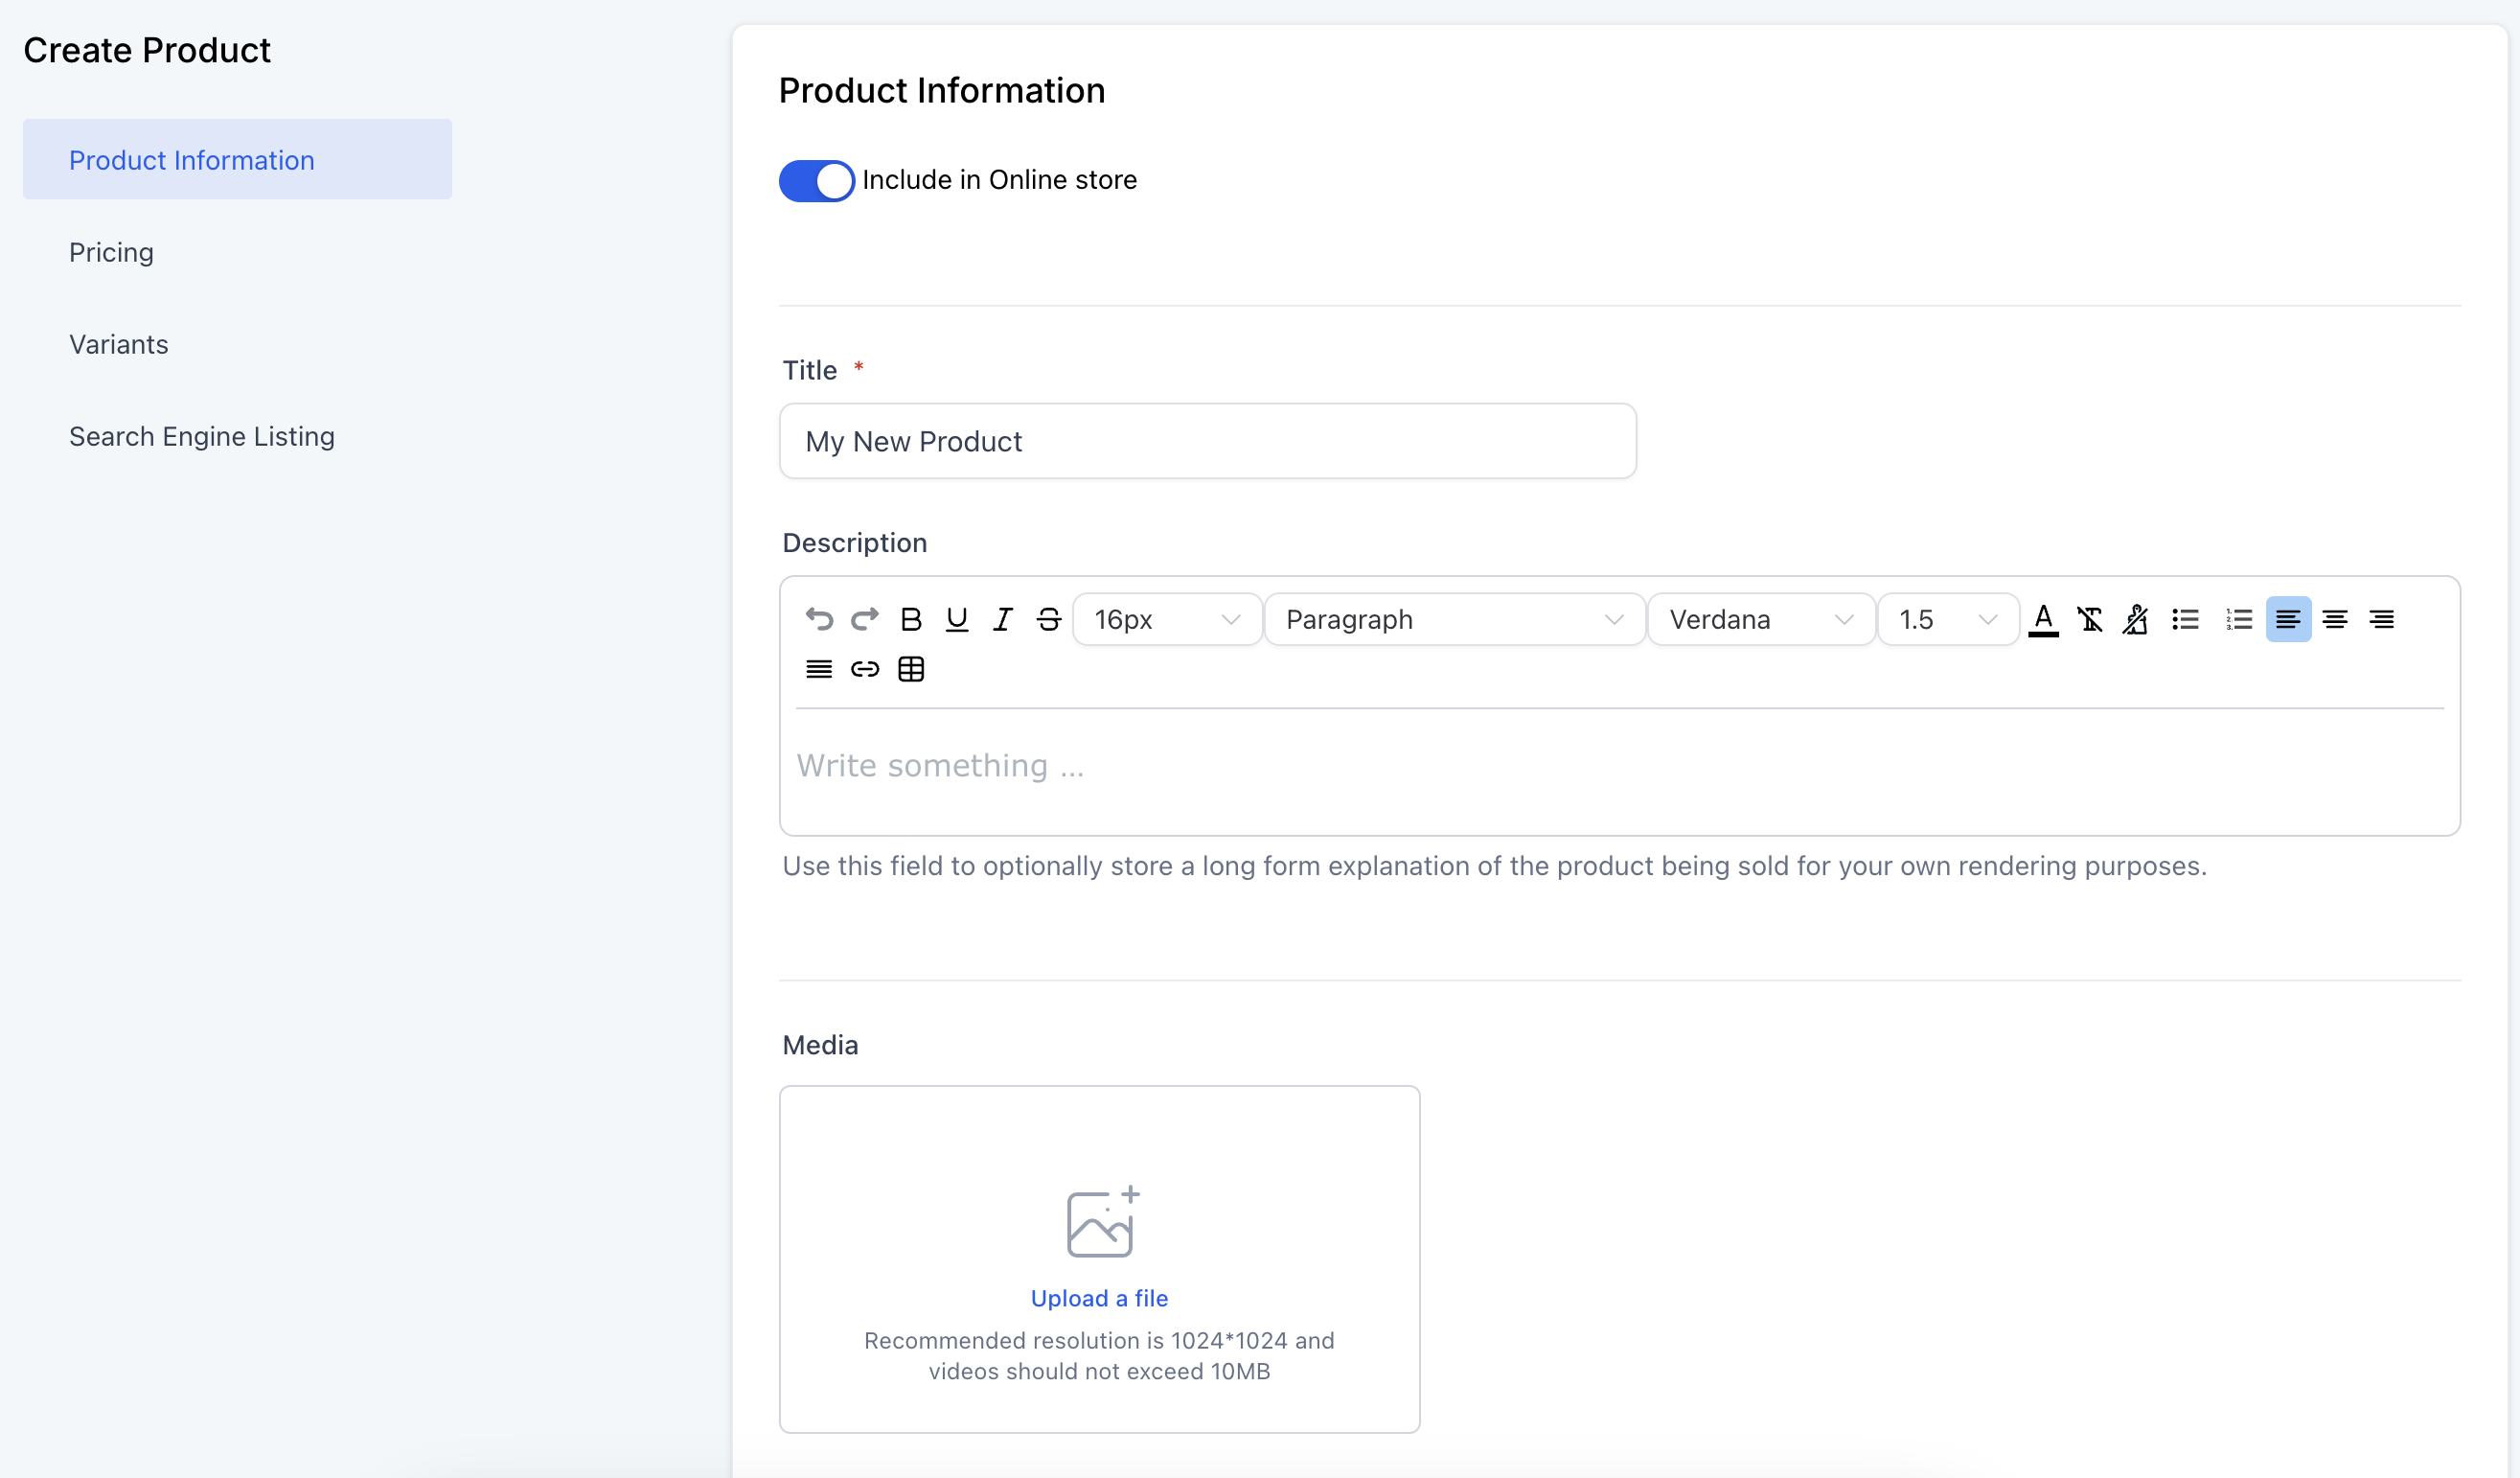
On this screen, you can configure basic product information.
Key settings include:
Include in Online Store
Enable this toggle if you want the product to appear in your storefront.
Product Title
Enter a clear and descriptive product name.
Description
Add detailed product information using the formatting editor.
Media Upload
Upload product images in the order you want them displayed in the storefront.
High-quality images improve customer trust and conversion rates.
Organize Products with Collections
Collections help group related products together so customers can browse categories easily.
To add a product to a collection:
Select the Collections field.
Search for an existing collection.
Assign the product to one or more collections.
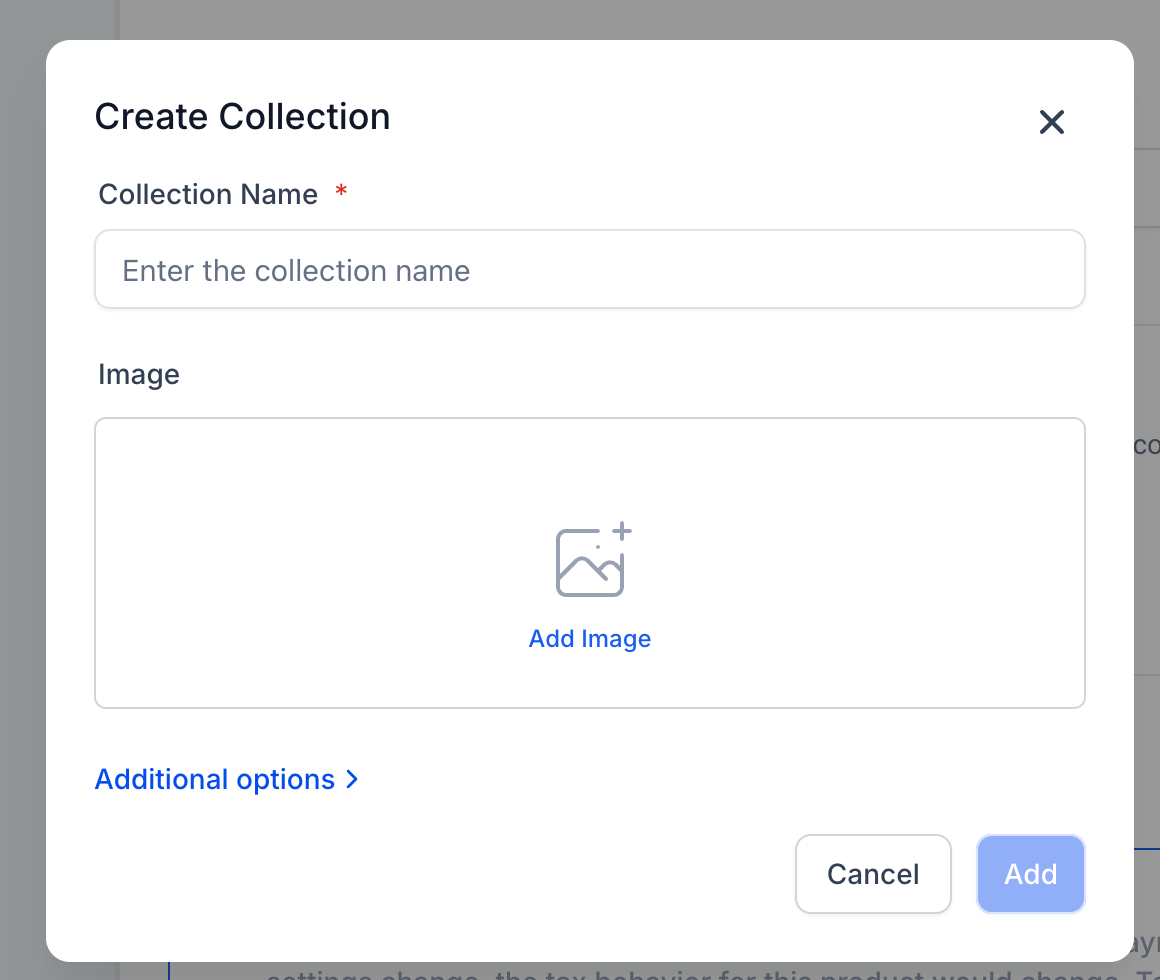
If no collection exists:
Click the + icon
Create a new collection
Add the product to it immediately.
Collections help organize products by category such as:
Clothing
Accessories
Seasonal items
Featured products
Configure Product Taxes
Product taxes allow you to control how tax is calculated for each item.
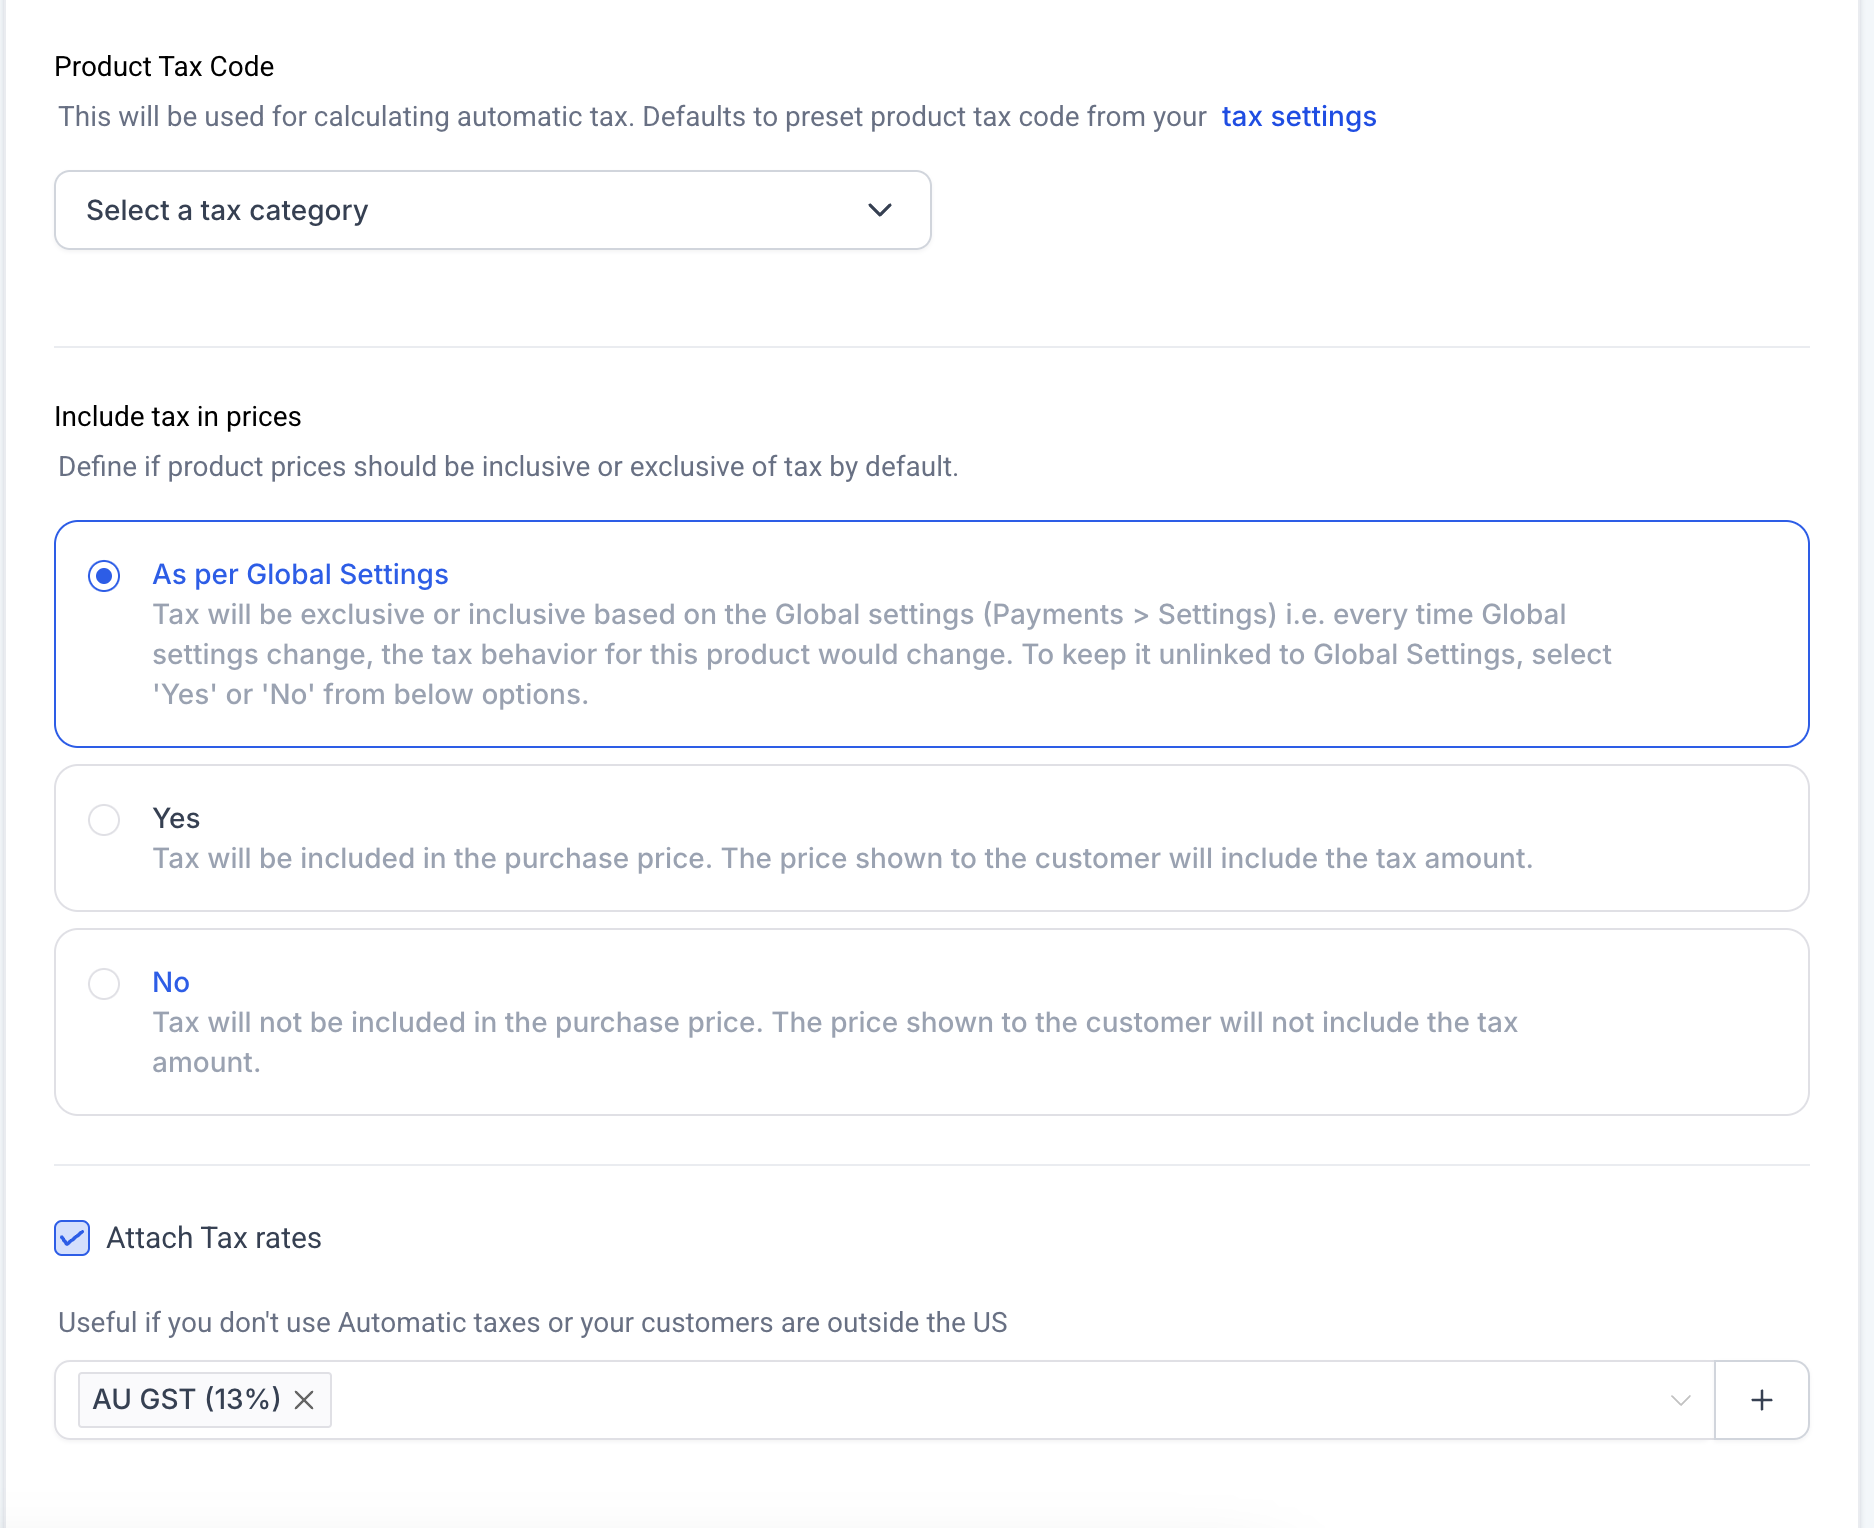
You can configure tax behavior using the following options:
Product Tax Code
Select the appropriate tax category for automatic tax calculations.
Include Tax in Prices
You can choose one of three settings:
As per global settings
The product follows the default tax configuration.
Yes
Taxes are included in the displayed product price.
No
Taxes are added separately during checkout.
Attach Tax Rates
Manual tax rates can be attached to the product if required.
This option is useful for stores that operate in regions where automatic tax calculations are unavailable.
Set Product Pricing
Pricing defines how customers are charged for the product.
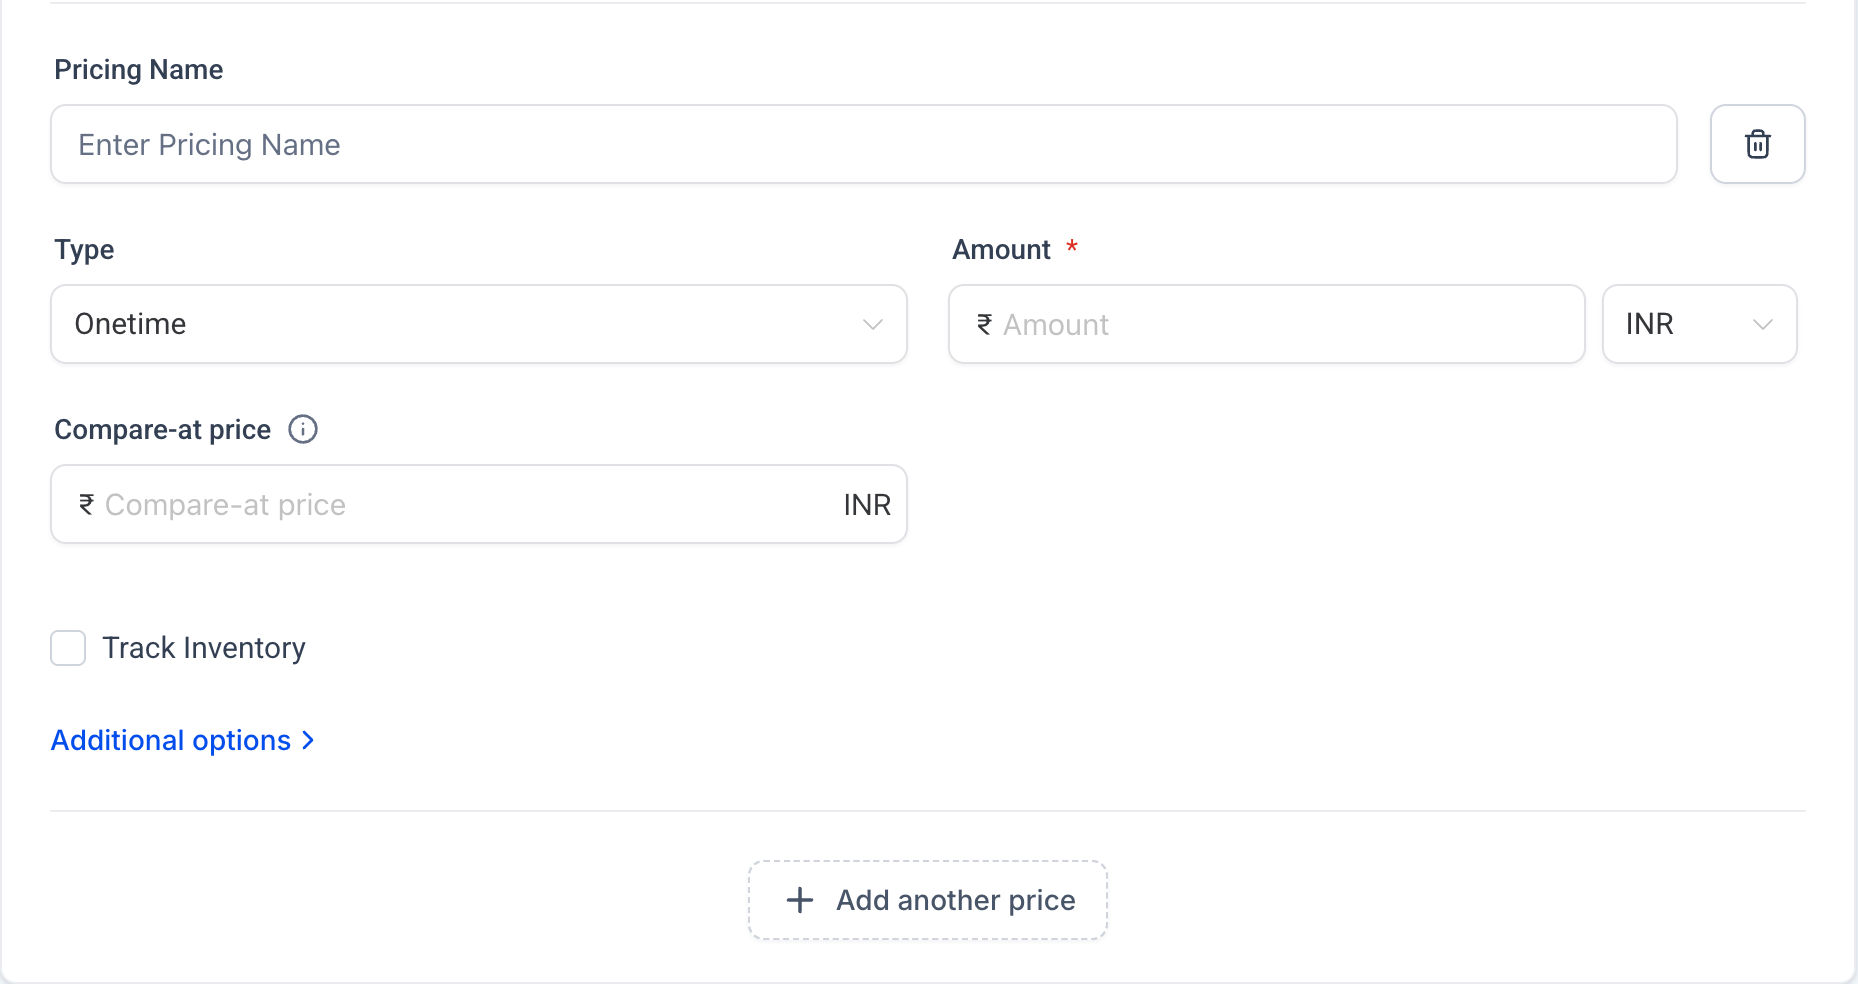
For one-time purchases, configure the following:
Pricing Name
Enter a label for the pricing structure.
Pricing Type
Select One-time to charge a single payment.
Amount
Set the purchase price.
Optional pricing options include:
Compare-at Price
Displays a higher original price to highlight discounts.
Track Inventory
Enable inventory tracking for the product.
Available Quantity
Define how many units are available.
Continue Selling When Out of Stock
Allow purchases even when inventory reaches zero.
Additional pricing options allow you to add descriptions or attach special offers.
Configure Recurring Pricing
If your product uses subscriptions or installment payments, you can configure recurring billing.
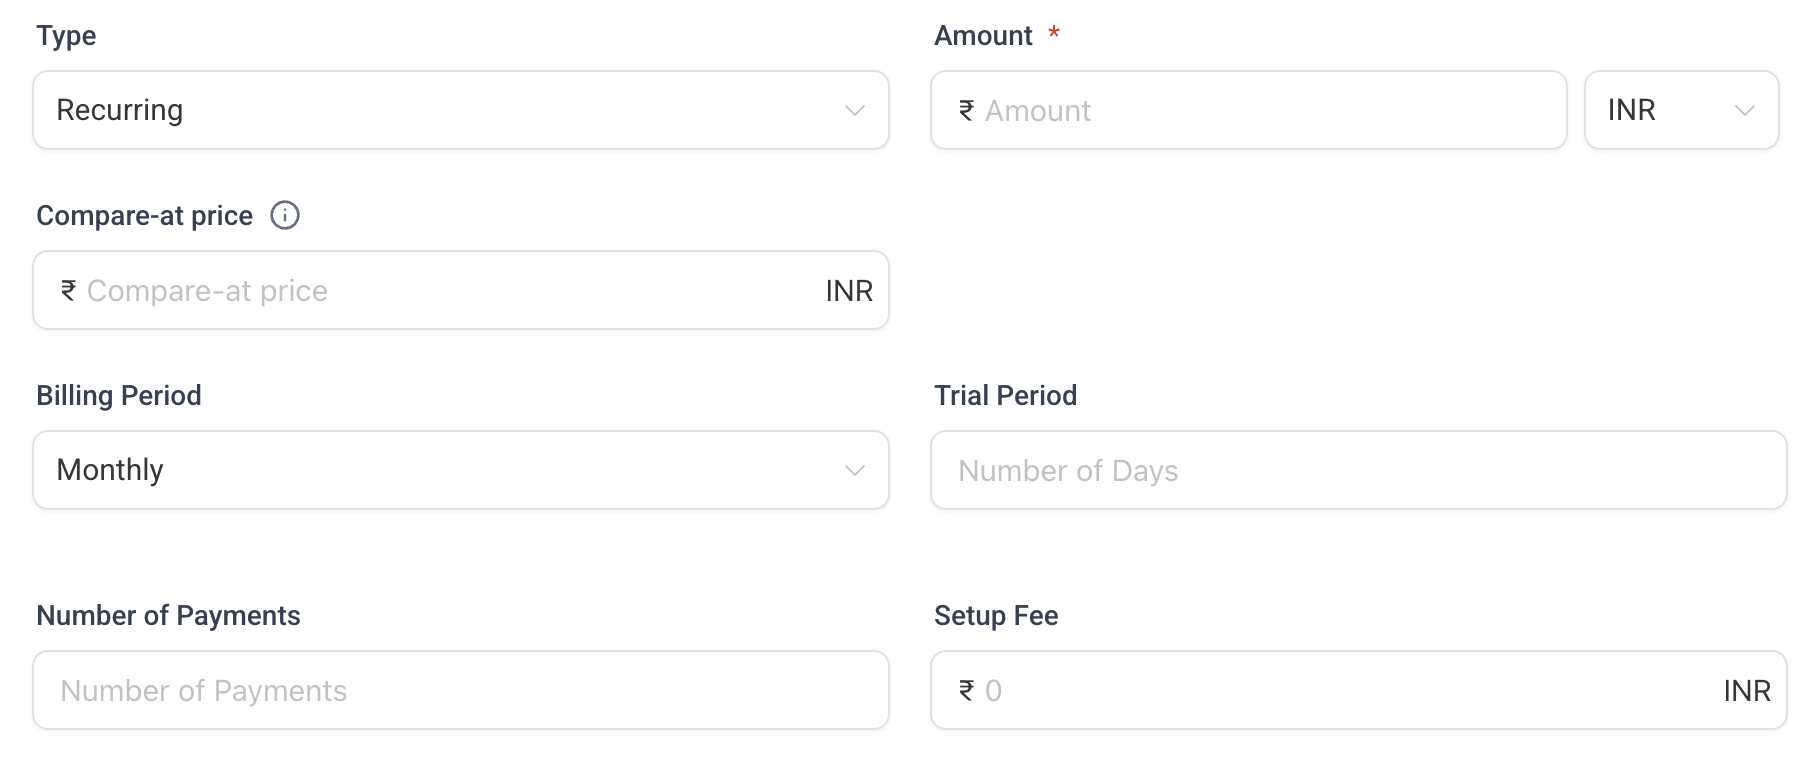
Recurring pricing allows you to define:
Billing Period
How often the customer is billed (monthly, yearly, etc.).
Trial Period
Optional number of days before billing begins.
Number of Payments
Limit the total number of billing cycles.
Setup Fee
Optional one-time charge added to the first payment.
Recurring pricing is commonly used for:
Membership programs
Subscription services
Payment plans
Add Product Variants
Variants allow a single product to have multiple options, such as different sizes or colors.
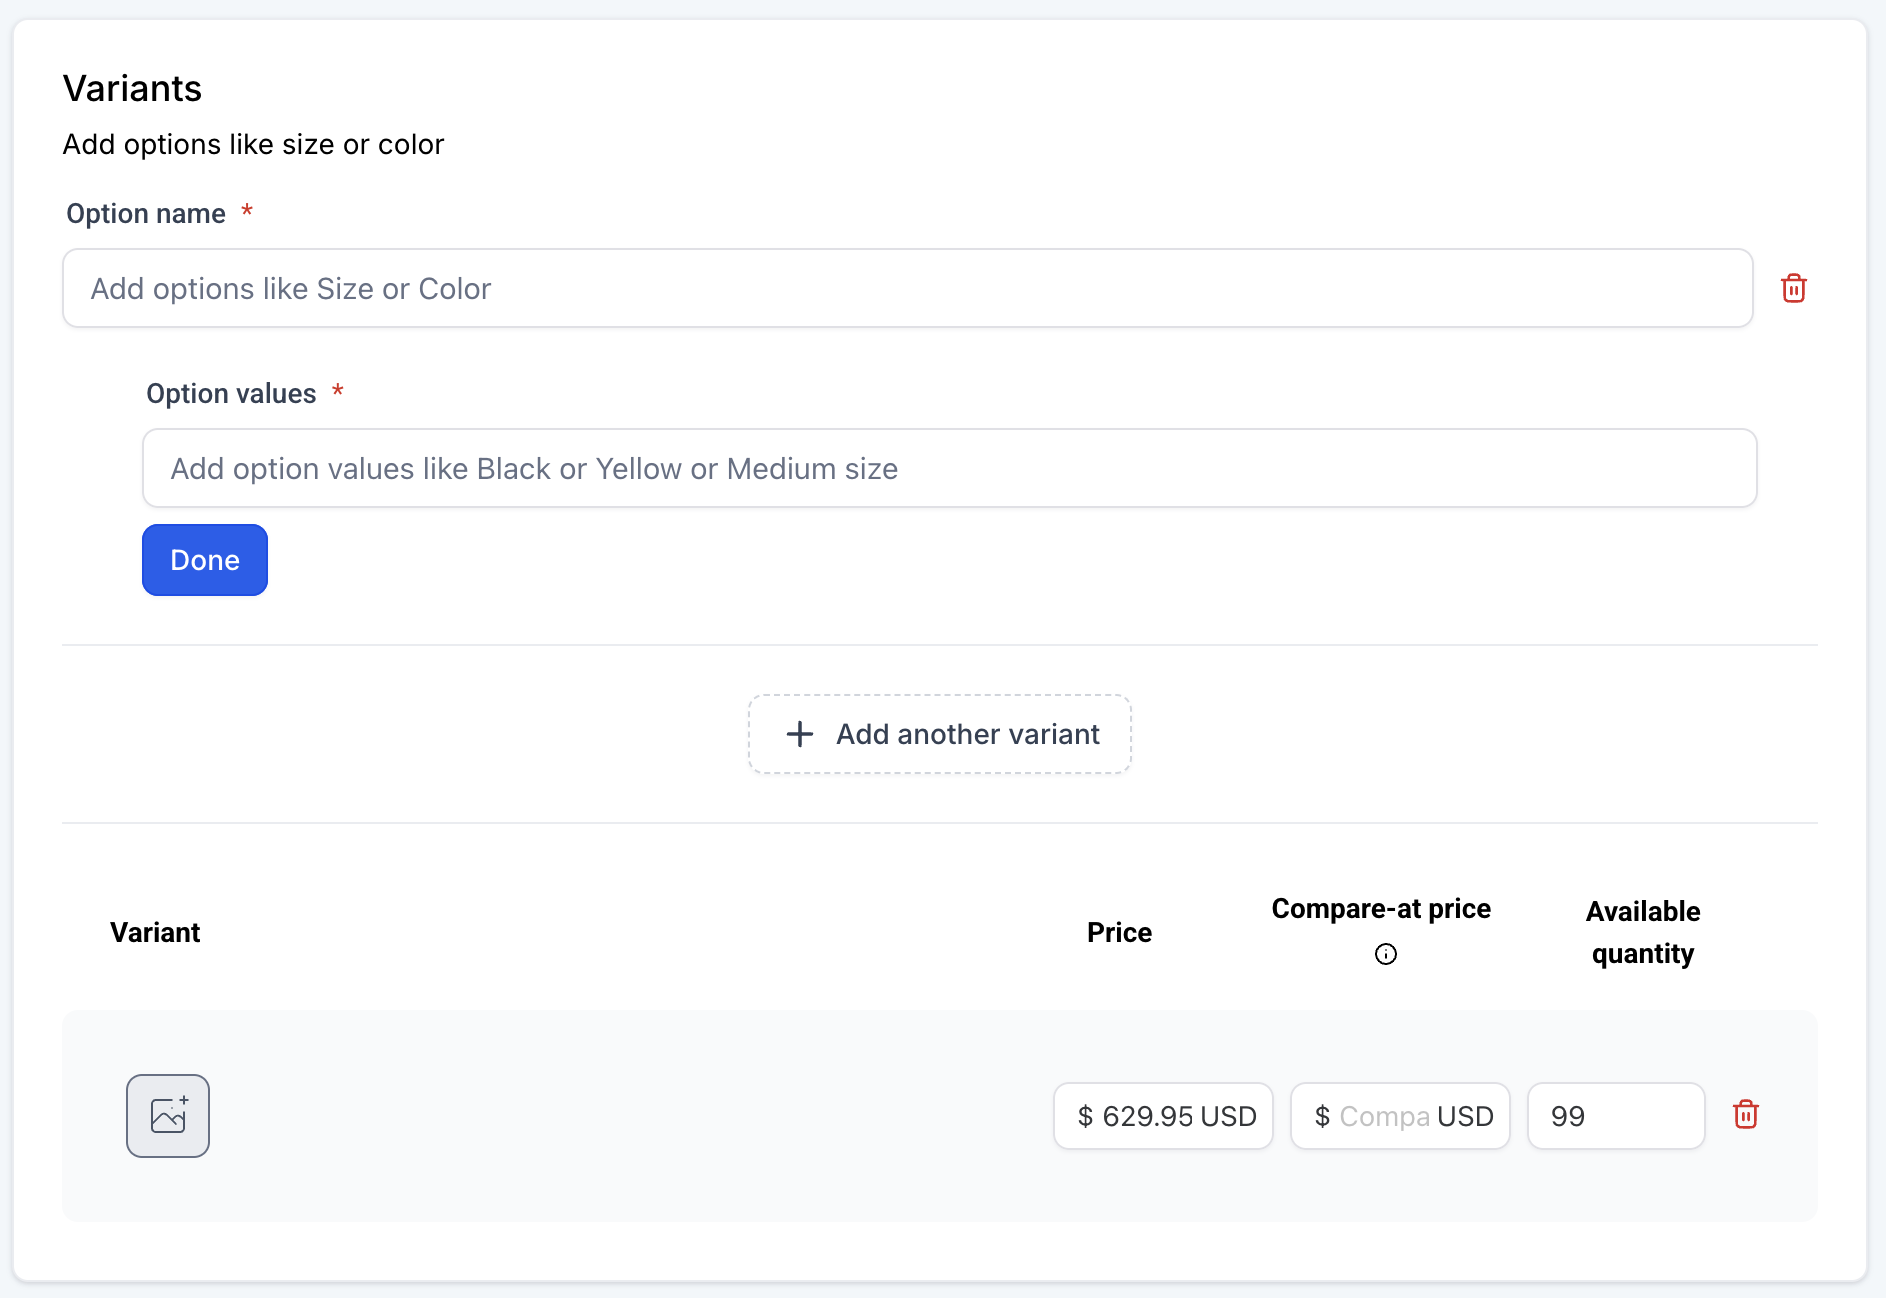
To configure variants:
Enter an Option Name such as Size or Color.
Add Option Values such as Small, Medium, Large.
Click Done to generate the variants.
Each variant can have its own:
Price
Compare-at price
Inventory quantity
Product image
Variants help avoid creating separate listings for similar items.
Save and Publish the Product
Once all settings are configured:
Review product information.
Click Save to store the product.
Set the product status.
Available status options include:
Draft
Product remains hidden from customers.
Active
Product becomes visible in your store.
Publishing the product makes it available for customers to purchase.
Best Practices for Product Setup
To ensure your products perform well in your store:
Use Clear Product Titles
Avoid vague names. Use descriptive titles customers can easily search.
Upload High-Quality Images
Images should clearly show the product and its variations.
Organize Products with Collections
Well-organized collections improve store navigation.
Track Inventory When Possible
Inventory tracking helps avoid overselling products.
Use Variants Instead of Duplicate Products
Variants keep your store organized and easier to manage.
Frequently Asked Questions
Q: Can I create multiple pricing options for the same product?
Yes. You can add multiple pricing options, including one-time or recurring pricing structures.
Q: What happens if inventory reaches zero?
If “Continue Selling When Out of Stock” is disabled, customers will not be able to purchase the product once inventory reaches zero.
Q: Can I edit a product after publishing it?
Yes. Products can be edited at any time from the Products page.
Q: Can products belong to multiple collections?
Yes. A single product can be assigned to multiple collections for better organization.
Need Help
If you encounter issues while creating or managing products:
Review the product settings to ensure all required fields are completed.
Confirm images and pricing configurations are correctly set.
Check inventory and variant settings if products are not appearing correctly.
If you still need assistance, contact the support team or visit the Help Center for additional guides and troubleshooting resources.