
Reviewing DNS records before completing a domain transfer helps protect the services already connected to your domain, including websites, email, and verification records. You can retrieve DNS records by uploading a zone file or using an automatic scan, then compare the results with your current DNS provider and add or correct anything that is missing before continuing the transfer.
TABLE OF CONTENTS
- Overview: Review DNS records
- Need to review DNS records
- Step 1: Retrieving DNS records
- Step 2: Reviewing DNS Records
- FAQs
Overview: Review DNS records
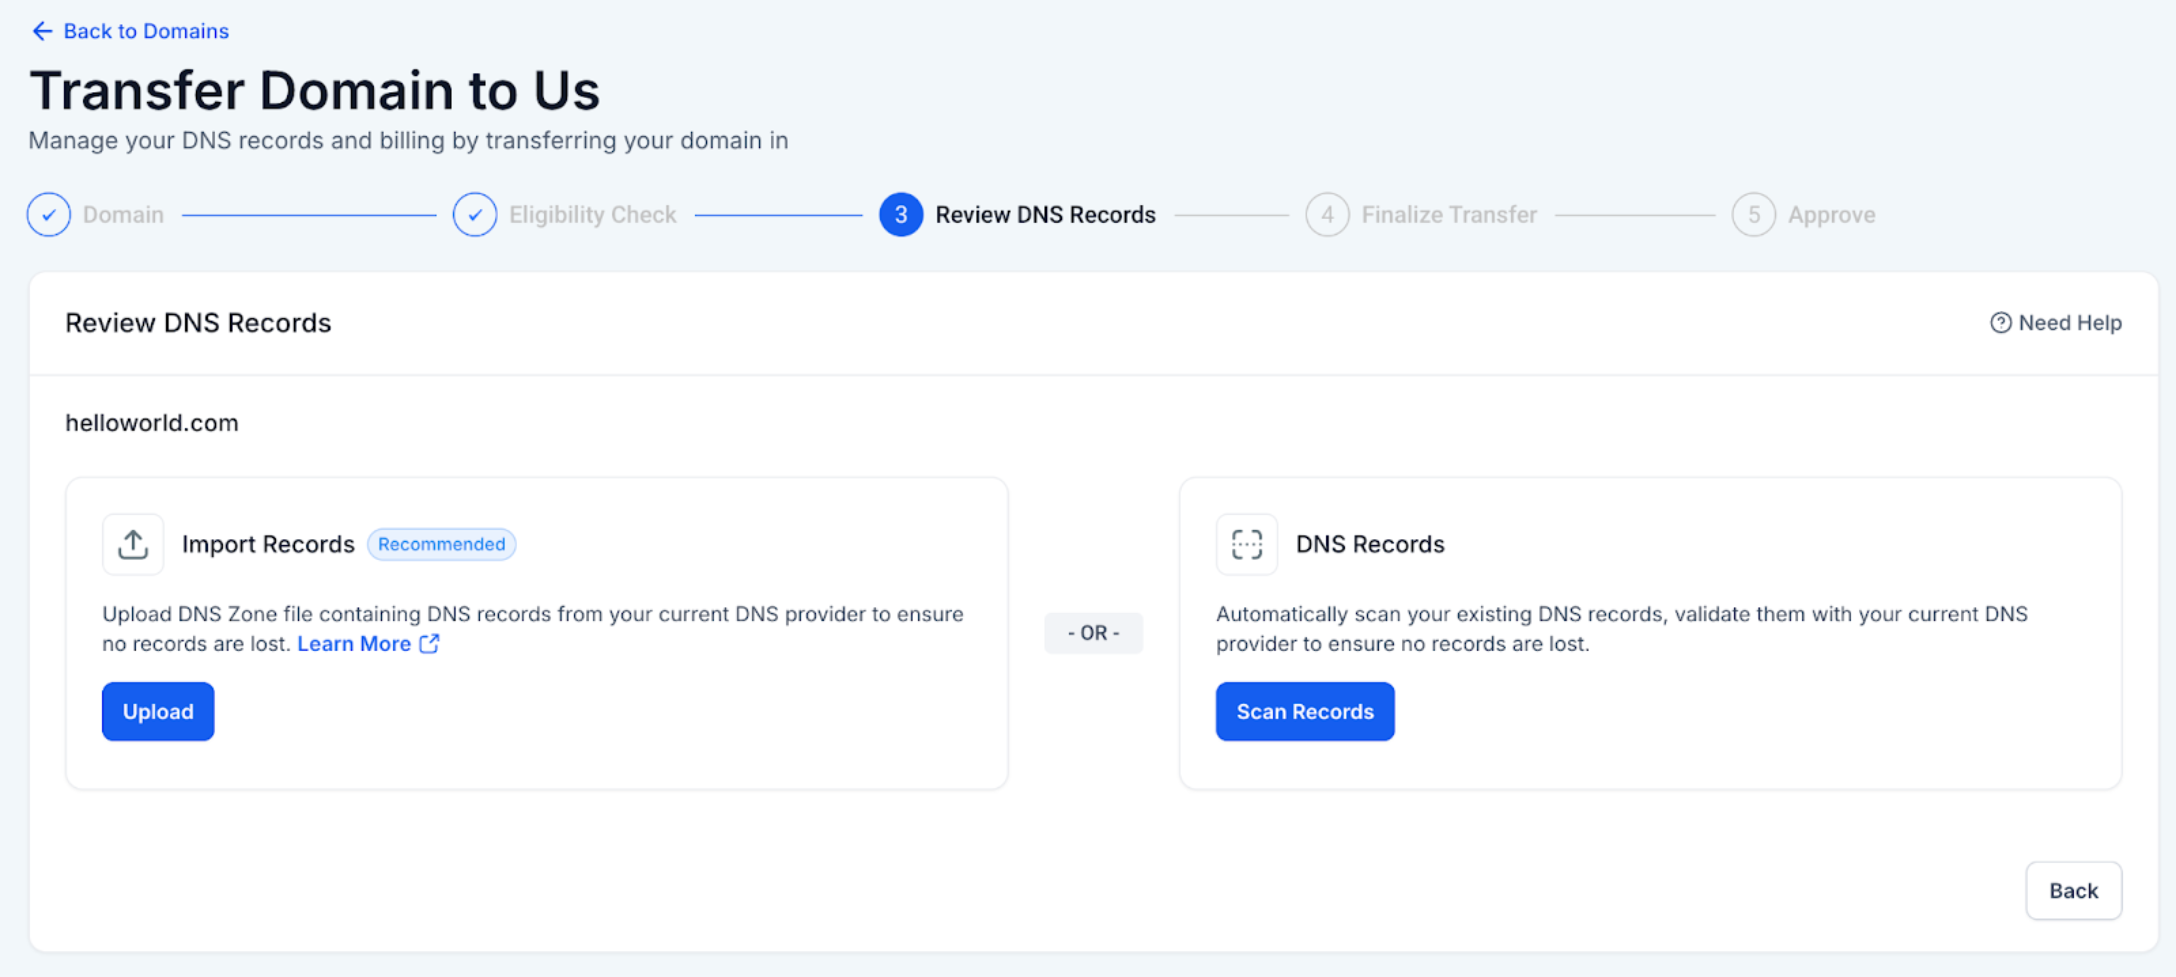
Once a domain has passed the Eligibility Check, the next step is to review its DNS records. In this step, users have the option to either
upload a DNS Zone File or
scan DNS records automatically.
Need to review DNS records
When you transfer your domain from your current registrar, such as GoDaddy, Namecheap, etc., it’s important to ensure that all DNS records configured with your current DNS provider are accurately transferred as well. This is crucial to keep your existing services like websites, email, and others working smoothly after the transfer. If the DNS records are not reviewed properly, your website might go down or your email may stop working. To avoid such issues, it is strongly recommended to carefully review and replicate your DNS records before completing the domain transfer.
Step 1: Retrieving DNS records
Users can choose between two methods to retrieve your DNS records by uploading the DNS zone file from your current DNS provider or auto scanning the DNS records:
1. Upload DNS Zone File
This method is recommended if you want to import all DNS records from your current DNS provider without missing any of the existing records.
How to get the DNS Zone file from your current DNS provider?
Login into your current DNS provider or where you purchased your domain originally.
NOTE: Your domain registrar and DNS provider can be different if you’ve changed the nameservers where you bought your domain. For example, if you bought your domain on GoDaddy but pointed it to Cloudflare by updating the nameservers, then Cloudflare is now managing your DNS. In that case, you’ll need to log in to Cloudflare to access your DNS records (zone file).
Go to DNS settings of the domain you want to transfer
Locate the option to export DNS zone/records file
In case you can’t find such option, reach out to your current DNS provider or registrar’s support to get it
Go to your registrar below to follow step by step process:
GoDaddy
Learn about how to upload zone files from GoDaddy HERE.
Cloudflare
Learn about how to upload zone files from Cloudflare HERE.
NameCheap
Currently, Namecheap does not offer a downloadable zone file, so you may need to recreate the records manually or reach out to support to access the records. Link to manually extract the records HERE.
IONOS
2. Auto Scan DNS Records
This method is convenient and requires no prior setup. In this method, your existing DNS records will be automatically scanned, but some of the existing records may not get detected in the scan. So, to avoid interruptions in your existing connected services like funnel, website etc post transfer, it is highly recommended to manually cross check the scanned records with your records at your current DNS provider or registrar and add/edit records if required.
NOTE: Your domain registrar and DNS provider can be different if you’ve updated the nameserver records at your registrar. For example, if you purchased your domain from GoDaddy but pointed it to Cloudflare by changing the nameservers, then Cloudflare becomes your DNS provider. In that case, you’ll need to log in to Cloudflare to view and compare your DNS records.
Step 2: Reviewing DNS Records
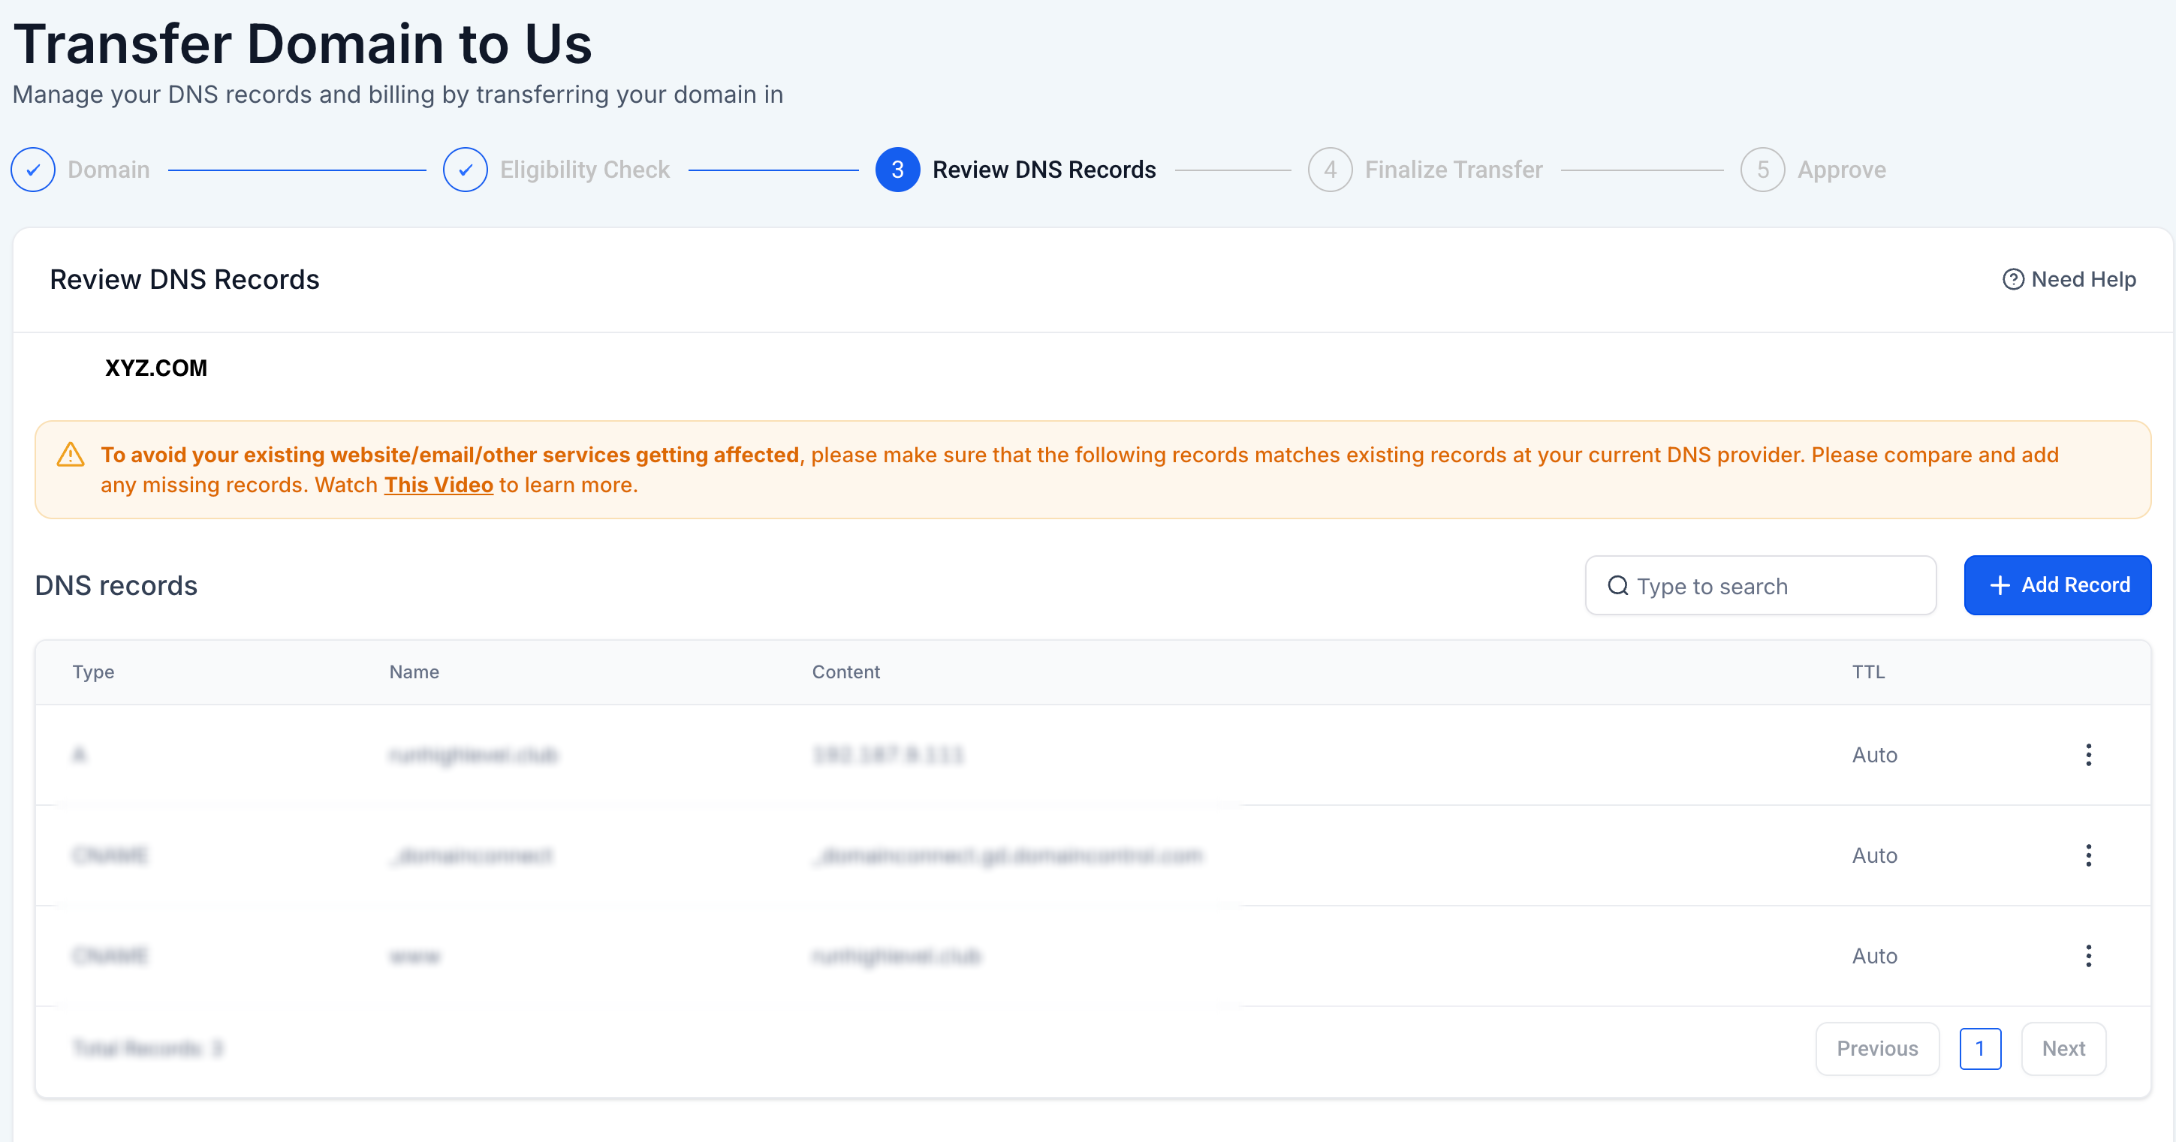
Once records are retrieved, you can now review your DNS records. In the DNS table shown you can:
View all DNS entries in a table format, categorized by record type (e.g., A, CNAME, TXT, MX).
Add new records by clicking “Add Record”.
Edit or delete individual records as needed.
Search records using any field (name, type, value).
GoDaddy Interface -
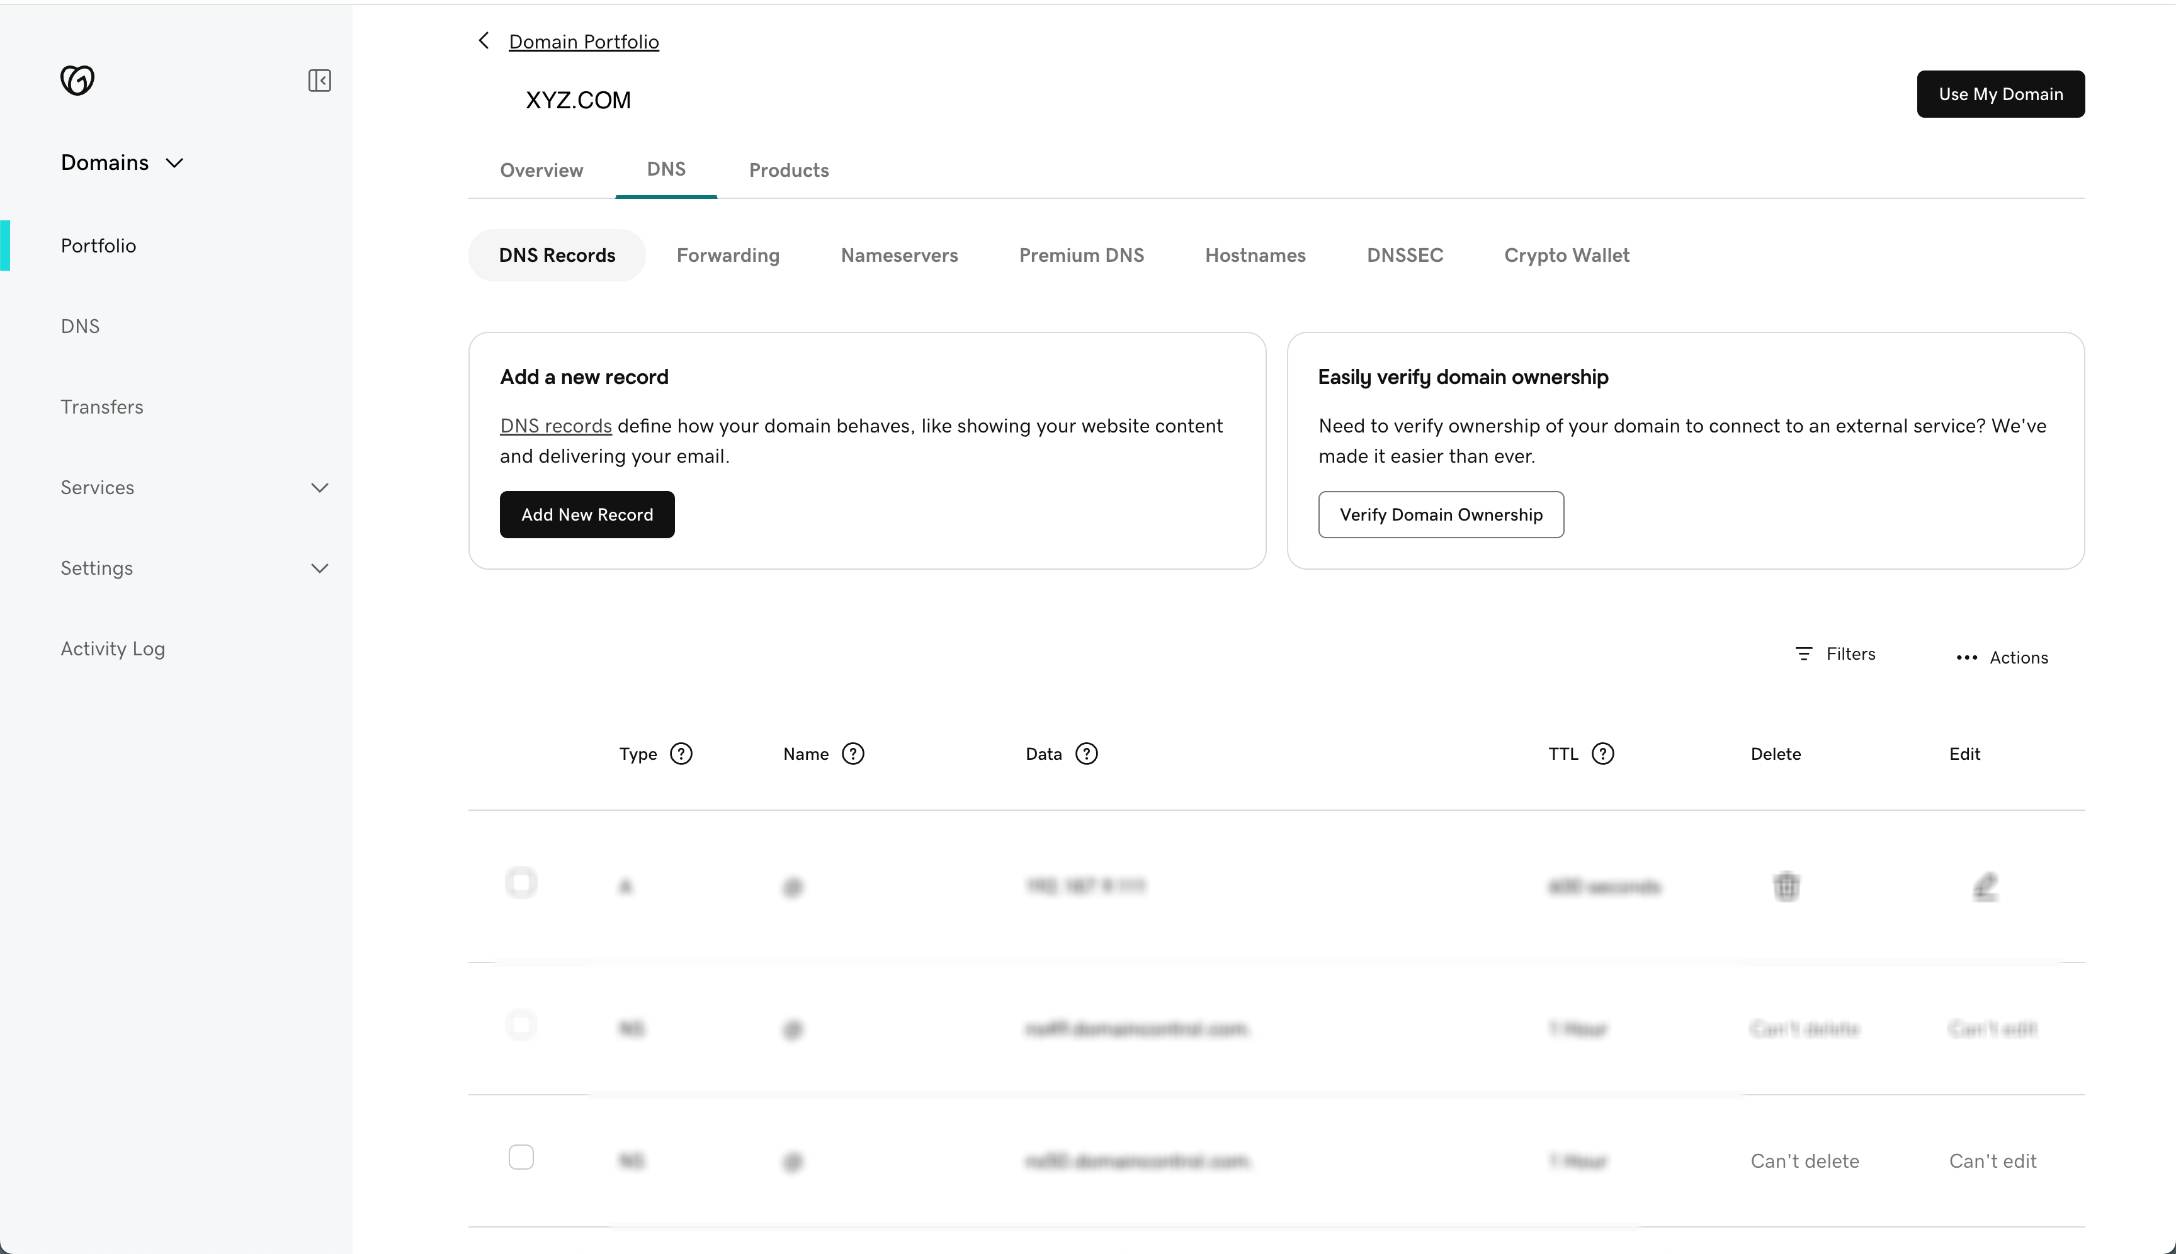
NOTE: It is highly recommended to manually cross-check the scanned DNS records with the records currently available at your DNS provider or registrar (where you originally purchased your domain). If any record is missed during the automatic scan, it could cause your website to go down or your email to stop working after the transfer. That’s why it’s important to carefully review and compare the scanned records with your existing ones, and make any necessary additions or changes to ensure nothing is left out.
FAQs
1. What if some DNS records are missing after auto-scan?
Always manually cross-check the scanned records with your current DNS provider. Auto-scanning might miss some records. You can edit, delete, or add records before finalizing the transfer.
2. What if my nameservers are managed by someone else (e.g., Cloudflare), but the domain is with GoDaddy?
Then your DNS provider is Cloudflare even if your registrar is GoDaddy. When transferring the domain, your DNS setup will still be managed at Cloudflare unless you switch nameservers post-transfer.
3. What if my registrar and DNS provider are different?
Then you'll need to log in to your DNS provider (e.g., Cloudflare) to export or review DNS records. The registrar only holds the domain, not the DNS settings.
Need Help?
If DNS records are missing, incomplete, or do not match during a domain transfer, first confirm where the domain’s active DNS is actually managed and compare the imported records with that source.
Verify that:
- You are reviewing DNS records for the correct domain.
- You know whether your registrar and DNS provider are the same or different.
- You are checking records at the provider that manages the domain’s active nameservers.
- The uploaded zone file came from the correct DNS provider.
- The zone file includes the records currently in use.
- If you used Auto Scan, you manually compared the scanned records with the records at your current DNS provider.
- Important A, CNAME, MX, TXT, and other required records are present.
- Missing records were added before continuing the transfer.
- Incorrect records were edited carefully rather than replaced in bulk.
- Records supporting email, websites, verification, or other services were not removed accidentally.
- Any changes made during the review were saved successfully.
- You have not assumed that the registrar manages DNS when the nameservers point somewhere else.
If Auto Scan misses records, use your current DNS provider as the source of truth and manually add the missing entries before finalizing the transfer.
If the issue continues, collect the domain name, current registrar, active DNS provider, retrieval method used, missing or mismatched DNS records, and screenshots of both the current DNS zone and the transfer review screen before contacting support.