When you set up calling in your sub-account, you can either verify a phone number you already own, or buy a new phone number from LeadConnector. This article explains the difference and helps you pick the right option.
Contents
- At a glance
- Side-by-side comparison
- Pick this if
- Verifying is not the same as porting
- What your customers see when you call
- Using both options at once
- How to get started
- Turning on call recording for a verified number
- Troubleshooting
- For agency administrators: turning this option on or off
At a glance
Pick Use your existing phone number if you only need to make outbound calls and you want your customers to see your familiar business number when you call them.
Pick Buy a new phone number if you also need to receive calls or text messages, run inbound automations, or set up voicemail and call routing.
You can use both options on the same sub-account if you want to.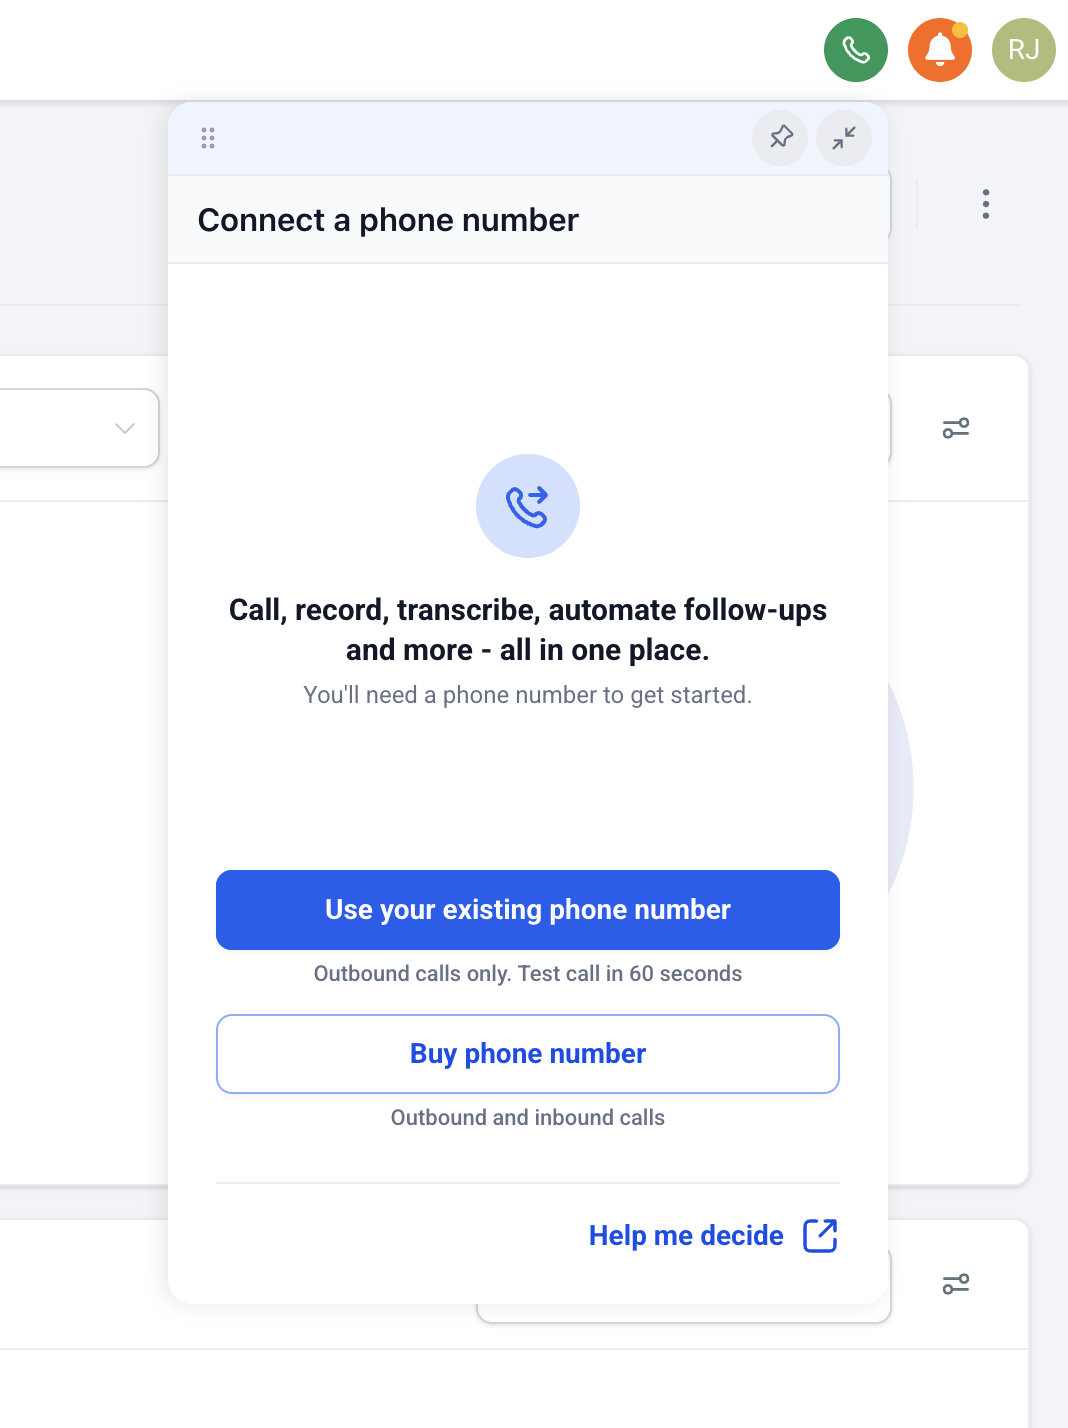
Side-by-side comparison
| Feature | Use existing number | Buy a new LeadConnector number |
|---|---|---|
| Place outbound calls | Yes | Yes |
| Receive inbound calls | No | Yes |
| Send or receive SMS | No | Yes |
| Voicemail, IVR, and call routing | No | Yes |
| Call recording | Yes (toggle in number settings) | Yes |
| Voice transcription and post-call summaries | Yes (when recording is on) | Yes (when recording is on) |
| Caller ID shown to the person you call | Your existing number | The new LeadConnector number |
| Trust signal on the recipient’s phone | Standard | Highest, when the number is added to your business trust profile |
| Trigger workflows from inbound calls or texts | No (no inbound) | Yes |
| Time to start | About 60 seconds (one OTP) | A few minutes for selection and checkout, plus any required regulatory steps |
| Cost | No verification fee. Standard outbound calling rates apply per minute. | Monthly number rental plus per-minute usage |
Pick this if
Use your existing number if:
- You already have a number printed on your business cards, website, or vehicle wraps and you want it to keep showing up on outgoing calls.
- You only need outbound calling. Customers reach you on a different channel like email, a web form, or your existing phone line.
- You want to start dialing in about a minute.
Buy a new number if:
- You need to receive calls or texts.
- You want to run automations that trigger when a contact texts in or calls.
- You want voicemail, an IVR, business-hours routing, or call queues.
- You want the highest possible trust signal on the recipient’s phone.
Verifying is not the same as porting
Verifying your existing number proves you own it so the system can show it as your caller ID on outbound calls. Your number stays with your current carrier. Inbound calls and texts still go to your current carrier.
If you want your existing number to live inside LeadConnector and handle inbound calls, texts, voicemail, and workflows, you need to port the number or set it up as a hosted number. Those are separate processes.
What your customers see when you call
When you call from a verified existing number, your customers see your existing number on their screen. Most carriers deliver these calls normally. Some carriers may not show a “Verified Caller” badge for these calls, because the highest trust level is reserved for numbers that are owned by LeadConnector and registered to your business profile.
When you call from a LeadConnector number that has been added to your business trust profile, your customers see the LeadConnector number, and supported carriers can display a “Verified Caller” badge or similar indicator.
In both cases the call is delivered. The badge mainly affects how the call looks on the recipient’s screen and can reduce the chance of being filtered as spam.
Using both options at once
You can have a verified existing number and a purchased LeadConnector number on the same sub-account.
For inbound, calls and texts always come in on the purchased LeadConnector number. A verified existing number cannot receive anything in LeadConnector.
For outbound, your sub-account has a default outbound number. You can override the default on any call from the Calling from picker in the dialer. Verified numbers show a green shield next to them in the picker.
If you want a specific number to be your default, set it under your phone number settings.
How to get started
If you have not set up any phone number yet:
- Open your sub-account.
- Click the dialer icon at the top right of the screen.
- Choose Use your existing phone number.
- Enter your phone number and follow the prompts. We will read out a one-time code on a voice call to that number.

- Enter the code on screen to confirm ownership.

If you already have a phone number on this sub-account and want to add a verified number alongside it:
- Go to Settings, then Phone System, then Phone Numbers.
- Click Add Number.
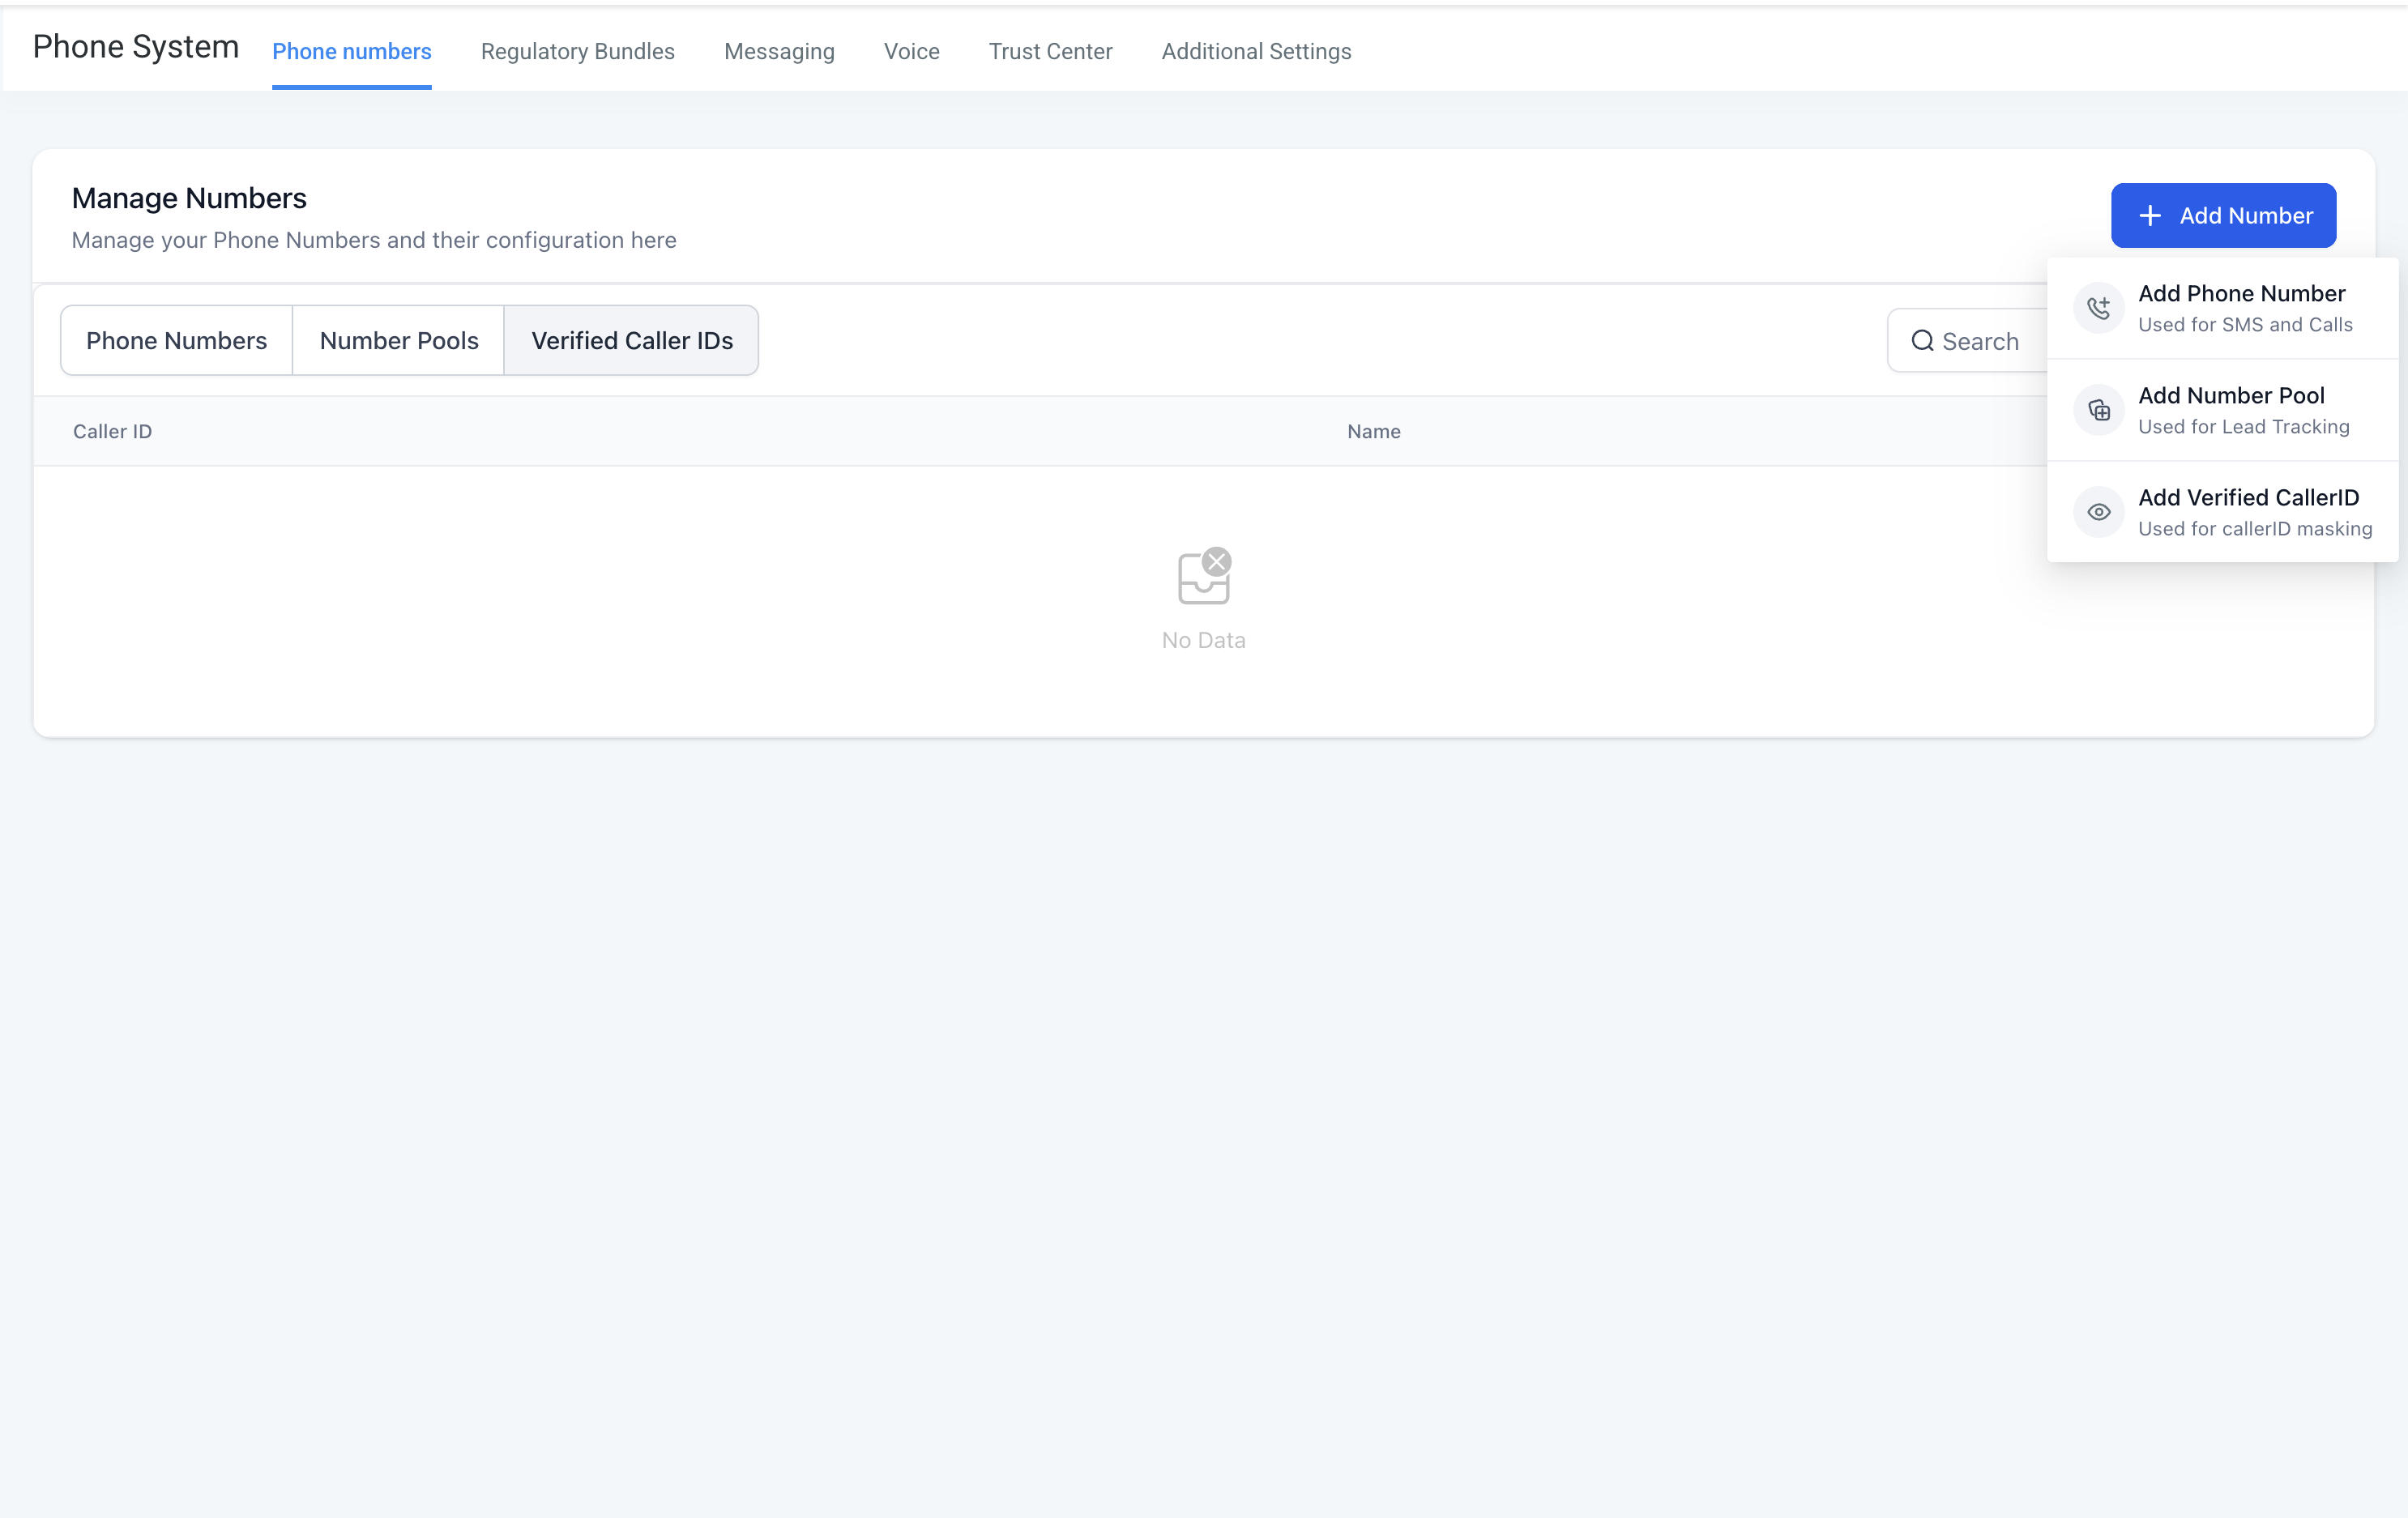
- Click Add Verified Caller ID.
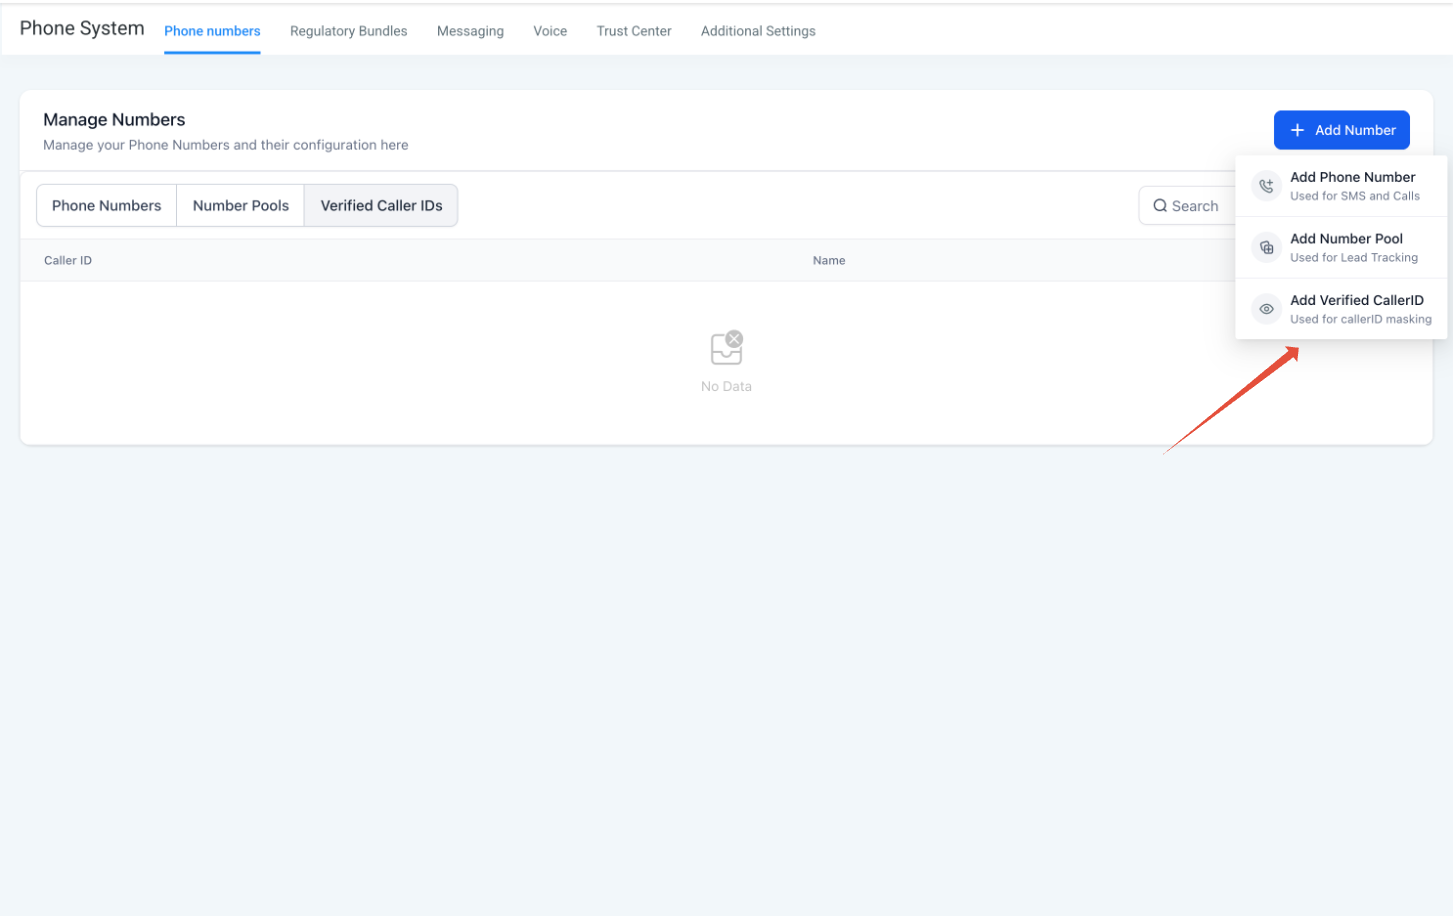
- Enter your phone number and follow the prompts. We will read out a one-time code on a voice call to that number.
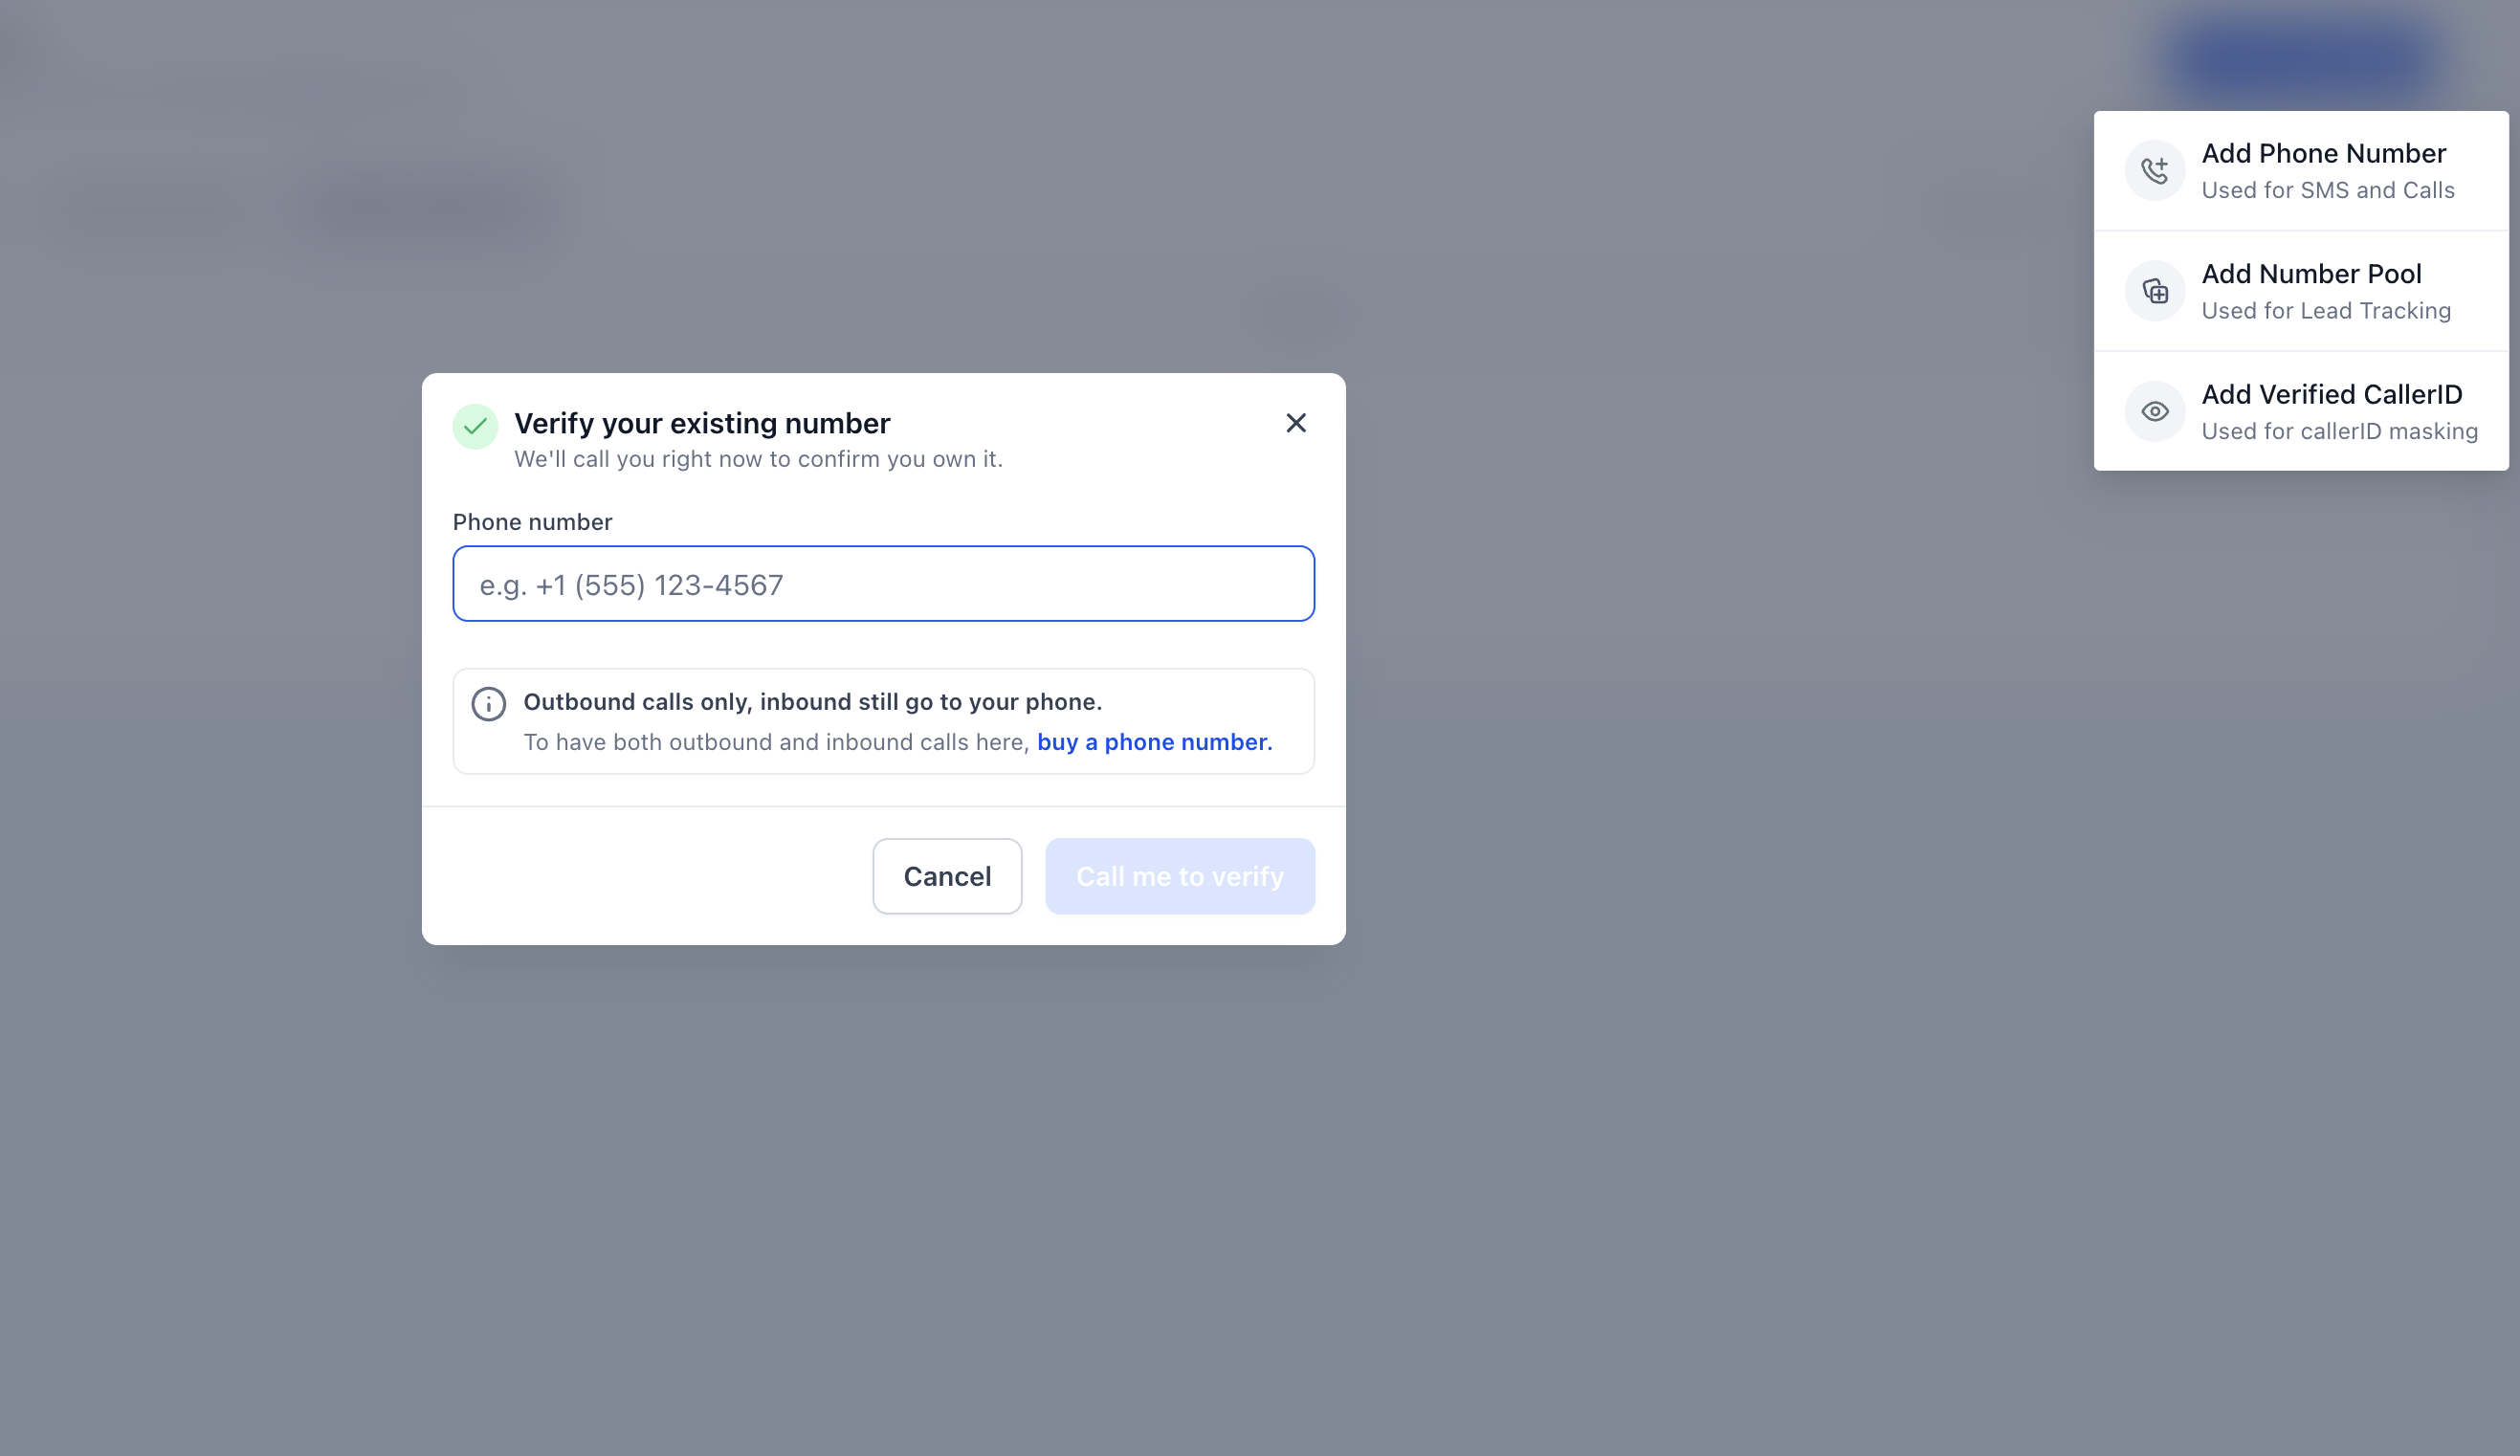
- Enter the code on screen to confirm ownership.
Most countries are supported. Verification takes about 60 seconds. By default each sub-account can have up to 10 verified caller IDs.
For step-by-step screenshots, see How to Set Up Verified Caller ID.
To buy a new LeadConnector number:
- Go to Settings, then Phone System, then Phone Numbers.
- Click Add Number, then Buy phone number.
- Choose a country and area code, search available numbers, and complete checkout.
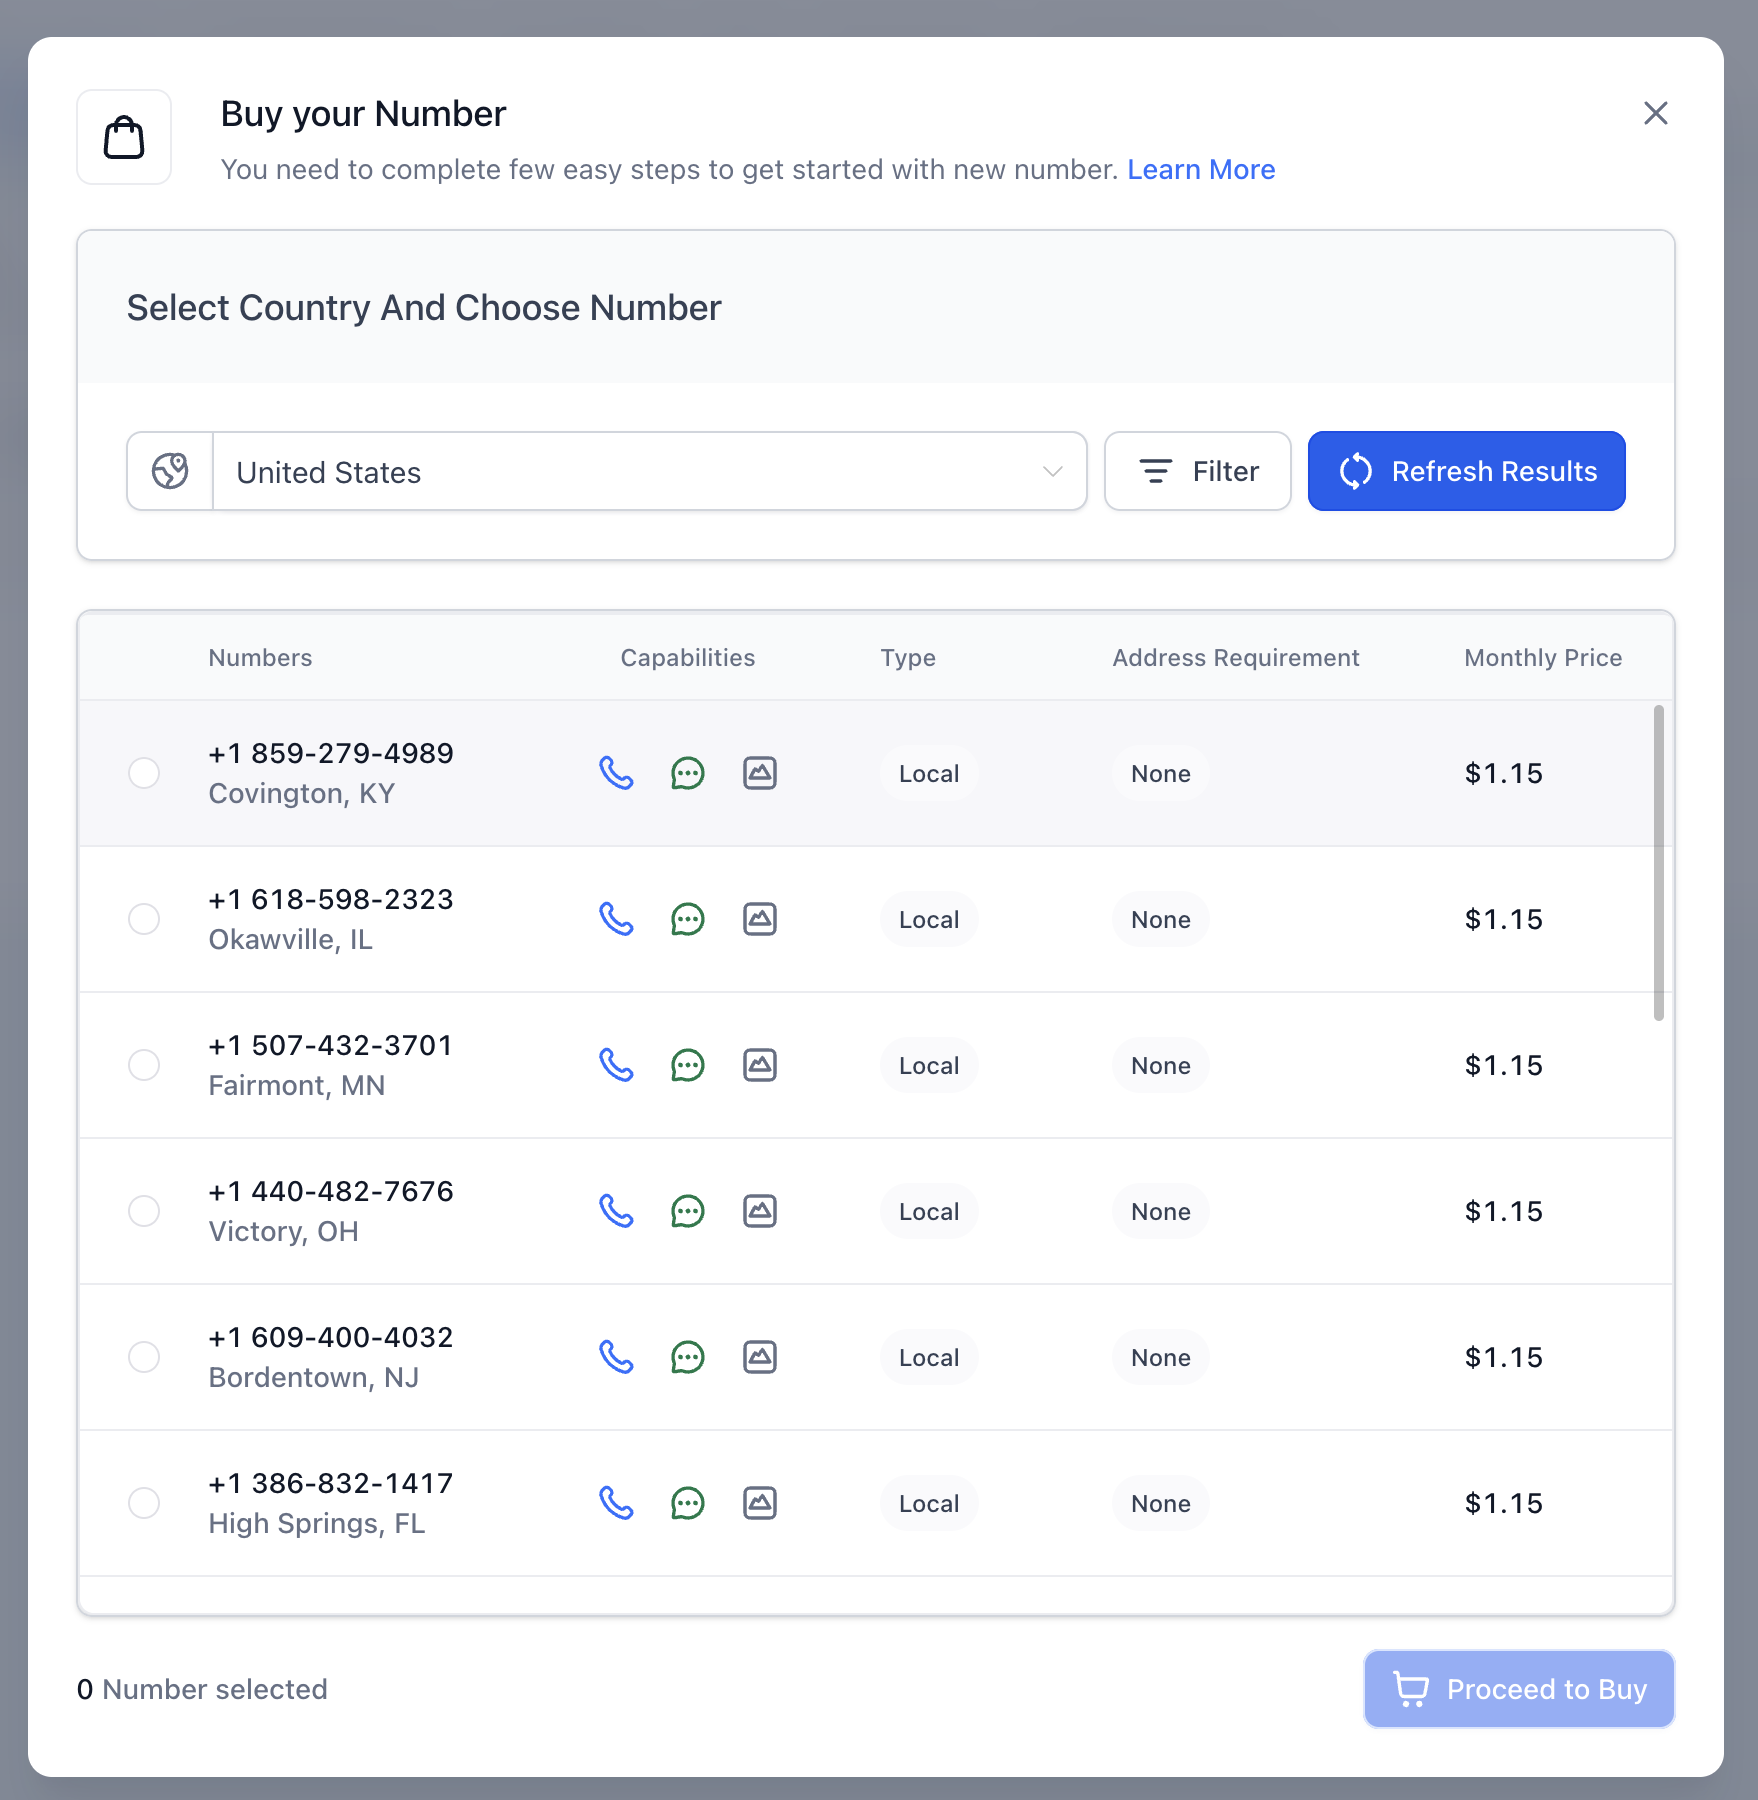
- Some countries require a regulatory bundle. Follow the on-screen prompts if you are asked for one.
For more, see How to Purchase a Phone Number for your Business.
Turning on call recording for a verified number
Recording is off by default for verified existing numbers. To turn it on:
- Go to Settings, then Phone System, then Phone Numbers.
- Find your verified caller ID in the list.
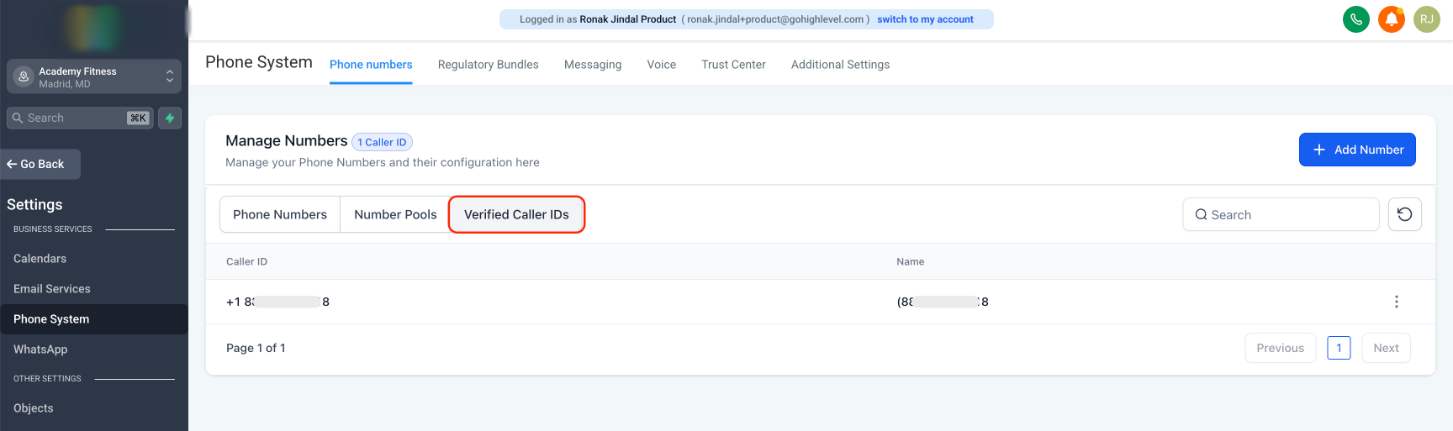
- Click Edit Configuration.
- Turn on Call Recording and save.
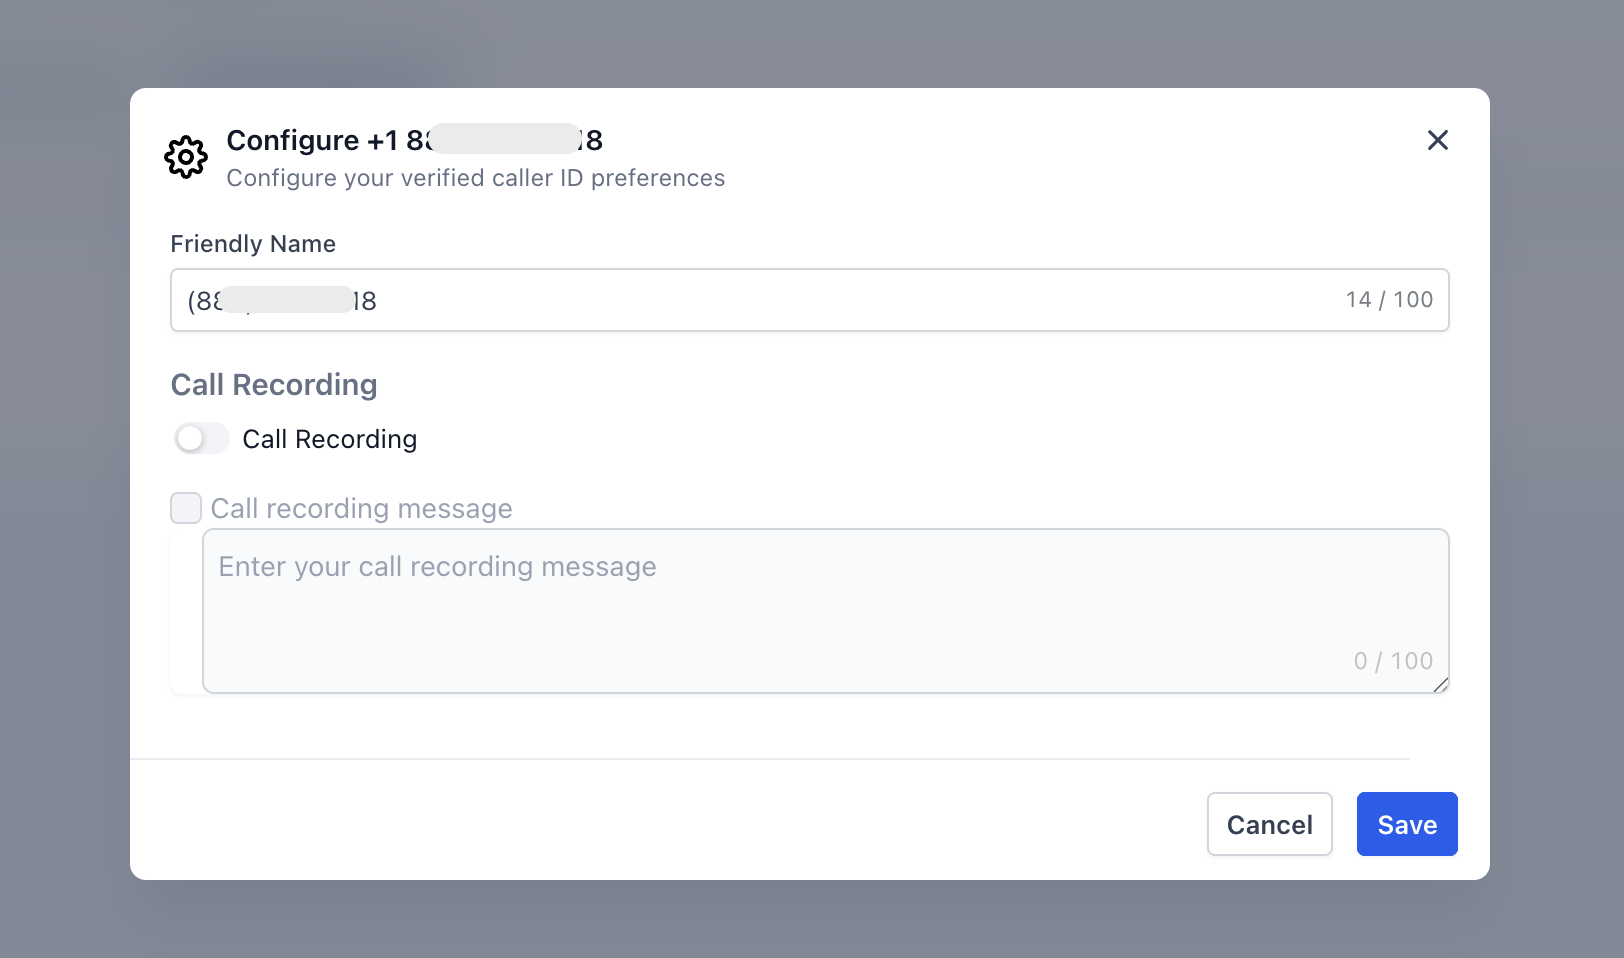
Voice transcription and post-call summaries follow the same recording rule. Once recording is on, transcription works on calls placed from that verified number the same way it does for purchased numbers.
Troubleshooting
Verification failed.
The most common reasons:
- The number you entered cannot receive a live voice call. Voicemail-only lines and fax lines will not work.
- The country code was wrong, or the number was not in international format.
- The one-time code expired before you entered it.
- The number is in a country that is not currently supported.
Try again on a number that can answer a live voice call. If it still fails, contact your agency administrator or LeadConnector support.
I verified my number, but I still cannot place calls to certain destinations.
Calling permissions for most destinations are turned on automatically when you verify. A small set of countries require manual enablement, and a few are not available at all. Countries that may need manual enablement today include Austria, Canada, China, France, Germany, the Netherlands, and Switzerland. Countries that are not available include Cuba, Iran, North Korea, and Syria, along with a small number of territories. If you need to call a country that requires manual enablement, contact your agency administrator or LeadConnector support.
I want to send a text message from my verified number.
Verified existing numbers are voice only. To send or receive SMS, you have three options:
- Buy a LeadConnector number.
- Transfer (port) your existing number into LeadConnector. The number leaves your current carrier and lives entirely inside LeadConnector.
- Use number hosting. The number stays with your current carrier for voice, and LeadConnector handles SMS.
I want to use a SIP trunk or my own carrier.
Bringing your own SIP trunk is not supported today.
I do not see the option to use my existing phone number.
Your agency controls whether this option appears for sub-accounts. If you would like it enabled, contact your agency administrator.
For agency administrators: turning this option on or off
If you are a LeadConnector agency administrator and you want to control whether your sub-accounts see the Use your existing phone number option, you can toggle it from your agency settings.
- Go to Phone Integration in your agency settings.
- Open the Agency Settings tab.
- Under Verified Caller ID Settings, find Allow calling without buying a phone number.
- The helper text reads: “Allow sub-accounts to call using their existing phone number as Caller ID without buying a new phone number.”
- Turn the toggle on or off and save.
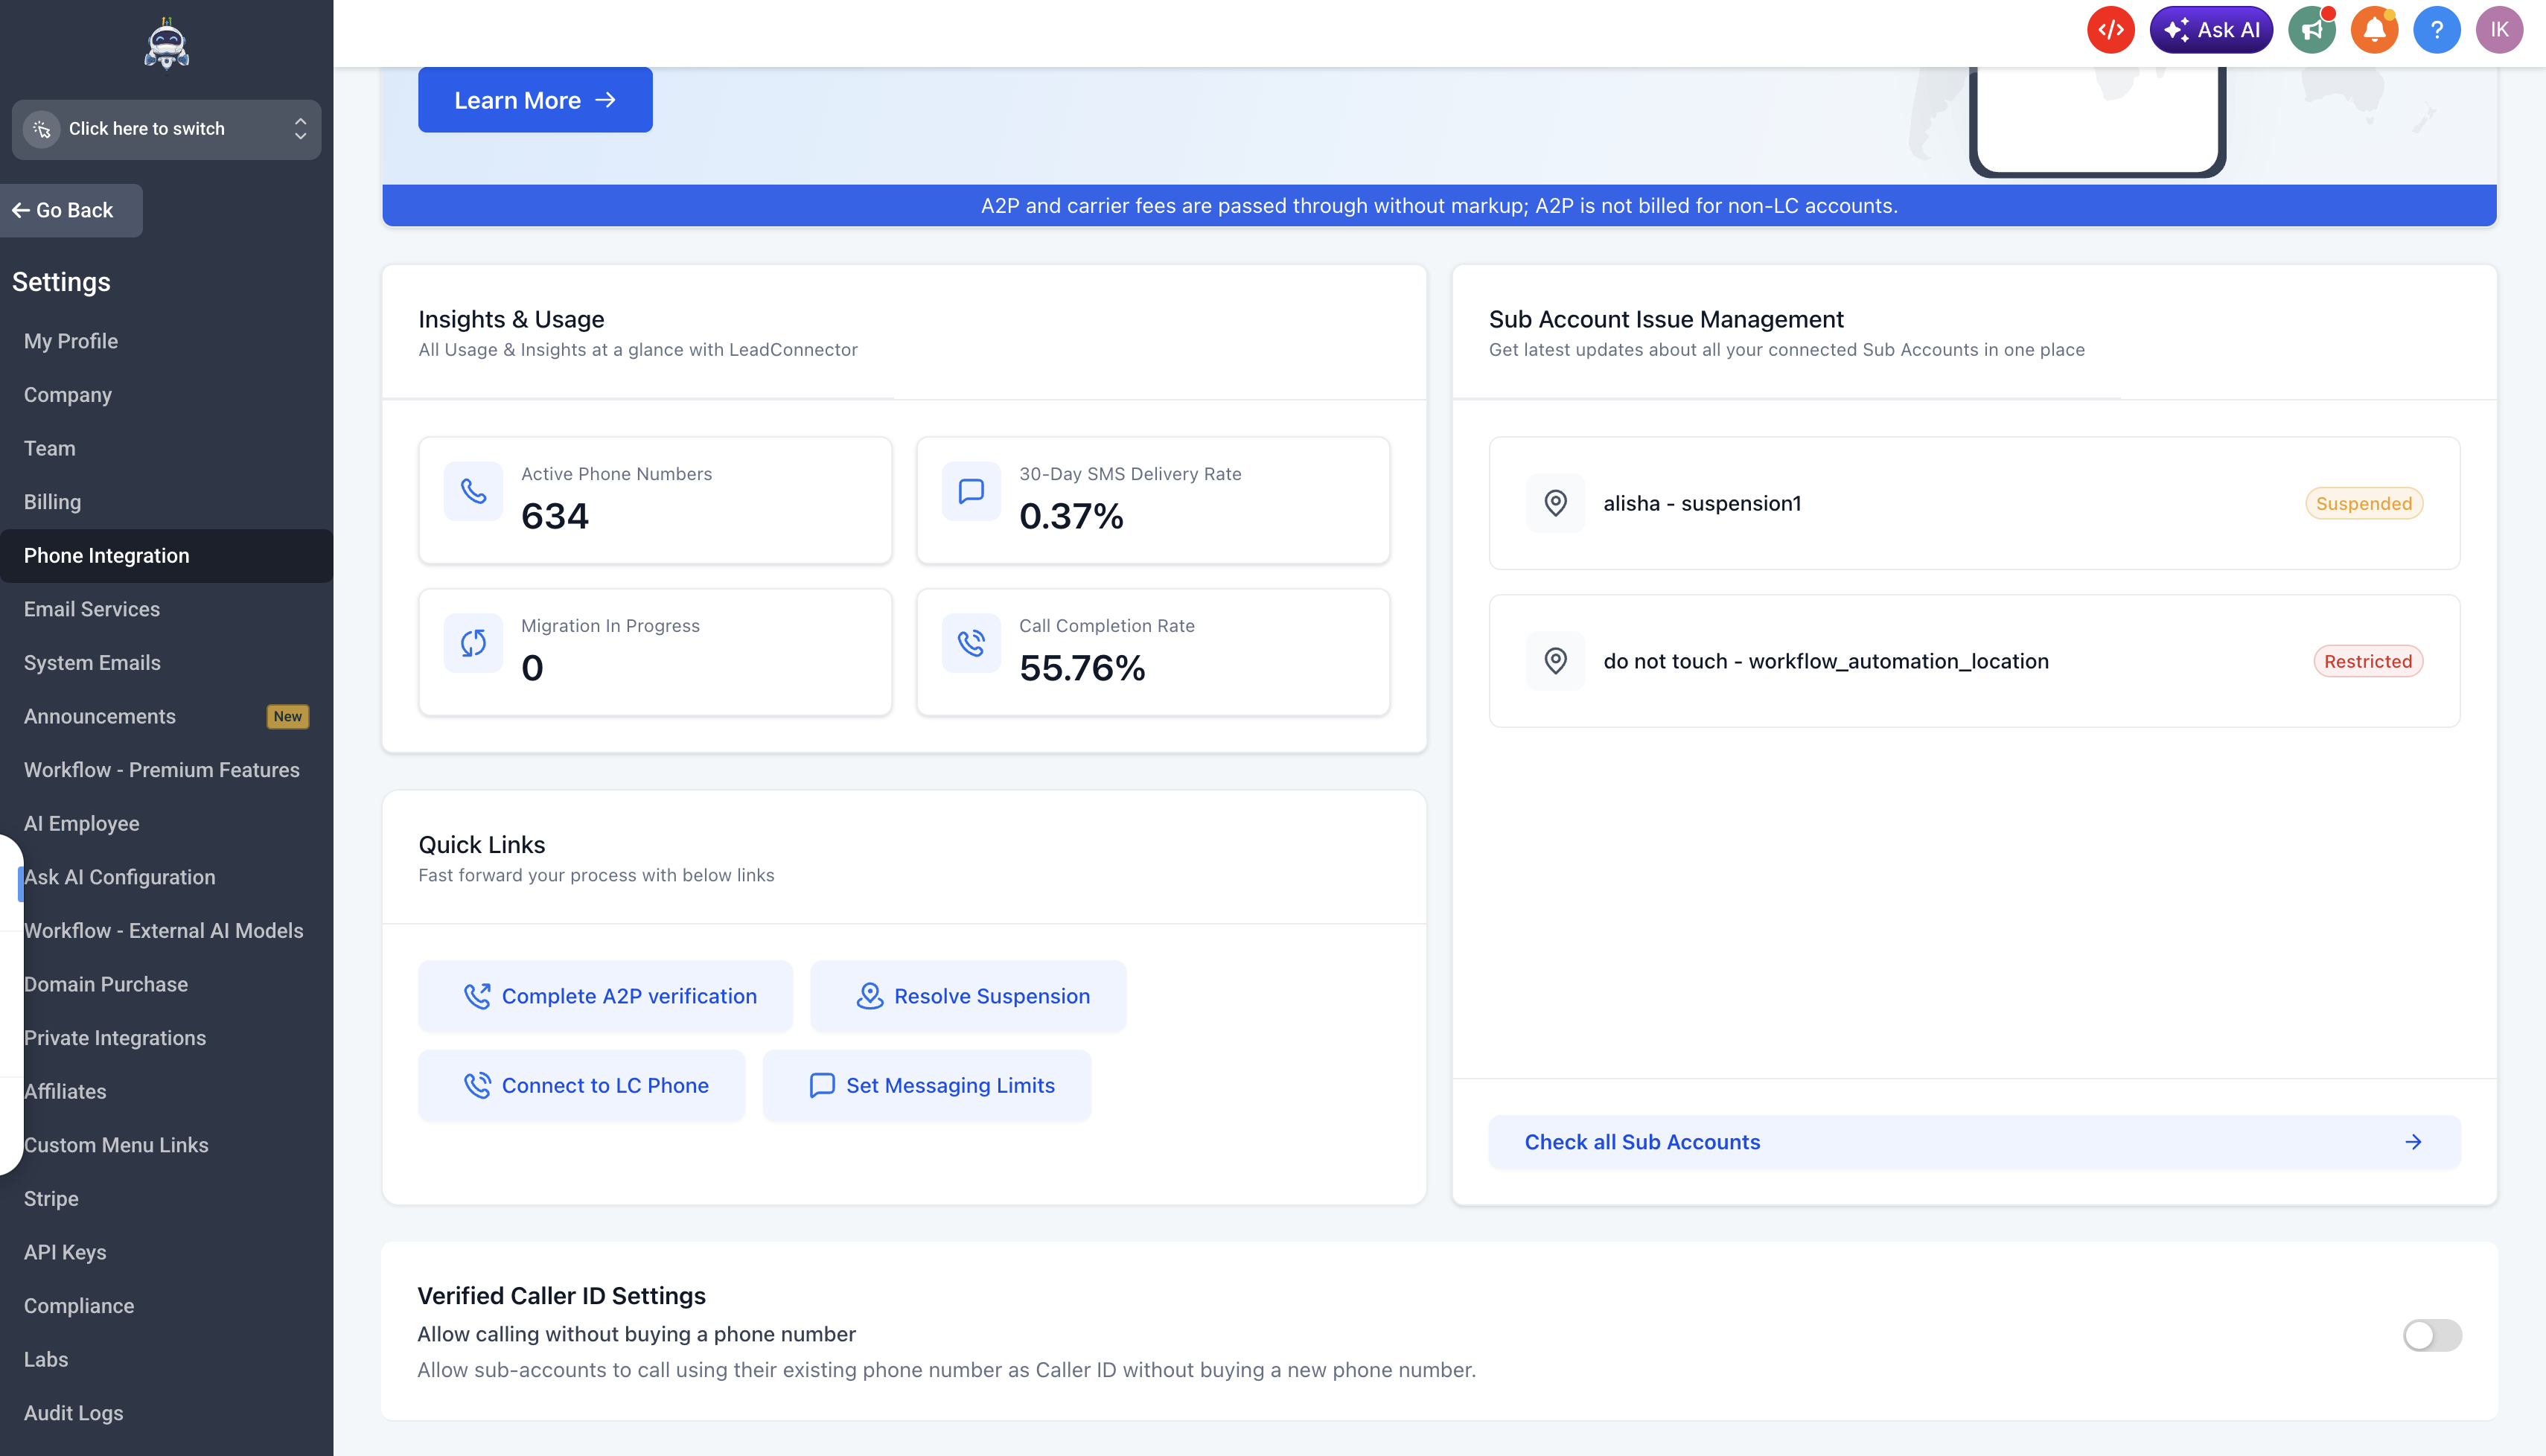
When the toggle is off, sub-accounts will only see the Buy phone number option in the dialer.