Workflow Action - Create & Update Multiple Rows in Google Sheets helps you create new spreadsheet entries or update existing ones in bulk within a single workflow. This article covers what the feature does, when to use each action type, and how to set it up correctly in Google Sheets.
TABLE OF CONTENTS
- What is Create & Update Multiple Rows in Google Sheets?
- Key benefits of Create & Update Multiple Rows in Google Sheets Action
- Prerequisites
- How to Use the Action to Create Multiple Spreadsheet Row(s)
- How to Use the Action to Update Multiple Spreadsheet Row(s)
- Frequently asked questions
What is Create & Update Multiple Rows in Google Sheets?
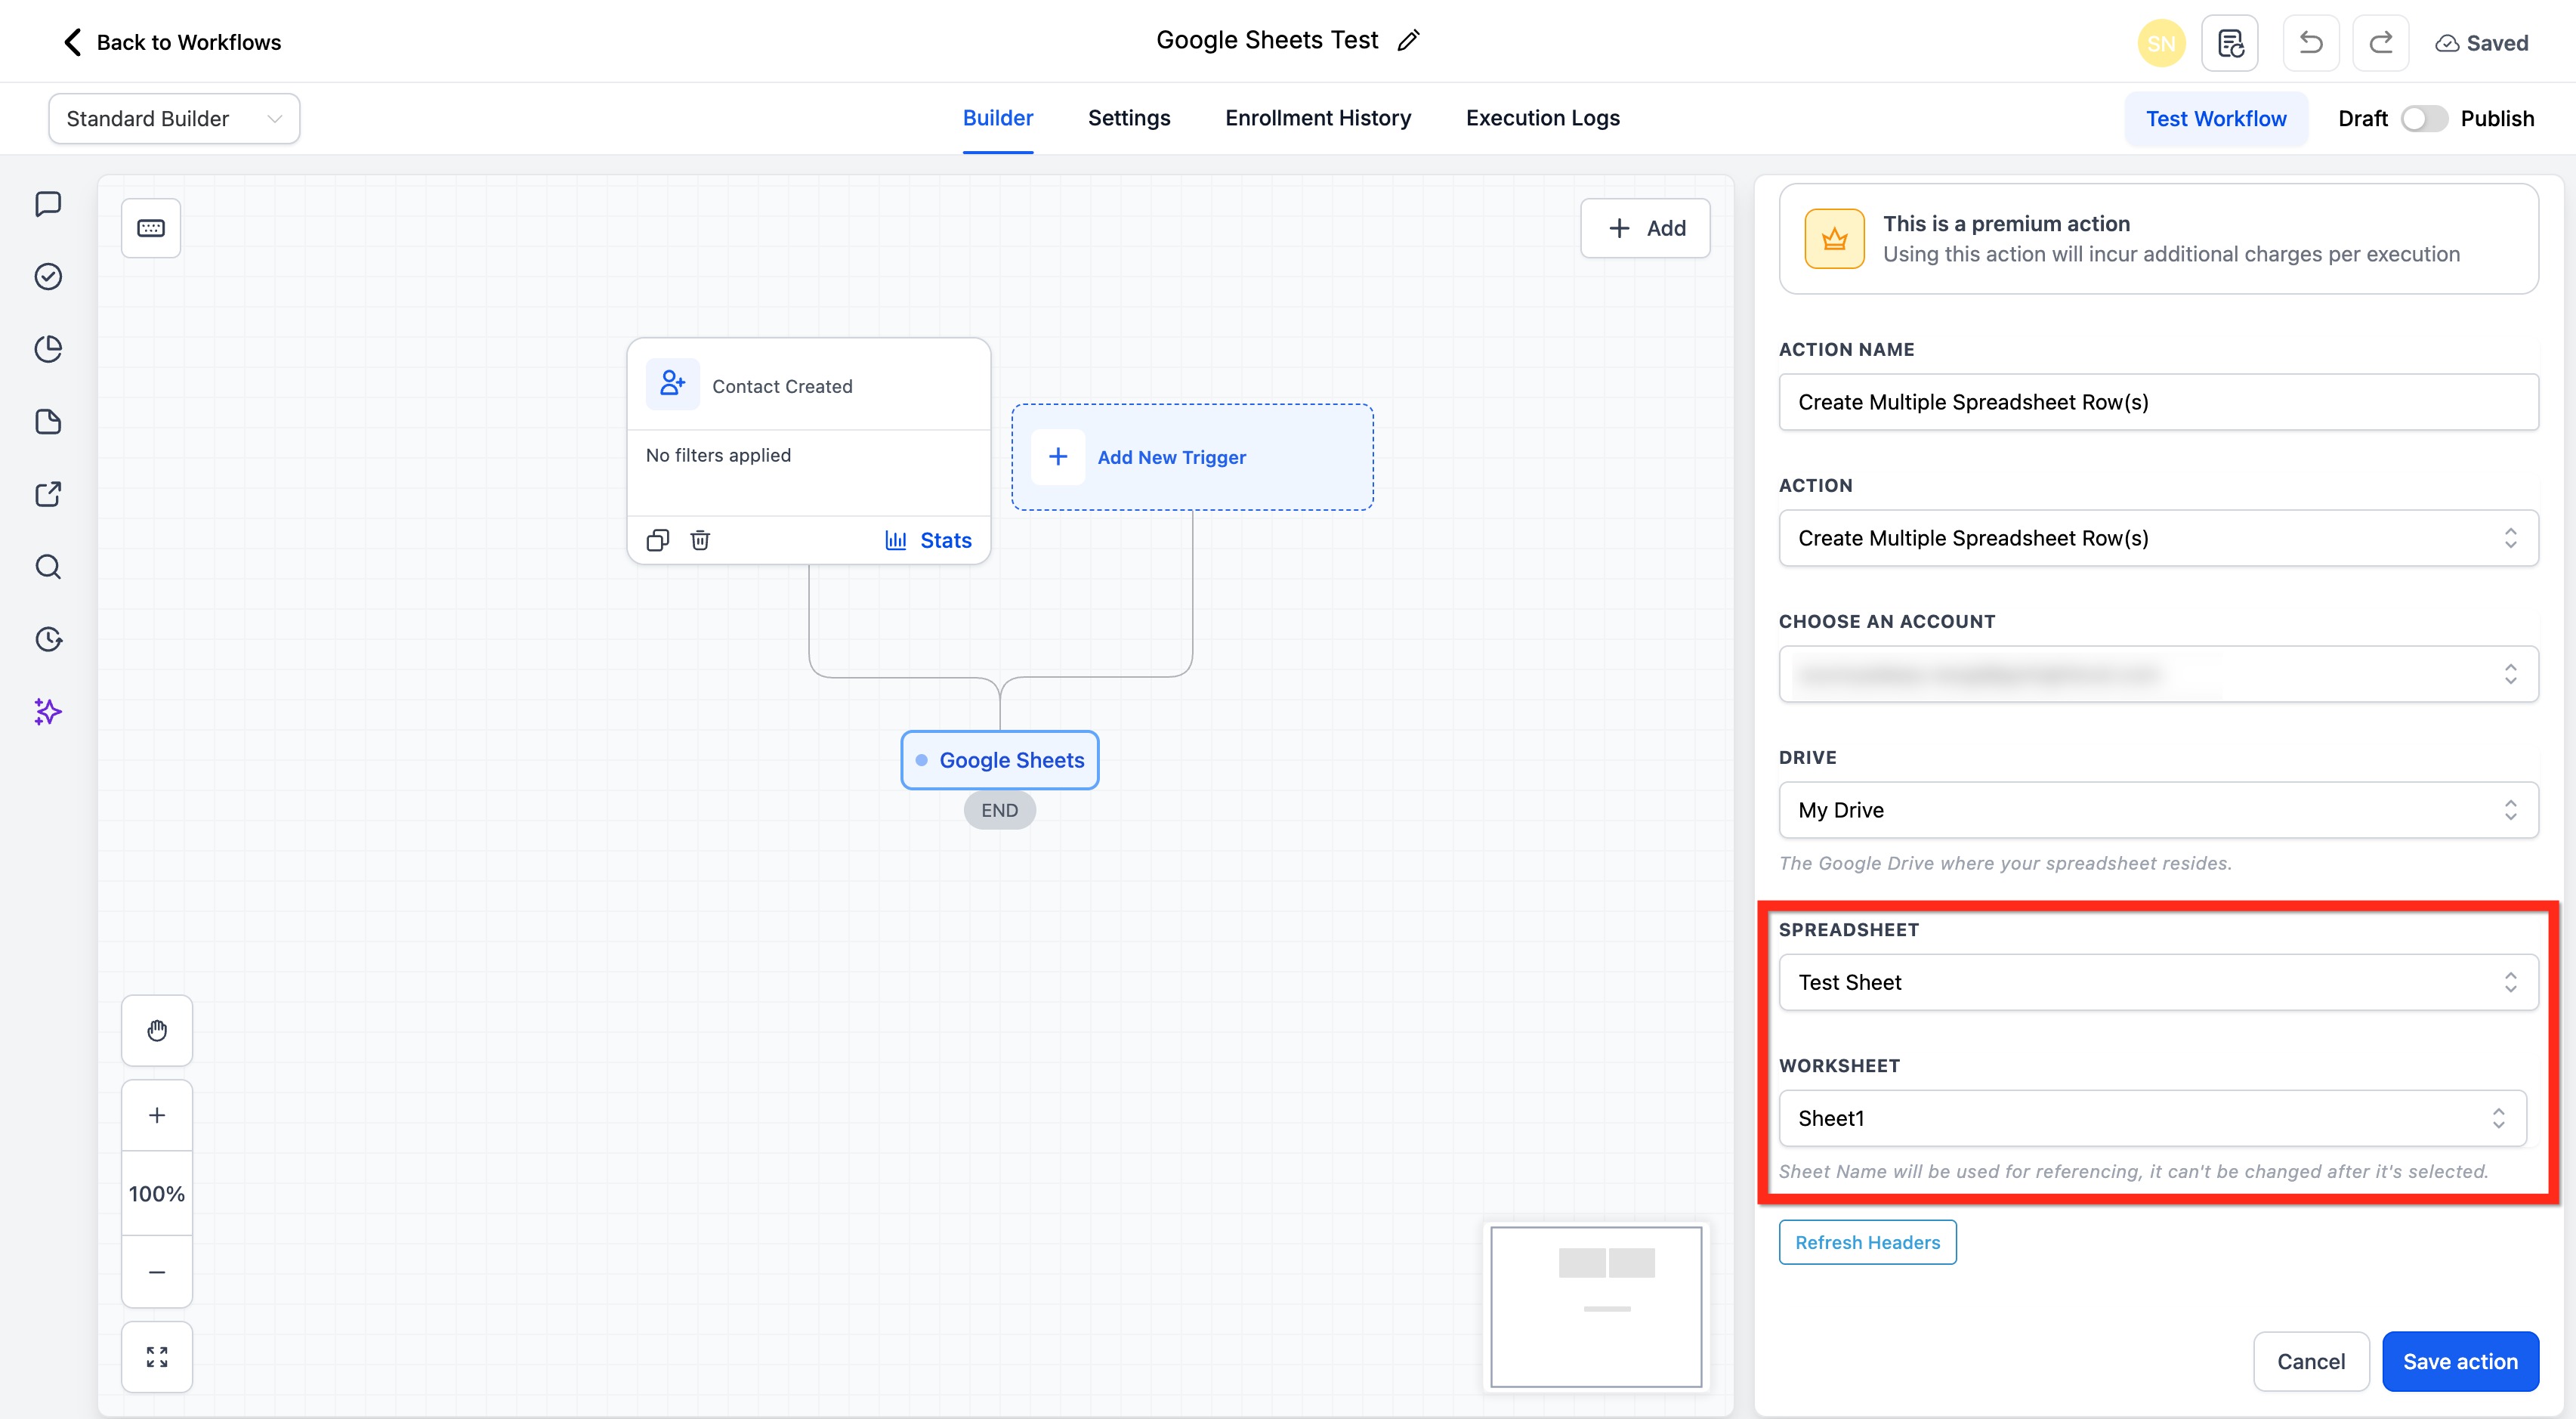
Note: This is a premium action. Using this action will incur additional charges per execution.
This workflow action allows a workflow to create or update more than one spreadsheet row during a single automation flow. It’s especially helpful when you need to log multiple entries, sync grouped records, or update several values at once while keeping the spreadsheet organized.
This functionality is part of the Google Sheets Premium Workflow Action and expands what you can do beyond single-row actions by letting you write or modify multiple rows more efficiently.
Key benefits of Create & Update Multiple Rows in Google Sheets Action
- Faster data logging: Create multiple spreadsheet rows in one action instead of repeating setup steps.
- Better organization: Keep related records together when workflows generate grouped or repeated data.
- Less manual work: Reduce the need to add or edit rows manually after a workflow runs.
- Improved accuracy: Map spreadsheet columns directly to workflow data to reduce copy/paste errors.
- More flexible updates: Update several values in a defined spreadsheet range when records need to change.
Prerequisites
Before mapping fields, confirm your spreadsheet and workflow setup to avoid broken mappings, incorrect updates, or missing data.
- Make sure your Google account is connected.
- Confirm the spreadsheet is stored in the correct Google Drive.
- Add clear column headers in the first row of the worksheet.
- Review the worksheet tab name before selecting it in the action.
- Make sure Google Sheets premium workflow actions are enabled for the account (if required).
- Refresh headers in the action whenever columns are added, renamed, or reordered.
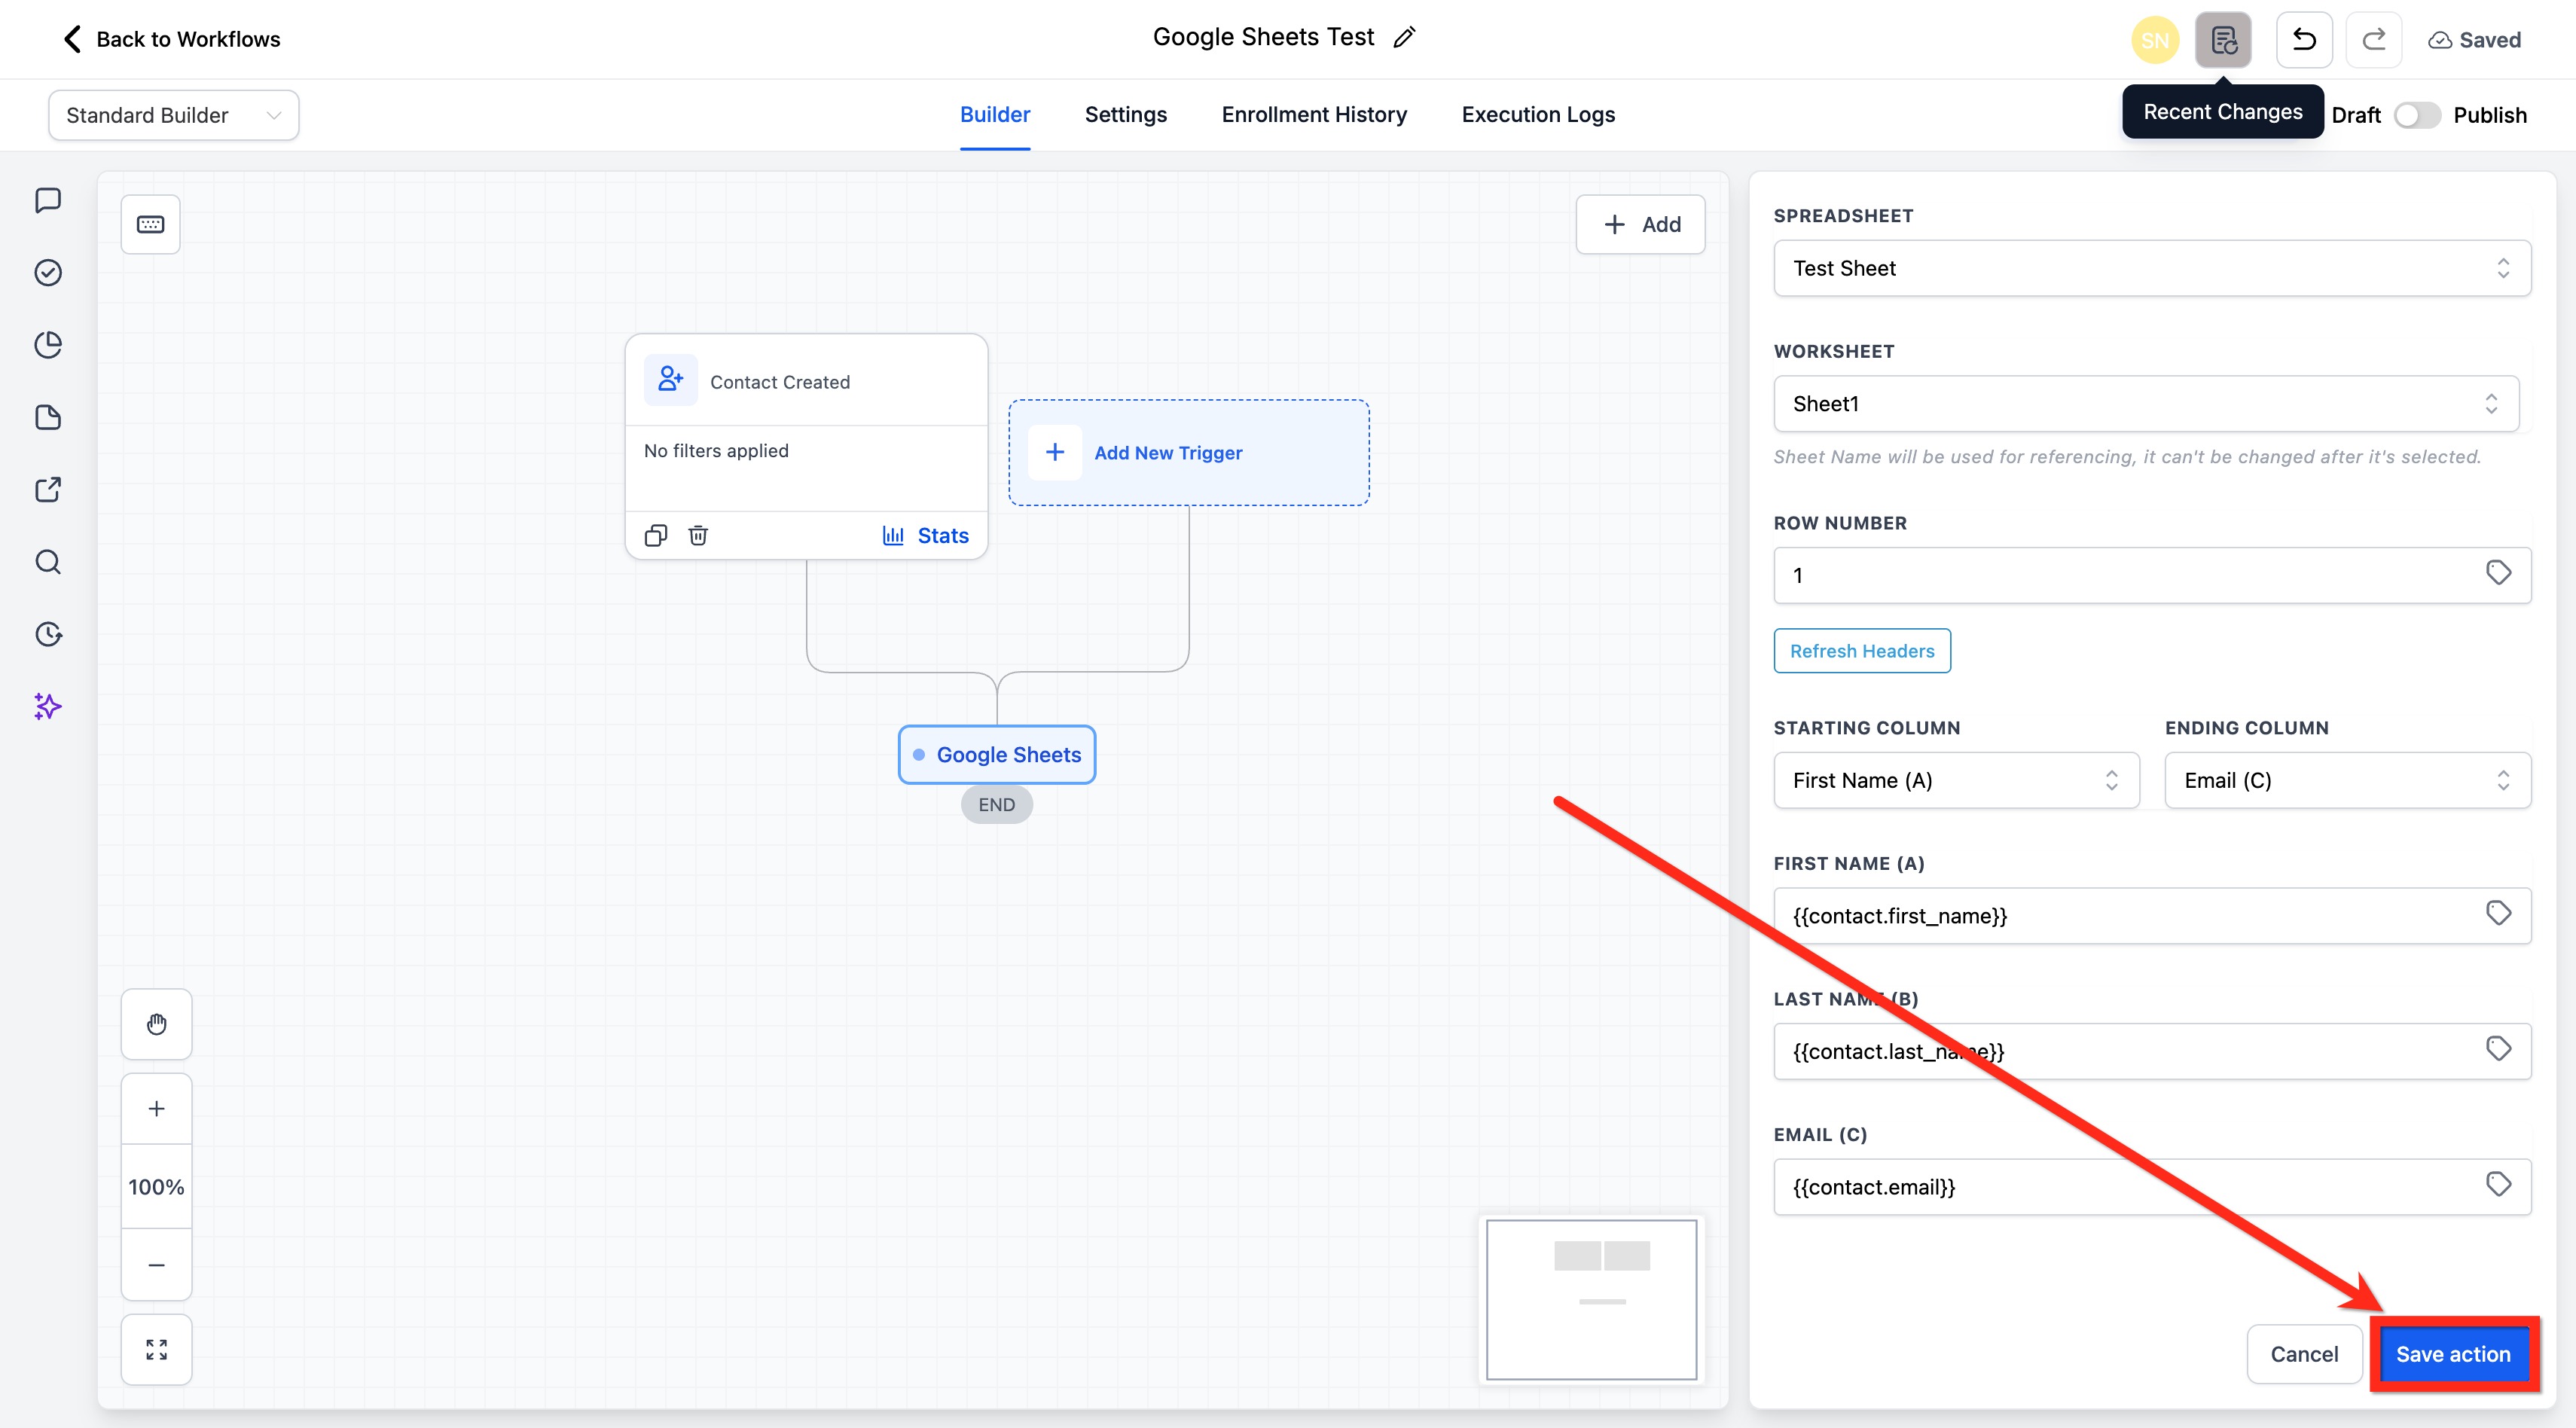
How to Use the Action to Create Multiple Spreadsheet Row(s)
Create Multiple Spreadsheet Row(s) is best when your workflow needs to add new entries to Google Sheets (instead of changing existing rows). This is useful for writing repeated records, storing grouped data, or sending multiple values into a spreadsheet during one workflow execution.
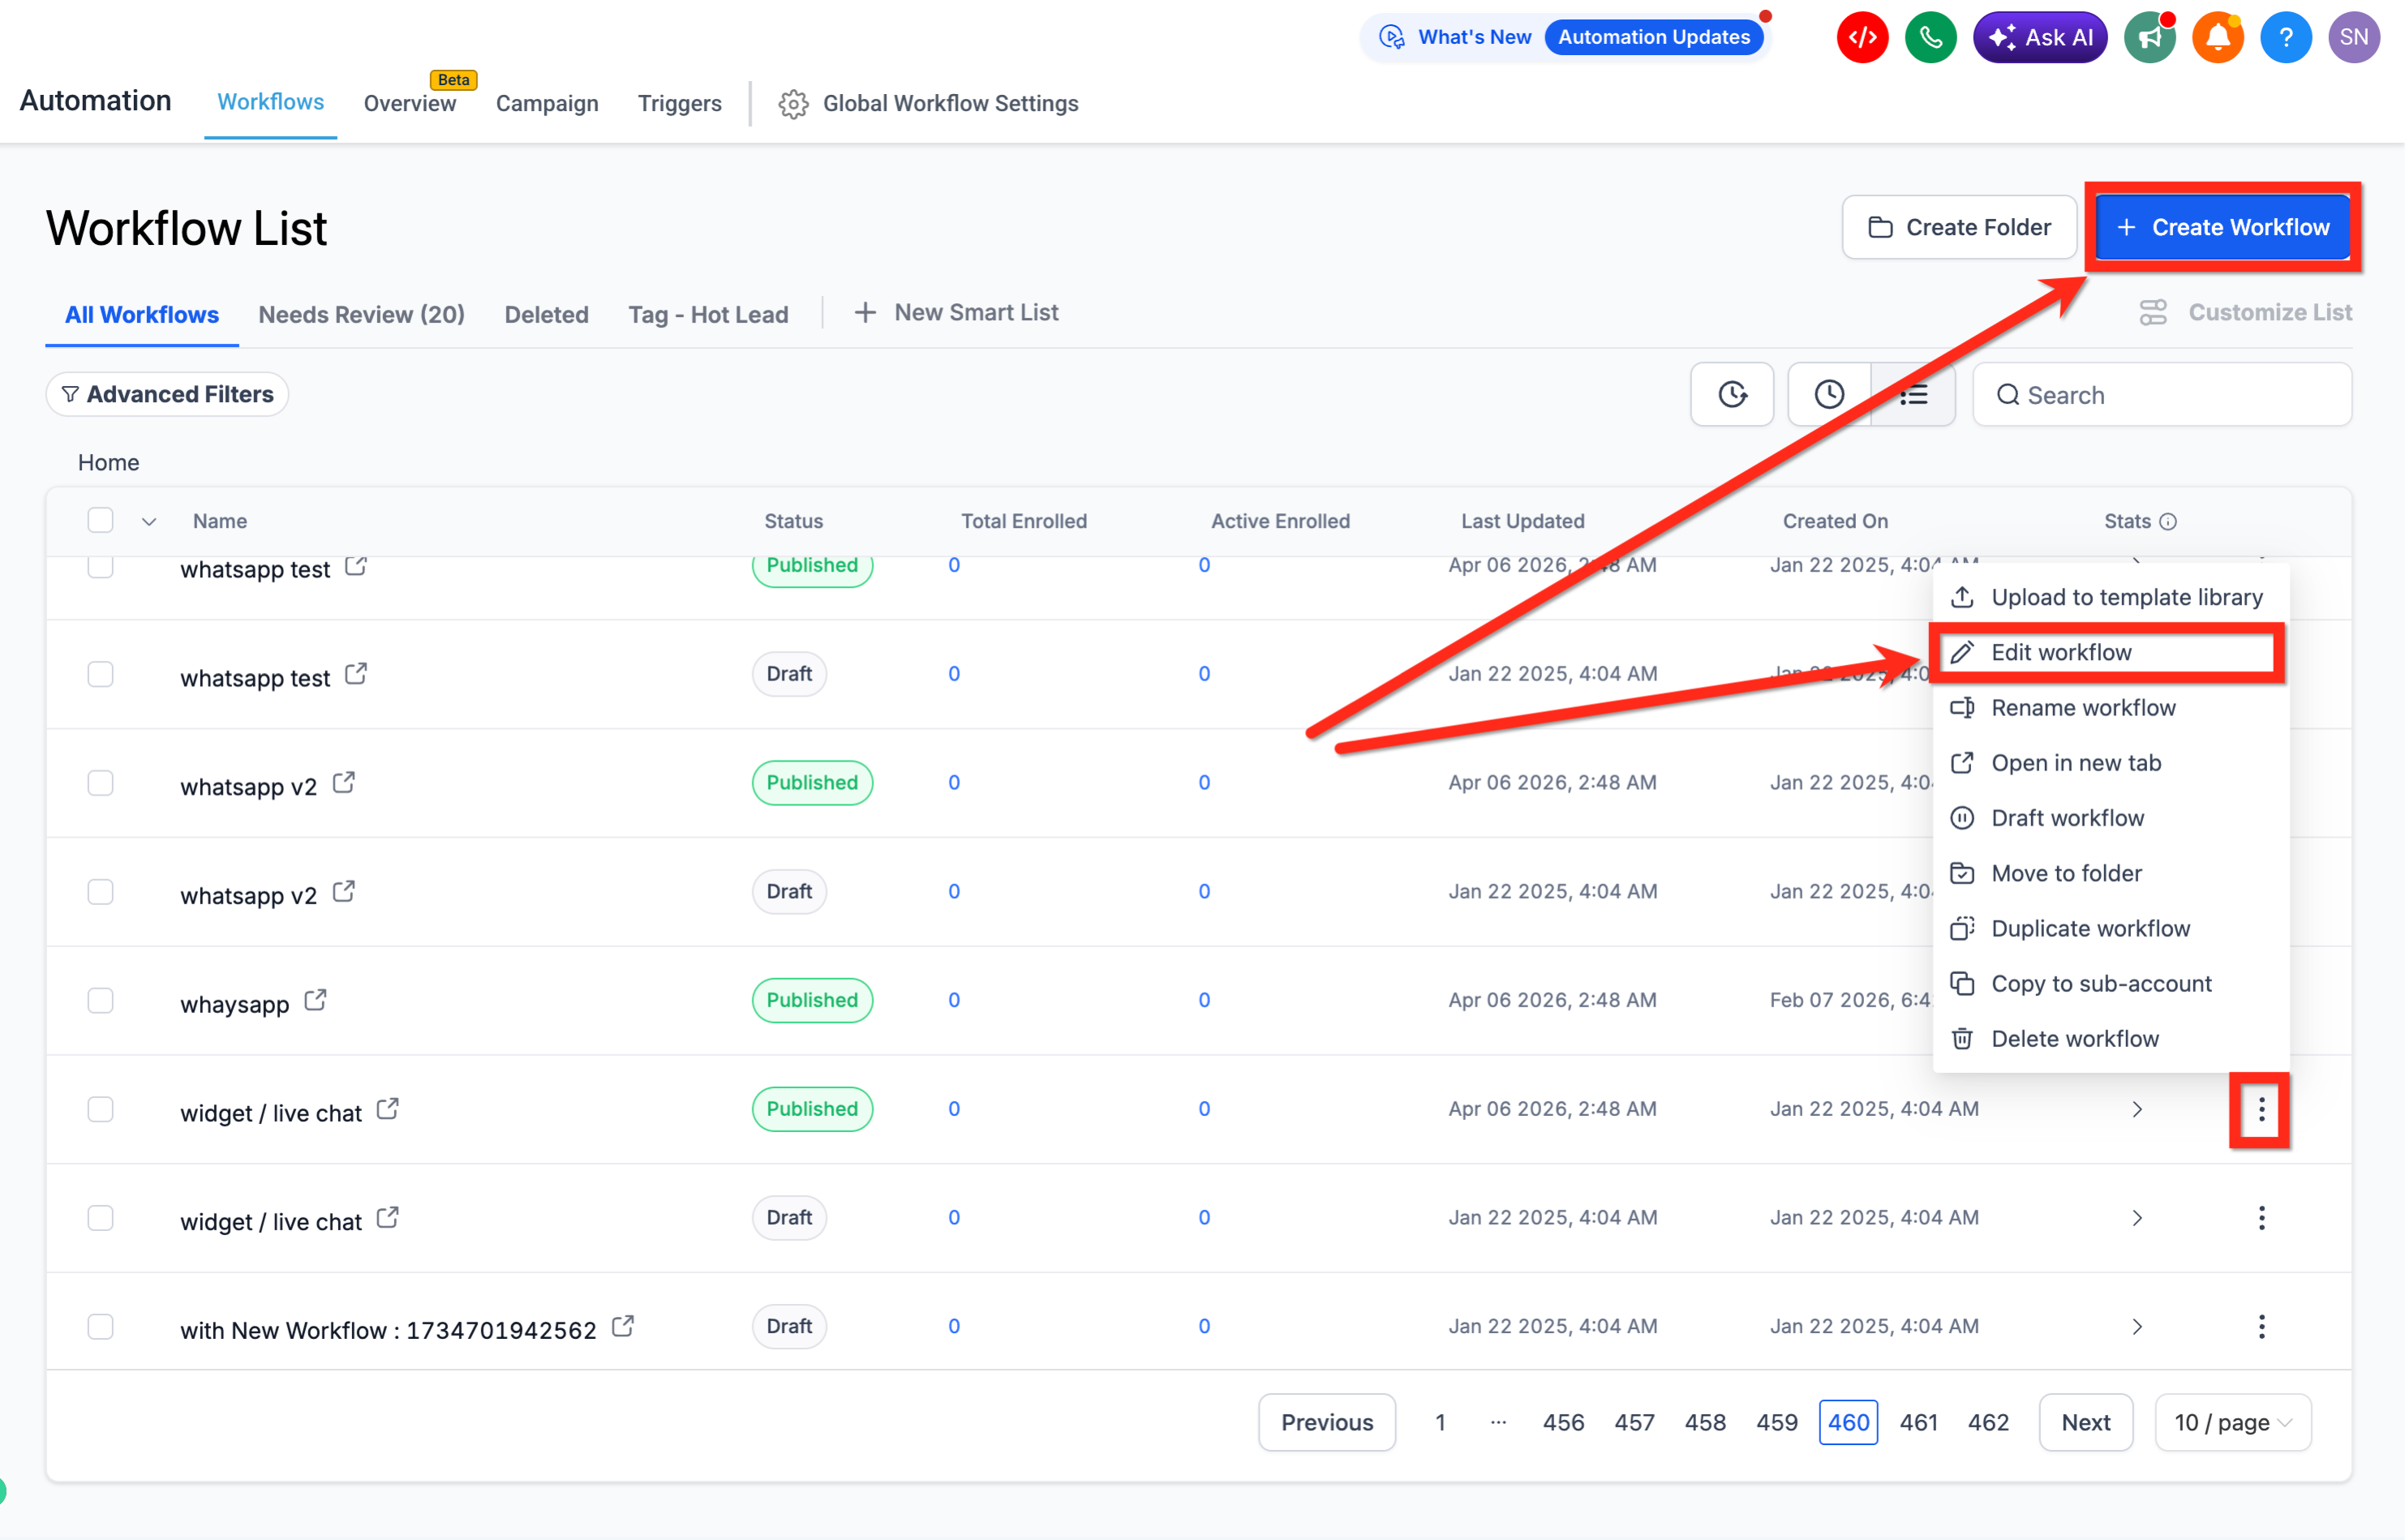
- Go to Automations > Workflows.

- Create a new workflow or edit an existing one.
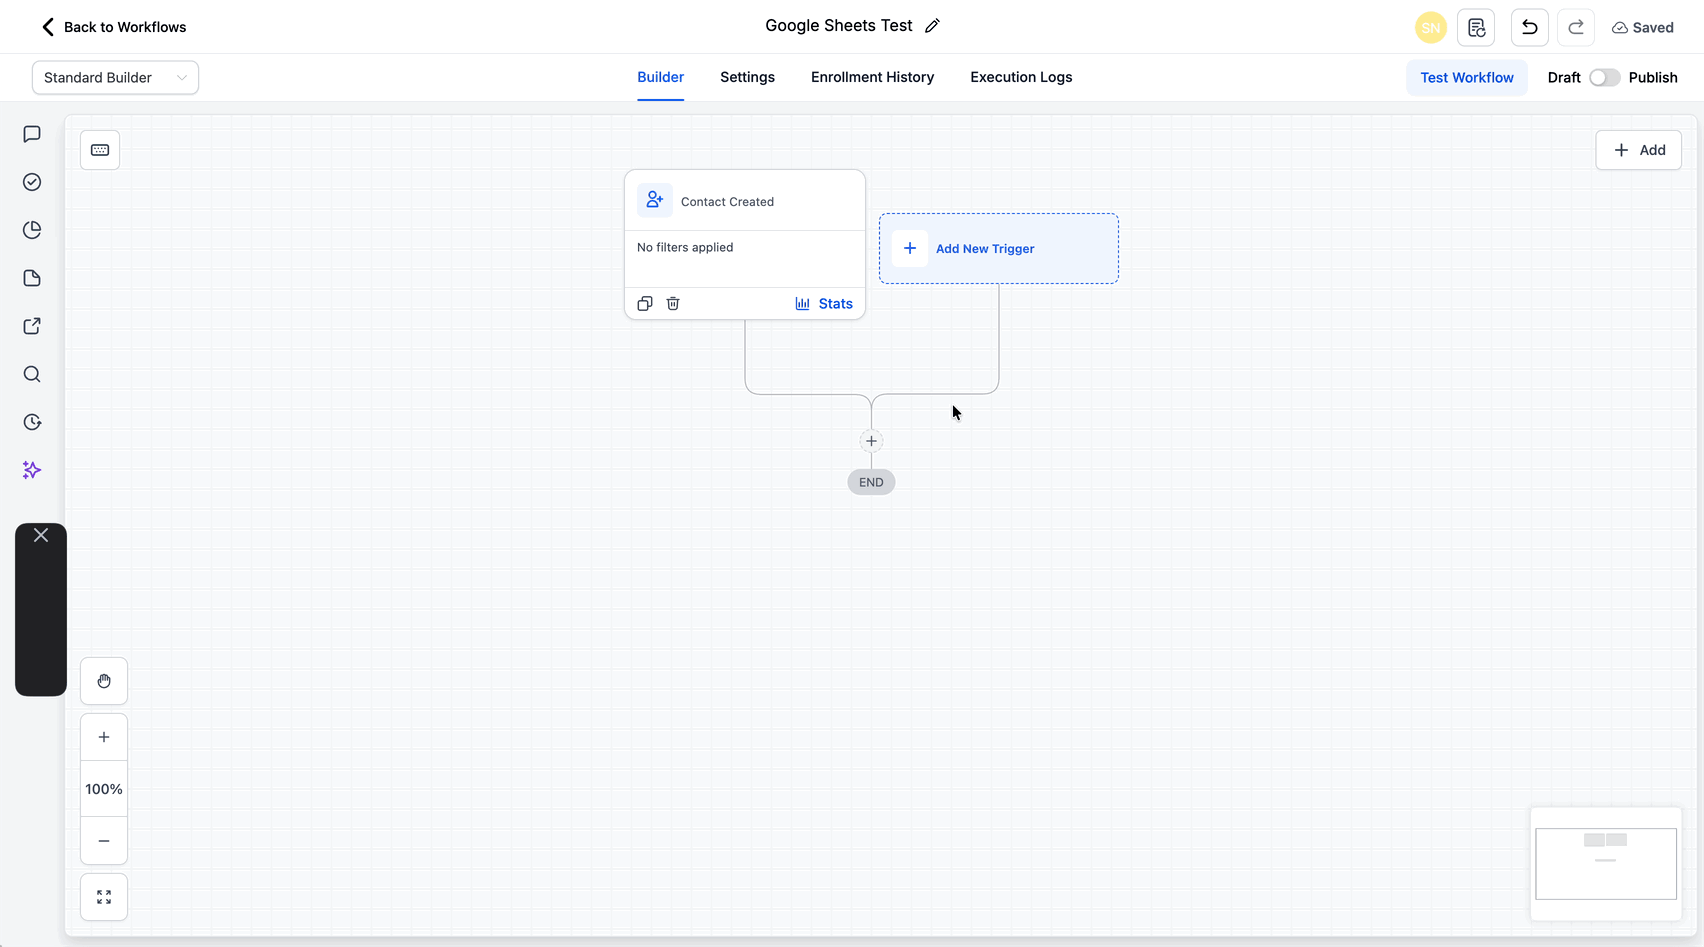
- Add a relevant trigger (for example: Contact Created, Form Submitted, etc.).
- Click the + button to add an Action.
- Search for Google Sheets and select it.
- Connect your location’s Google account.

- From the Action dropdown, select Create Multiple Spreadsheet Row(s).
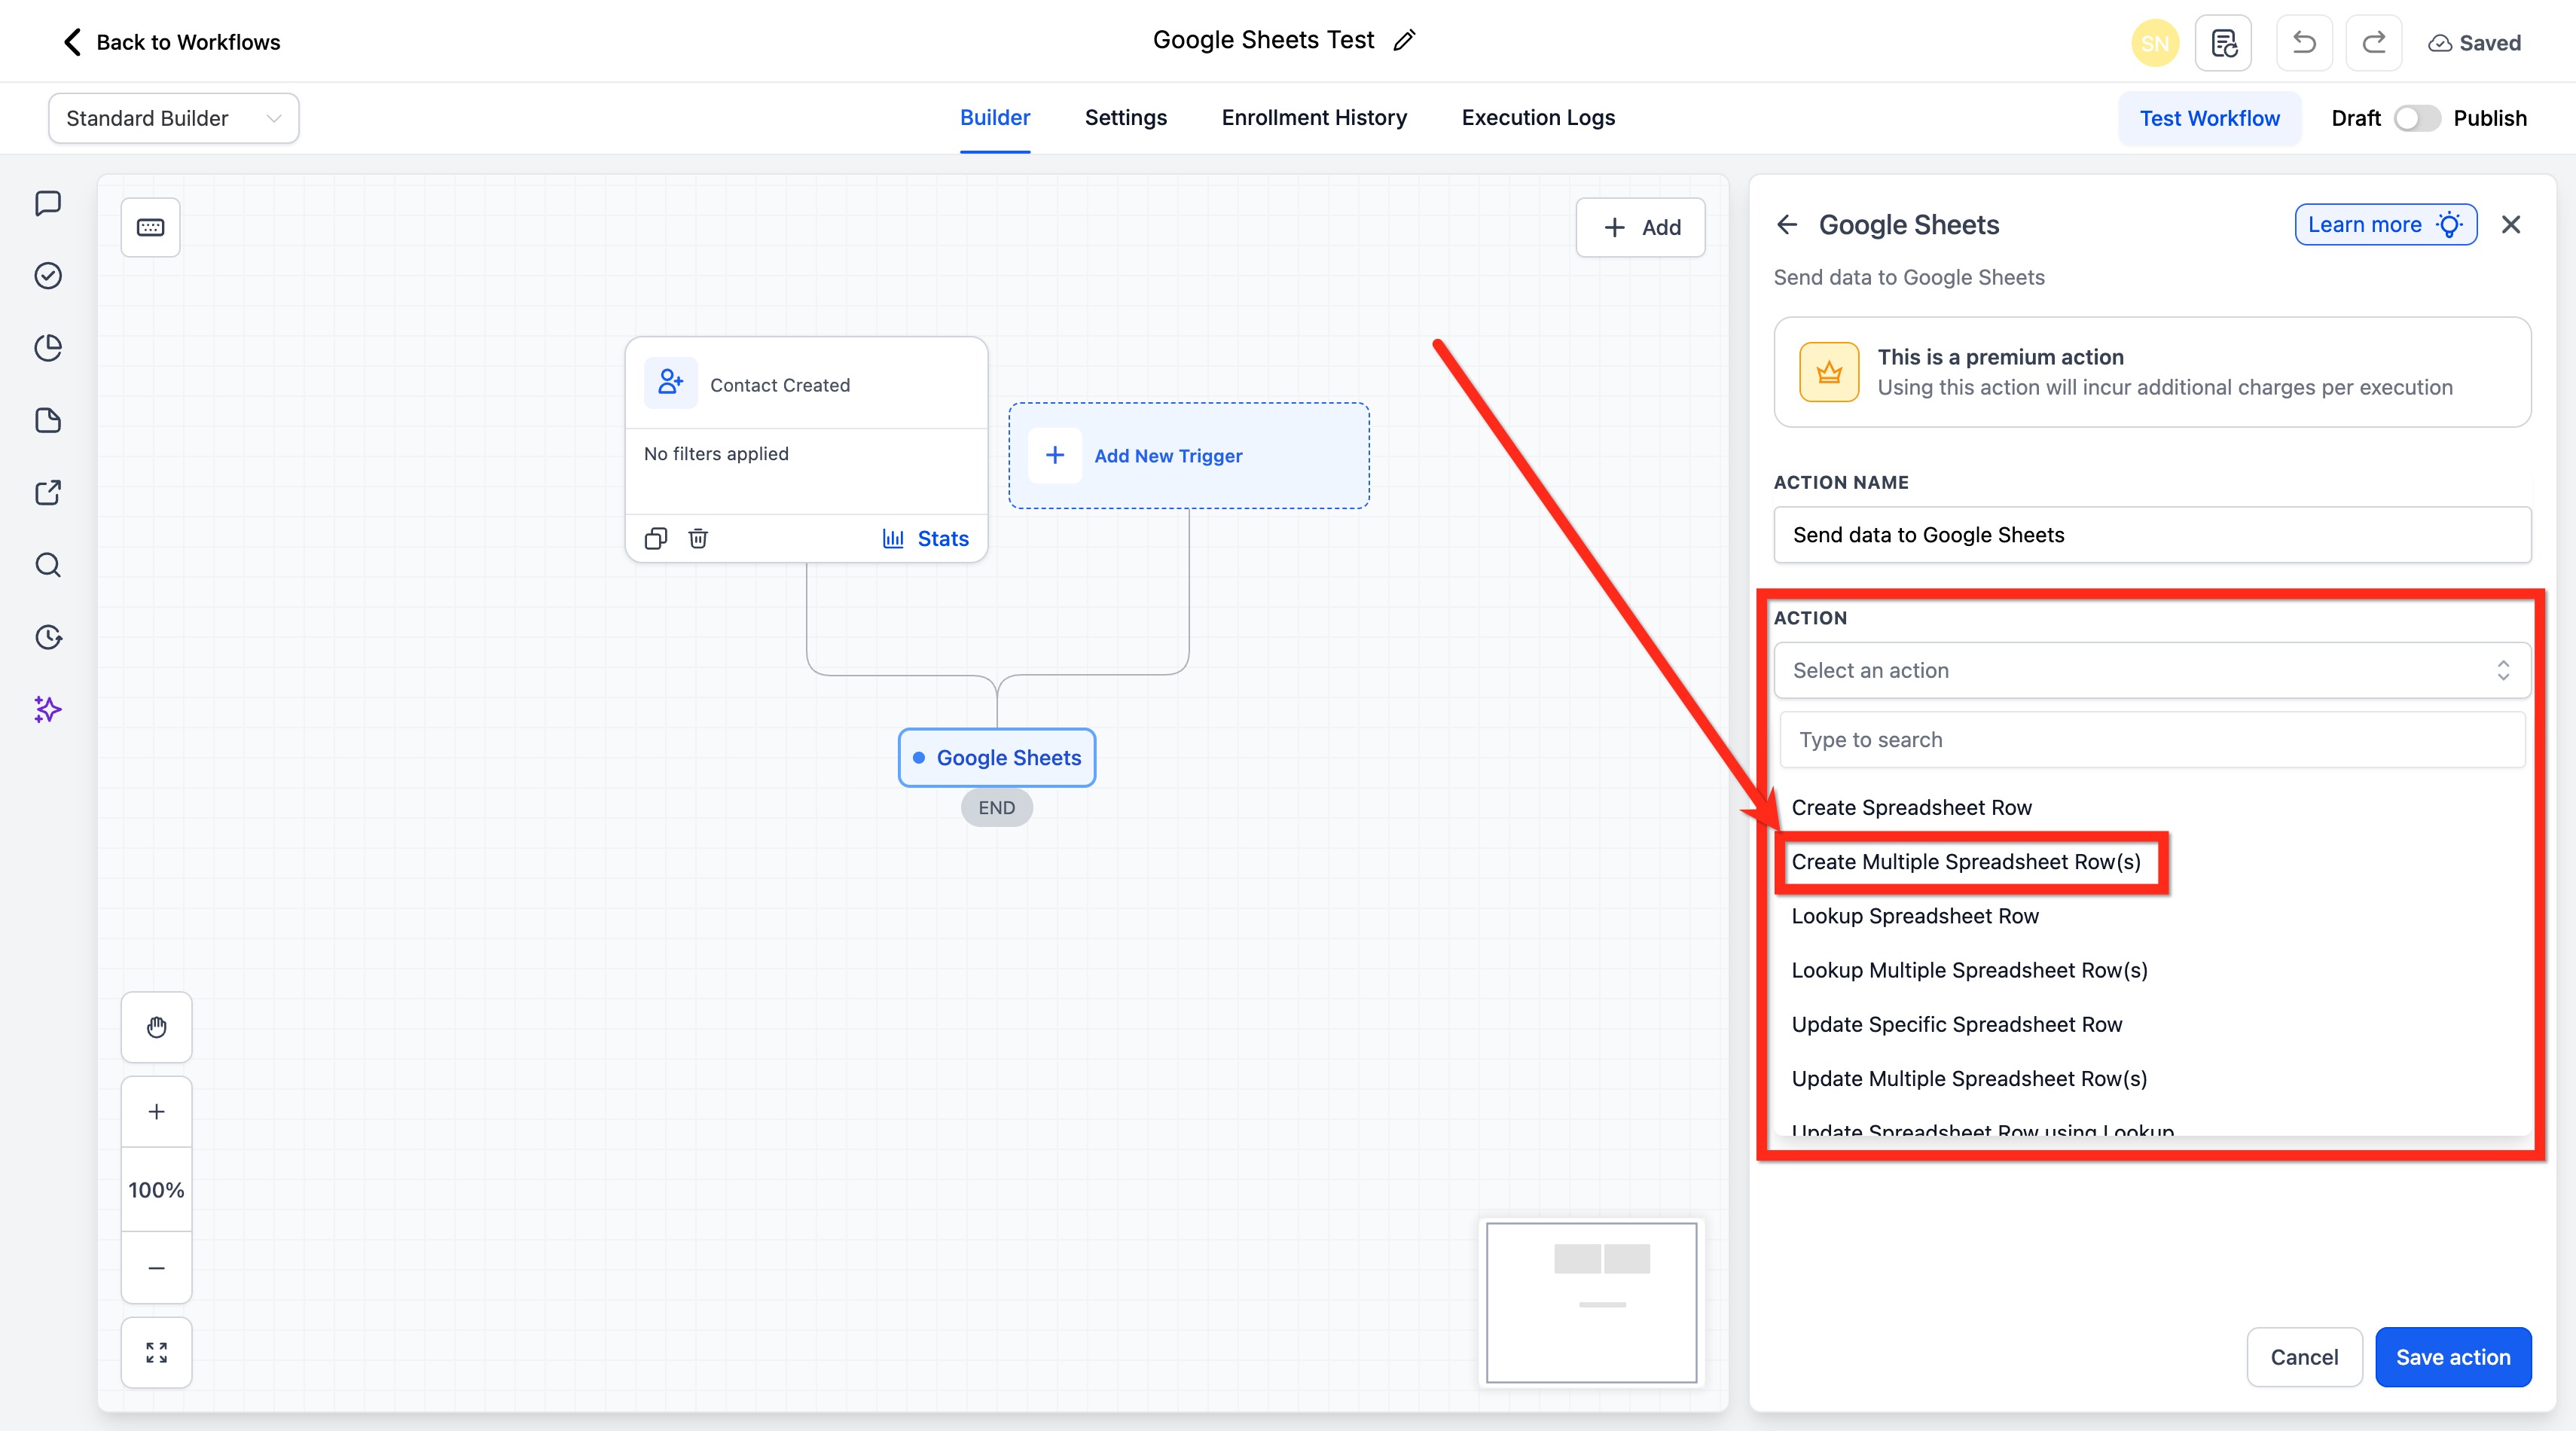
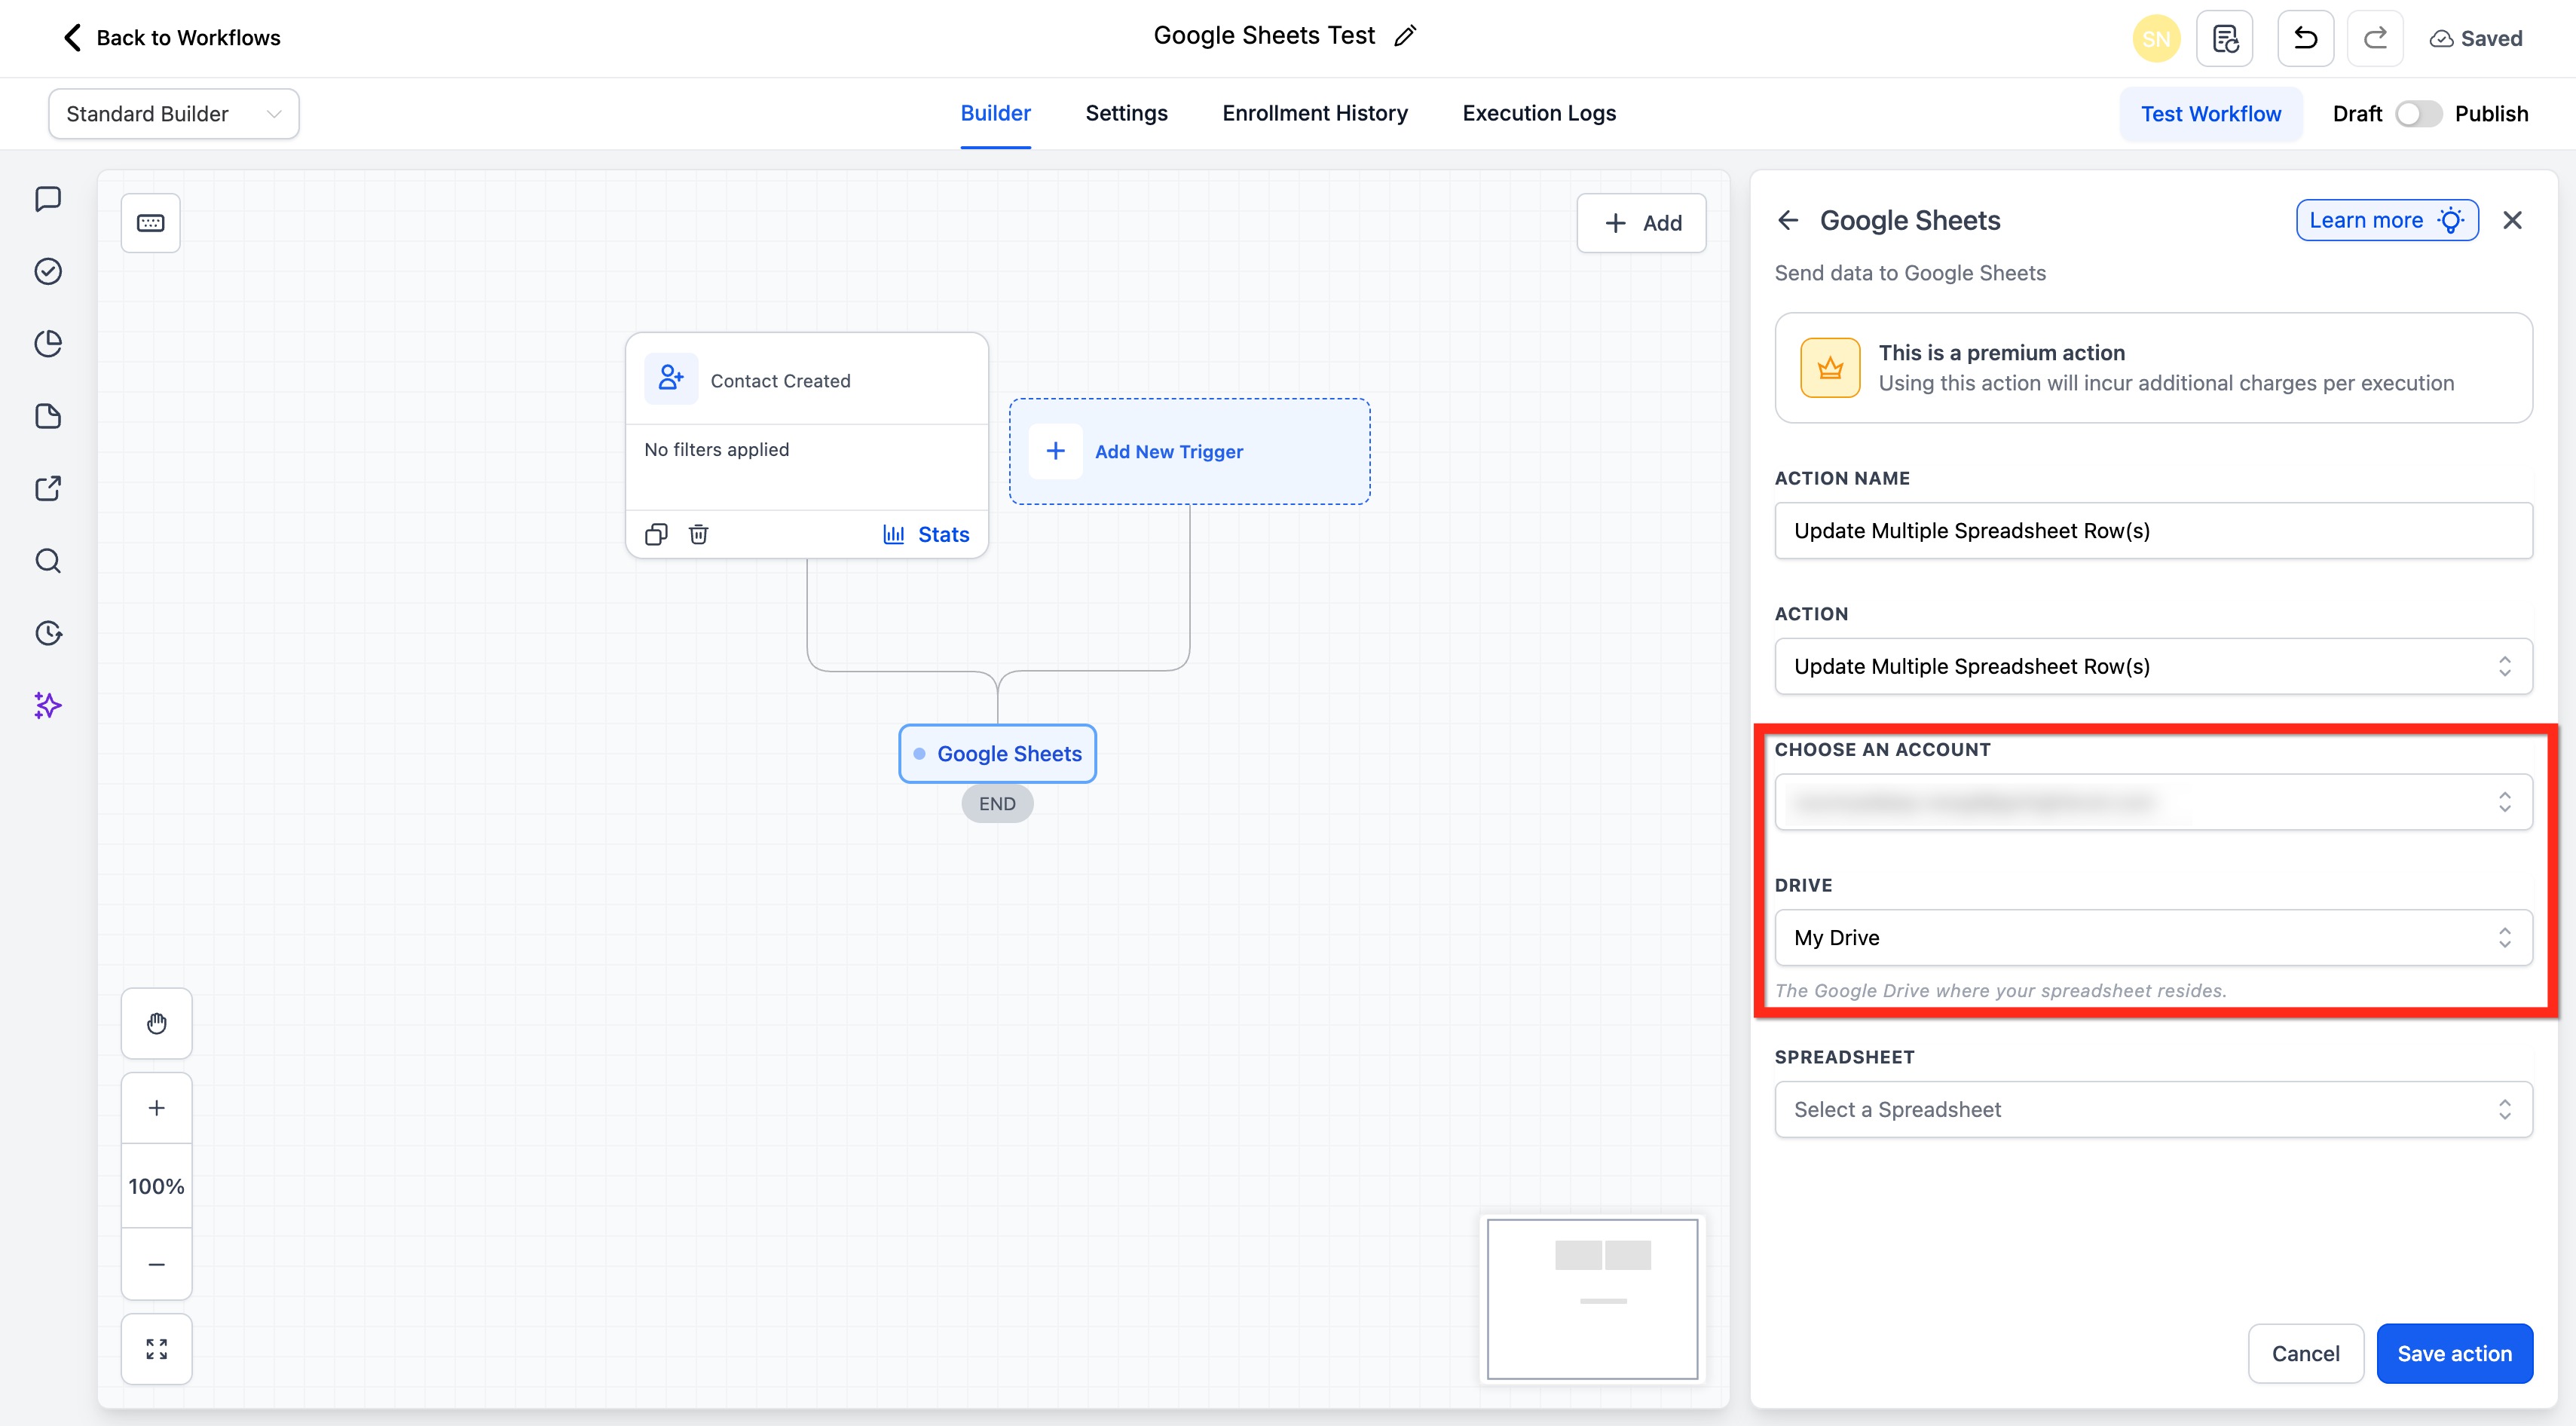
- Select the connected Google account you want to use.
- Select the Drive where the spreadsheet is stored.
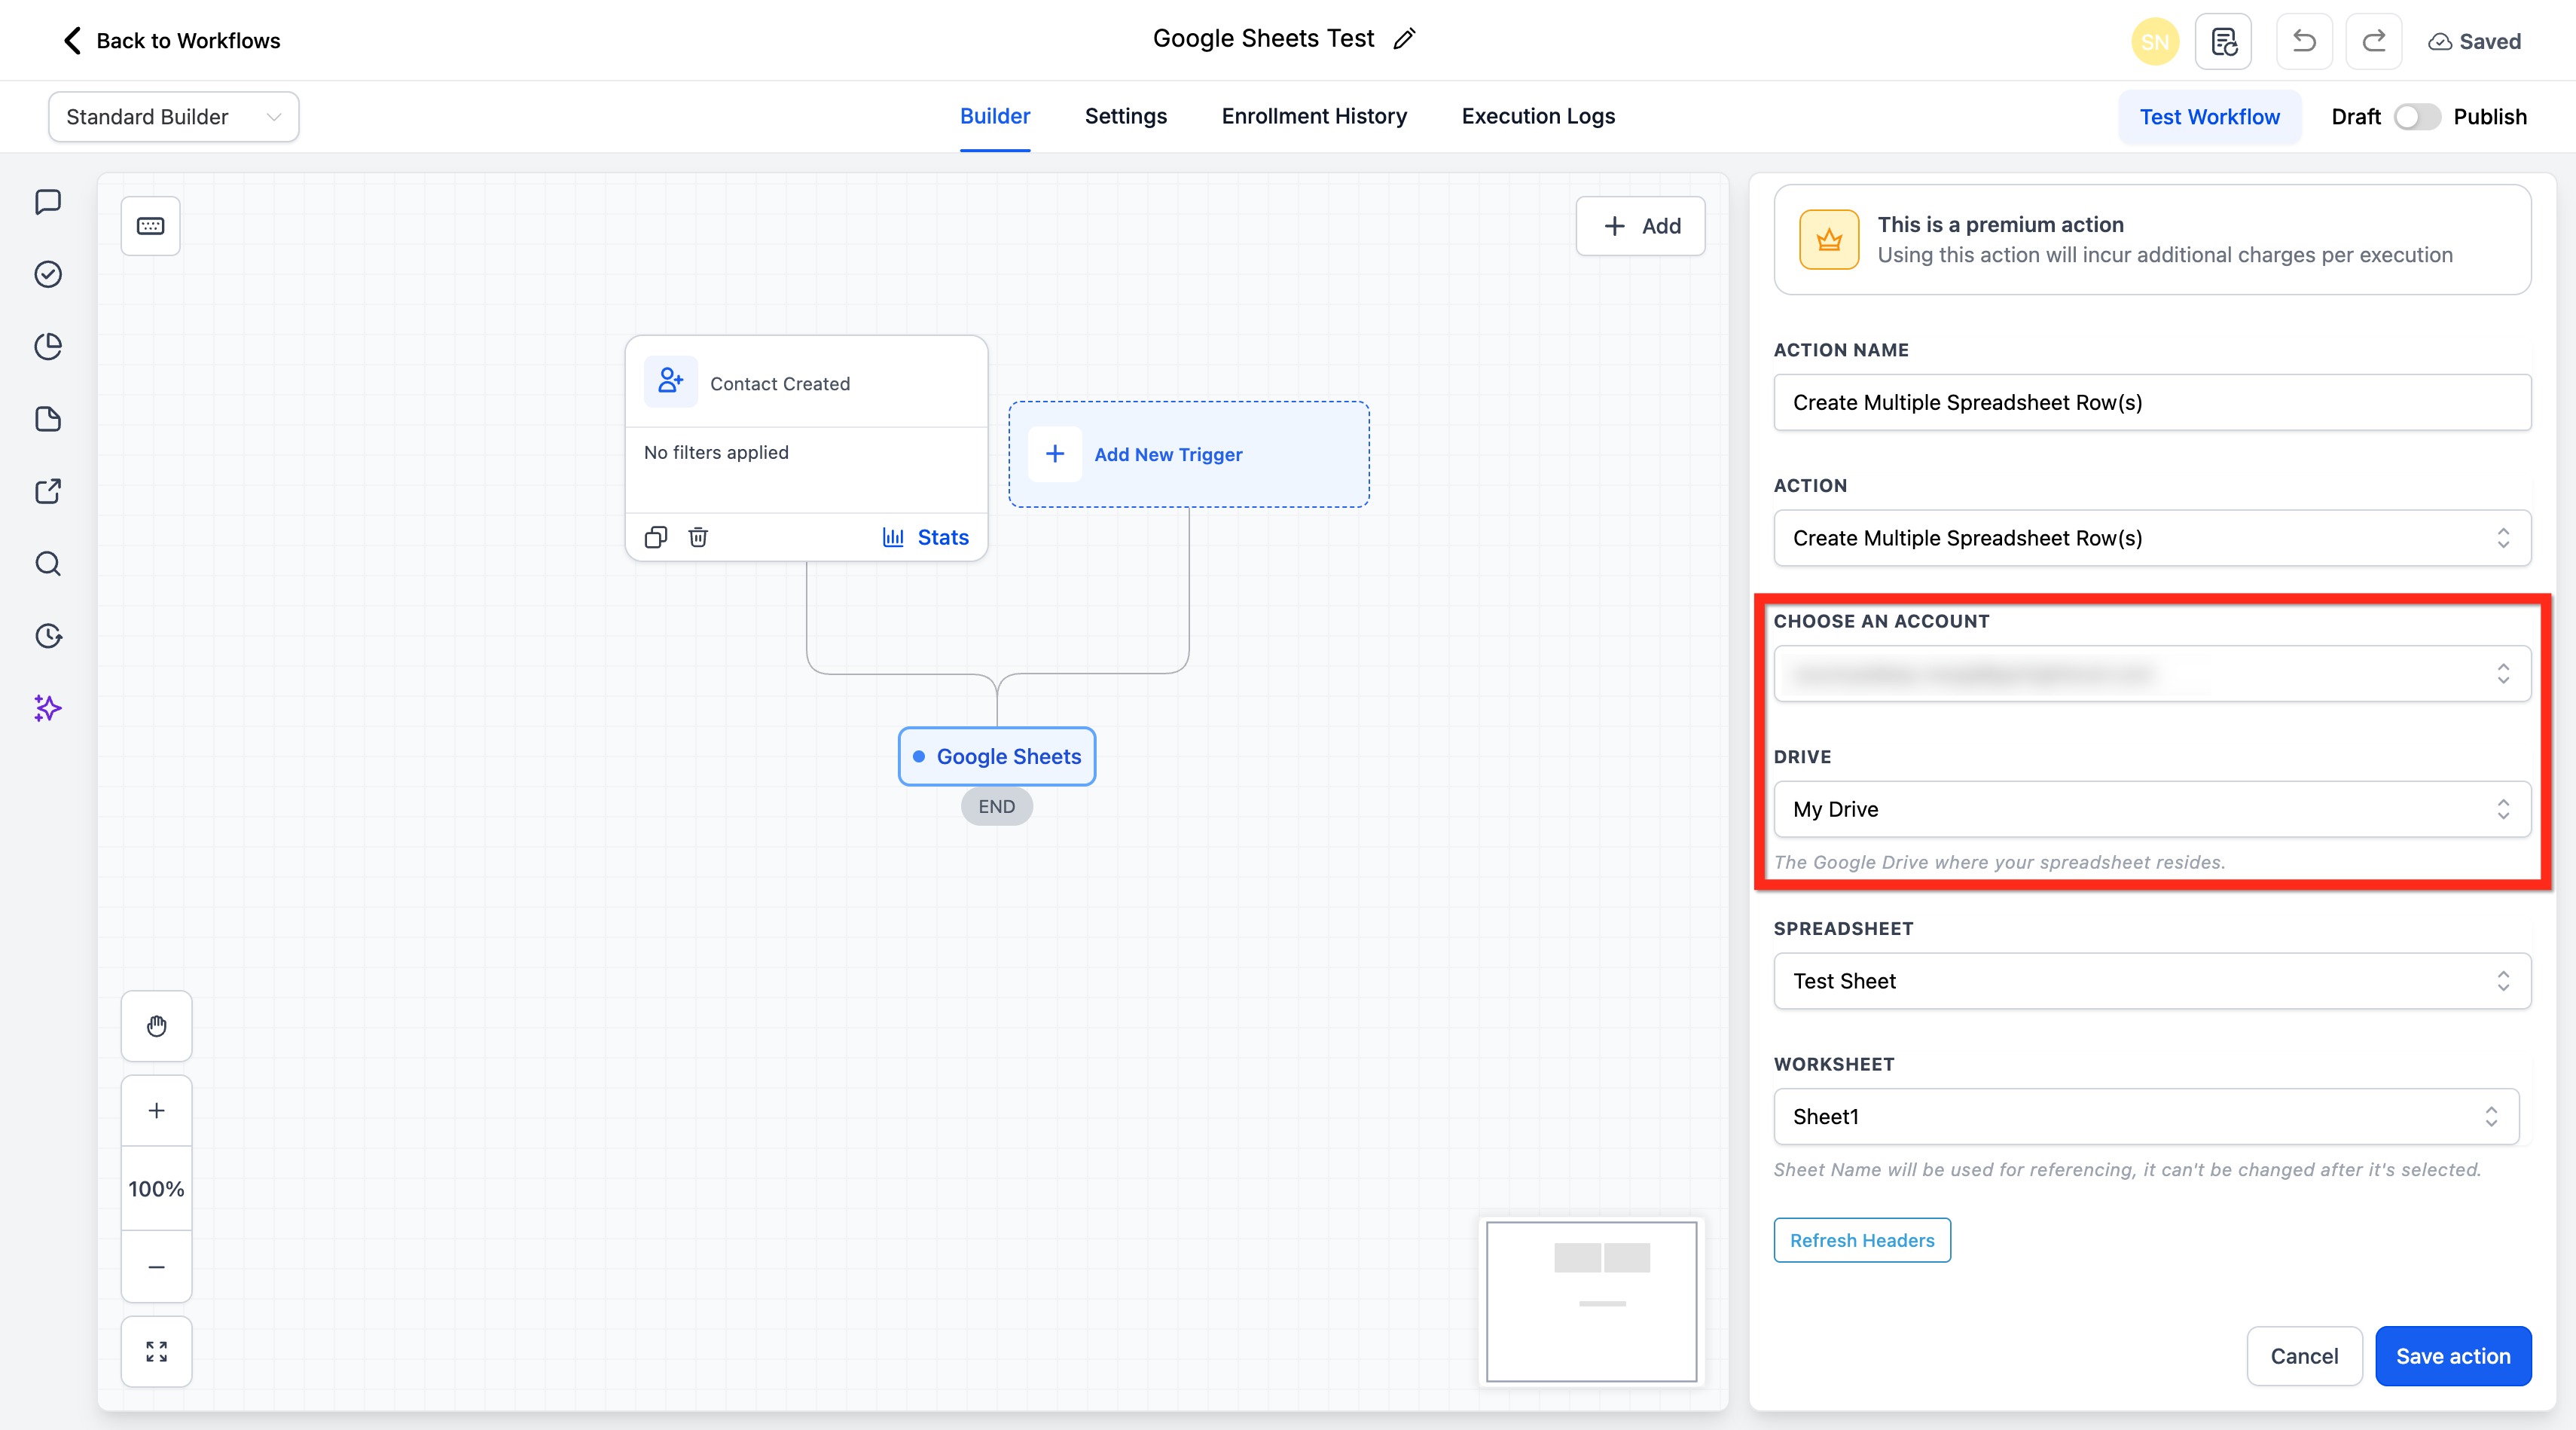
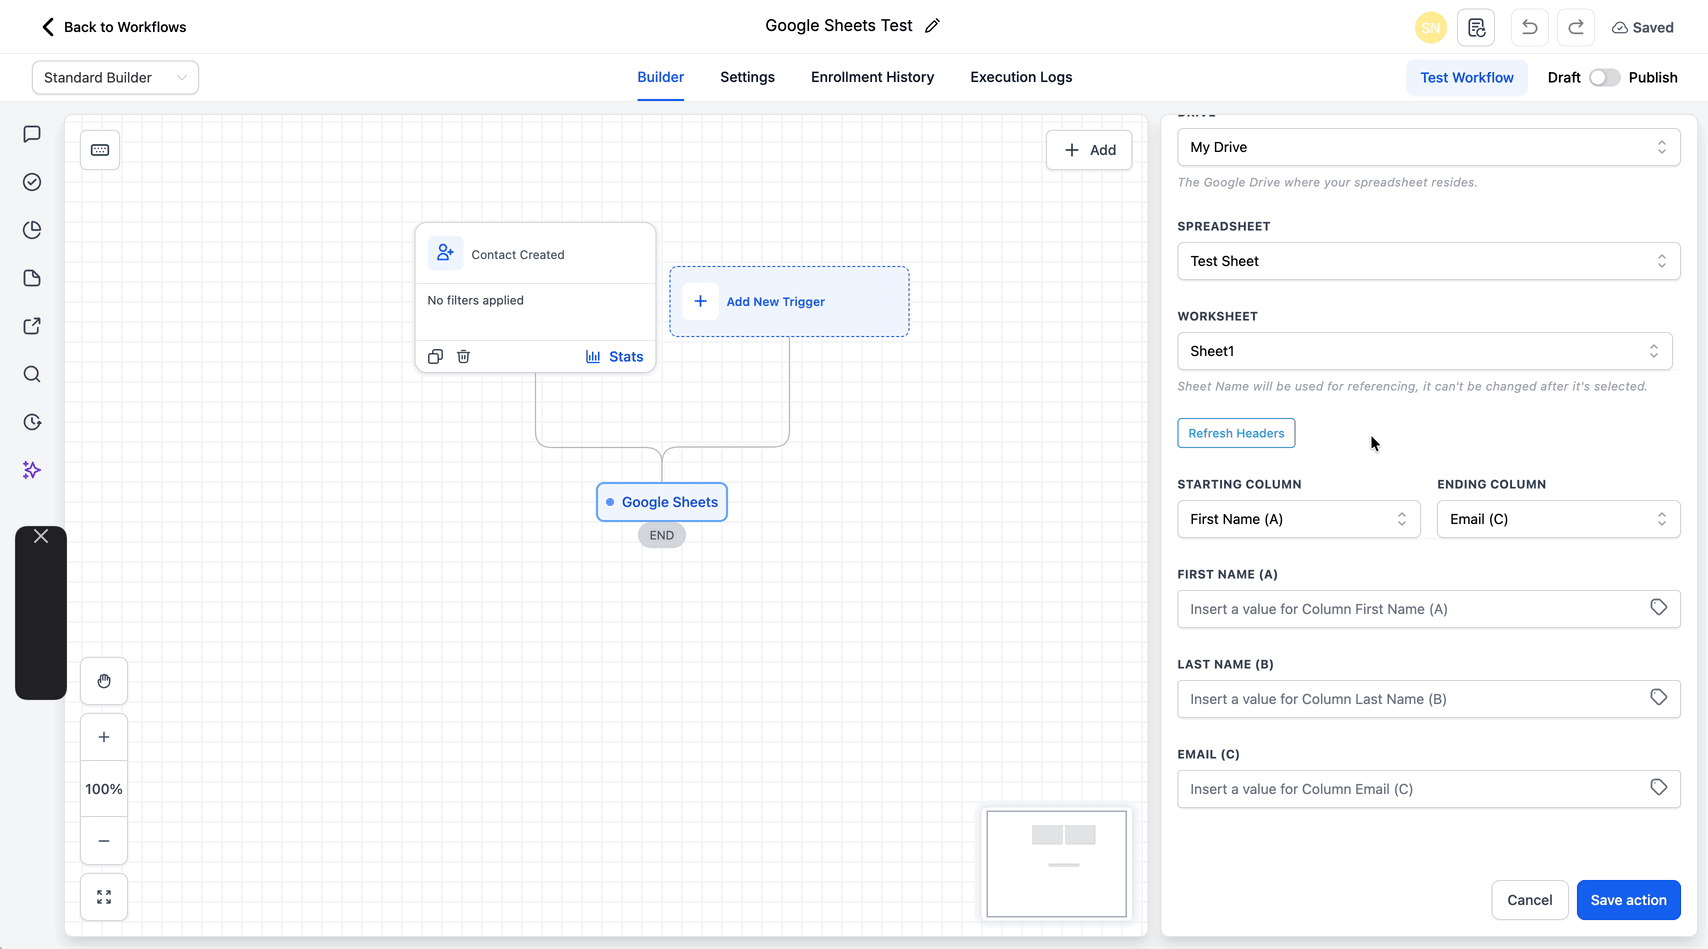
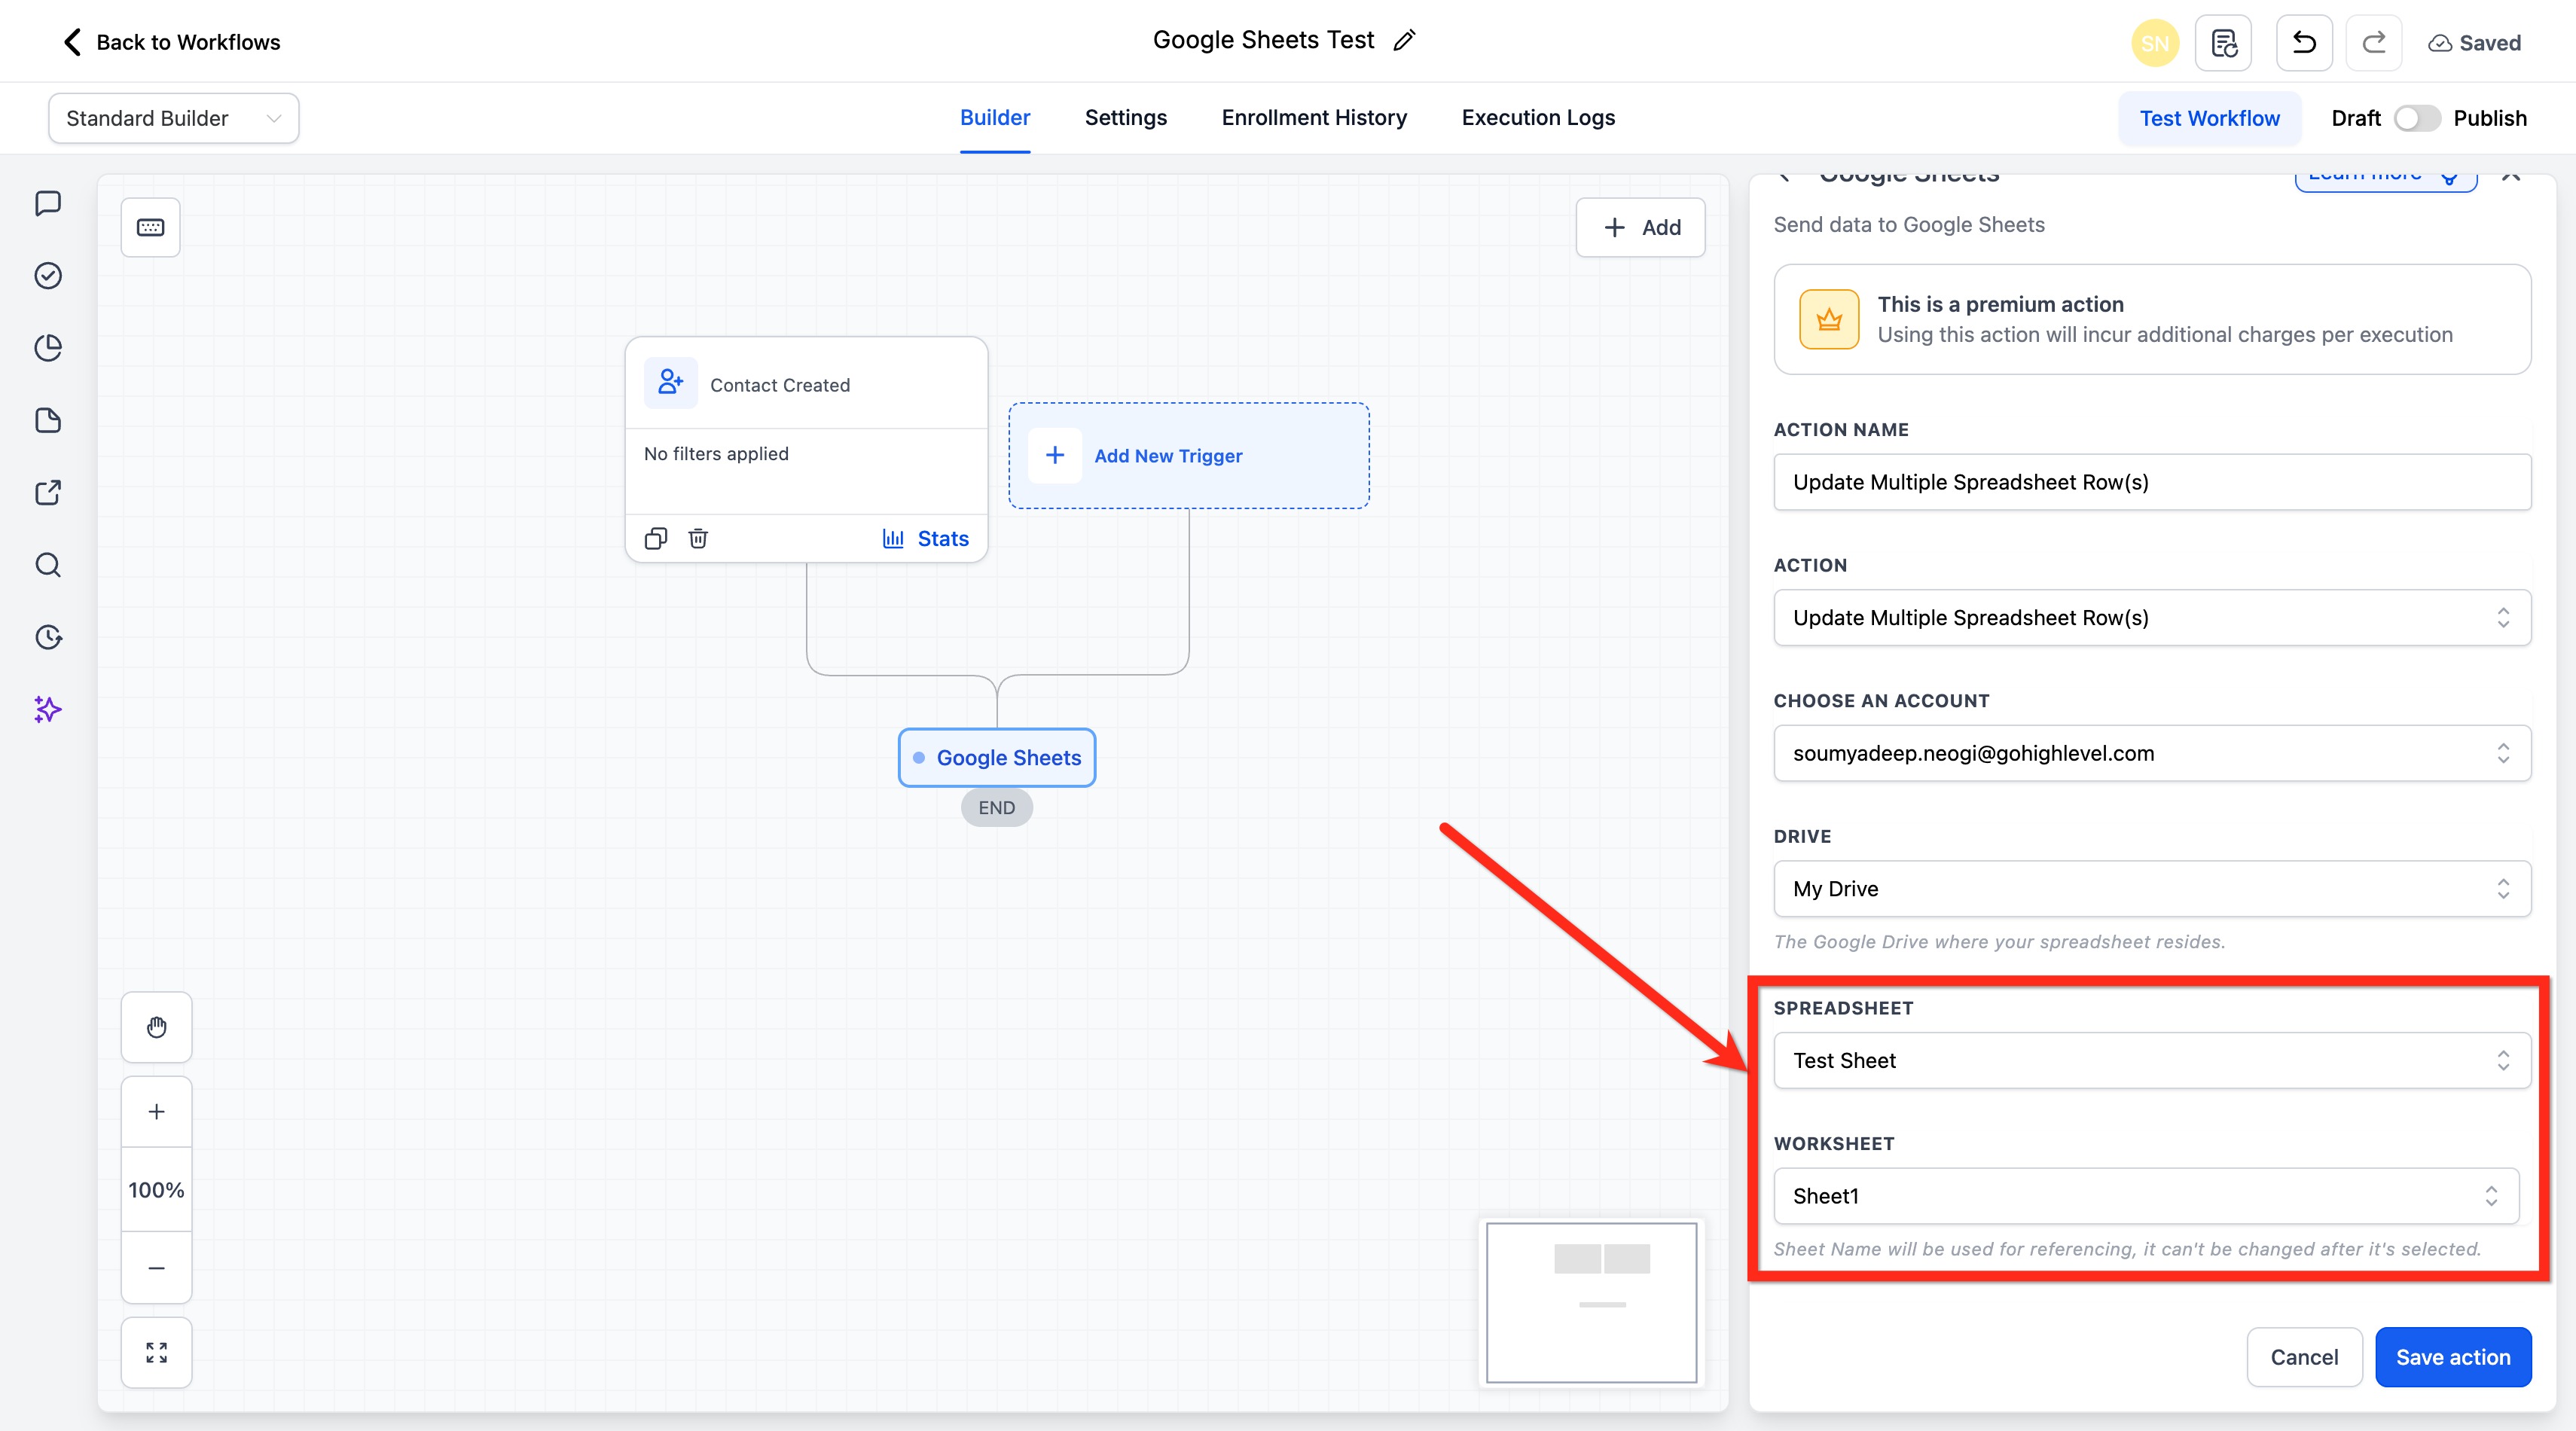
- Select the Spreadsheet and the Worksheet (tab).
- (Optional) Click Refresh Headers to fetch the latest header values from the sheet so mapping stays accurate.
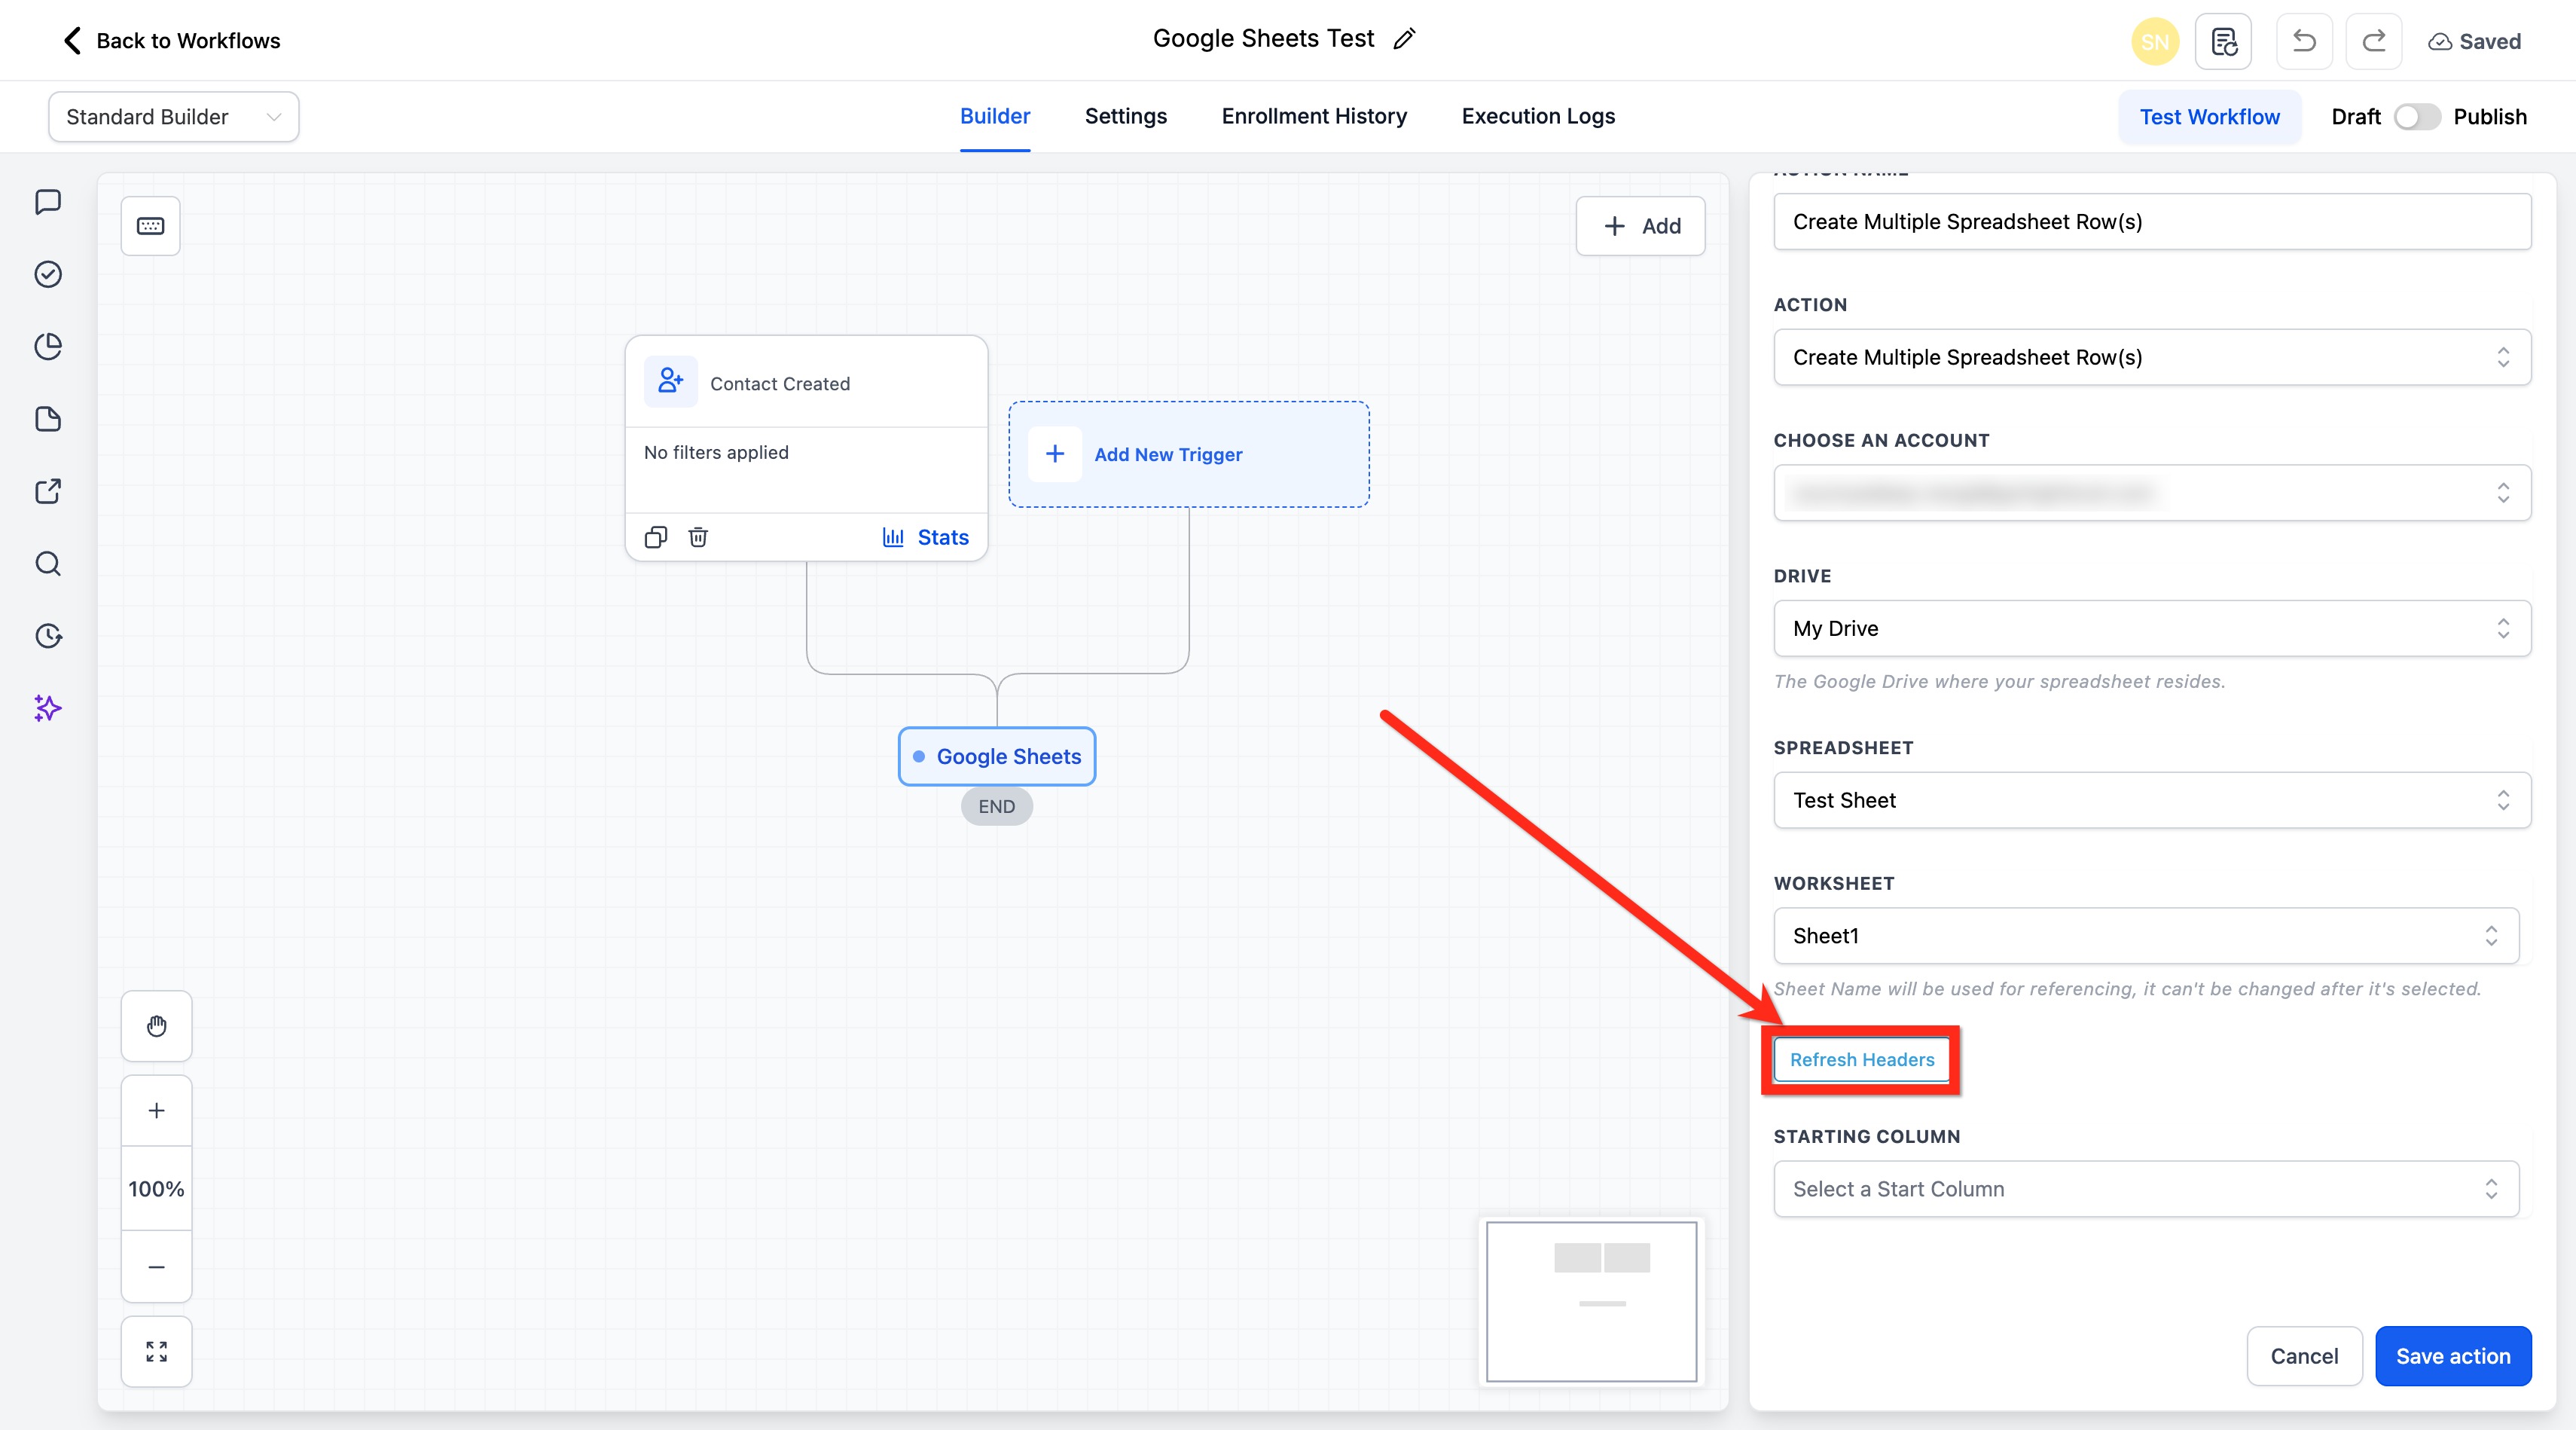
- Select Starting Column and Ending Column to define the column range available for mapping. The first row is treated as the header row and columns are labeled using those header values.
- Click Save Action.
Best use cases
- Logging repeated workflow outputs into a spreadsheet.
- Recording grouped entries from a single automation.
- Saving multiple related data points for tracking or reporting.
How to Use the Action to Update Multiple Spreadsheet Row(s)
Update Multiple Spreadsheet Row(s) is useful when spreadsheet rows already exist and the workflow needs to modify values within a selected row range. This helps maintain accurate records without creating duplicate entries.
- Go to Automations > Workflows.
- Create a new workflow or edit an existing one.

- Add a relevant trigger (for example: Contact Created, Form Submitted, etc.).

- Click the + button to add an Action.
- Search for Google Sheets and select it.
- Connect your location’s Google account.
- From the Action dropdown, select Update Multiple Spreadsheet Row(s).

- Select the connected Google account you want to use.
- Select the Drive where the spreadsheet is stored.
- Select the Spreadsheet and the Worksheet (tab).
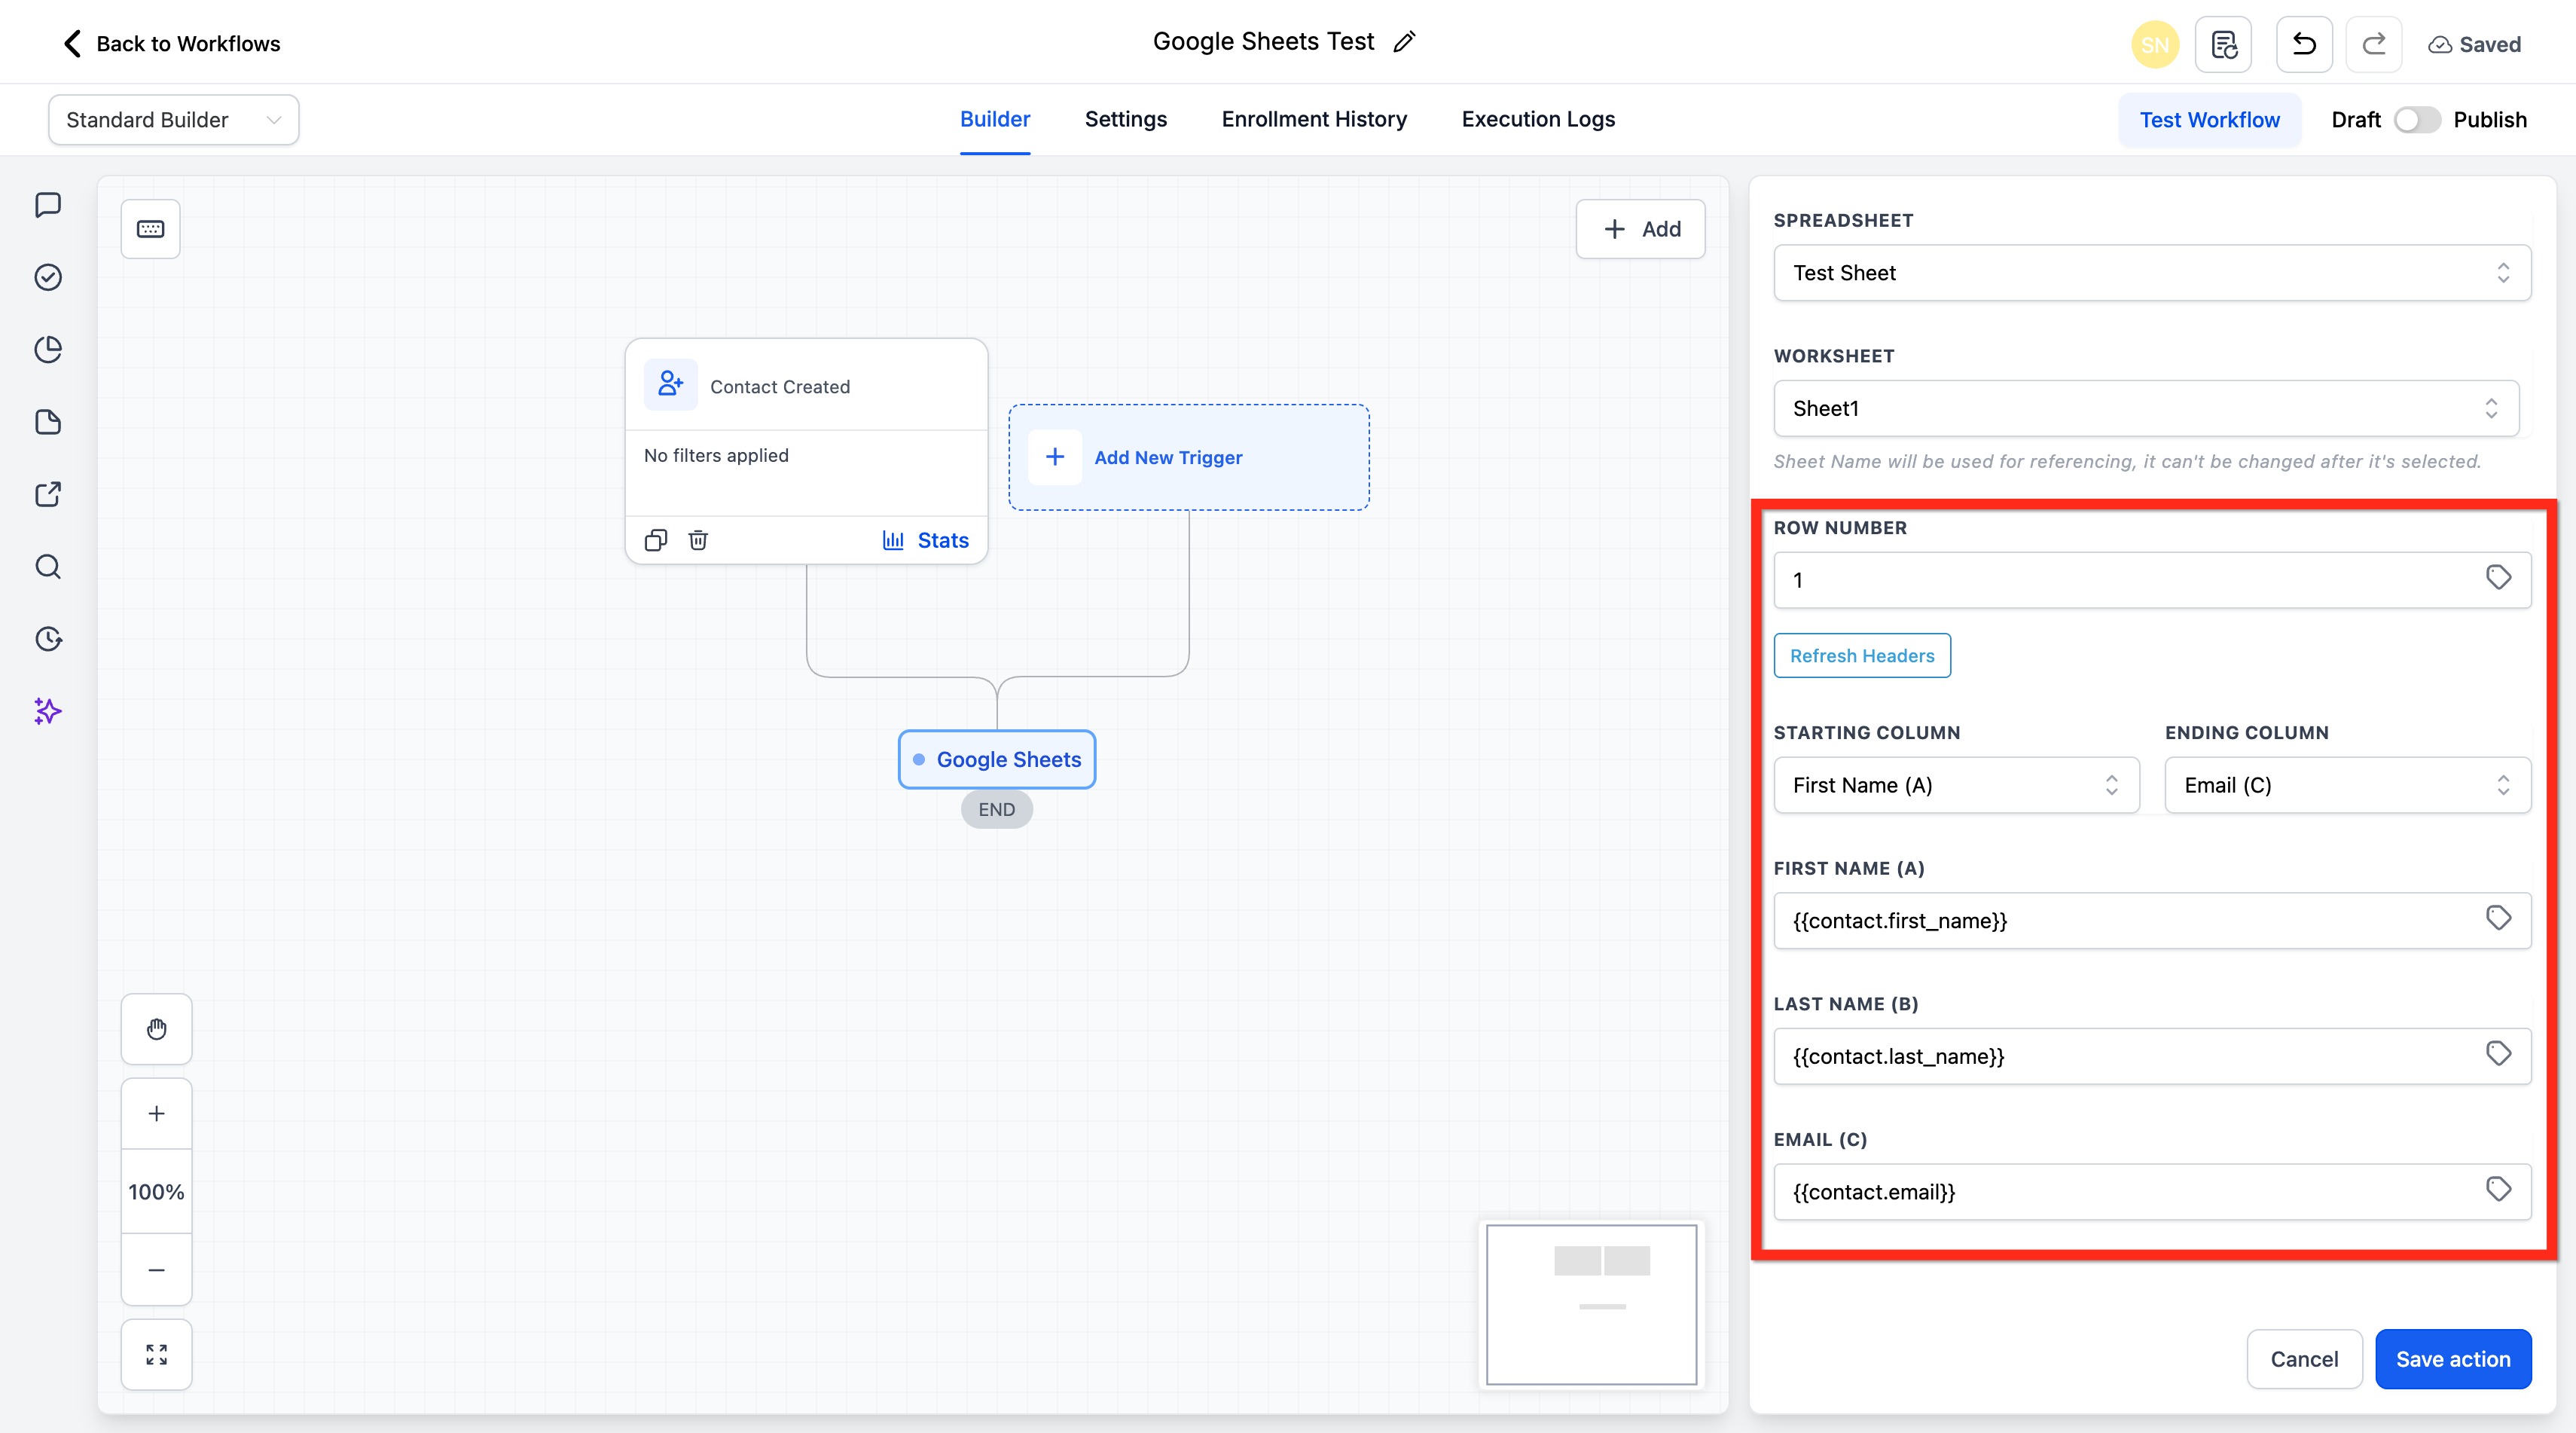
- Enter the row number where you want the update to begin.
- Select Starting Column and Ending Column to define the column range available for mapping (headers come from the first row).
- (Optional) Click Refresh Headers if you recently changed column names or order.
- Click Save Action.
When to use this option
- The spreadsheet row already exists.
- You need to replace or refresh values in current records.
- You want to avoid adding duplicate rows for the same data set.
Frequently asked questions
Q: What is the difference between Create Multiple Spreadsheet Row(s) and Update Multiple Spreadsheet Row(s)?
Create Multiple Spreadsheet Row(s) adds new spreadsheet entries. Update Multiple Spreadsheet Row(s) changes values in rows that already exist.
Q: Do I need headers in my Google Sheet?
Yes. Clear headers help the system recognize available columns for mapping and reduce setup errors.
Q: Why should I refresh headers?
Refreshing headers updates the available column names inside the workflow action after spreadsheet changes.
Q: What happens if I choose the wrong worksheet tab?
The workflow may write data to the wrong location or fail to map the expected columns correctly.
Q: Can I limit which columns are used?
Yes. The Starting Column and Ending Column fields define the column range available for mapping.
Q:When should I use multiple-row actions instead of a standard row action?
Use multiple-row actions when your workflow needs to create or update several spreadsheet rows as part of the same process.
Q: Can I update existing rows without creating duplicates?
Yes. Use Update Multiple Spreadsheet Row(s) when the target rows already exist and only the values need to be changed.
Q: Why is my new column not showing in the workflow action?
Click Refresh Headers after adding or renaming spreadsheet columns so the action pulls the latest sheet structure.