
Connect Jira Cloud to Workflows to automate issue management and customer follow-ups. Jira events can start workflows, while workflow actions can find, create, update, and manage Jira issues. This guide covers setup, available triggers and actions, contact matching, and troubleshooting.
TABLE OF CONTENTS
- What Is the Jira Integration?
- Key Benefits of the Jira Integration
- Prerequisites
- Connecting Your Jira Account
- Jira Triggers
- Jira Actions
- Matching Jira Issues to Contacts
- Common Jira Workflow Examples
- How to Set Up a Workflow with Jira
- Frequently Asked Questions
- Need Help?
What Is the Jira Integration?
The Jira integration connects Workflows with Jira Cloud. Jira triggers start automations when issues are created or updated, while Jira actions let workflows work with issues, users, projects, and sprints. Customer-specific messaging requires a matching contact.
Key Benefits of the Jira Integration
Linking Jira issue activity with workflows helps teams coordinate support, engineering, and customer communication without manually repeating each task.
- Two-Way Automation: React to Jira events and send supported updates to Jira.
- Timely Follow-Ups: Notify matched contacts when configured issue conditions are met.
- Less Duplicate Work: Find and link related issues using defined criteria.
- Issue Management: Create or update issues, add comments and attachments, track work, and manage watchers or sprints.
- Multi-Site Access: Choose among Jira Cloud Sites available to the connected account.
- Centralized Workflows: Combine CRM tasks, notifications, and Jira actions in one automation.
Prerequisites
Before connecting Jira, confirm that the accounts and records needed by your automation are accessible.
- Access to Automation → Workflows in your account.
- An Atlassian account, its email address, and access to the required Jira Cloud Site and resources.
- A shared reference, such as an email address, contact ID, or ticket ID, if Jira activity must identify a contact.
Connecting Your Jira Account
Authorize an Atlassian account once, then select that connection in supported Jira workflow steps.
- Open Automation → Workflows, create or open a workflow, and add a Jira trigger or action.
- Click Connect your account if no connection is available.
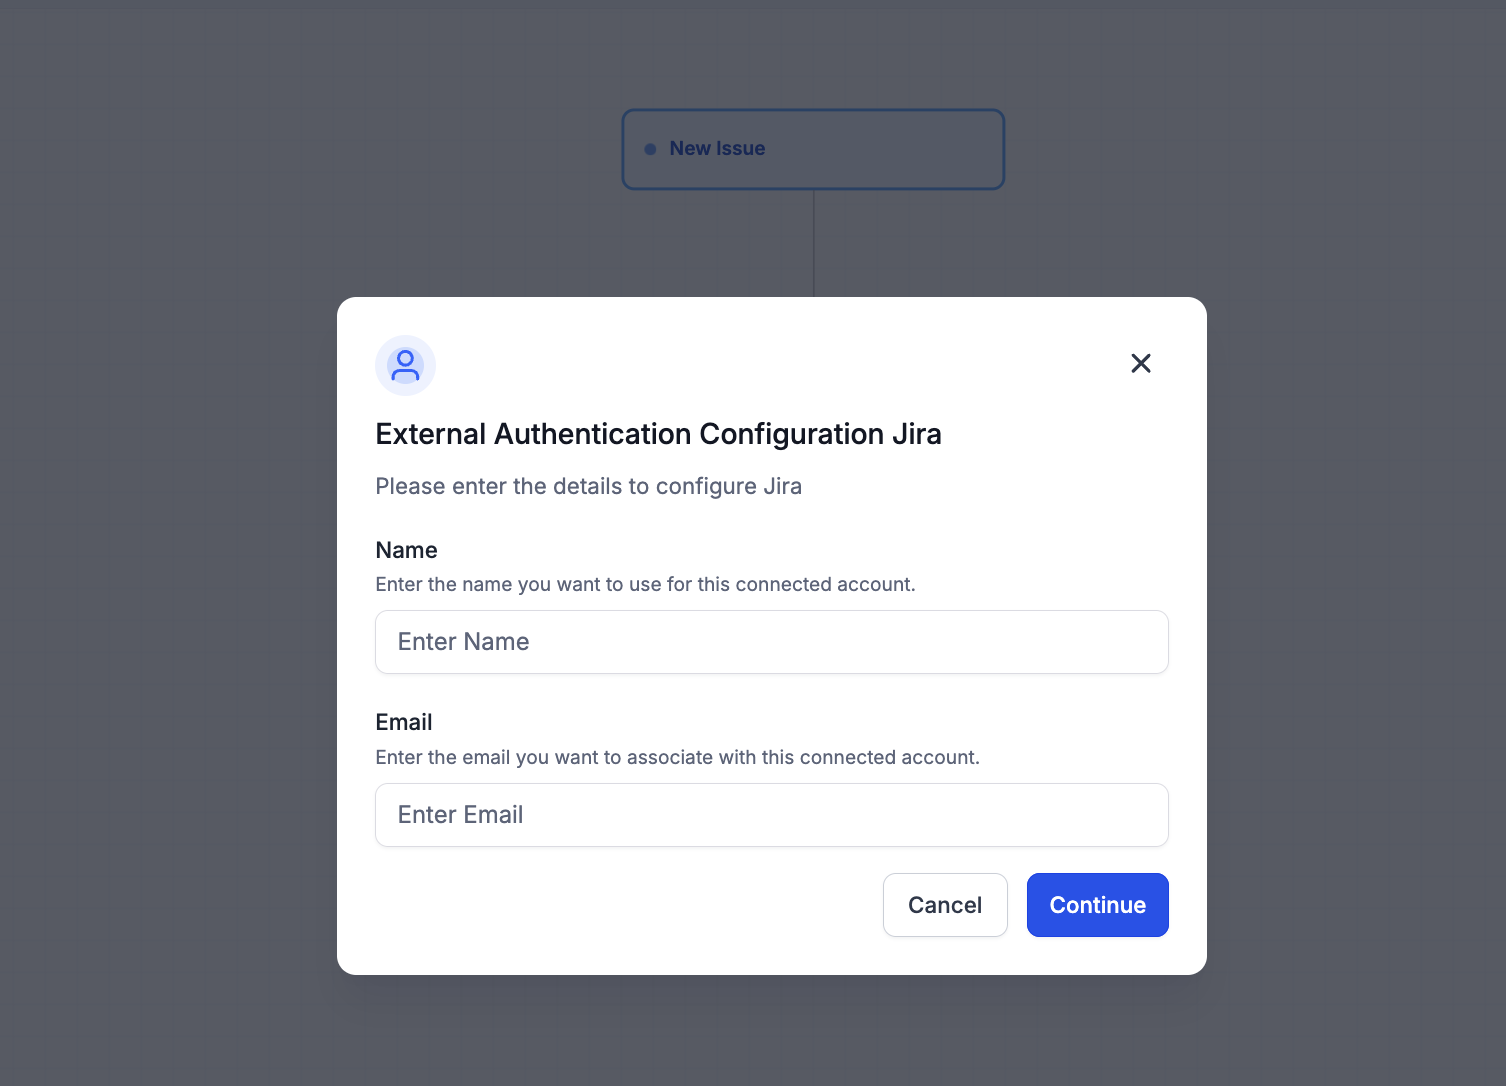
- Enter a connection Name and your Atlassian account Email in External Authentication Configuration.
- Click Continue and approve access in Atlassian.
- Select the authorized account and the appropriate Cloud Site where applicable.
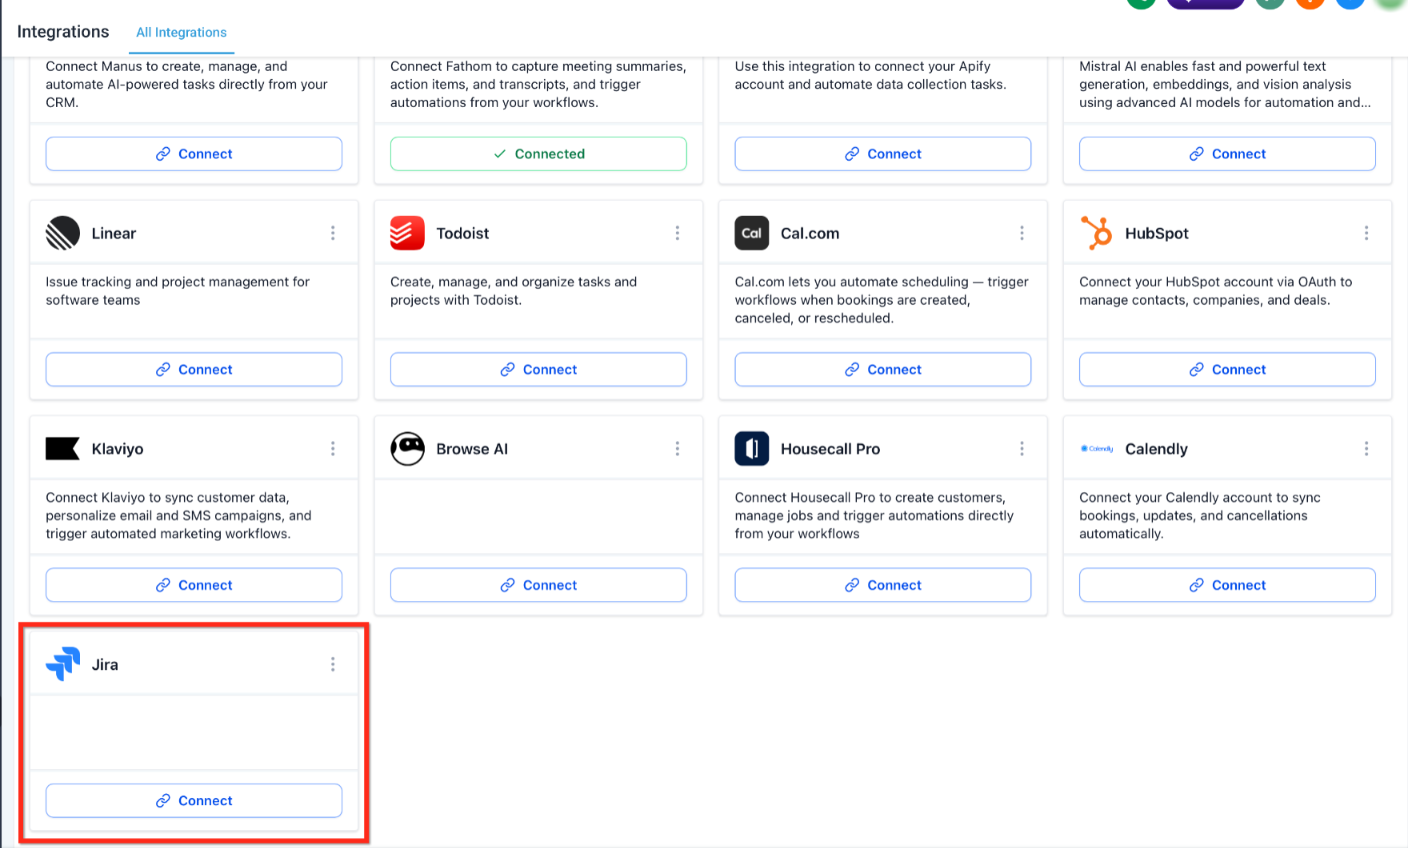
Alternative: Connect Jira from Settings → Integrations → Jira → Connect.
Jira Triggers
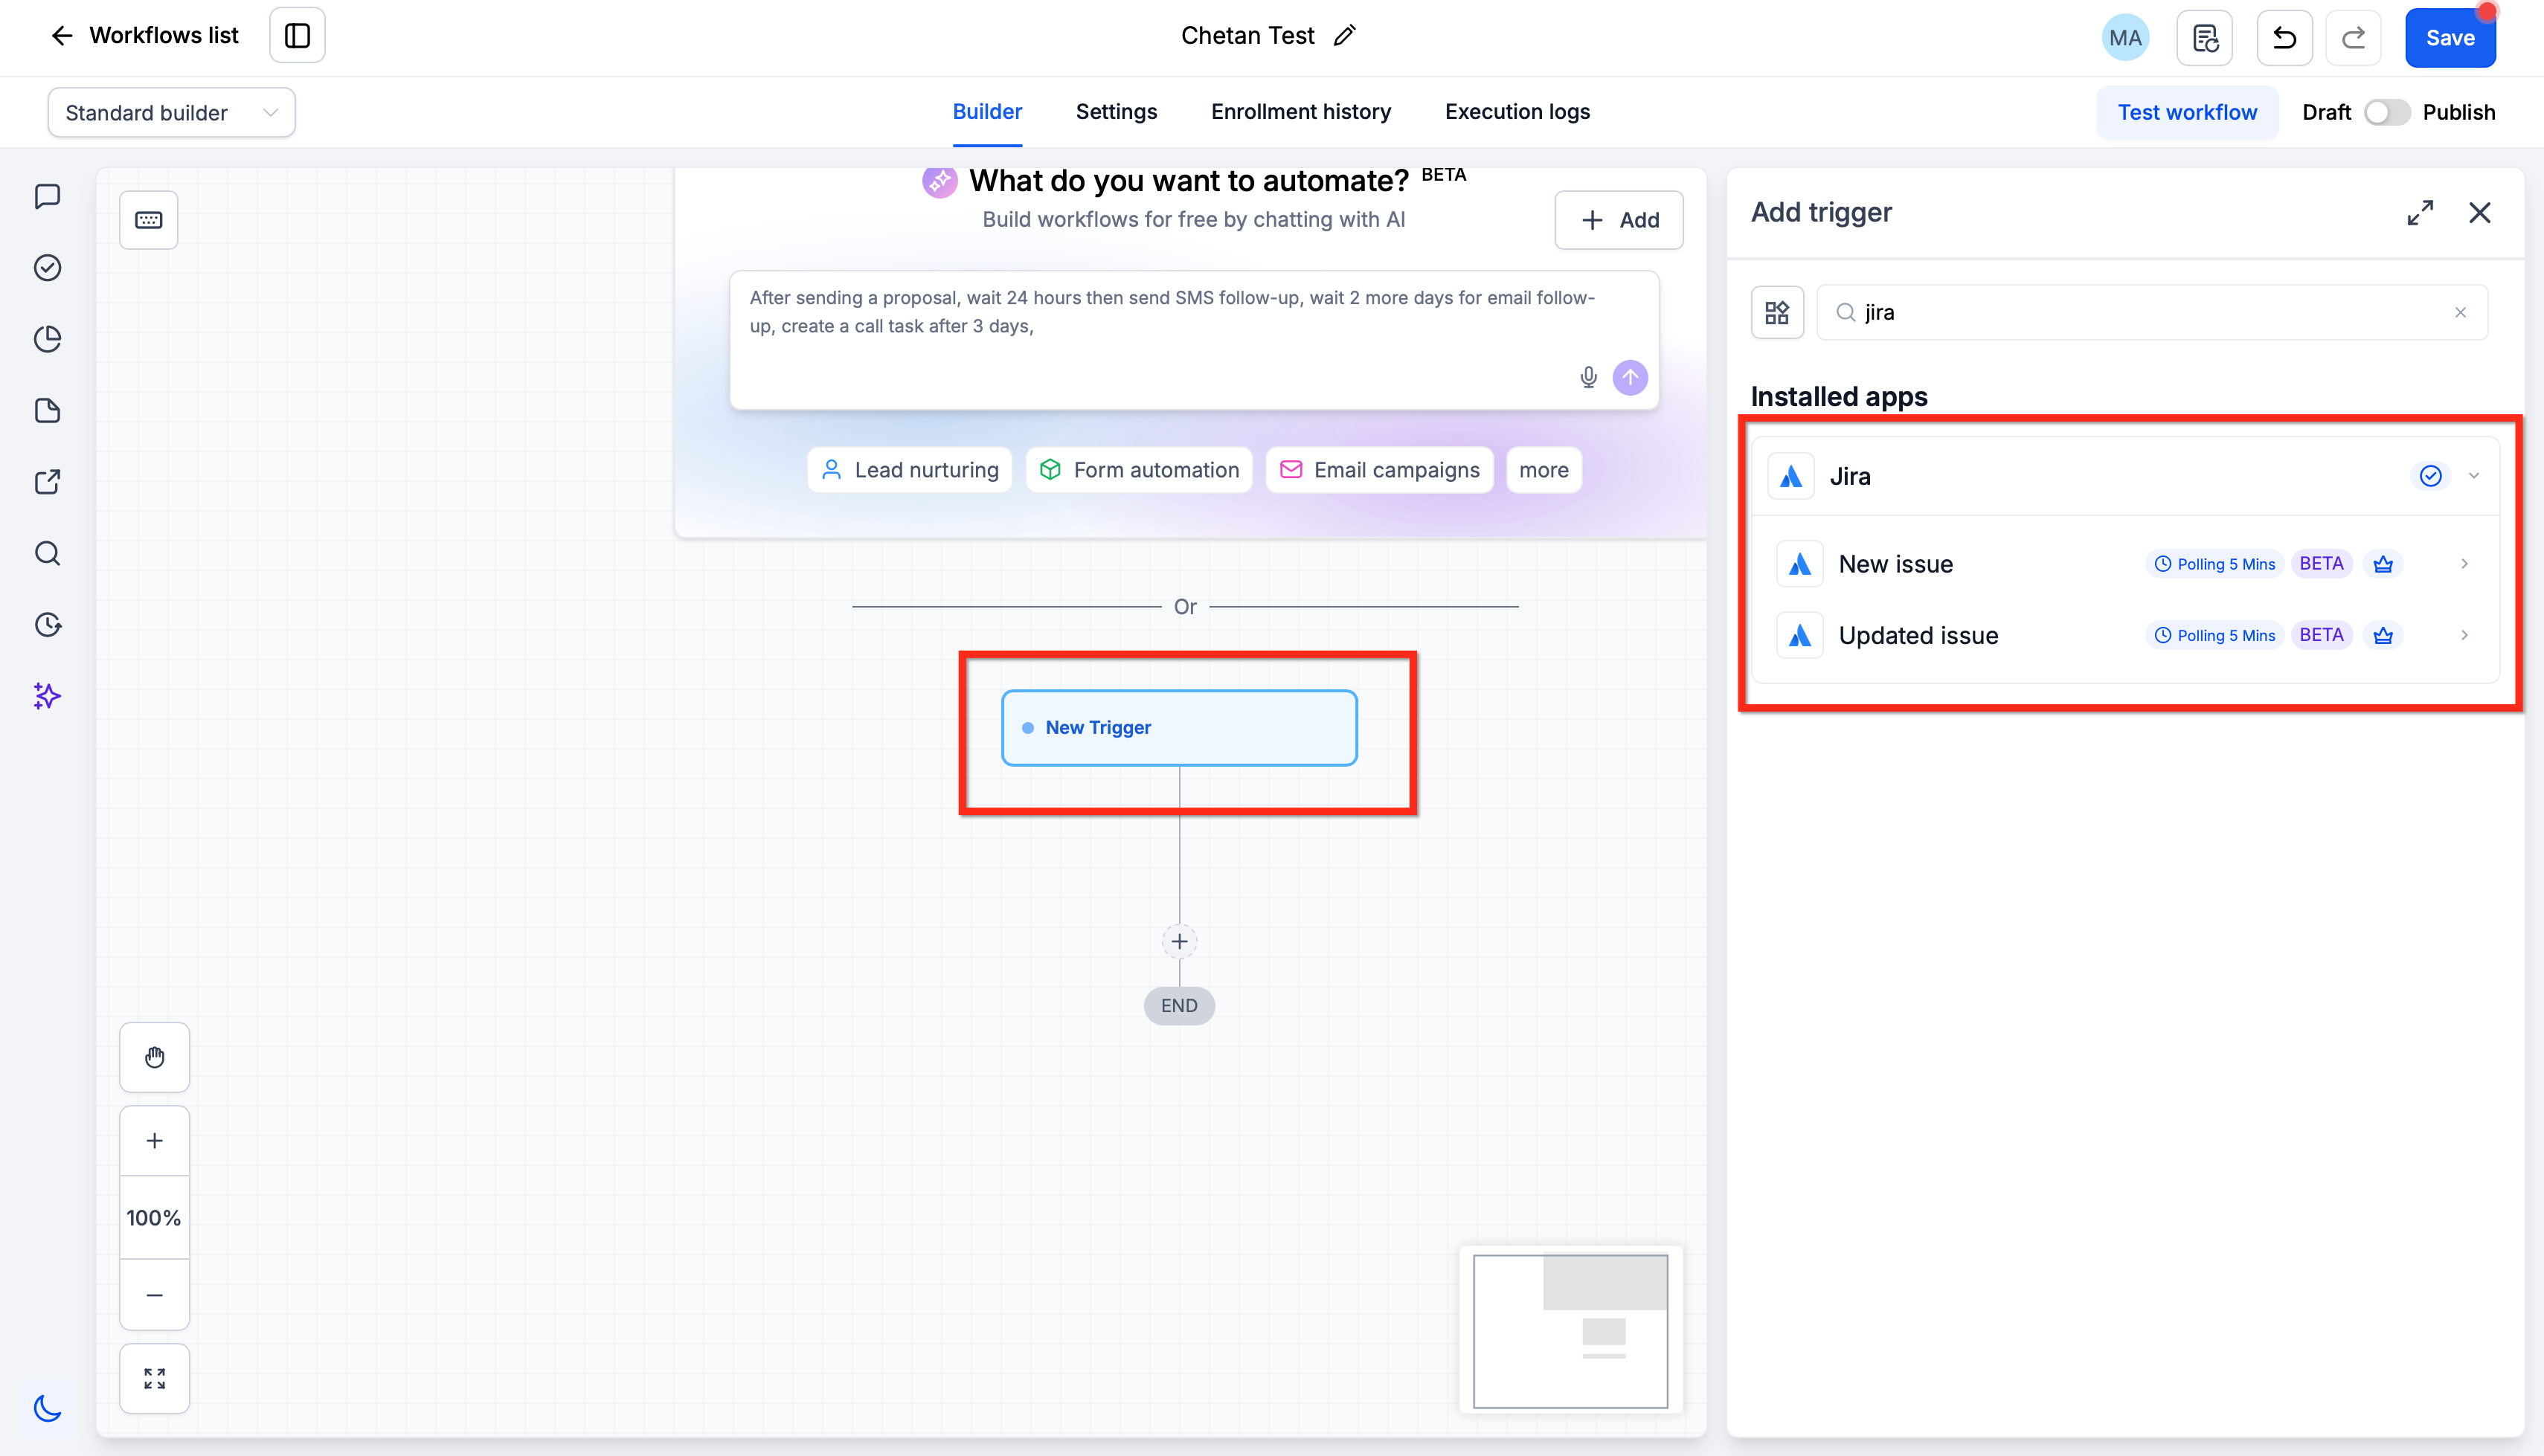
Jira triggers start workflows from issue events. Use the available Cloud Site and issue filters to limit which events qualify.
| Trigger | When It Runs | Typical Use |
|---|---|---|
| New issue | A Jira issue is created. | Find similar issues or start a follow-up. |
| Updated issue | An existing issue is updated. | React to a configured issue condition. |
Important: A filter such as Status = Done may also match later updates to an issue already in Done. Verify transition data or add safeguards before notifying customers of a resolution.
Jira Actions
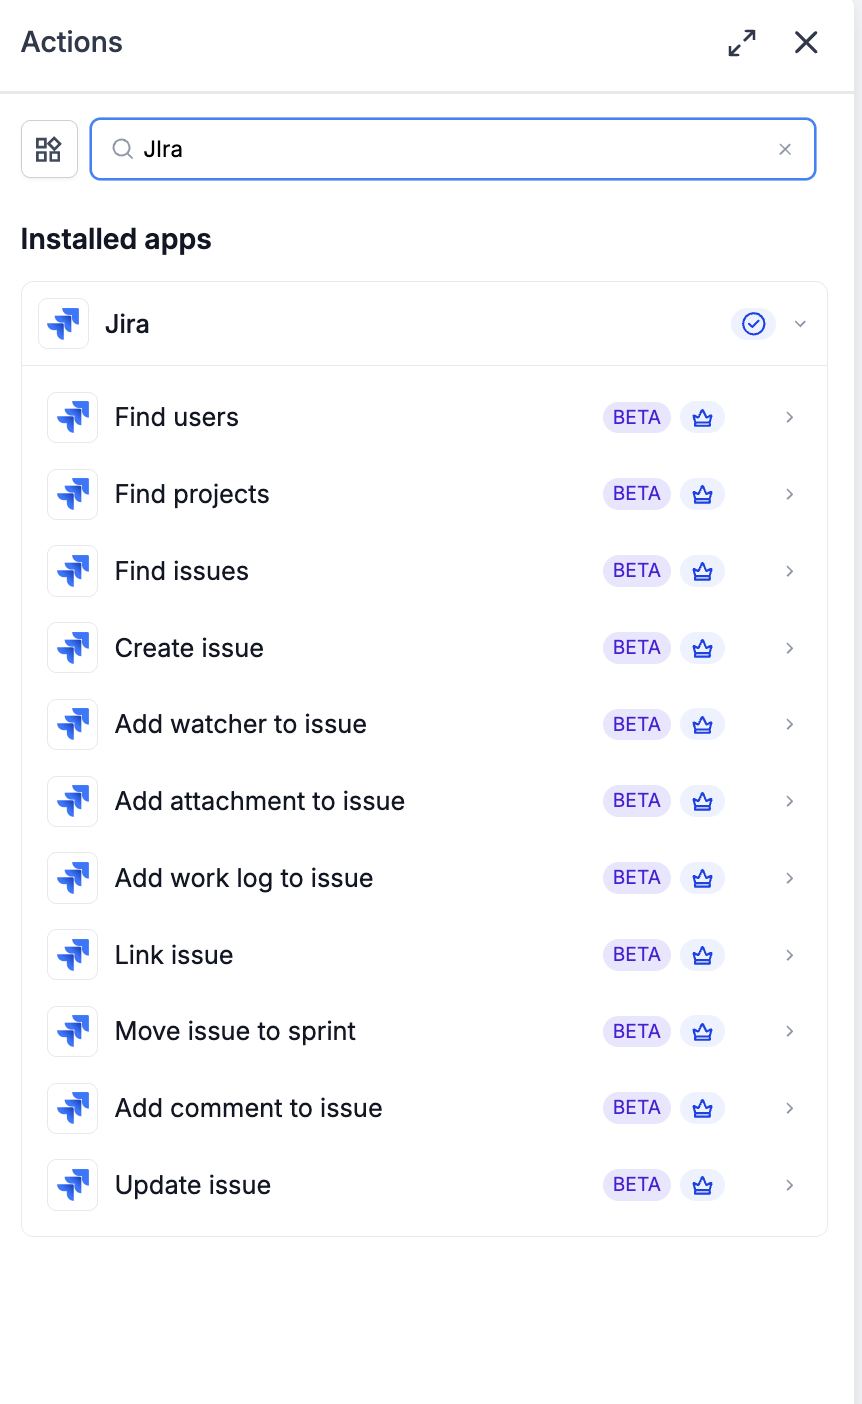
Jira actions search for records and perform issue operations. Choose the Cloud Site and Jira resources supported by the selected action.
| Category | Action | Purpose |
|---|---|---|
| Find | Find users | Locate Jira users. |
| Find | Find projects | Locate accessible projects. |
| Find | Find issues | Search for matching issues. |
| Manage | Create issue | Create an issue in a project. |
| Manage | Update issue | Change an existing issue. |
| Enrich | Add comment to issue | Post a comment. |
| Enrich | Add watcher to issue | Add an issue watcher. |
| Enrich | Add attachment to issue | Attach a supported file. |
| Enrich | Add work log to issue | Record work performed. |
| Organize | Link issue | Link related issues. |
| Organize | Move issue to sprint | Assign an issue to a sprint. |
Important: Create issue requires a Cloud Site. Available projects, issues, users, and sprints depend on the authorized Atlassian account. Use only file sources supported by the Add attachment to issue action.
Matching Jira Issues to Contacts
Jira issue events do not automatically identify the contact to message. A shared reference helps the workflow find and verify the intended recipient.
- Store an identifier in both systems, such as an email address, ticket ID, or contact ID mapped to a supported field.
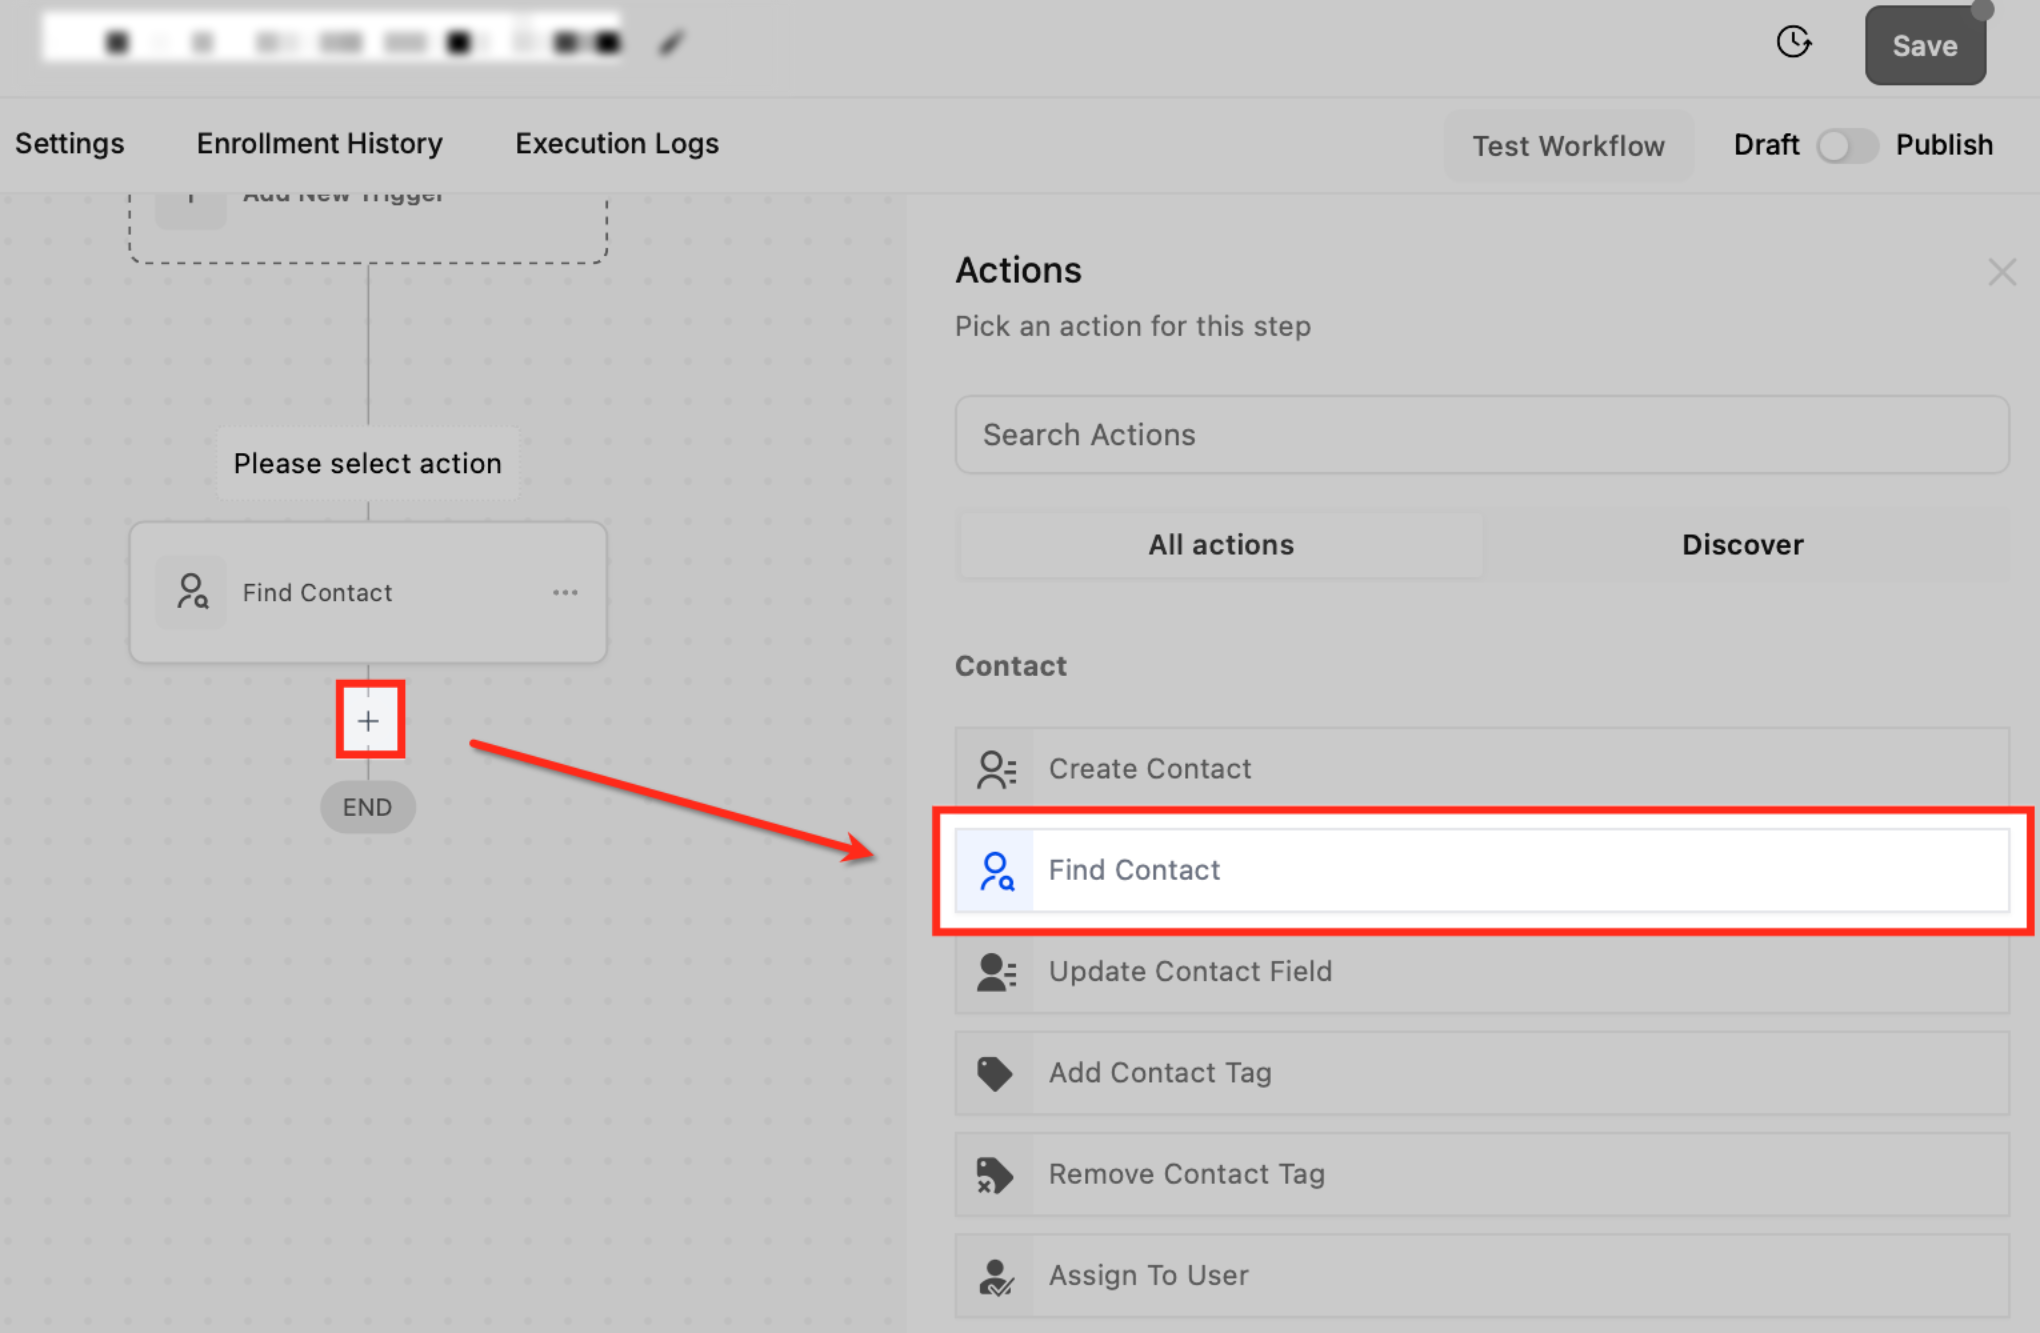
- Use Find Contact with that identifier where the action is supported.
- Continue contact-specific actions under Contact Found. Use Contact Not Found for a safe fallback when no matching contact is identified.
Common Jira Workflow Examples
These patterns illustrate how to combine Jira and workflow steps. Customize filters, record references, and fallback paths for your process.
- Customer-reported bug: Start from a configured workflow event → find the Jira project or user if needed → Create issue → optionally add a comment or supported attachment.
- Resolution follow-up: Updated issue → verify the resolution condition and prevent repeat notifications → match the contact → send an update only when a contact is found.
- Duplicate detection: New issue → Find issues using a shared reference → check the result with If/Else → Link issue when an appropriate match exists.
How to Set Up a Workflow with Jira
Configure the right trigger, Jira account, and record references, then test each path before publishing the workflow.
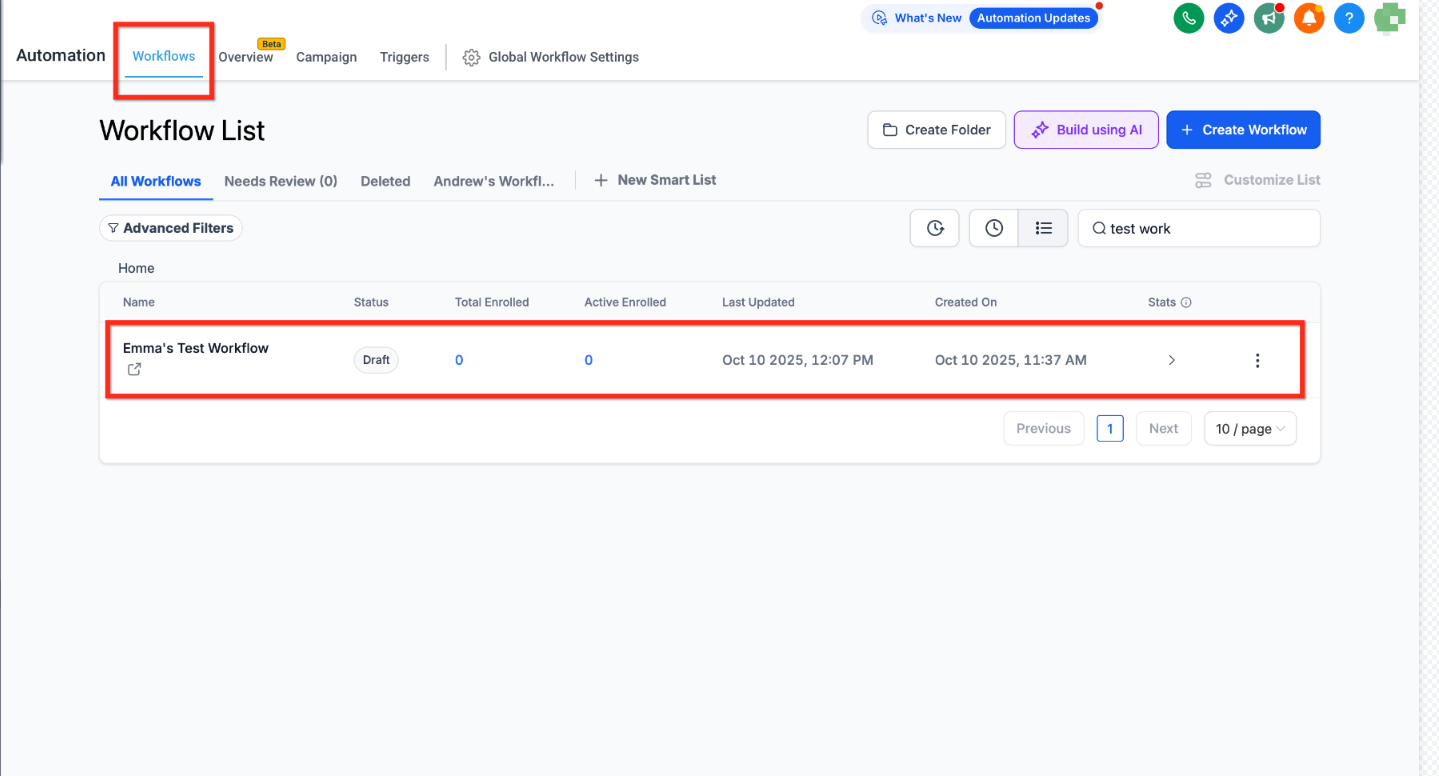
- Create or open a workflow. Go to Automation → Workflowsand name your workflow.
- Choose a trigger. Use New issue or Updated issuefor Jira-to-workflow automation, or choose an appropriate workflow trigger when the workflow should take action in Jira.
- Connect Jira.Choose an existing connection or authorize one using the connection steps above.
- Configure the Jira step.Select the account, Cloud Site, and applicable project, issue, user, sprint, or other fields. Use supported custom values for dynamic inputs.
- Add branches and follow-ups. Use If/Else for match results and Find Contact where needed. Handle missing records before sending messages or changing issues.
- Test, save, and publish. Confirm the correct site, issue, values, and recipient. After execution, inspect Execution Logs → View Details for the execution status and available error information.
Frequently Asked Questions
Q: Can different Jira steps use different Cloud Sites?
Supported steps expose their own Cloud Site settings. Select a site available to the connected account for each step.
Q: Why can't I find a Jira project, user, or sprint?
Check the selected Cloud Site and the connected account's permissions in Jira.
Q: What if multiple issues match my search?
Refine the search criteria and review the results before automatically linking or updating an issue.
Q: What if Find Contact returns no match?
Handle the Contact Not Found branch separately. Do not send a customer-specific message without identifying the intended recipient.
Q: Where can I investigate a failed Jira action?
Open the workflow's Execution Logs and select View Details. Check the selected site, inputs, status, and available error information.
Need Help?
If Jira does not connect or expected Jira resources are missing, confirm that the correct Atlassian account and Cloud Site are selected and that the connected account has permission to access the required projects, issues, users, or sprints.
If contact matching does not return the expected result, verify the shared identifier used by Find Contact and review both the Contact Found and Contact Not Found paths.
For failed Jira triggers or actions, open Execution Logs → View Details and review the selected Jira resources, mapped inputs, execution status, and available error information.
If the issue persists, contact support with the workflow name, Jira trigger or action involved, selected Cloud Site, and the relevant execution details.