
Pre-Built A2P Campaign (Widget-First) Registration Flow
This article walks you through LeadConnector's new pre-built A2P campaign registration flow that bundles a compliant chat widget with carrier-safe consent language and prevents common configuration errors.
You'll discover how this widget-first approach reduces approval times, eliminates manual disclosure writing, and ensures your SMS campaigns meet carrier requirements from day one.
What is the Pre-Built A2P Campaign Flow?
The pre-built A2P campaign flow is a guided registration experience that combines an auto-generated, carrier-compliant chat widget with locked consent language and a short questionnaire. This approach removes manual disclosure writing and prevents the configuration mistakes that typically delay or derail SMS campaign approvals.
Unlike the self-serve registration option where you can edit every field, this widget-first flow locks all compliance-sensitive elements to guarantee that what carriers review matches exactly what goes live on your website. The system generates your opt-in widget, injects your business name into disclosures, and includes all required STOP/HELP language automatically.
The flow is optimized for single-purpose campaigns — either Marketing/Promotional or Informational/Non-Marketing. Mixed-use-case and sole-proprietor campaigns require the self-serve registration flow.
Key Benefits
Choosing the pre-built campaign flow delivers several advantages over traditional manual registration:
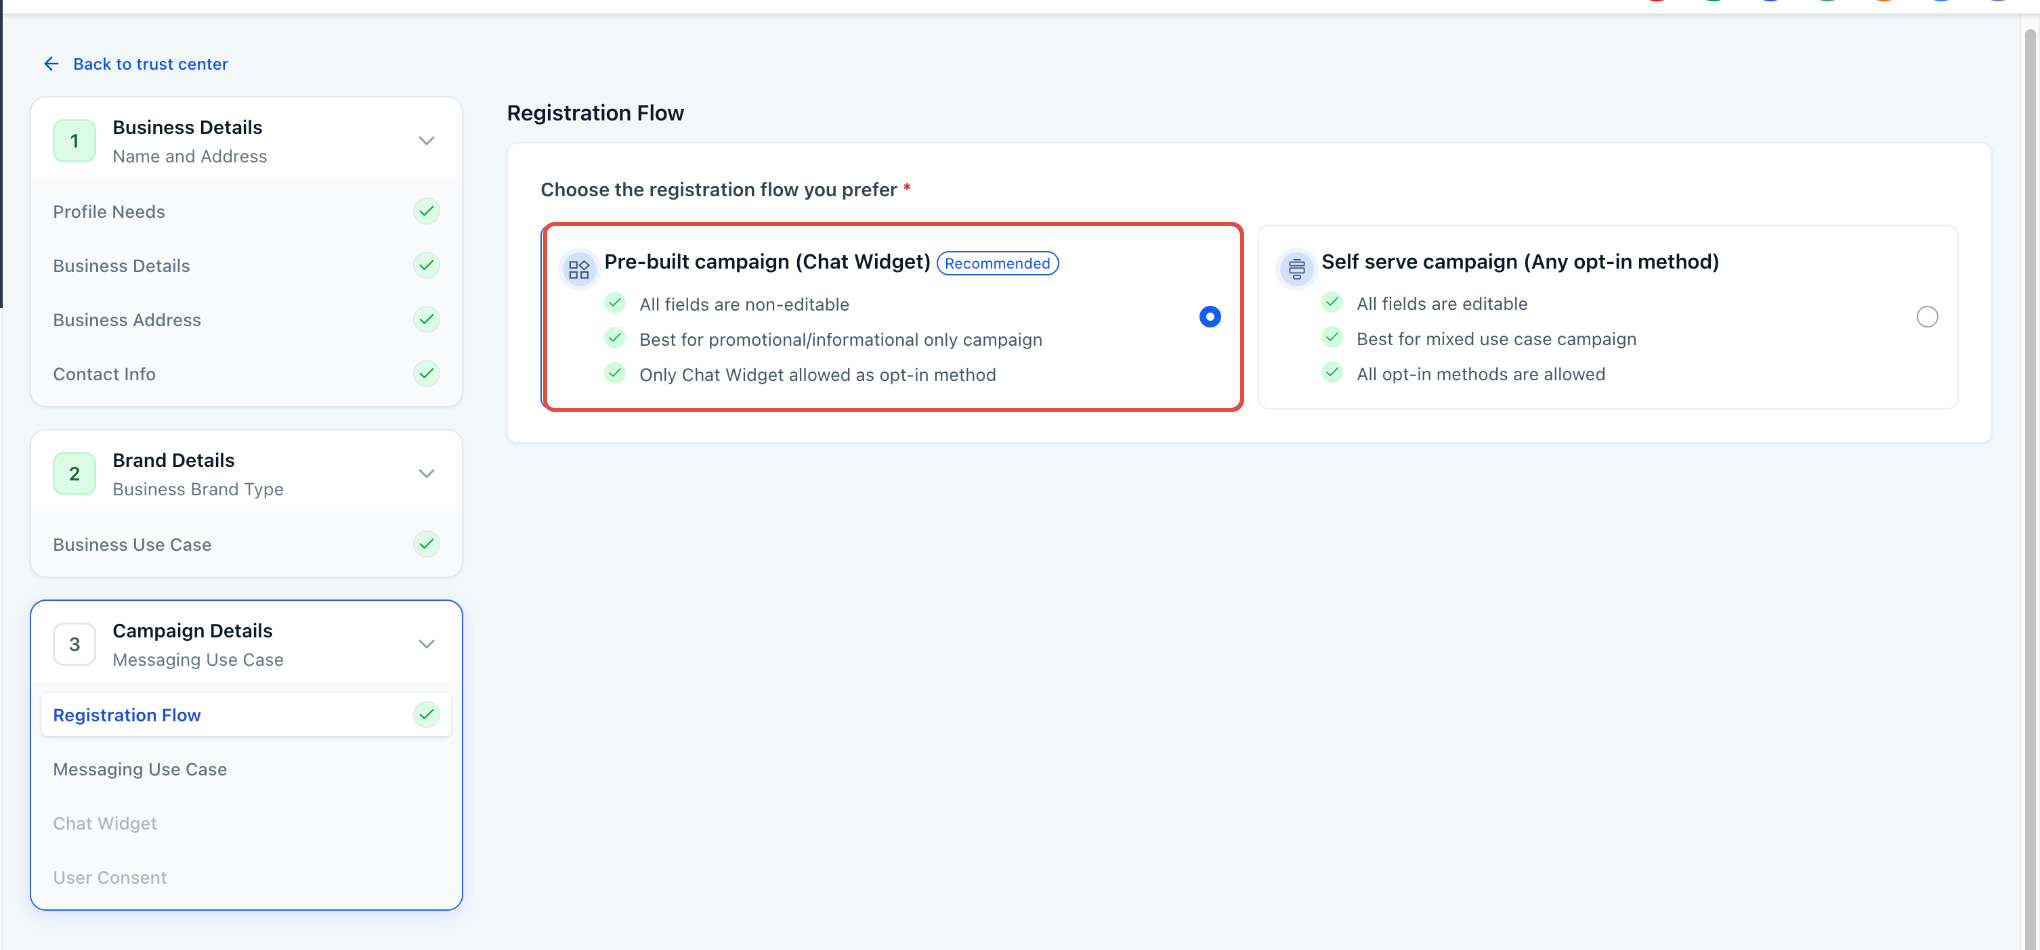
Simplified Messaging Use Case Selection
The widget-first flow requires you to declare your campaign type up front: Marketing/Promotional or Informational/Non-Marketing. Once you choose, the Campaign Use Case dropdown filters to show only options that align with your selection.
This early classification prevents you from accidentally mixing promotional offers with account notifications, a common cause of carrier scrutiny. It also removes granular legal jargon from your disclosures, keeping the language simple and reducing red flags during carrier review.
Financial + Marketing Conflict Prevention
Carriers frequently reject campaigns that combine marketing tactics with financial services or loan-related content. The pre-built flow detects this combination and prevents submission.
If you select Marketing/Promotional and then indicate your campaign involves financial services or loans, the system displays an in-app blocker. You must switch to Informational/Non-Marketing to proceed. This guardrail eliminates one of the highest-risk misclassification scenarios before your application reaches the carrier.
If your campaign includes promotional offers and serves the financial industry, register it as Informational to avoid automatic rejection.
Automatic Age-Gating Enforcement
When you indicate that your campaign involves age-gated content or financial services/loan-related messaging, LeadConnector enforces age verification at the widget level. A mandatory Date of Birth field appears in the chat widget and cannot be removed.
Contacts cannot submit the widget form without confirming their date of birth, ensuring compliance with CTIA guidelines for restricted categories. This automatic enforcement removes the risk of forgetting to add age checks manually.
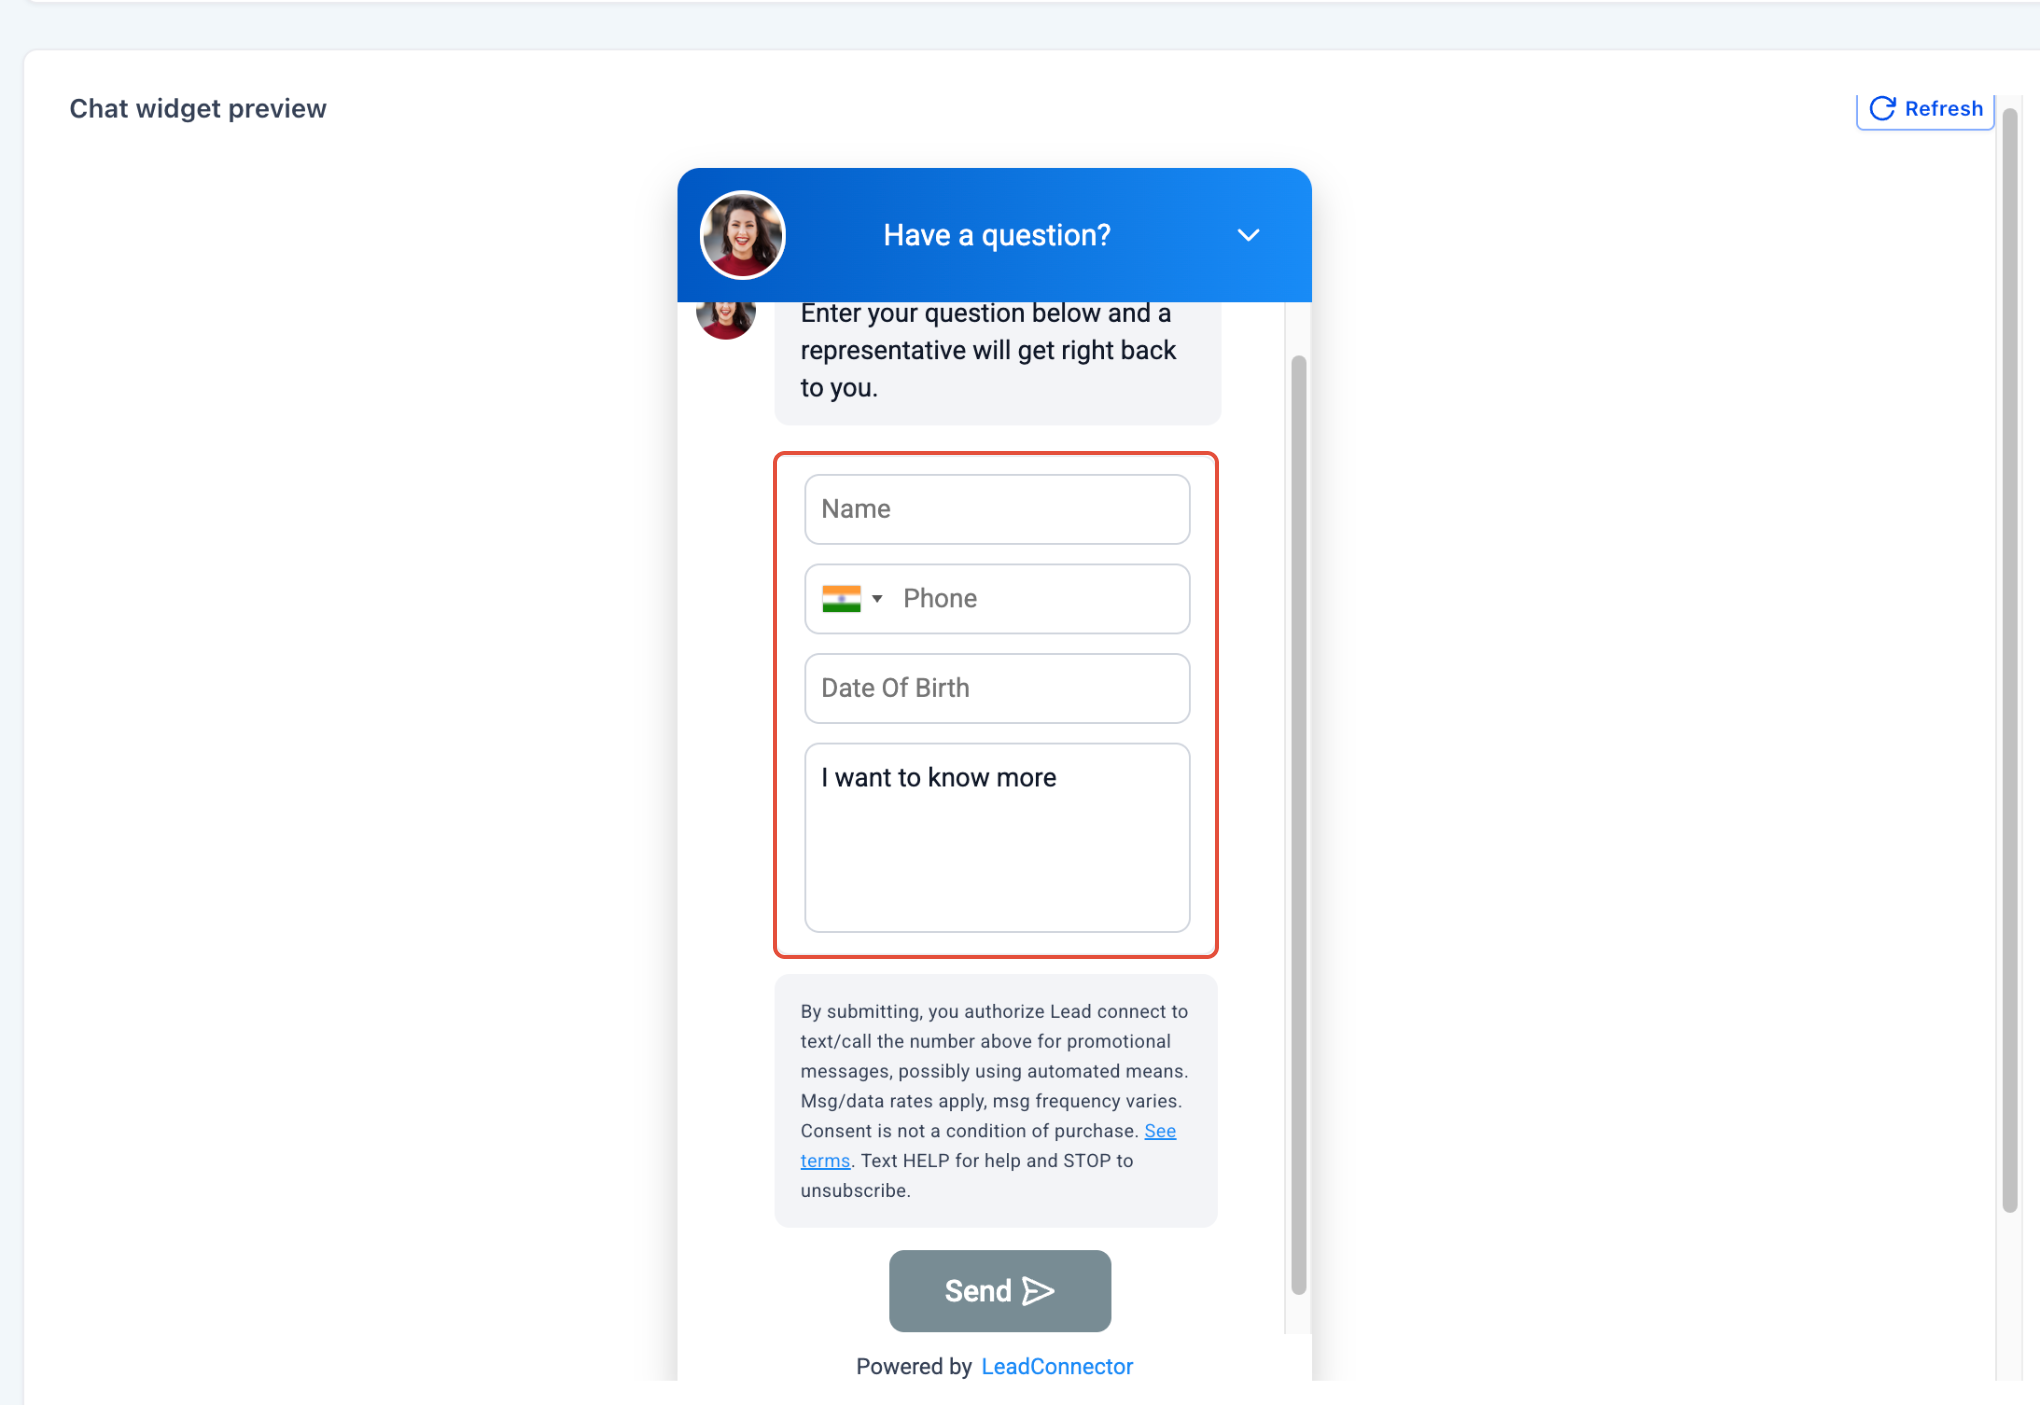
Auto-Generated Compliant Chat Widget
LeadConnector creates a fully functional, carrier-compliant chat widget tailored to your campaign. The widget includes:
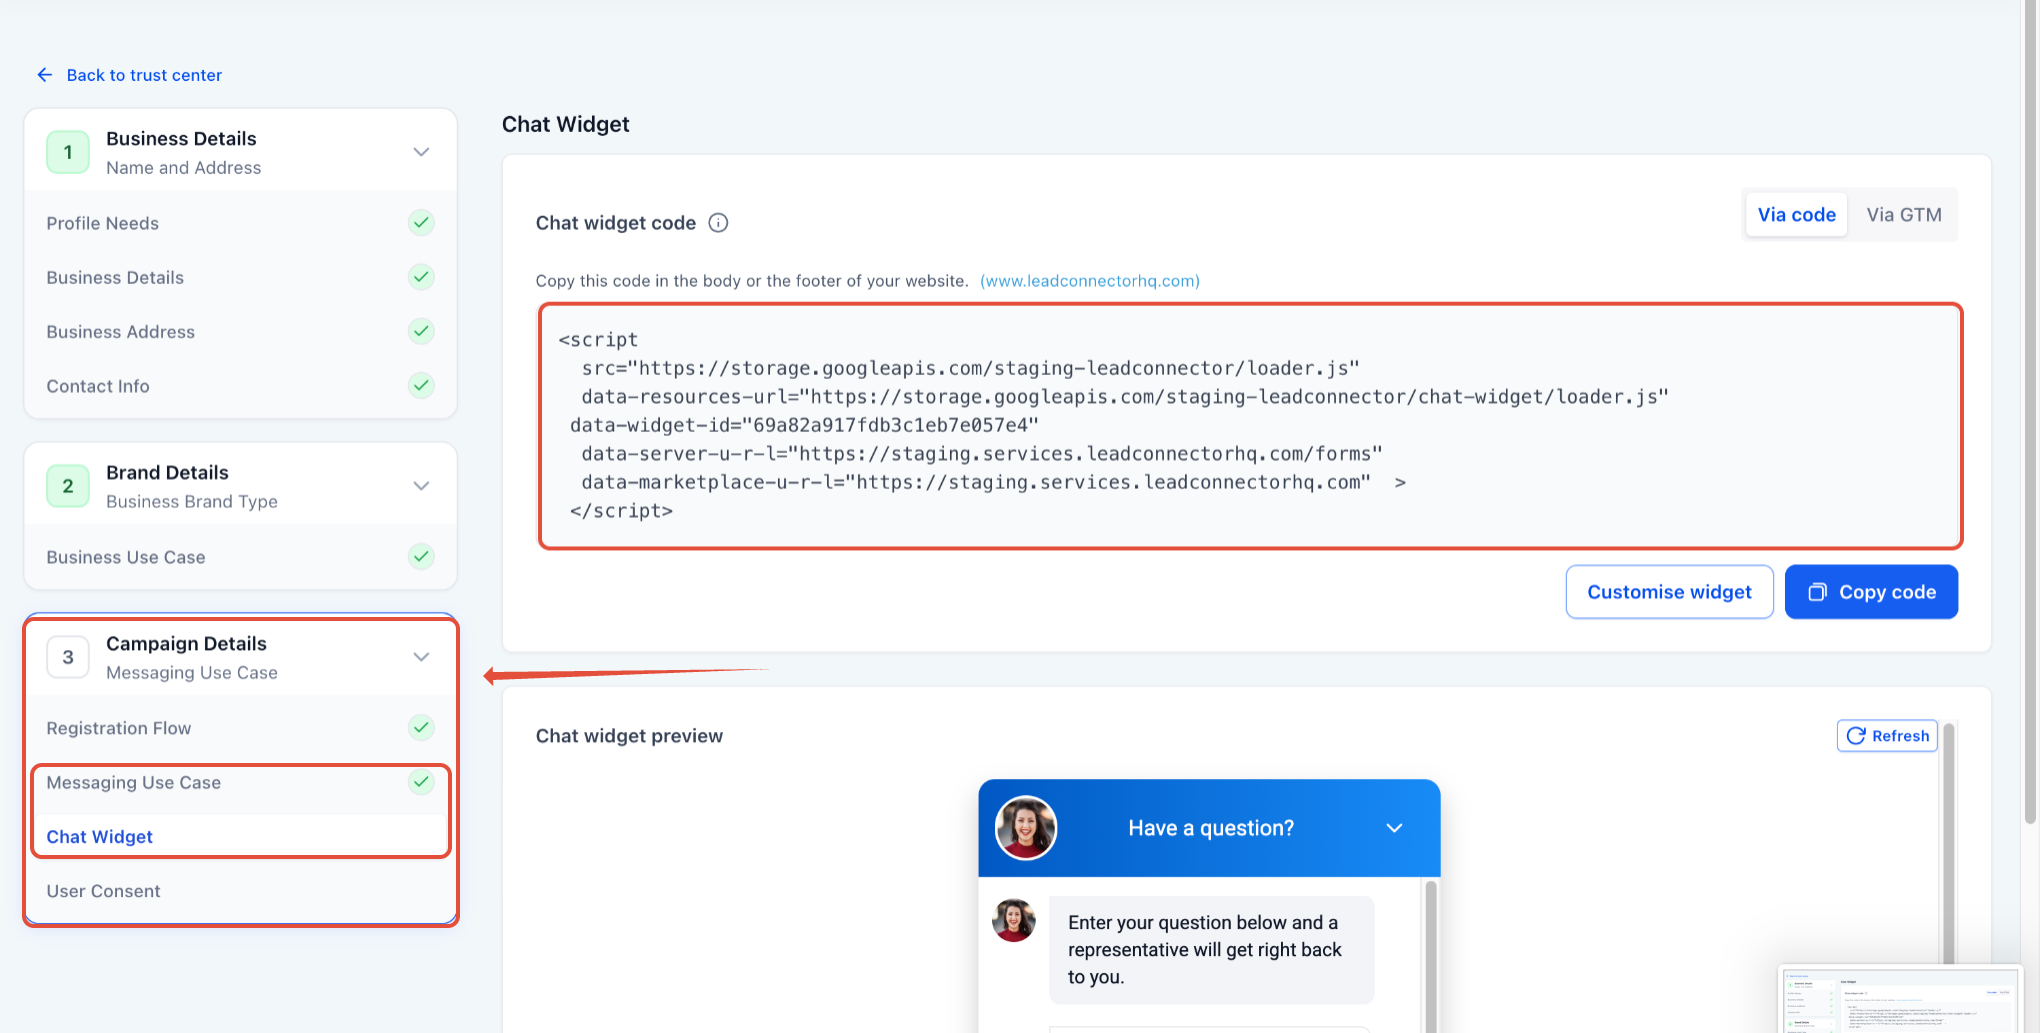
You can adjust the widget's color scheme and header text, but you cannot edit disclosure language, remove required fields, add consent checkboxes, or select alternative opt-in methods. This restriction ensures the live widget matches the carrier-approved registration exactly.
Locked Final Consent Review
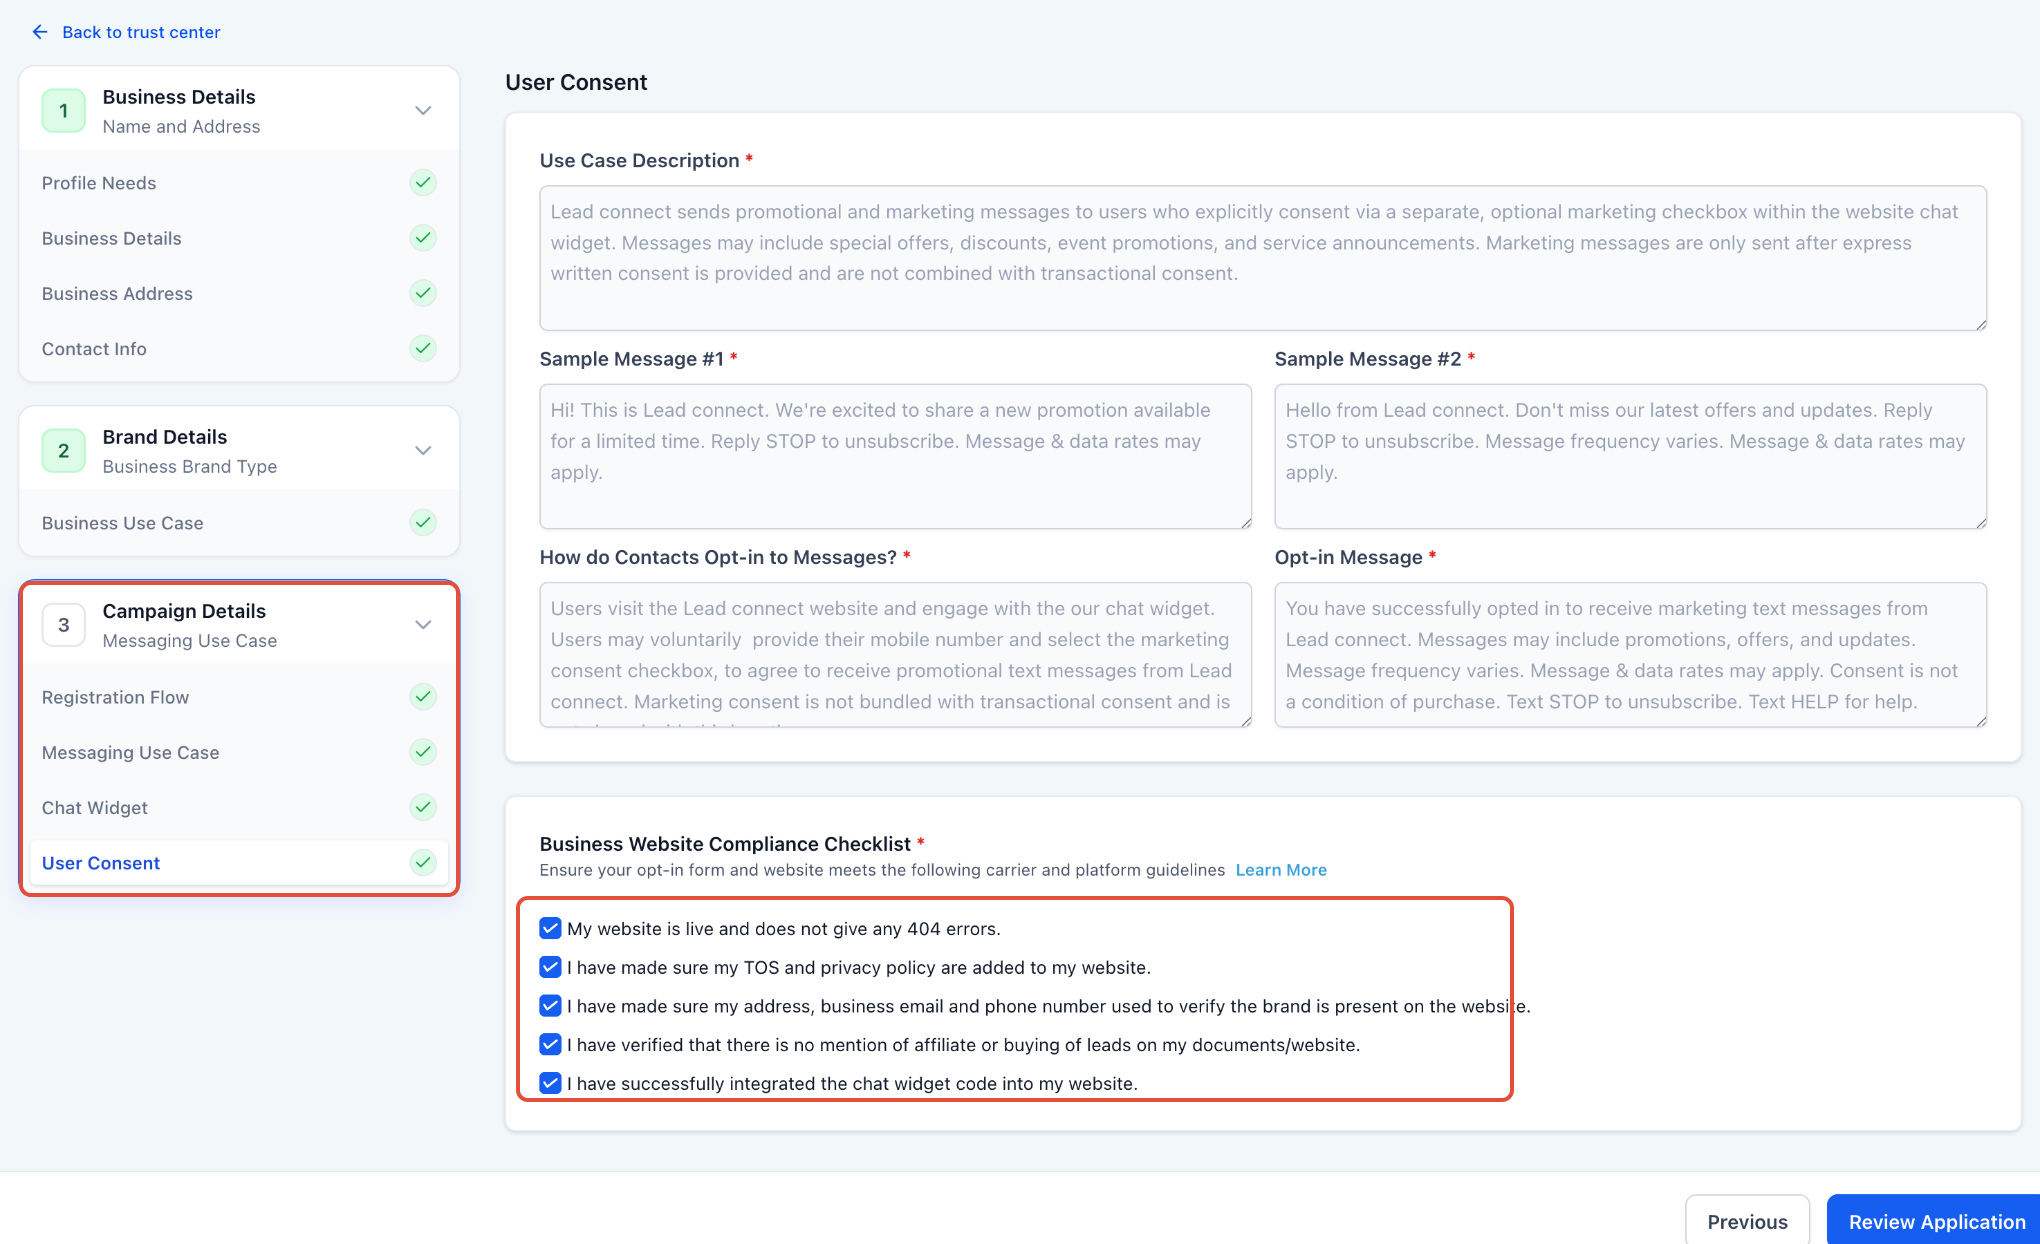
Before you submit your campaign, the system presents a read-only consent review screen. This summary includes your auto-generated sample messages, a preview of your chat widget, and a website compliance checklist.
All fields are non-editable. You cannot change consent language, alter opt-in methods, or modify disclosures at this stage. The checklist confirms that your website is live, includes your Terms of Service and Privacy Policy, displays your business contact information, and has the widget embed code installed.
Because every detail is locked, carriers can verify that the registration application matches your live implementation — a key factor in fast approvals.
How to Set Up the Pre-Built A2P Campaign
Follow these steps to register a new SMS campaign using the widget-first flow.
In your LeadConnector account, go to Settings → Phone Numbers → A2P Messaging Registration.
Click Create Campaign and select Pre-built campaign (Chat Widget) from the registration flow options.
Choose either Marketing / Promotional or Informational / Non-Marketing. The Campaign Use Case dropdown will filter based on your selection.
Respond to questions about financial content, age-gated content, and other campaign attributes. If you select conflicting options (e.g., Marketing + Financial Services), the system will display a blocker and prompt you to adjust your selections.
LeadConnector generates your chat widget automatically. You can adjust colors and the header text, but you cannot edit disclosure language or remove required fields.
Confirm that your website is live and publicly accessible, includes Terms of Service and Privacy Policy links, displays your business contact information, and has no mention of lead buying or affiliate marketing.
Verify all auto-generated details on the read-only consent review page. Click Submit when ready.
Copy the JavaScript embed code provided and paste it into the footer or body of the web page you confirmed during setup.
Track approval progress under Campaigns → Status. Widget-first submissions typically receive carrier approval within 48 hours.
Ensure your widget is live and publicly accessible before submitting your campaign. Carriers will verify the opt-in method is functional and matches your registration.
If you encounter issues during campaign setup or need guidance on selecting the right registration flow, follow these steps:
- Navigate to Settings → Phone Numbers → A2P Messaging Registration and review your existing campaigns for status updates.
- Check the in-app blocker messages if your questionnaire selections are flagged — adjust your campaign type or content categories as recommended.
- Verify your website meets all compliance checklist requirements before submitting.
- Contact LeadConnector support directly from your account if you need clarification on messaging use cases or carrier rejection reasons.