
Automate email communication directly from Company and Custom Object workflows without creating separate contact-based workflows. The Send Email action lets you send emails to associated contacts based on their relationship to a company or custom object, making it easier to automate onboarding, notifications, reminders, and other business communications from a single workflow. This feature is currently available through Labs. Enable Email Action in Company & Custom Object Workflows before using the Send Email action.
TABLE OF CONTENTS
- What Is the Send Email Action?
- Key Benefits
- Common Use Cases
- How to Set Up the Send Email Action
- Important Notes
- Frequently Asked Questions
- Need Help?
What Is the Send Email Action?
Company and Custom Object workflows often involve contacts who are related to the same record. Until now, sending automated emails from these workflows required additional contact-based workflows or extra automation steps.
The Send Email action removes that complexity by allowing emails to be sent directly from Company and Custom Object workflows to associated contacts.
Instead of building multiple workflows for different record types, you can manage your communications from a single automation while choosing exactly which associated contacts should receive each email.
Key Benefits
Using the Send Email action helps simplify workflow automation while keeping communications relevant to the correct contacts.
- Automate emails directly from Company and Custom Object workflows
- Reduce workflow complexity by eliminating unnecessary contact workflows
- Target specific associated contacts using recipient options and association labels
- Reuse the familiar email editor with personalization tokens and formatting tools
- Automatically prevent duplicate emails when contacts match multiple associations
- Support onboarding, reminders, approvals, and notifications from one workflow
Common Use Cases
The Send Email action supports a variety of business processes where communications depend on Company or Custom Object activity.
Some common examples include:
- Sending welcome emails when a new company is created.
- Sending renewal reminders before contracts or memberships expired.
- Notifying stakeholders when projects or deals reach important milestones.
- Sending order or service completion updates.
- Requesting approvals from internal team members.
- Automatically following up when a Company or Custom Object reaches a specific stage.
How to Set Up the Send Email Action
A few simple configuration steps allow you to send automated emails directly from Company and Custom Object workflows.
Enable the Labs Feature
Before using the Send Email action, enable the Labs feature.
Navigate to:
Settings → Labs
Locate Email Action in Company & Custom Object Workflows and enable it.
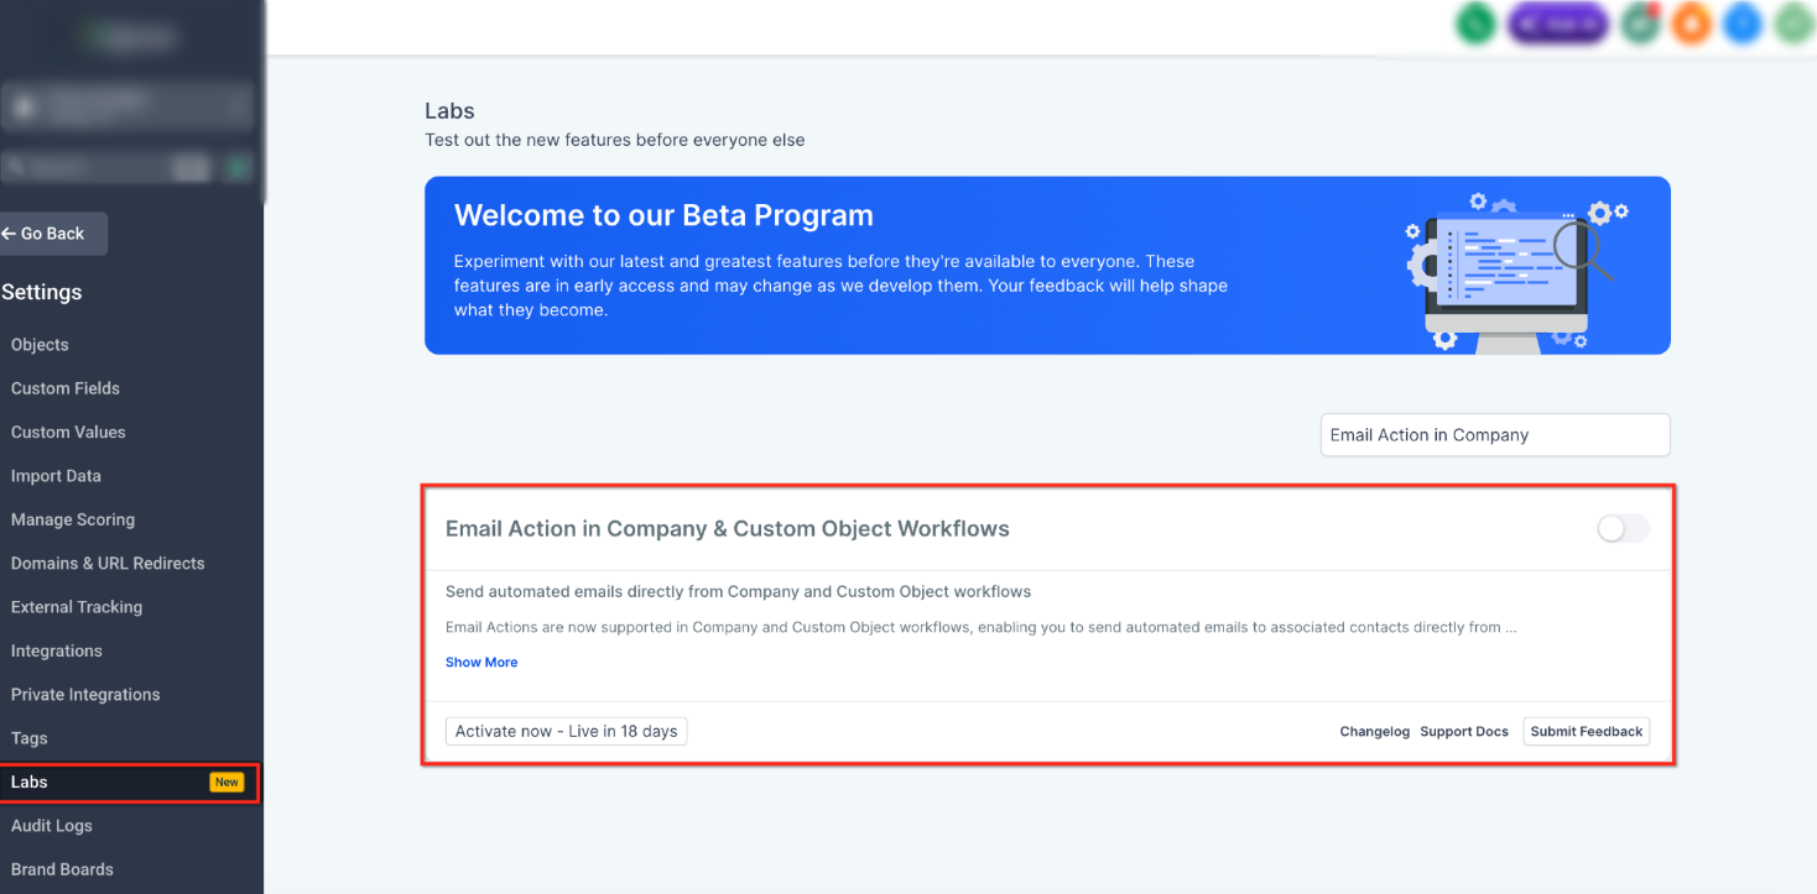
Open the Labs page and enable Email Action in Company & Custom Object Workflows before creating your workflow.
Open or Create Your Workflow
Navigate to Automation → Workflows.
Create a new Company or Custom Object workflow or open an existing one.
Add the Send Email Action
Click + Add inside the workflow.
Select Send Email from the Communication actions or search for Send Email using the action search.
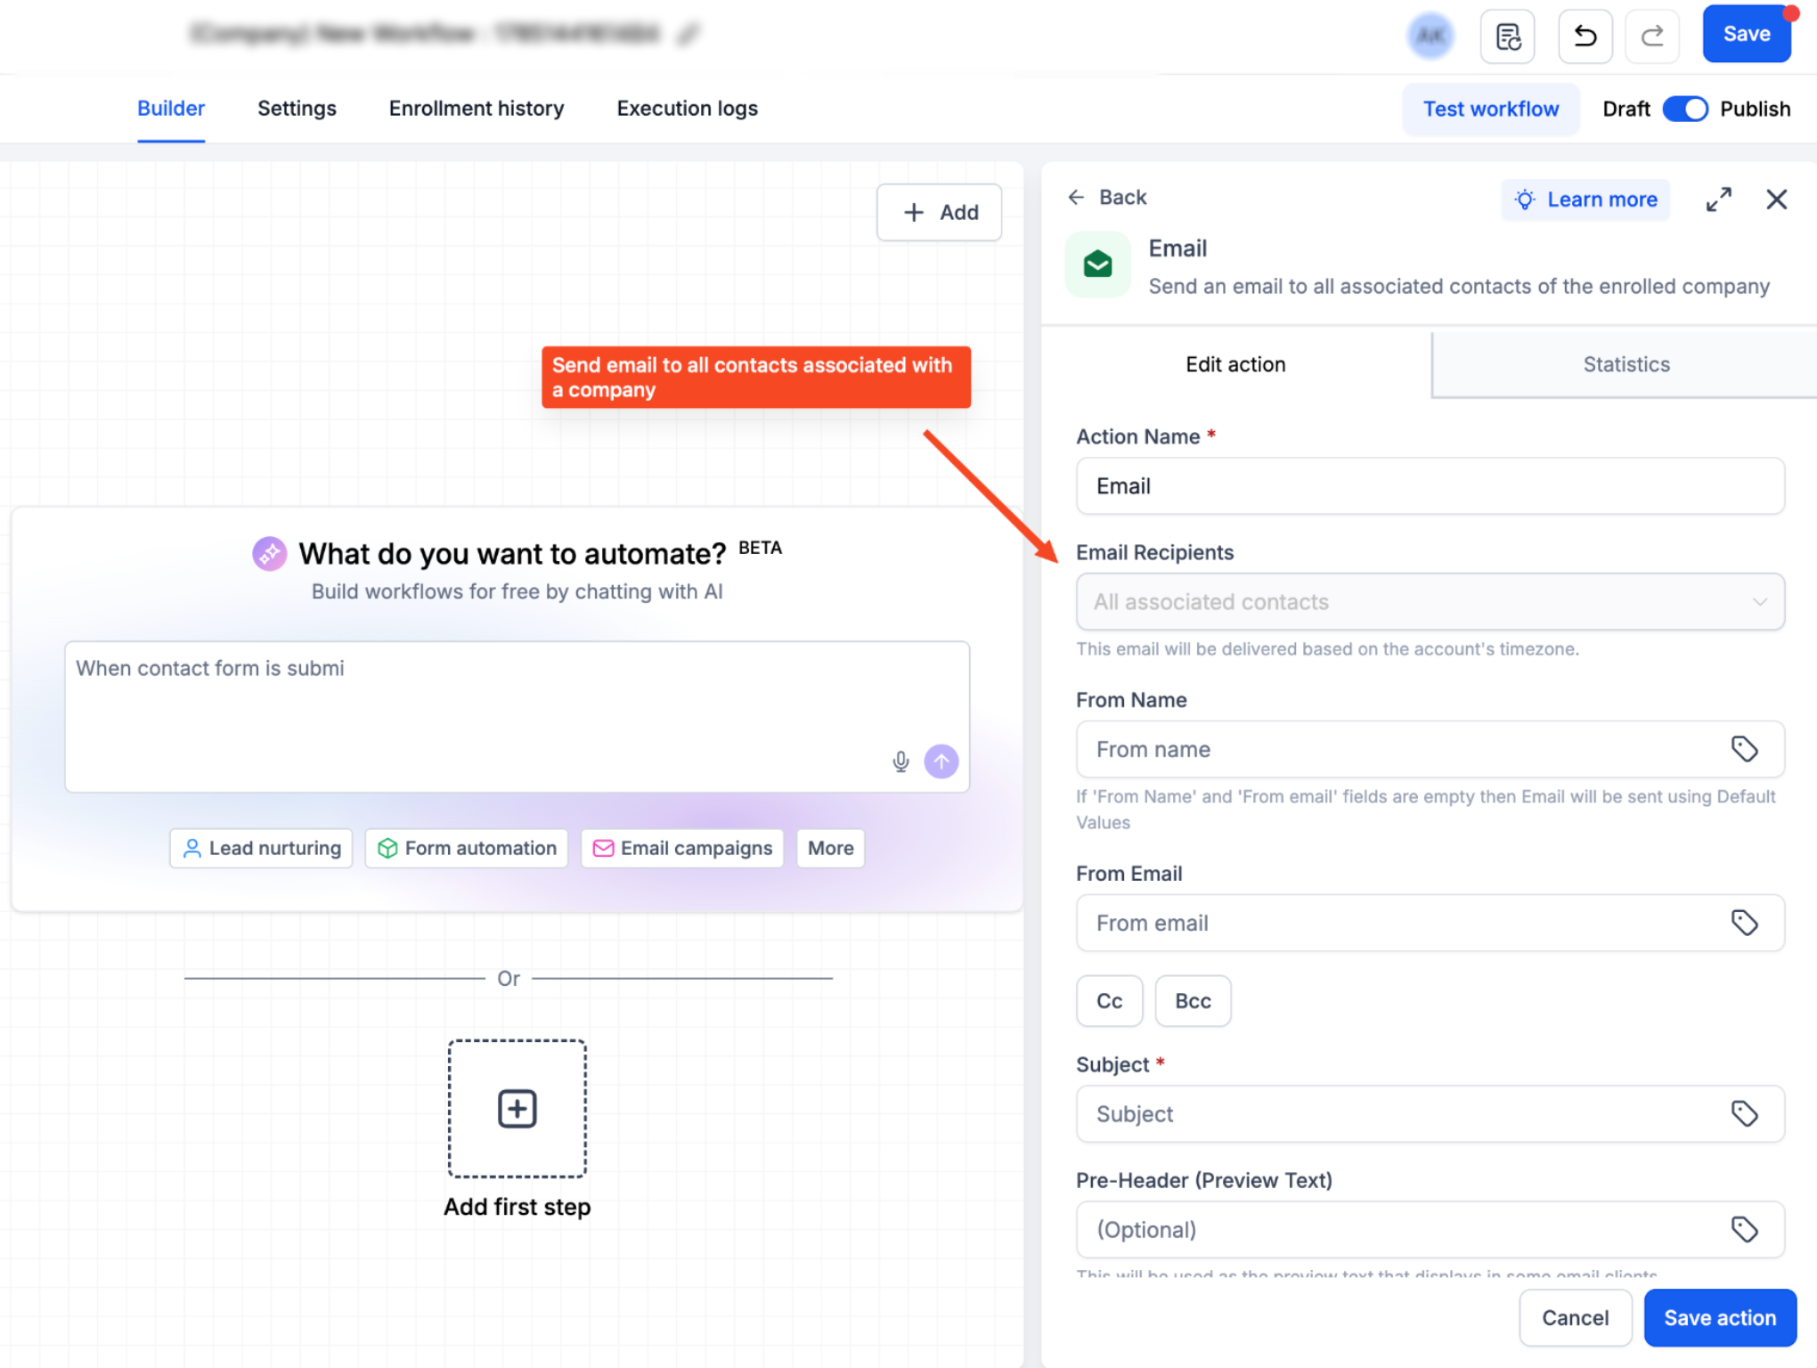
Add the Send Email action to your Company workflow. The email action becomes available after enabling the Labs feature.
Choose Your Email Recipients
Select who should receive the email using the Email Recipients dropdown.
Available options include:
- All associated contacts
- Most recently associated contact (Custom Object workflows only)
- Earliest associated contact (Custom Object workflows only)
Choosing the correct recipient ensures your automation reaches the intended contact.
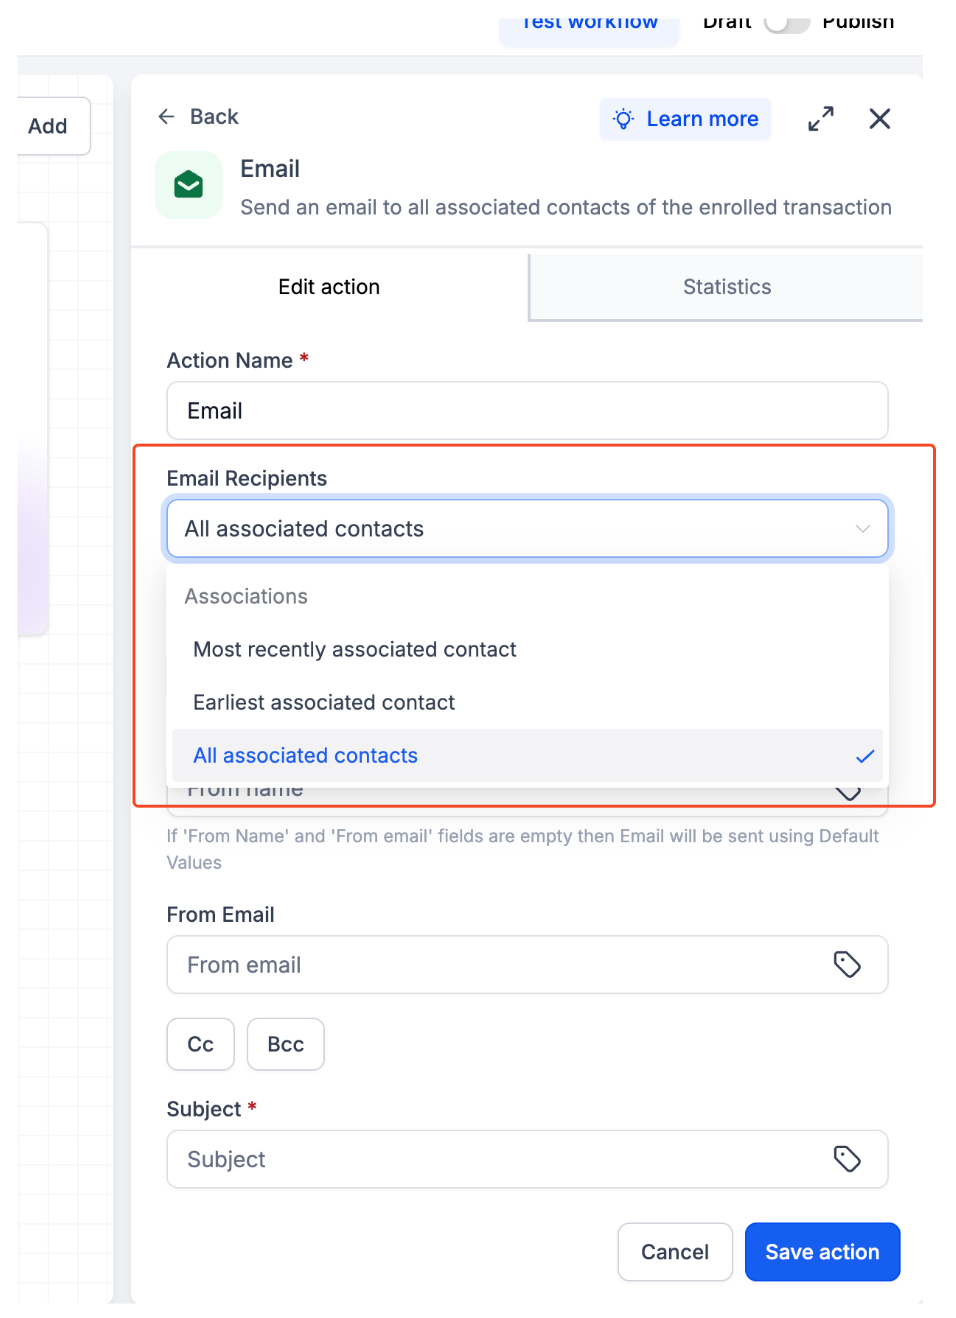
Choose whether the email should be sent to all associated contacts or a specific associated contact.
Filter Recipients with Association Labels
Association Labels let you target only specific types of related contacts.
For example, instead of emailing every associated contact, you can limit delivery to contacts that match selected relationship types.
If no Association Label is selected, the email is delivered according to the recipient option chosen in the previous step.
Configure Email Settings
Complete the standard email settings:
- From Name
- From Email
- Subject
- CC
- BCC
If From Name or From Email is left blank, the system uses the default values configured for your account.
Create Your Email
Compose your email using the built-in email editor.
The editor supports the same formatting and personalization features available in other workflow email actions, including:
- Rich text formatting
- Personalization tokens
- Custom fields
- Attachments (where supported)
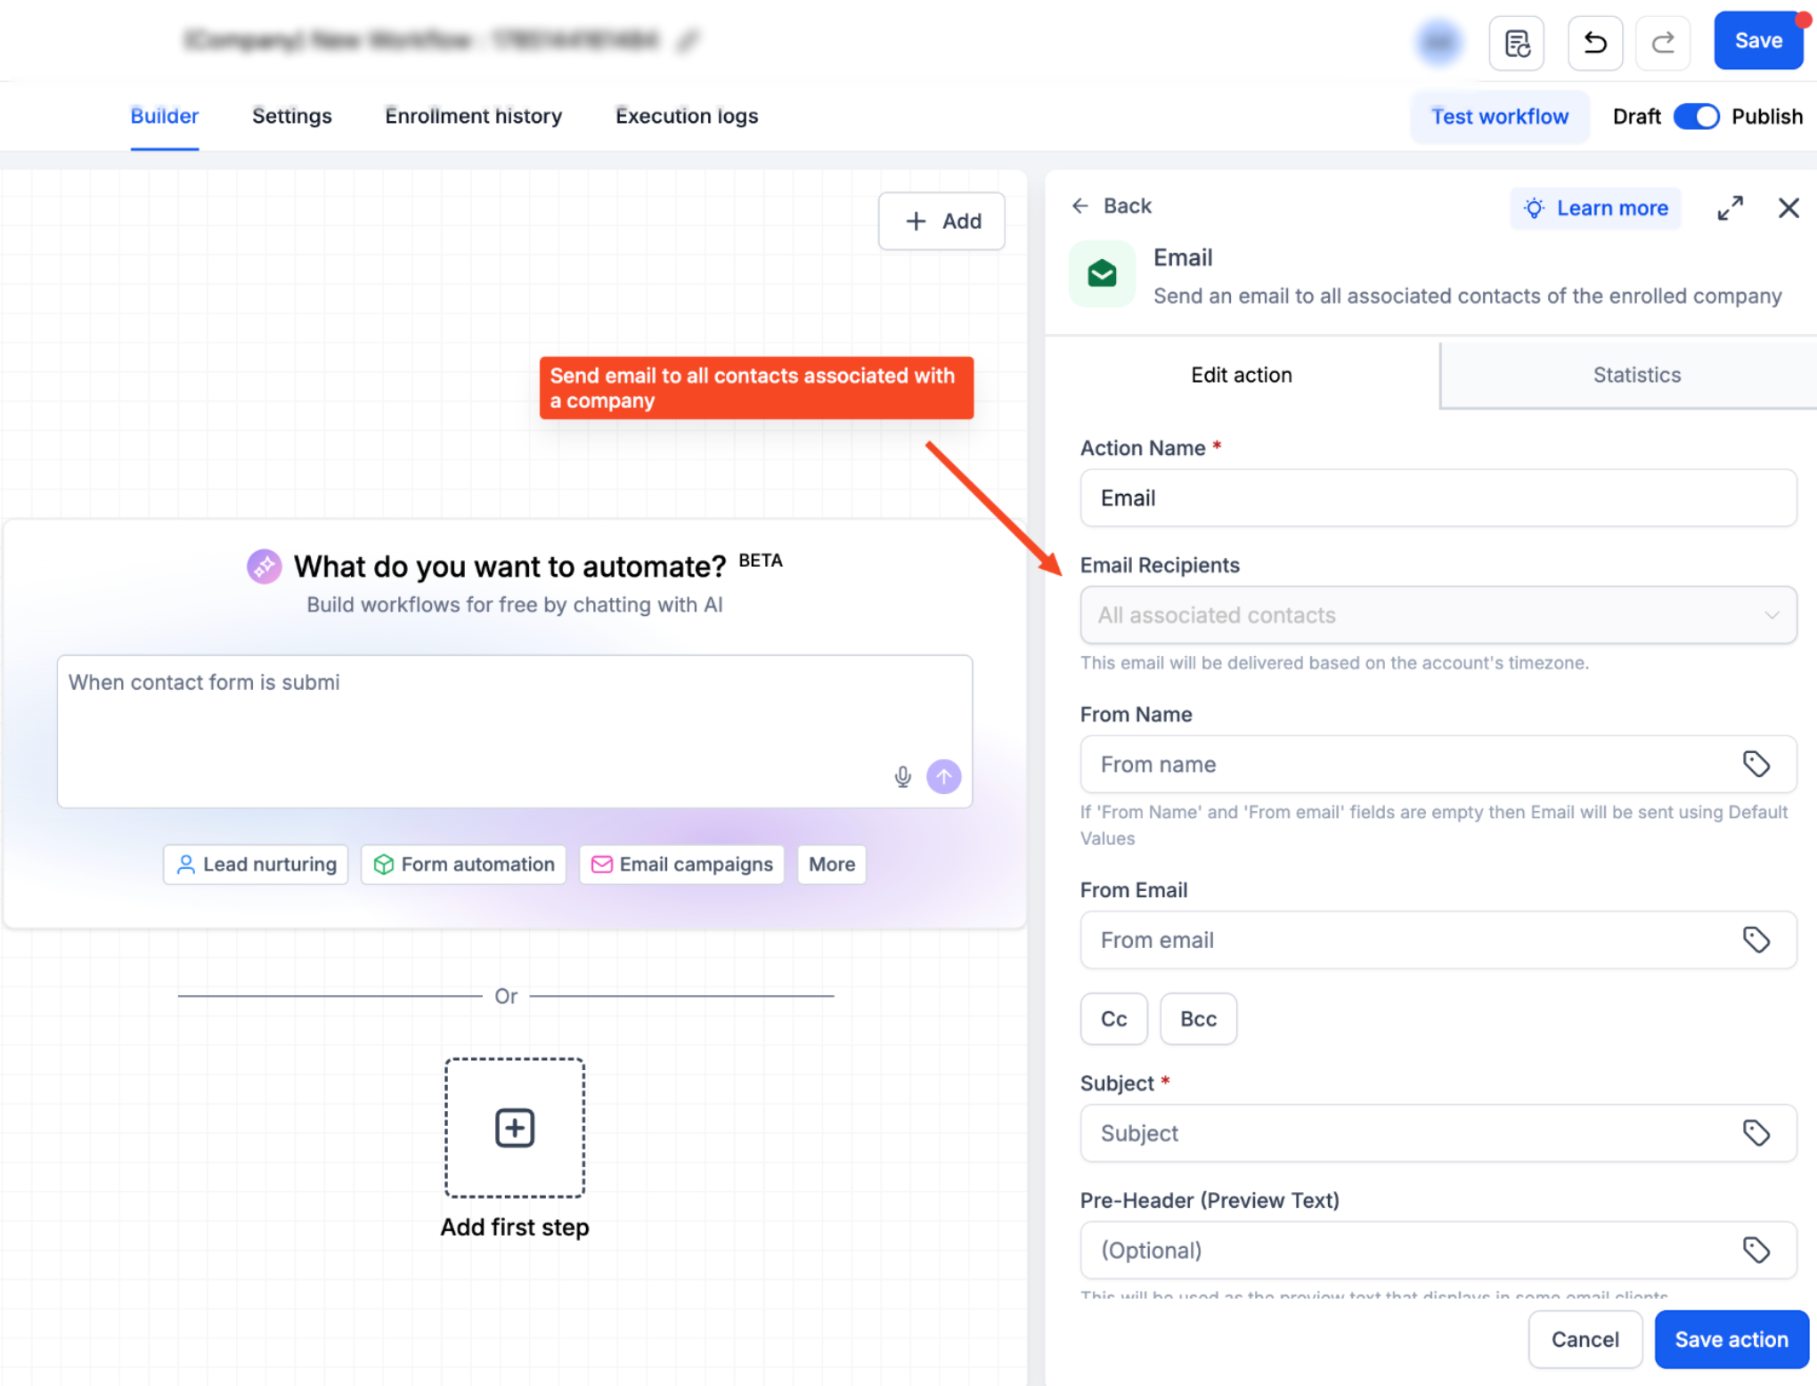
Create your email using the workflow email editor. Personalization tokens and formatting options are available just like other workflow email actions.
Save and Publish
Click Save Action after completing the email configuration.
Publish your workflow to begin sending emails automatically whenever the workflow trigger runs.
At runtime, emails are delivered to the selected associated contacts based on the configured recipient options and association labels.
Important Notes
Understanding how the Send Email action behaves helps ensure emails are delivered to the correct recipients and prevents unexpected results during workflow execution.
- Emails are sent using the Bulk Email sending domain configured for your account.
- Email delivery follows your account’s configured timezone.
- If From Name or From Email is left blank, the default account values are used automatically.
- If a contact matches multiple selected Association Labels, they receive only one email. Duplicate emails are automatically prevented.
- Company workflows send emails to associated contacts based on the selected recipient configuration.
- Custom Object workflows provide additional recipient options, including the earliest or most recently associated contact.
Frequently Asked Questions
Q: Do I need to enable this feature before I can use it?
Yes. This feature is currently available through Labs. Enable Email Action in Company & Custom Object Workflows before the Send Email action appears in Company or Custom Object workflows.
Q: Where can I find the Send Email action?
Open your workflow, click + Add, then select Send Email from the Communication category. You can also search for Send Email using the action search bar.
Q: What’s the difference between “All Associated Contacts” and Association Labels?
All Associated Contacts sends the email to every contact related to the Company or Custom Object.
Association Labels act as an additional filter, allowing you to send emails only to contacts with specific relationship types.
Q: What happens if a contact matches multiple Association Labels?
The contact receives only one email. Duplicate email delivery is automatically prevented, even if multiple selected labels match the same contact.
Q: Can I choose which associated contact receives the email?
Yes.
For Custom Object workflows, you can send the email to:
- All Associated Contacts
- Earliest Associated Contact
- Most Recently Associated Contact
Company workflows send emails to associated contacts based on the selected recipient configuration.
Q: Can I personalize these emails?
Yes. The email editor supports personalization tokens, custom fields, formatting, and the same editing capabilities available in other workflow email actions.
Q: What happens if no associated contacts match my selected Association Labels?
If no associated contacts match the configured recipient criteria, no email is sent. The workflow continues to the next action without generating an error.
Q: Which sending domain is used?
Emails use the Bulk Email sending domain configured for your account. Verify that your sending domain is configured correctly to help ensure successful email delivery.
Need Help?
If emails aren’t being sent as expected, first verify that the Labs feature is enabled, the workflow is published, and the correct recipient option has been selected. Also confirm that associated contacts exist for the Company or Custom Object and that any Association Labels match the relationships you’re targeting.
Before troubleshooting further, verify that:
- The Labs feature is enabled.
- The workflow is active and published.
- Associated contacts exist for the record.
- Recipient options are configured correctly.
- Association Labels match the intended contacts.
- Your Bulk Email sending domain has been configured.
- The From Name and From Email values are valid, or account defaults are available.
If you continue experiencing issues, collect screenshots of your workflow configuration, recipient settings, Association Labels, and email action before contacting support. Providing this information will help speed up troubleshooting and resolution.