
Bulk Import Companies via CSV
This article walks you through the bulk company import process in LeadConnector's CRM, including how to prepare your CSV file, map fields correctly, handle duplicates, and track import results.
You'll also learn how to enable the feature in Labs, understand verification steps, and use best practices to avoid data errors during migration.
Company and Custom Object Import is currently available in Labs. You must enable it before accessing bulk import functionality. Navigate to Settings → Labs → Company and Custom Object Import to activate the feature.
What is Bulk Import for Companies?
Bulk Import for Companies is a CSV-based import tool that lets you create and update multiple company records at once in LeadConnector's CRM. Instead of manually entering each company, you can upload a structured file containing company information and map it to the appropriate CRM fields.
The import process uses a four-step guided wizard that walks you through uploading your file, choosing import behavior (create, update, or both), mapping CSV columns to CRM fields, and verifying data before final submission. The system detects duplicates based on Company ID and provides detailed statistics on successful imports, errors, and warnings.
After completing an import, you can track progress and download a detailed report from the Bulk Actions – Companies dashboard for auditing and troubleshooting.
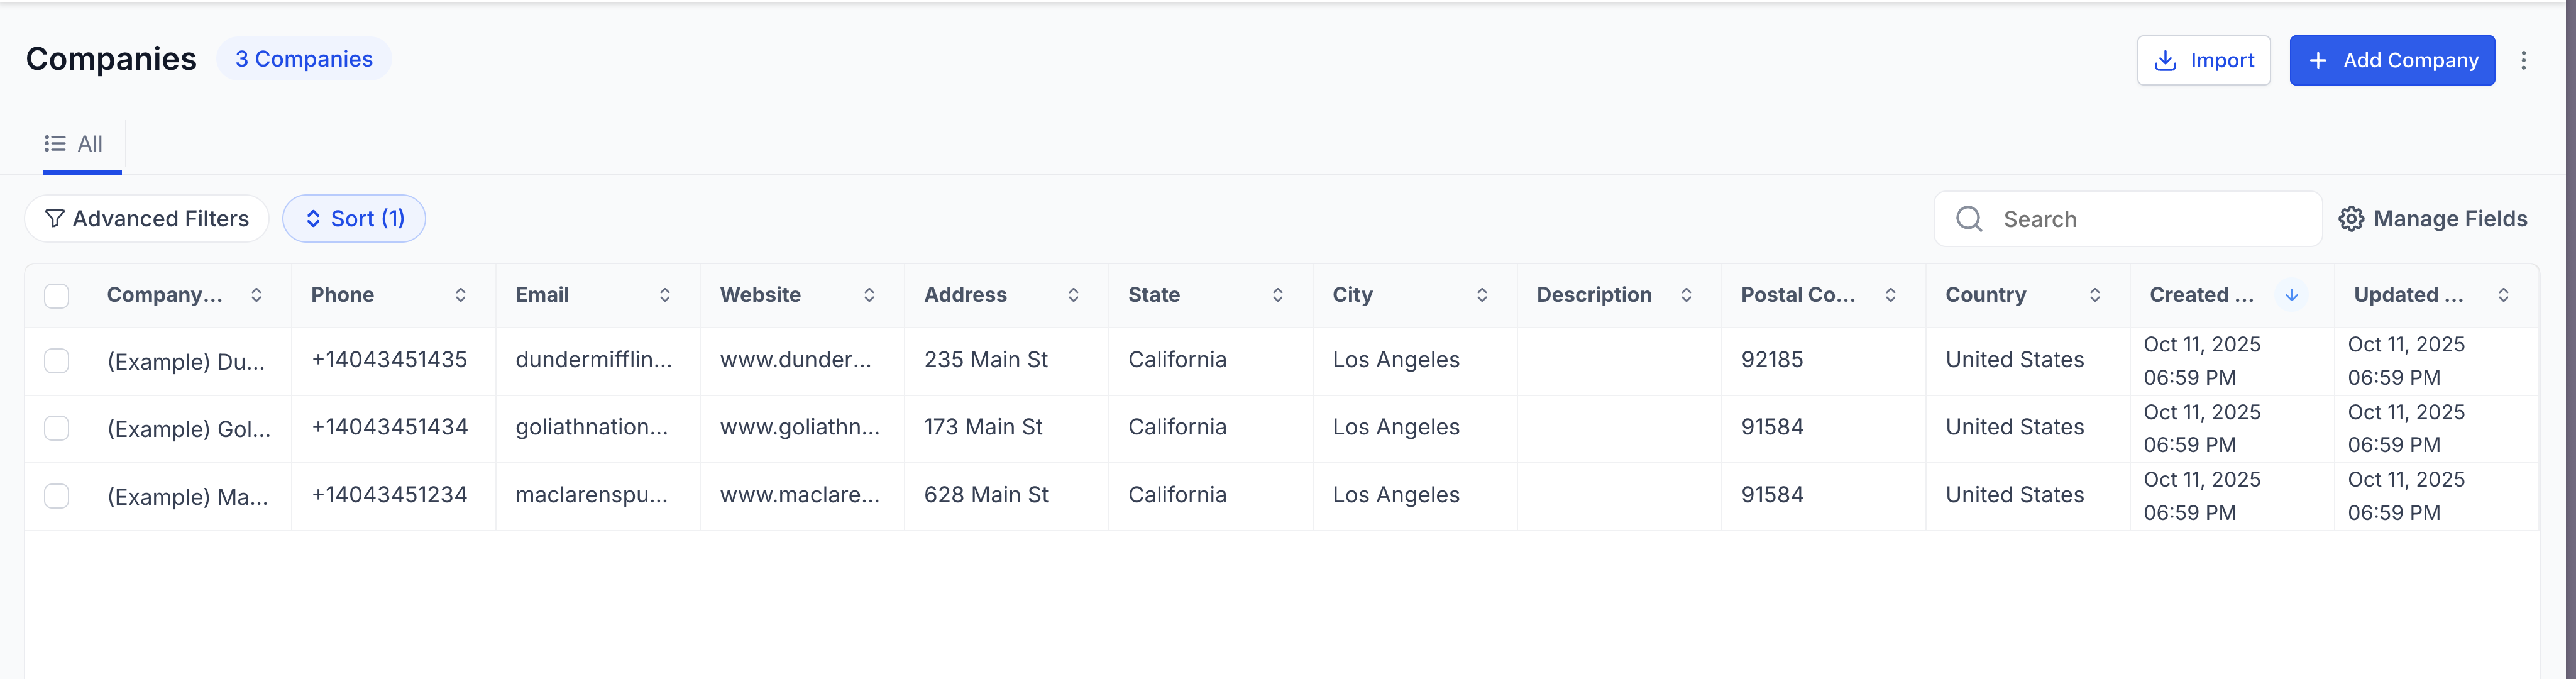
Key Benefits
The bulk import feature streamlines CRM data management by eliminating repetitive manual entry and reducing the time required to migrate or update large company datasets.
Enabling Company Import in Labs
Before you can access bulk company import, you must enable the feature through LeadConnector's Labs settings. Labs features are experimental or early-access capabilities that require manual activation.
In your LeadConnector account, click the gear icon or navigate to Settings from the main navigation menu.
Within Settings, locate and click Labs to view all available experimental features.
Scroll down to find Company and Custom Object Import, then toggle the switch to On. The feature is immediately activated.
Once enabled, the import option appears in the Companies section. If you do not see the feature after toggling, refresh your browser.
How to Set Up Bulk Company Import
The bulk import wizard guides you through a four-step process: starting the import, uploading your CSV, mapping fields, and verifying data before submission. Follow these steps to complete a successful import.
Navigate to Companies in the main menu, then click the Import button. On the object selection screen, choose Companies.
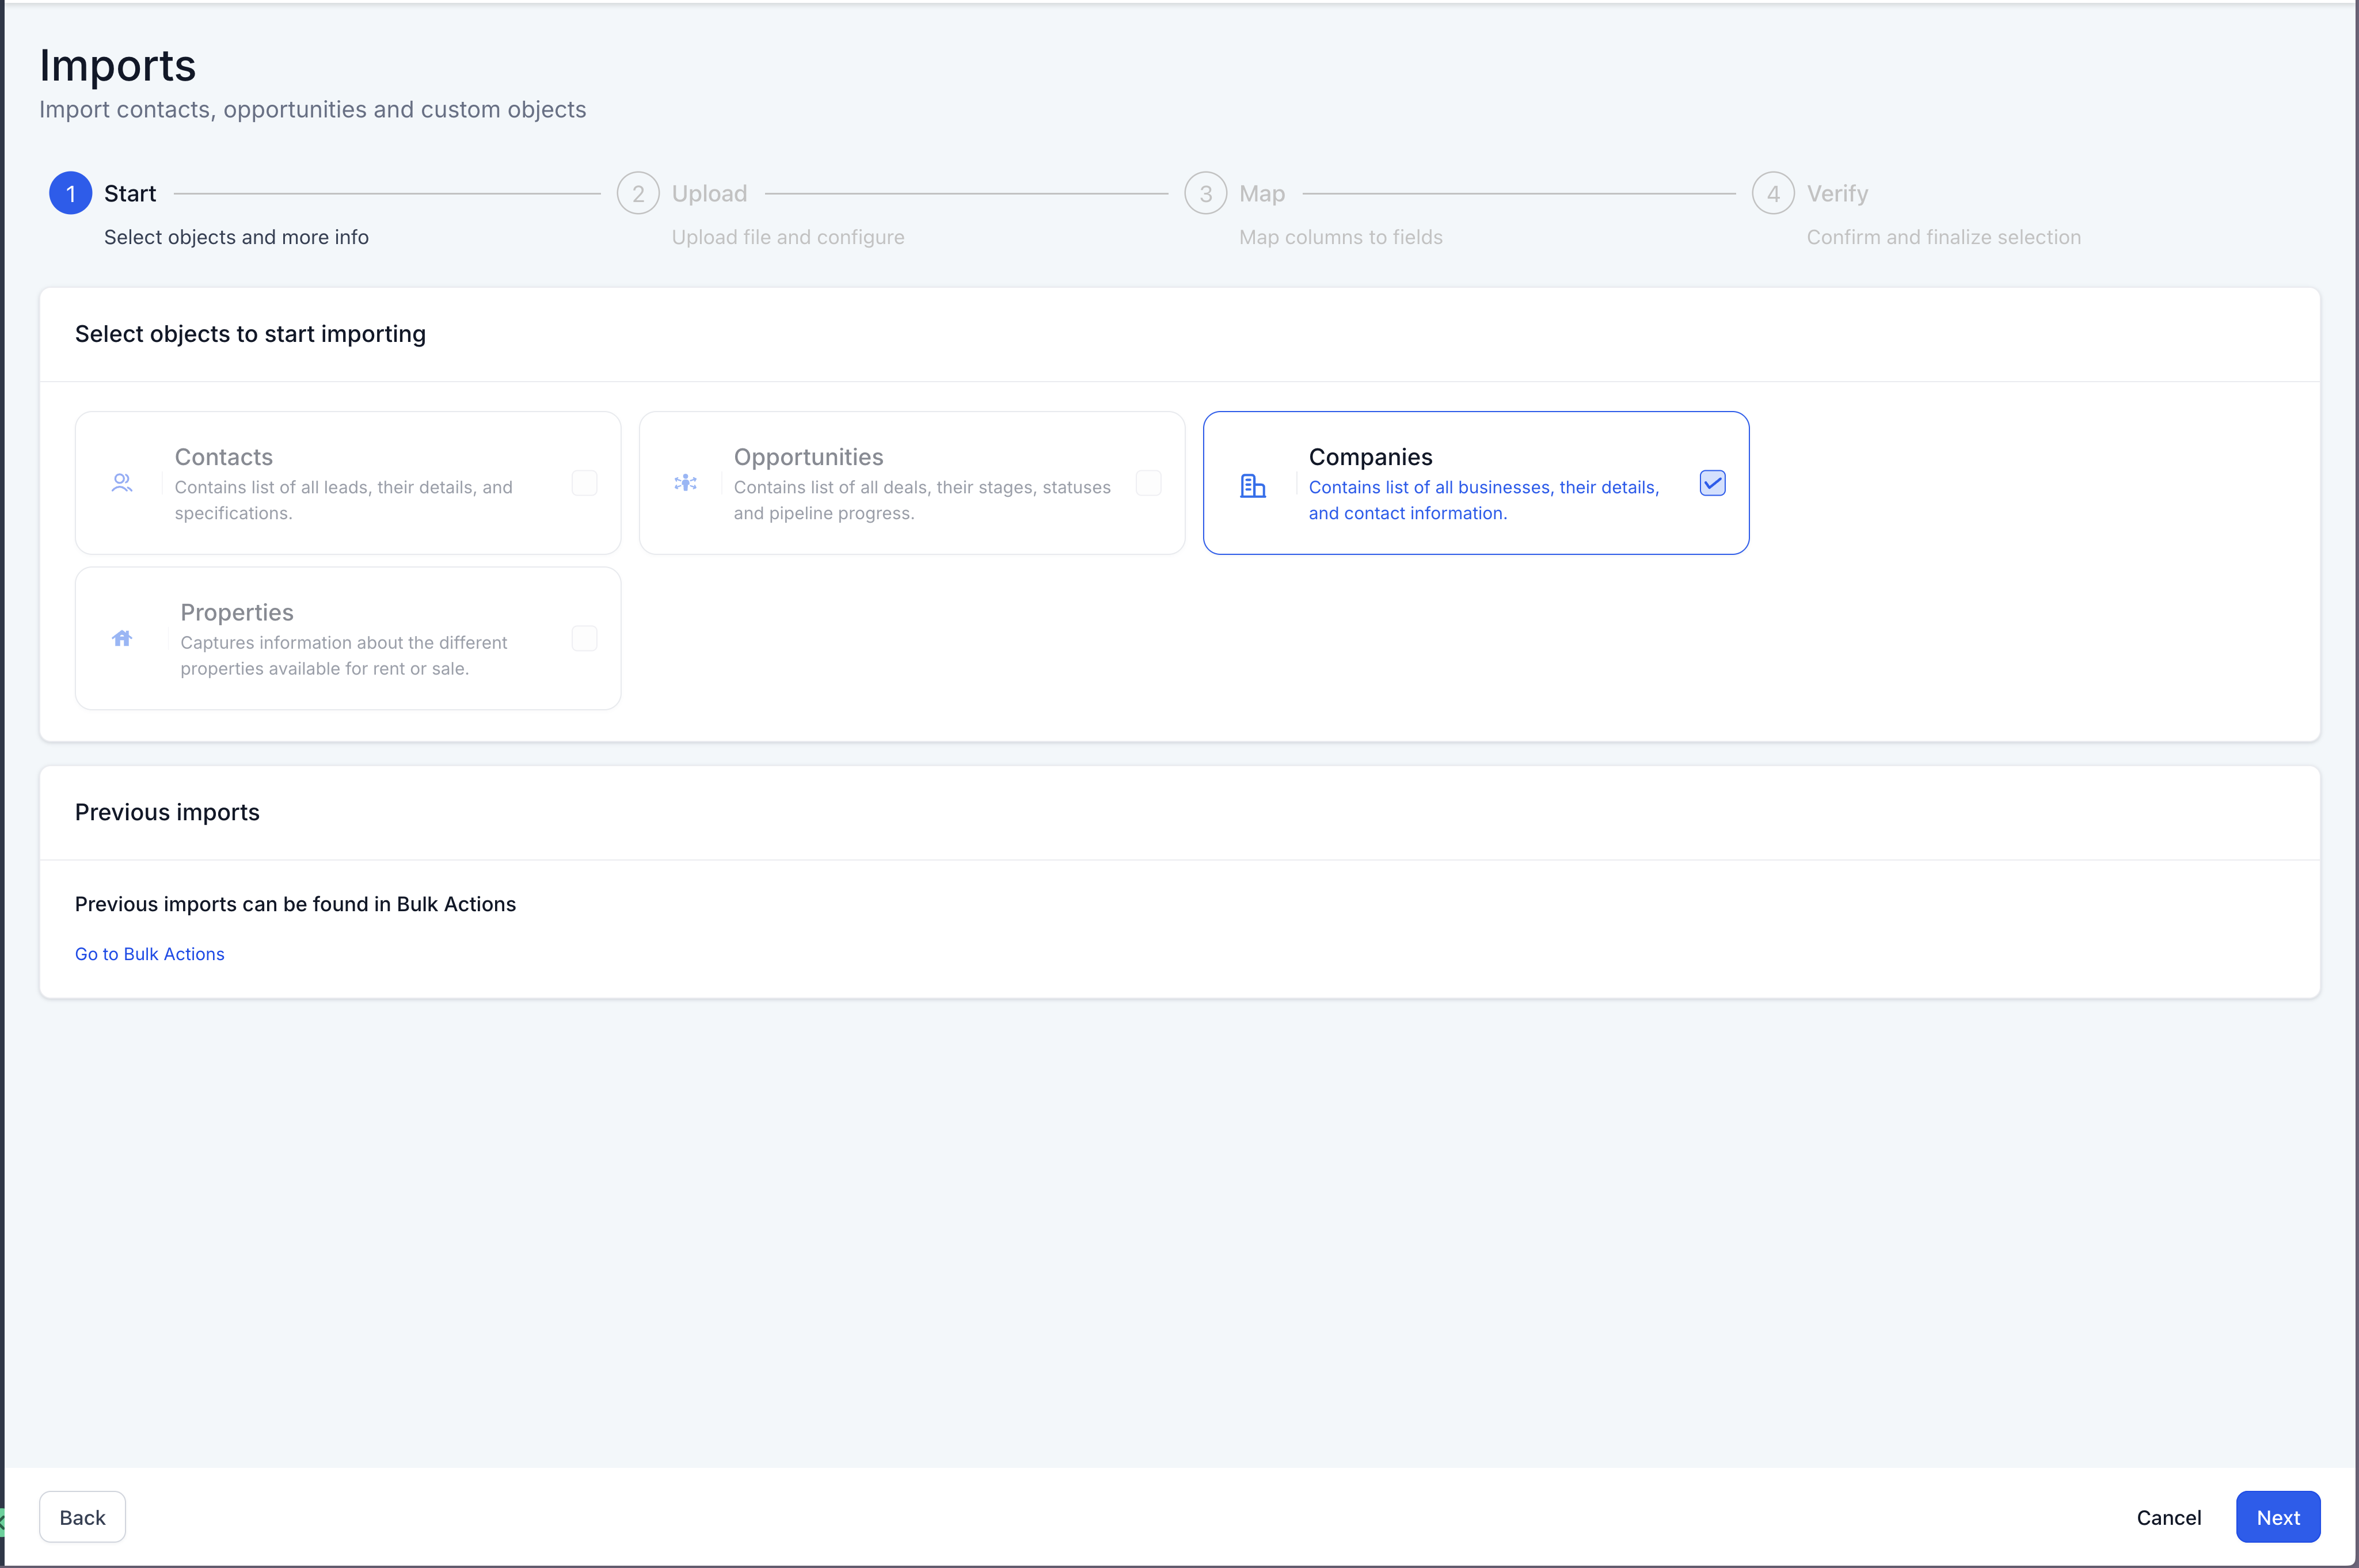
Click Choose File or drag and drop your CSV into the upload area. Your file should include column headers that match or can be mapped to LeadConnector company fields.
After uploading, select your import behavior:
- Create companies — Only create new records; skip existing ones.
- Update companies — Only update existing records; skip new ones.
- Create & update companies — Create new records and update existing ones.
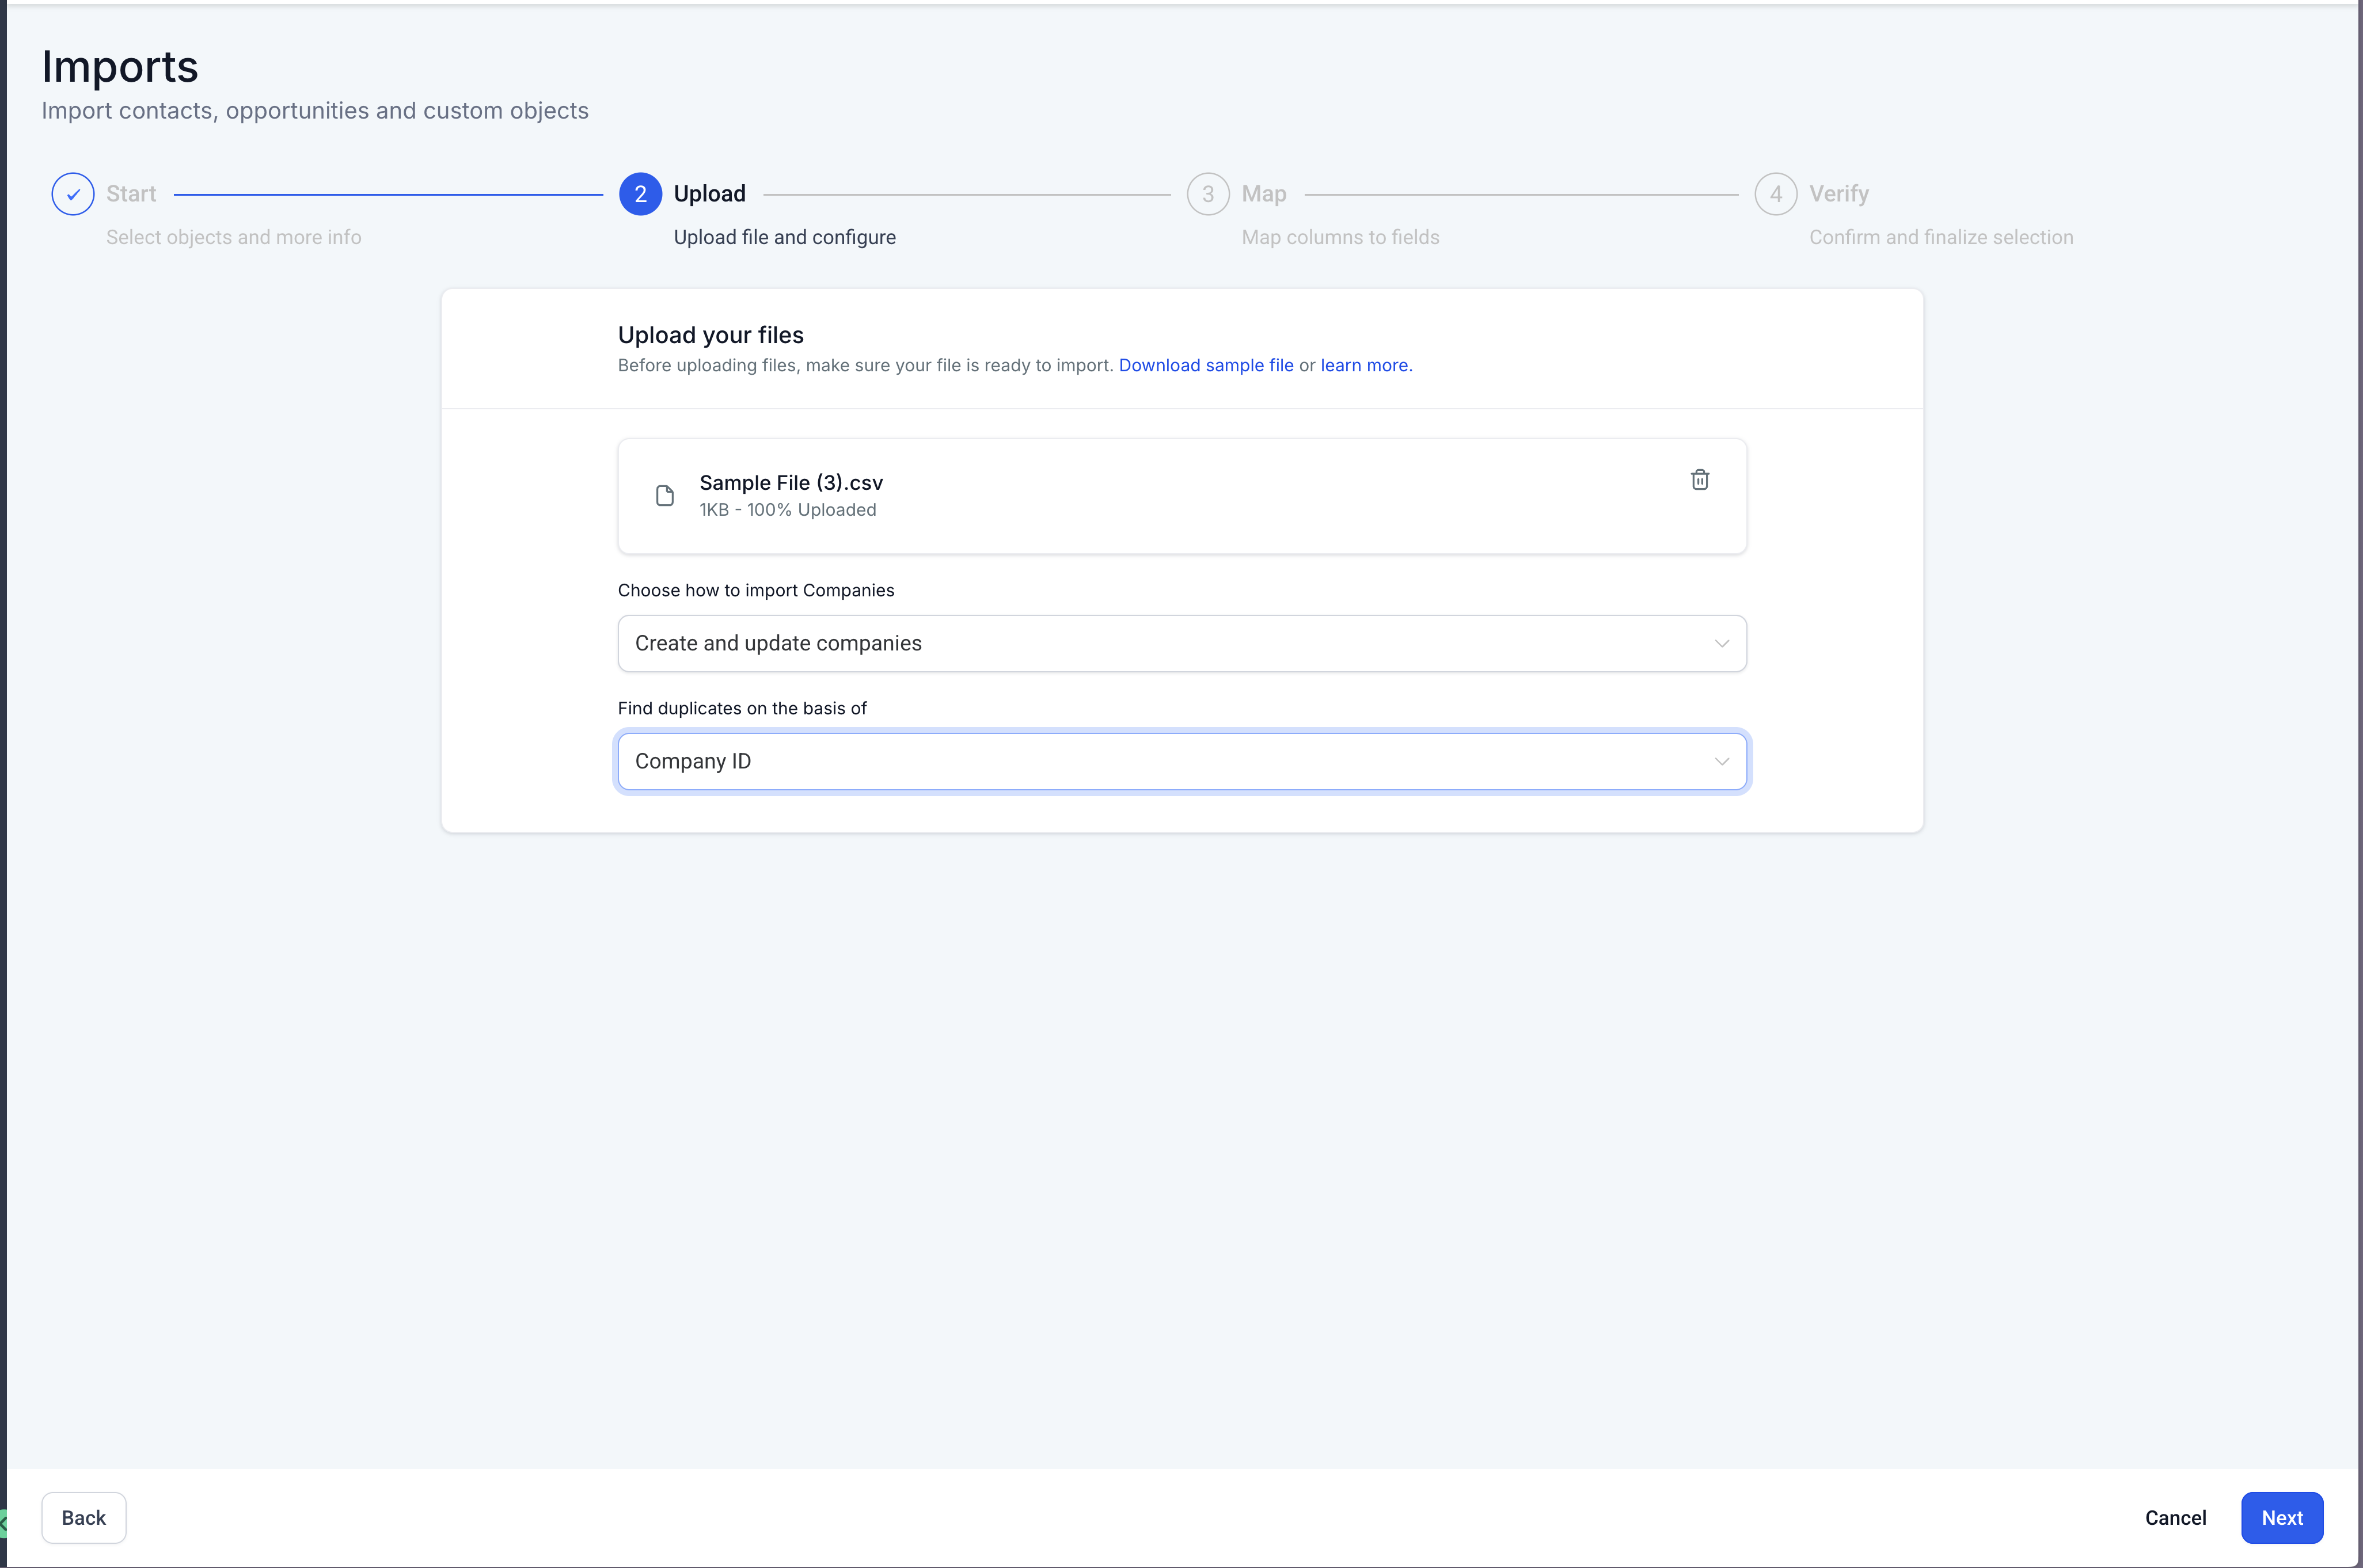
Choose the field used to identify duplicate records. The system defaults to Company ID. If a matching ID is found, the import updates that record instead of creating a duplicate.
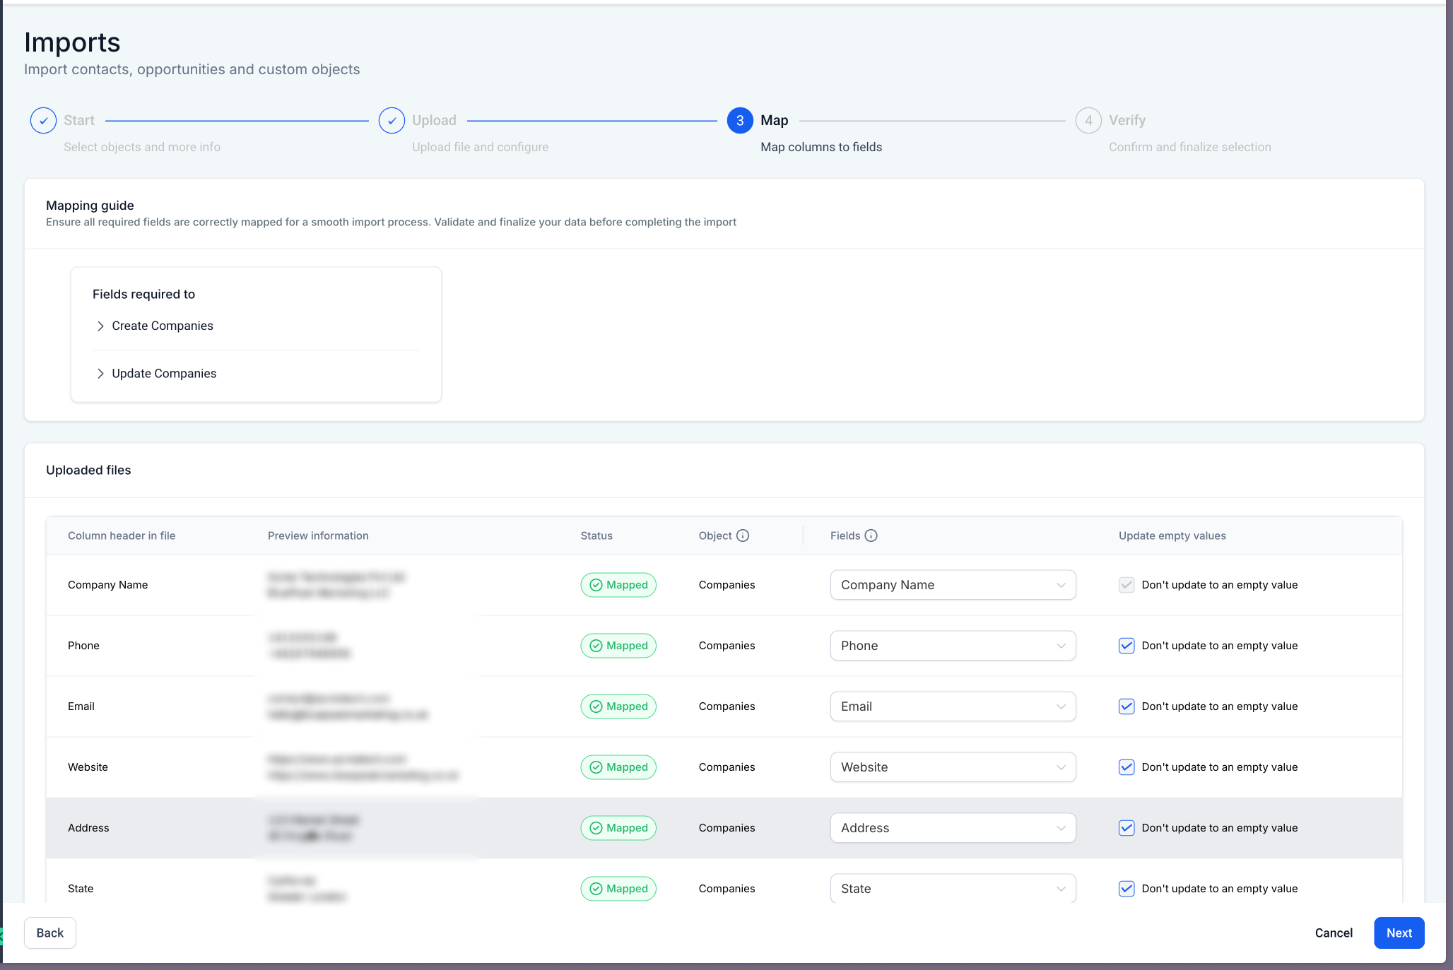
The wizard displays a preview of your CSV data alongside available CRM fields. Match each CSV column to the corresponding company field in LeadConnector. For example, map a column named "Company Name" to the CRM field "Name".
If you want to prevent blank CSV cells from overwriting existing data, enable Don't update to empty value for specific fields.
The verification screen displays a summary of your import configuration, including the number of rows to import, field mappings, and duplicate handling rules. Review all settings carefully before proceeding.
Click Start Bulk Import to begin processing. The system processes your file in the background and provides progress updates in the Bulk Actions – Companies dashboard.
Tracking and Monitoring Import Progress
After you start a bulk import, LeadConnector processes your file in the background and displays real-time status updates in the Bulk Actions – Companies dashboard. This section shows all active and completed imports with detailed statistics.
Go to Companies, then click Bulk Actions – Companies from the top menu or action bar. This page lists all import jobs with timestamps and status indicators.
Each import displays three key metrics:
- Success — Number of records successfully created or updated without errors.
- Error — Number of records that failed to import due to validation issues or system errors.
- Warning — Number of records imported with minor issues, such as missing optional fields or formatting concerns.
After an import completes, click the Download Report button to receive a detailed CSV file containing row-by-row results. This report includes error descriptions, affected records, and suggested fixes for failed entries.
If you see a high error count, download the report immediately to identify the root cause. Common issues include incorrect field mappings, invalid data formats, or missing required fields.
Best Practices and Setup Tips
Following these best practices ensures accurate imports, minimizes errors, and protects your existing CRM data from accidental overwrites or deletions.
Remove duplicate rows, fix formatting errors, and ensure all required fields (like Company ID) are populated. Use spreadsheet tools to check for blank cells or inconsistent data types before import.
Do not rush through the mapping step. Verify that each CSV column is matched to the correct CRM field. Incorrect mappings can result in data being written to the wrong fields or rejected entirely.
If your CSV contains blank cells for certain columns, enabling this option prevents those blank values from overwriting existing data in LeadConnector. This is especially useful for partial updates or incomplete datasets.
Before importing thousands of records, run a test import with 5–10 sample rows. Verify the results in your CRM, check the import report, and confirm that mappings and duplicate handling work as expected.
After each import, download the detailed report and save it for your records. This report is invaluable for troubleshooting, auditing, and identifying patterns in failed or warning records.
Bulk imports cannot be undone. Always back up your existing company data before running large-scale updates or replacements. If you accidentally overwrite critical fields, you will need to manually restore the data or re-import from a backup.
Frequently Asked Questions
If you encounter issues during bulk import or need additional support, follow these steps:
- Download the import report from Bulk Actions – Companies to identify specific error rows.
- Check the Help Center for articles on CSV formatting and field requirements.
- Contact support via the in-app chat if errors persist or if you need guidance on complex field mappings.
- Review the verification screen carefully before submitting large imports to prevent widespread errors.