
Launching a website involves creating your pages, connecting a domain, assigning it to the website, and publishing the final version. Following the correct order helps prevent broken URLs, domain errors, and unpublished changes from affecting your visitors.
TABLE OF CONTENTS
- What Is a Website Launch?
- Before You Begin
- Create and Prepare Your Website
- Connect Your Domain
- Assign the Domain to Your Website
- Publish and Verify Your Website
- Frequently Asked Questions
- Need Help?
What Is a Website Launch?
A website launch makes your completed website available to visitors through your chosen domain or subdomain.
Save stores changes made in the Website Builder, while Publish makes the saved version available on the live website. Your domain must also be properly connected and assigned for visitors to reach the site at the intended address.
Before You Begin
Preparing your content and domain information before launch helps prevent setup delays.
Confirm that you have:
- Your website content, images, navigation, and required pages ready.
- A domain or subdomain you want visitors to use.
- Access to your domain provider's DNS settings if manual configuration is required.
- A designated homepage and URL paths for additional pages.
- Reviewed the website on desktop and mobile.
Create and Prepare Your Website
Building and reviewing the website before connecting your domain helps prevent incomplete content from reaching visitors.
Go to Sites → Websites.
Create a new website or open an existing one.
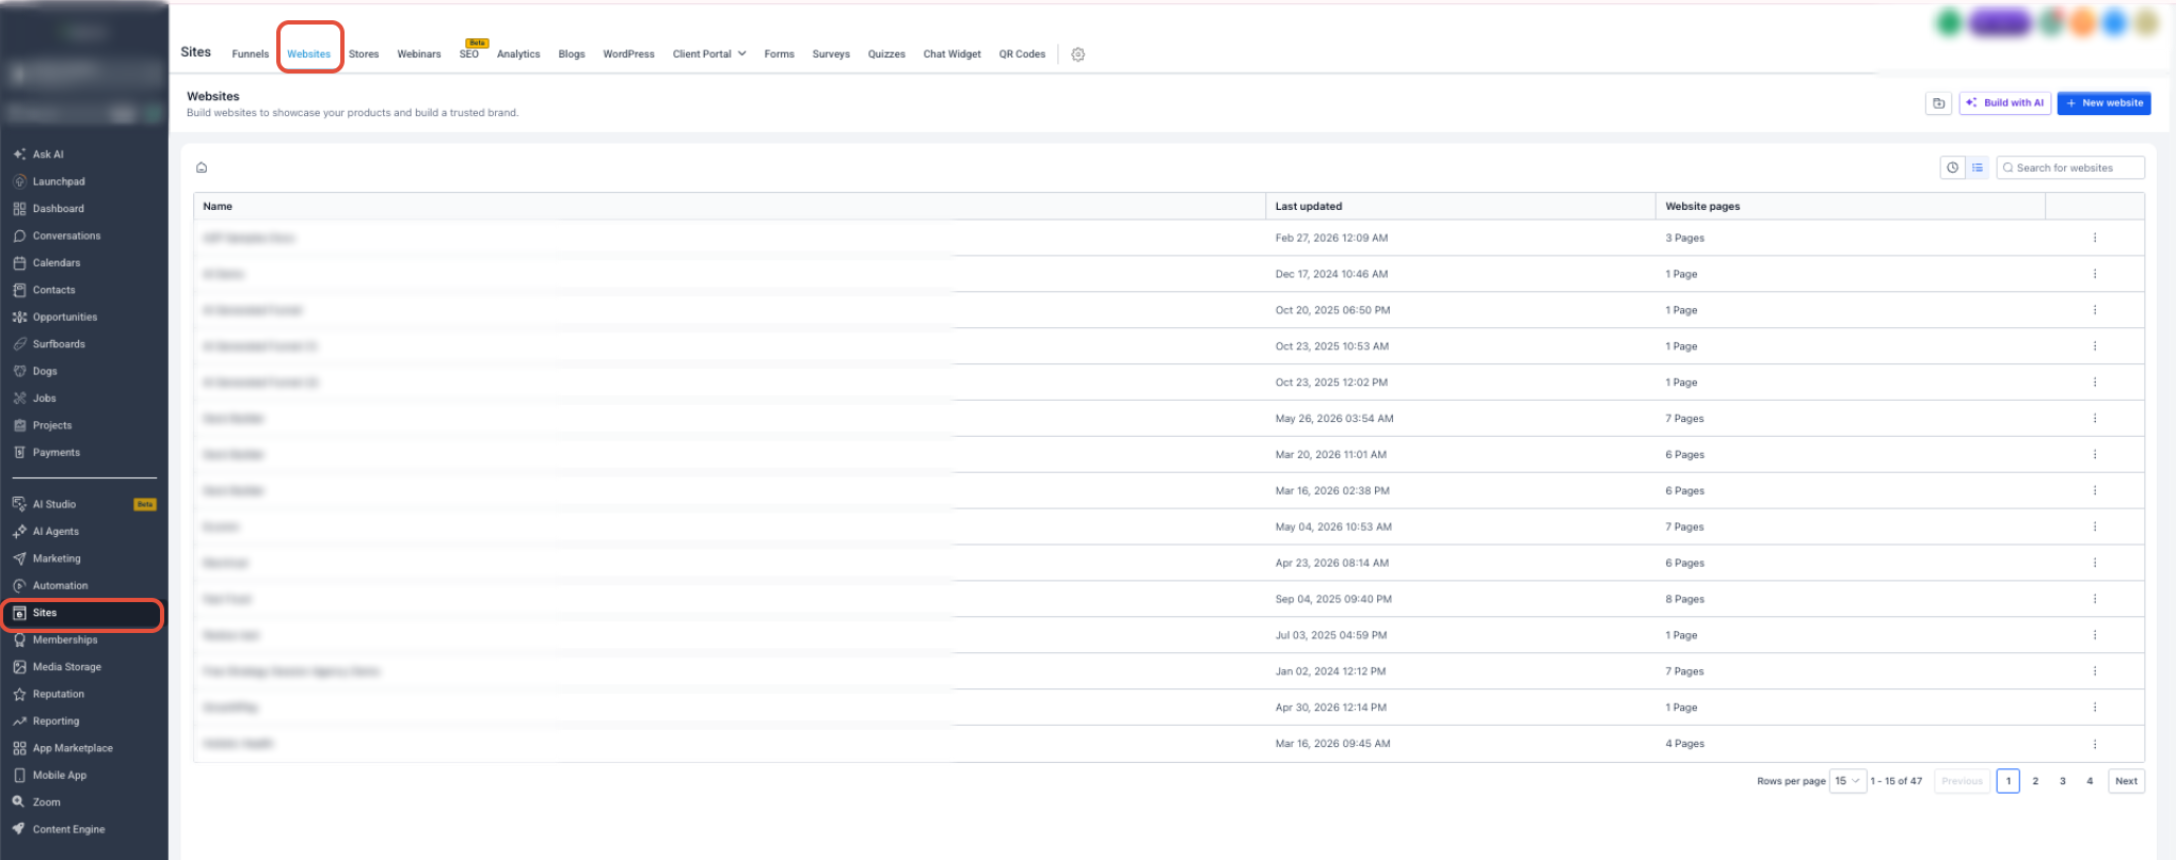
Open Sites → Websites, then select the website you want to prepare for launch or create a new website.
Before continuing:
- Update your text, images, colors, navigation, buttons, and forms.
- Confirm that navigation links open the correct pages.
- Review desktop and mobile layouts.
- Add page titles and meta descriptions where needed.
- Preview each page.
- Save your changes.
Connect Your Domain
Connecting a domain establishes the web address visitors will use to reach your website.
When selecting a domain from the Website Builder, you can choose an existing connected domain or begin the domain connection process.
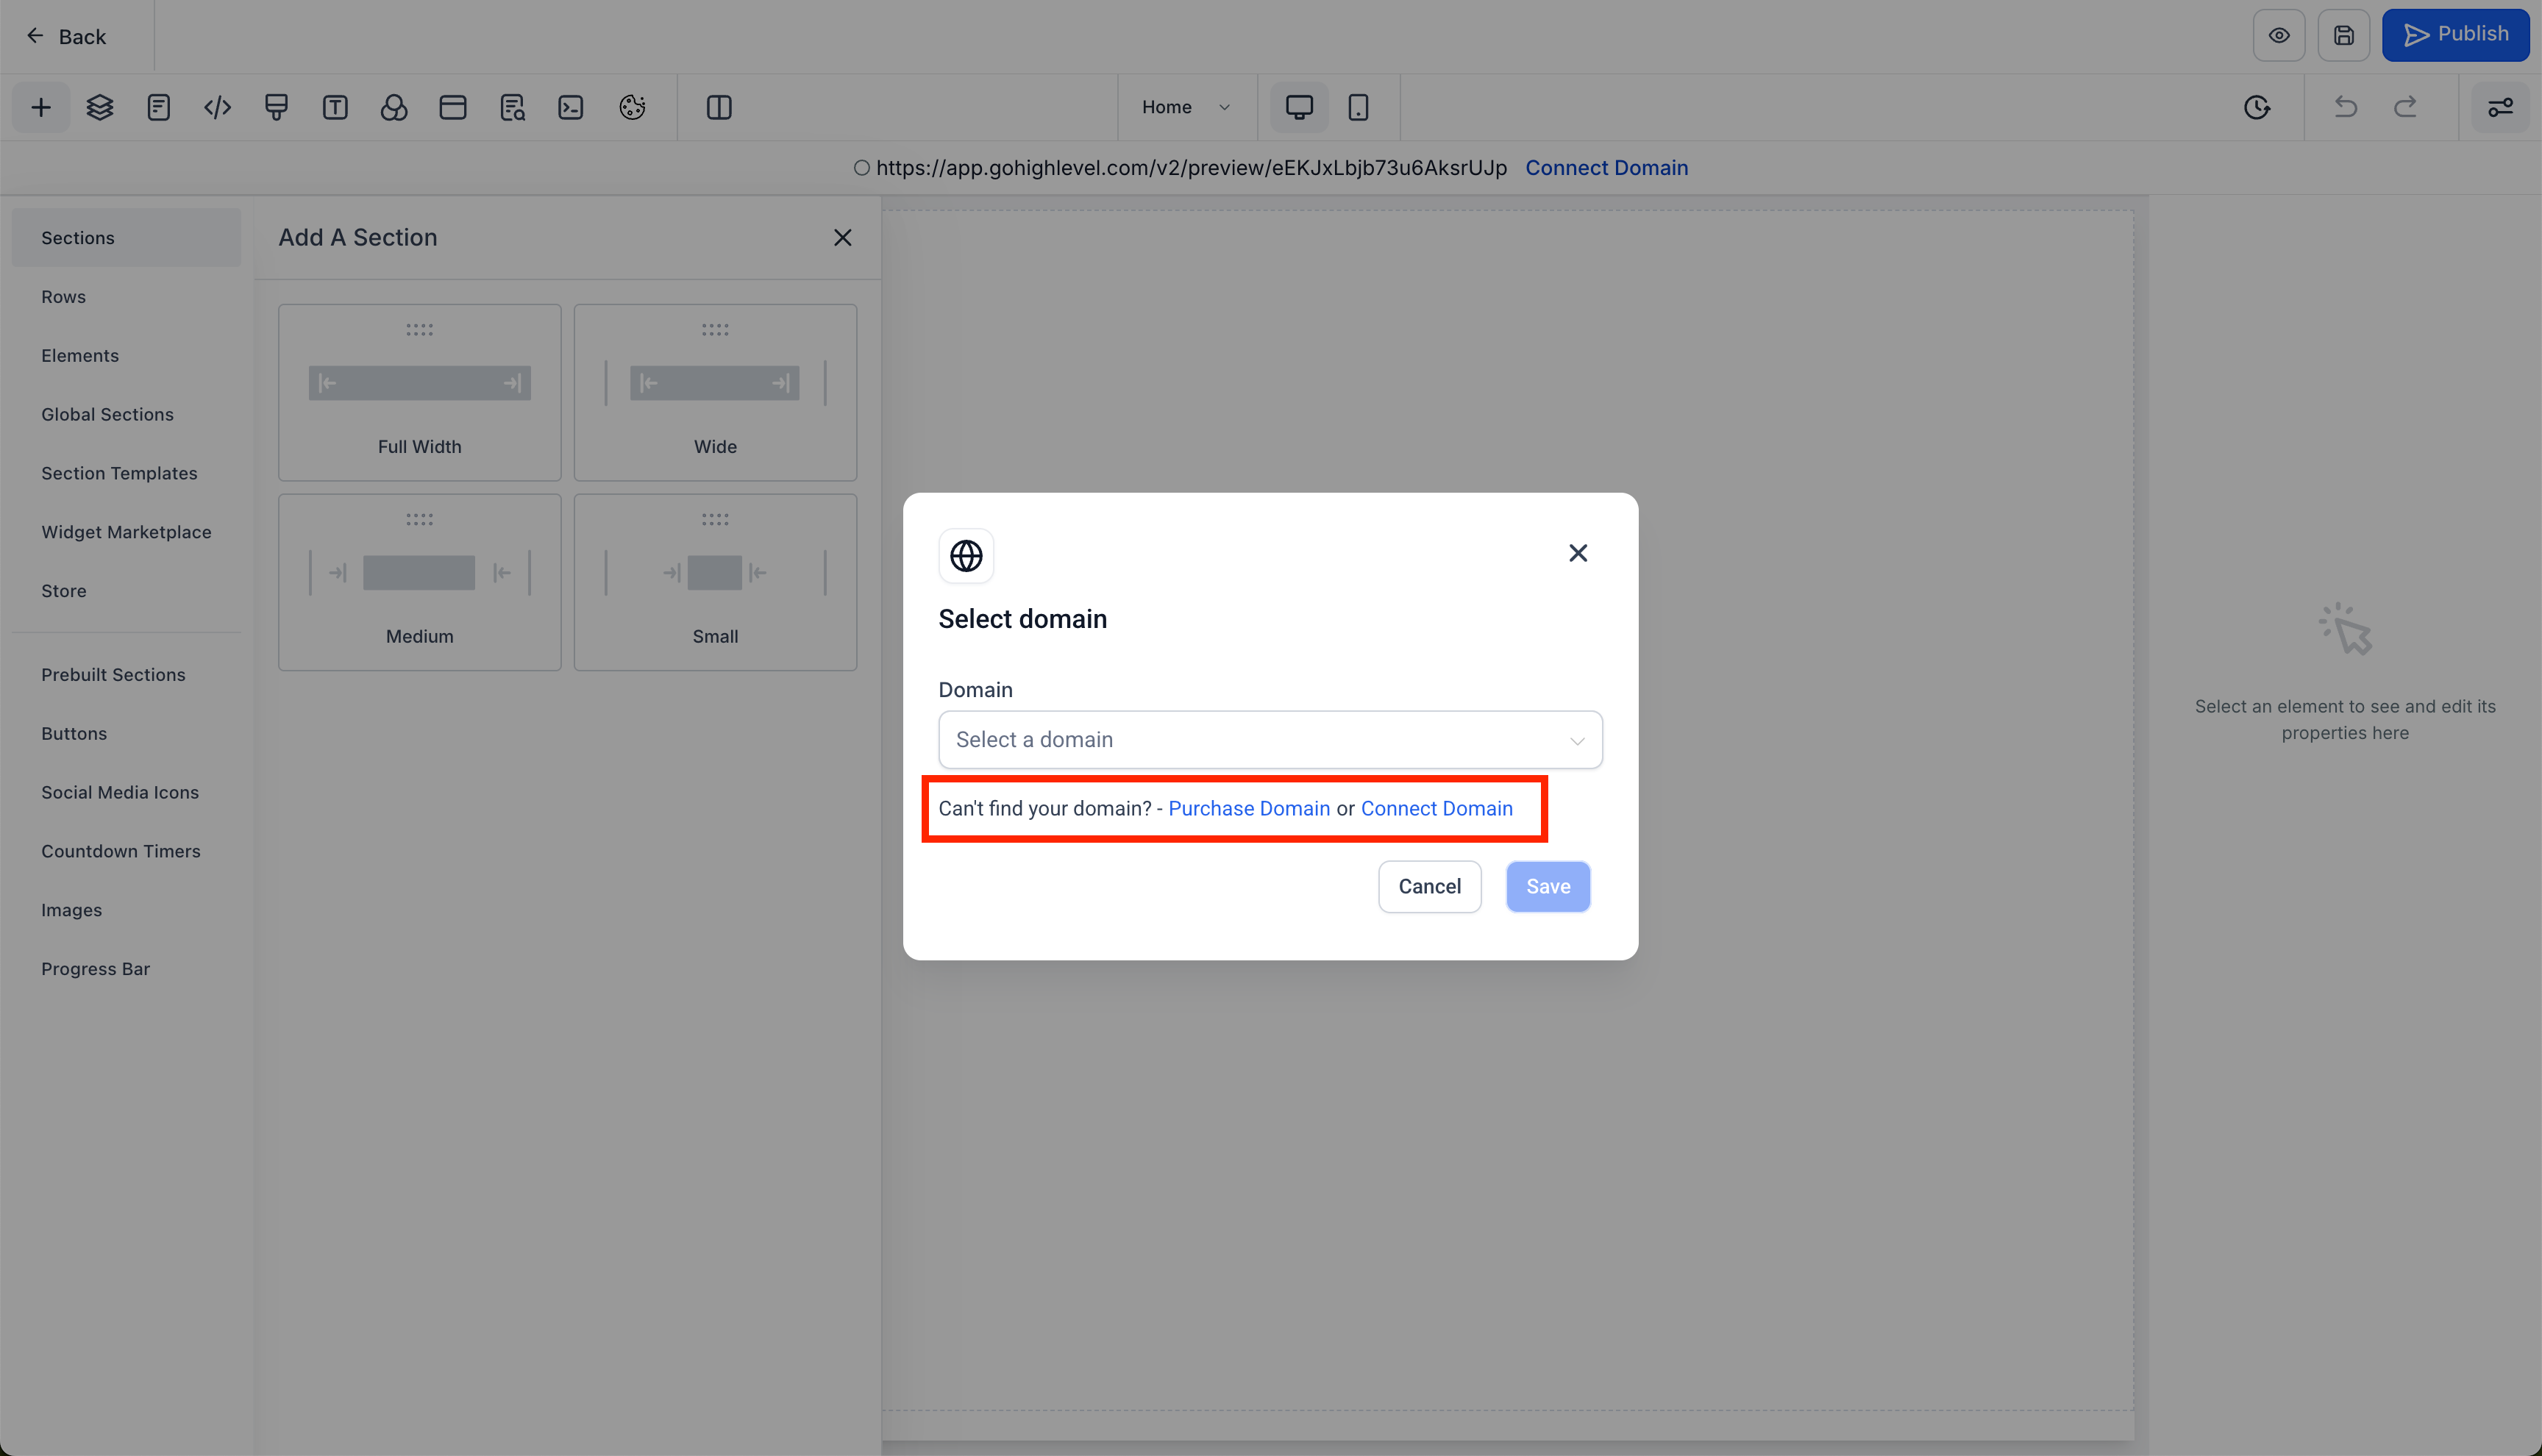
Open the domain selector. Choose an existing domain or select Connect Domain when the domain you want to use is not available.
You can also manage domains from:
Settings → Domains & URL Redirects
From the Domains page, click Connect a domain.
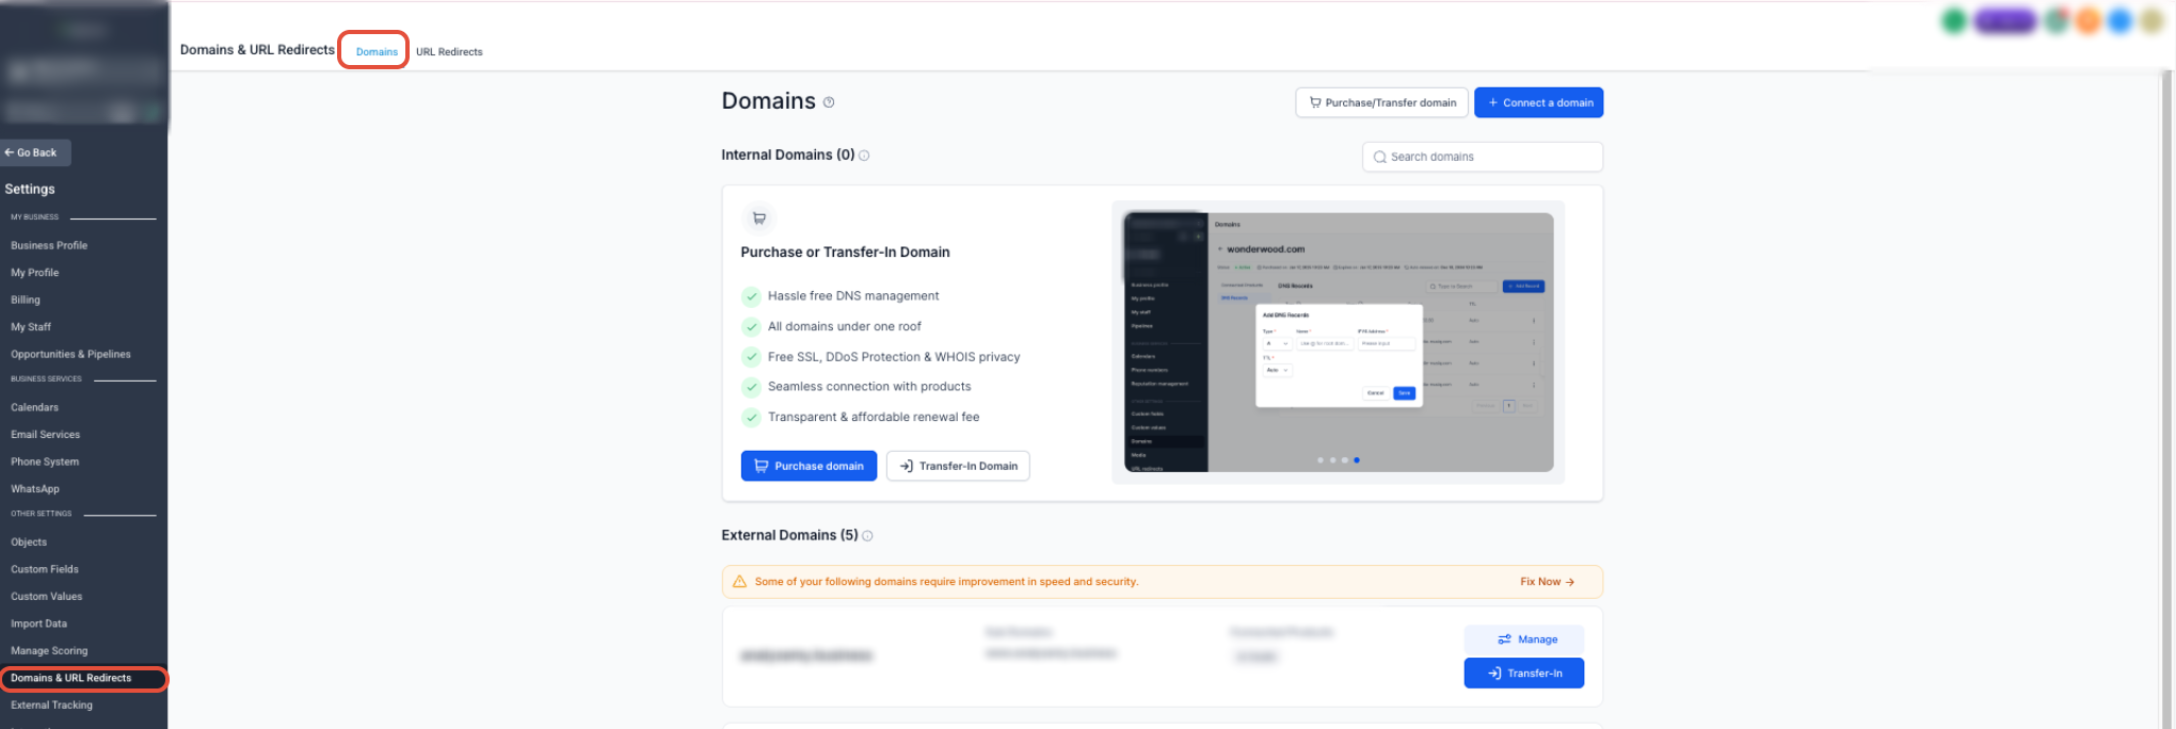
Open the Domains area and click Connect a domain to begin connecting an externally managed domain.
Enter the domain or subdomain visitors should use, then click Continue.
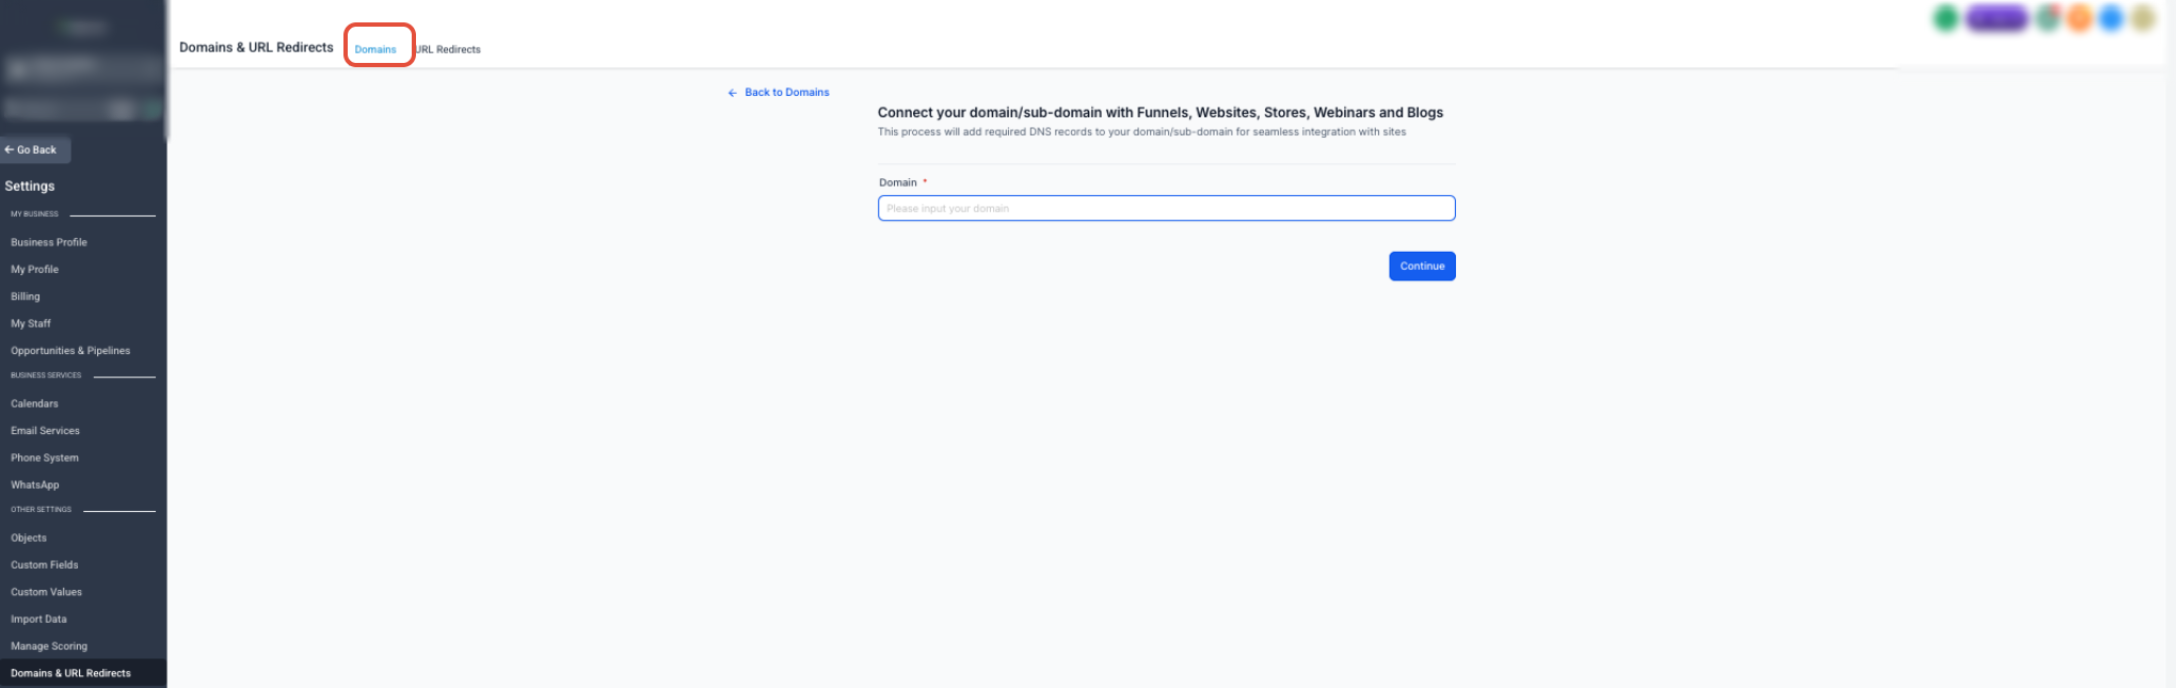
Enter the exact root domain or subdomain you want to connect, then click Continue and follow the displayed DNS instructions.
Depending on your domain provider, you may be able to complete the connection automatically or be asked to manually add DNS records.
When manual configuration is required, enter the provided DNS records exactly as shown through the provider managing your domain.
Wait until the domain is connected or verified before continuing.
Assign the Domain to Your Website
Connecting a domain verifies the address, but the domain must also be assigned to the correct website.
Return to Sites → Websites, open the website, and select the connected domain from its domain settings.
Review the URL path before saving:
- Use the intended homepage as the default when visitors should reach the website directly from the domain.
- Keep a path such as /services when the website should load from a specific path.
Save the website settings after assigning the domain.
Publish and Verify Your Website
Publishing makes the latest saved version available to visitors. A final live-site review helps catch issues that may not appear inside the builder.
Open the Website Builder and:
- Preview the website one final time.
- Click Save.
- Click Publish.
- Publish each page that should be available to visitors.
After publishing, open the website in a private or incognito browser window and confirm:
- The correct domain opens.
- The website loads securely over HTTPS.
- The correct homepage appears.
- Navigation links and buttons work.
- Forms, calendars, popups, and checkout elements work when applicable.
- Desktop and mobile layouts display correctly.
- The latest published content appears.
- No placeholder content, test information, or broken links remain.
Frequently Asked Questions
Q: Why does my live website still show old content?
The latest changes may have been saved but not published. Open the affected page, click Publish, then check the website again in a private or incognito browser window.
Q: Why is my domain still pending?
DNS changes may still be updating, or one of the required records may be incorrect. Compare the DNS records with the values provided during setup and allow time for recent changes to propagate.
Q: Why does my website show an SSL or privacy warning?
Confirm that the required DNS records are correct and that there are no conflicting records. SSL can only be provisioned after the domain configuration has been successfully verified.
Q: Why does my domain open a 404 page?
Confirm that the domain is assigned to the correct website, the intended page has been published, and the homepage or URL path is configured correctly.
Q: What should I do if automatic domain connection is unavailable?
Use the manual connection process and add the exact DNS records provided during setup through the service managing your domain.
Q: Do I need to connect the domain again every time I update my website?
No. Once the domain is correctly connected and assigned, normal website updates only need to be saved and published.
Need Help?
If your website is not appearing correctly after launch, first determine whether the issue involves the website, domain connection, DNS records, or publishing status.
Verify that:
- The domain is connected or verified.
- The domain is assigned to the correct website.
- Required DNS records match the values provided during setup.
- The intended homepage and URL paths are configured correctly.
- The affected pages have been published.
- Recent DNS changes have had enough time to propagate.
- The website works in a private or incognito browser window.
If the issue continues, capture the domain status, DNS configuration, website assignment, affected URL, and a screenshot of the error before contacting support. This information will make troubleshooting faster and help avoid unnecessary DNS changes.