A countdown timer is a powerful tool for creating urgency and excitement for upcoming events, product launches, sales, and sign-ups. It visually counts down the time remaining until a specific event or action, encouraging users to act quickly.
TABLE OF CONTENTS
- Where Can You Use a Countdown Timer?
- How to create a countdown timer?
- Step 1: Navigate to Marketing
- Step 2: Click on New
- Step 3: Select a Template
- Step 4: Choose Timer Type
- Step 5: Configure Timer Details
- Step 6: Add Links
- Step 7: Customize Styling
- Step 8: Rename Timer
- Step 9: Save
- Related Articles
Where Can You Use a Countdown Timer?
- Product Launch: Use a countdown timer to build anticipation for the release of a new product. Display the timer on your landing page, emails, and social media to let customers know exactly when the product will become available.
- Event Registration: If you’re hosting an event, a countdown timer can remind people of the registration deadline or when the event will start. Place the timer on your event page, in invitations, and in follow-up emails to keep potential attendees informed.
- Sale: For limited-time sales or flash promotions, a countdown timer shows how much time is left to take advantage of special offers. Feature the timer on your sale page, in marketing emails, and on your website to drive urgency.
- Sign-Up: When running a campaign that requires sign-ups or registrations, a countdown timer can highlight the deadline for joining. Include the timer on your sign-up page and in promotional materials to prompt users to register before time runs out.
How to create a countdown timer?
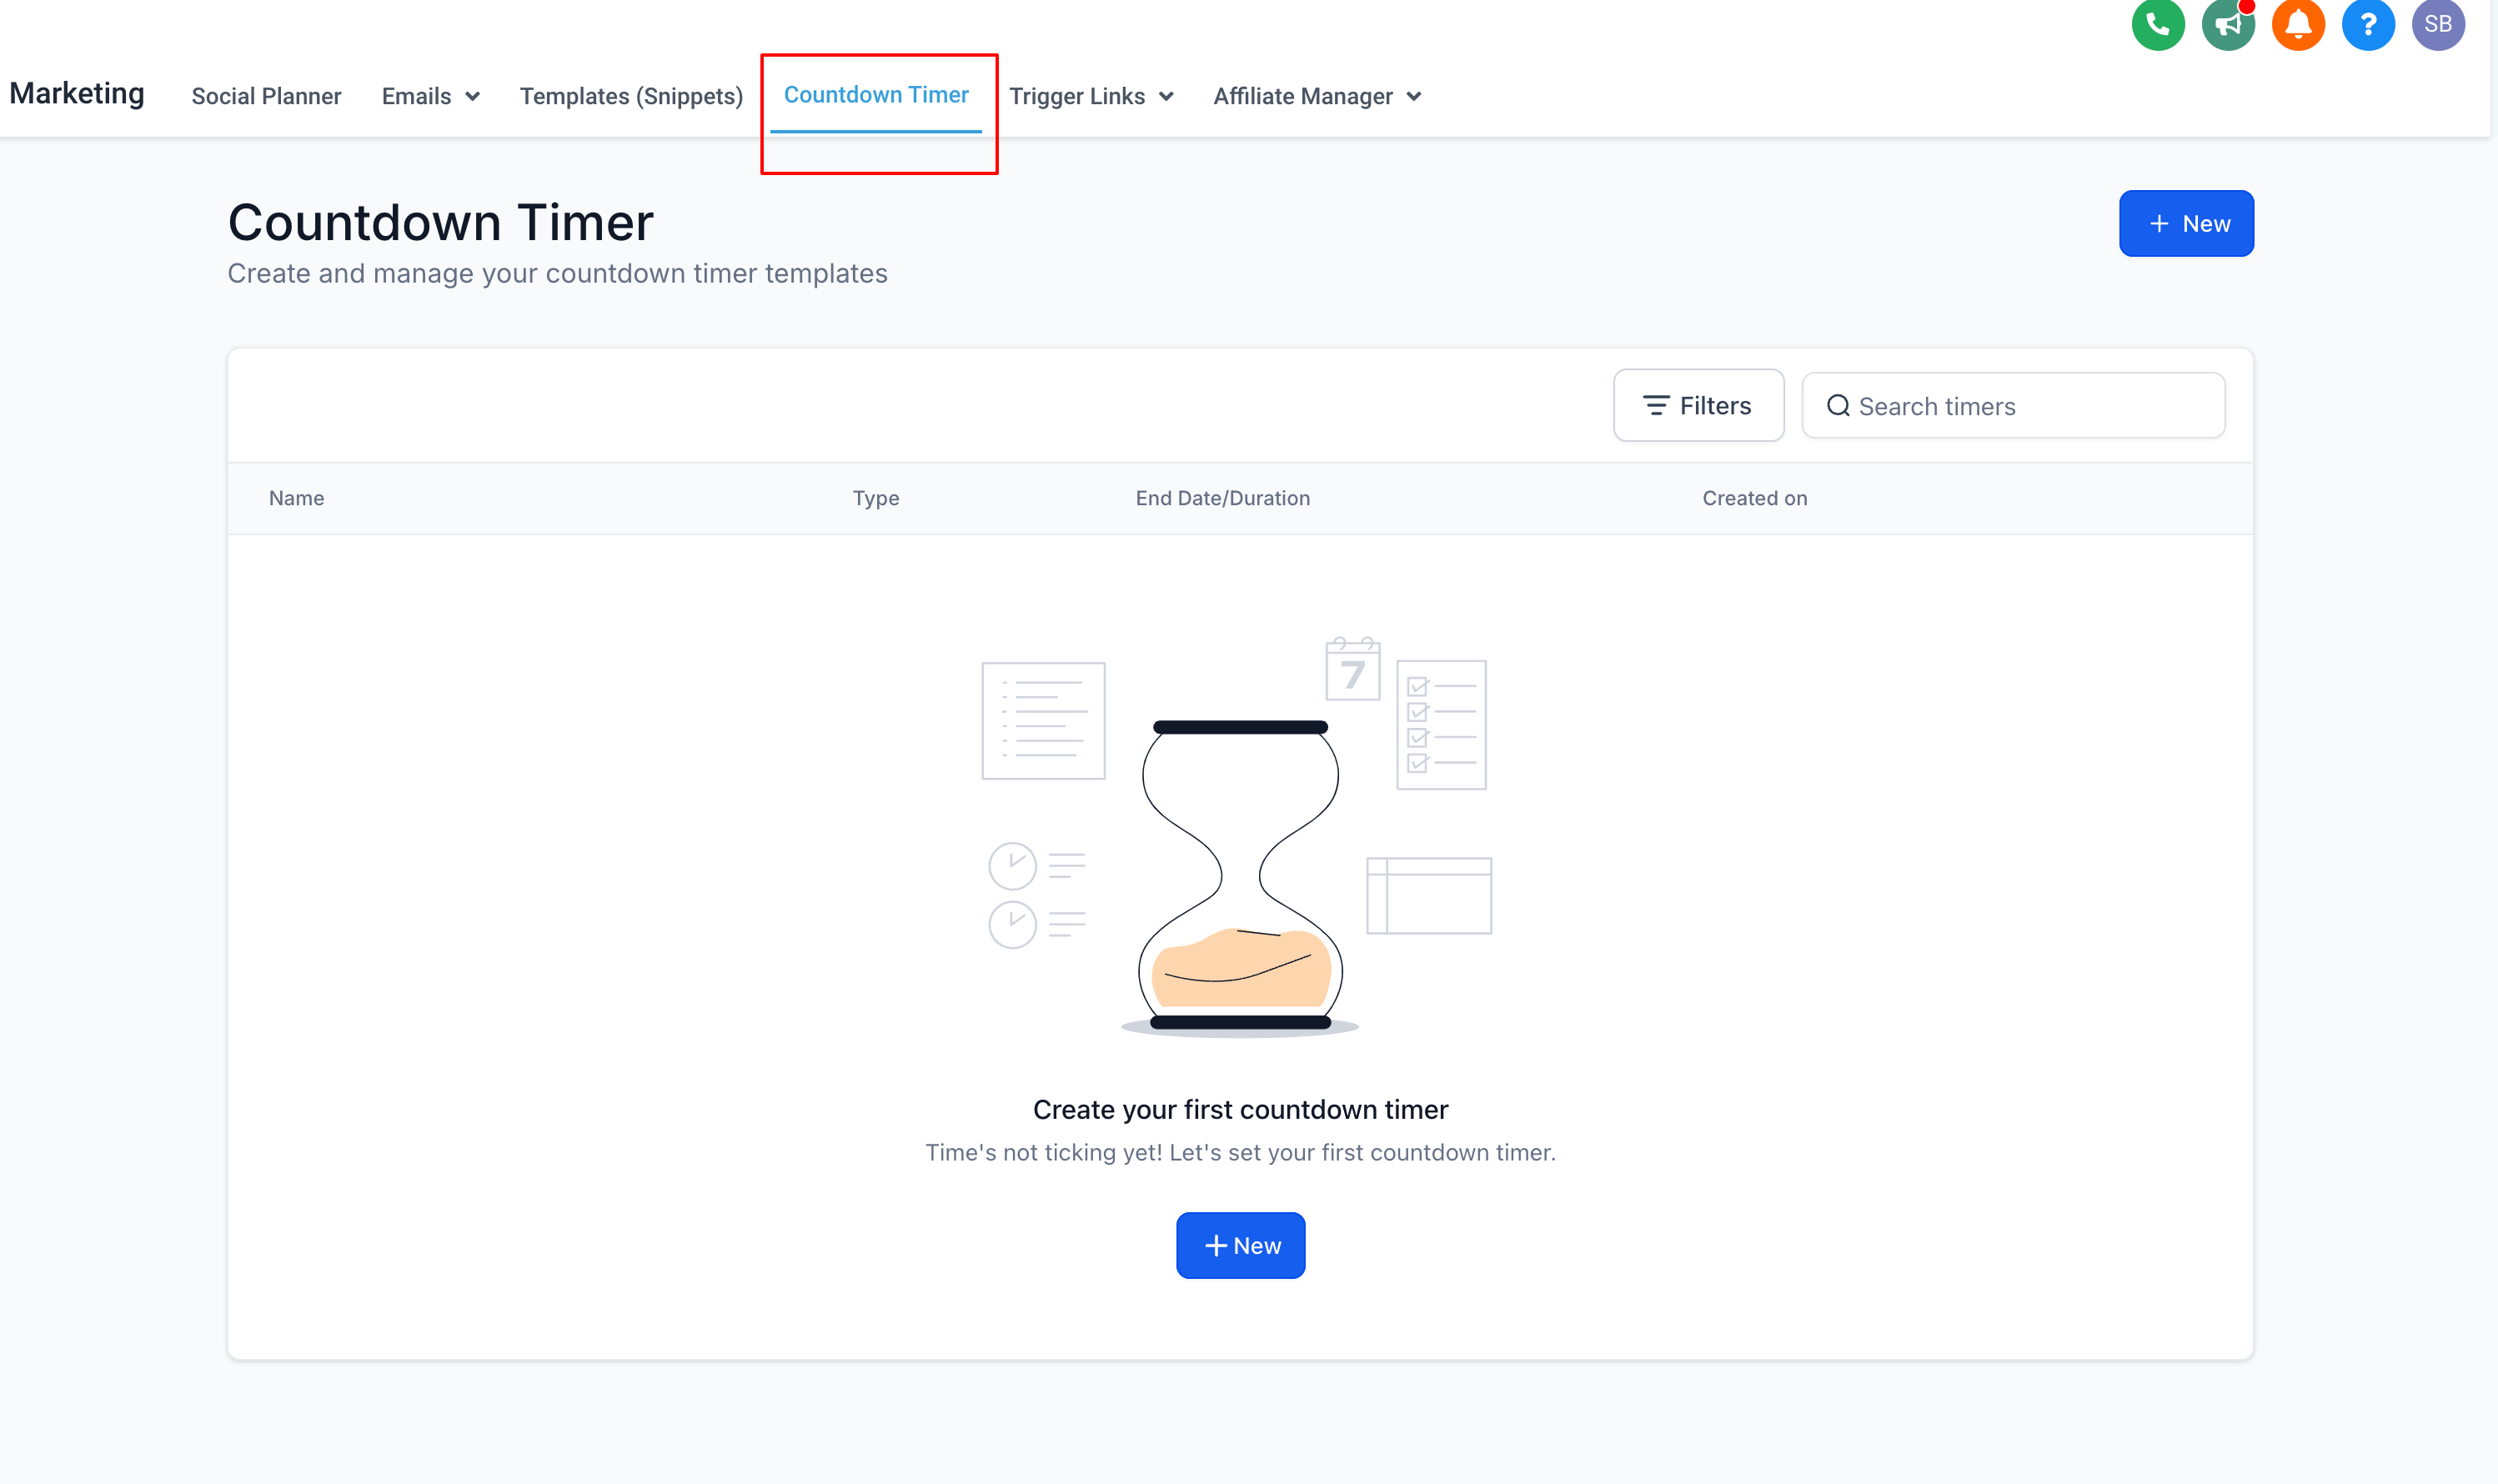
Step 1: Navigate to Marketing
Go to the "Marketing" section and select "Countdown Timer."
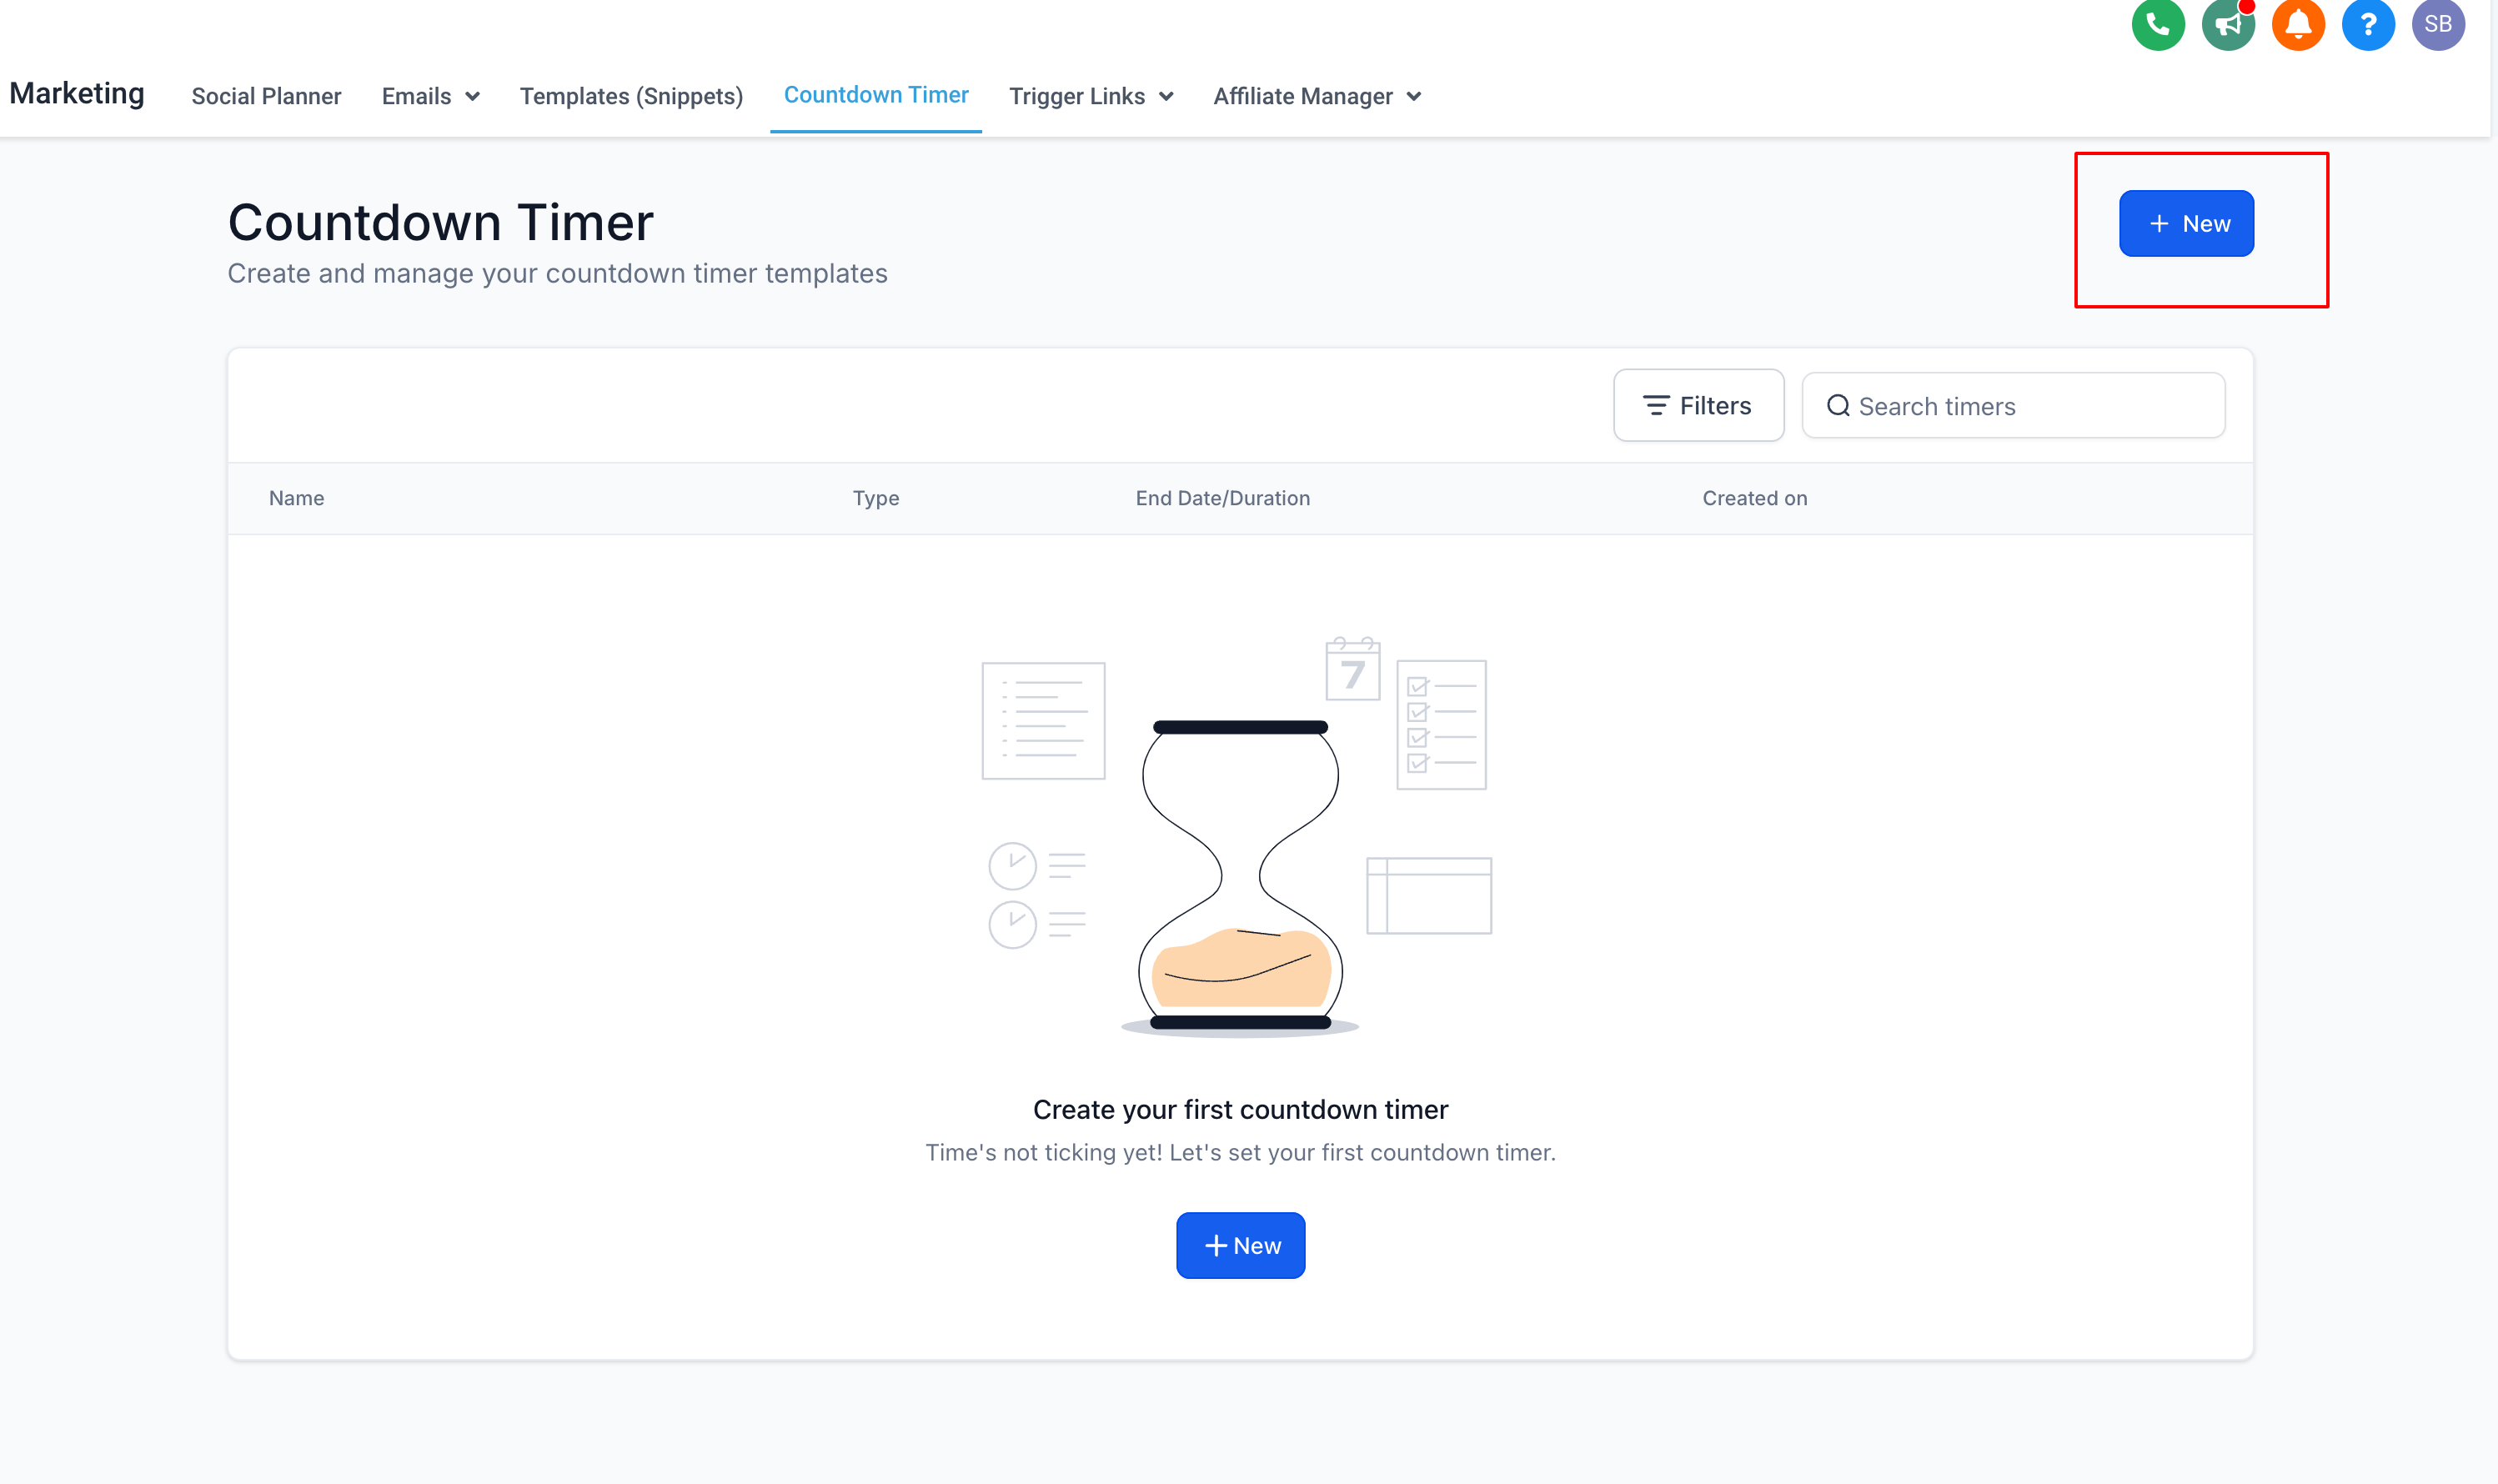
Step 2: Click on New
Click the "New" button to start creating your timer.
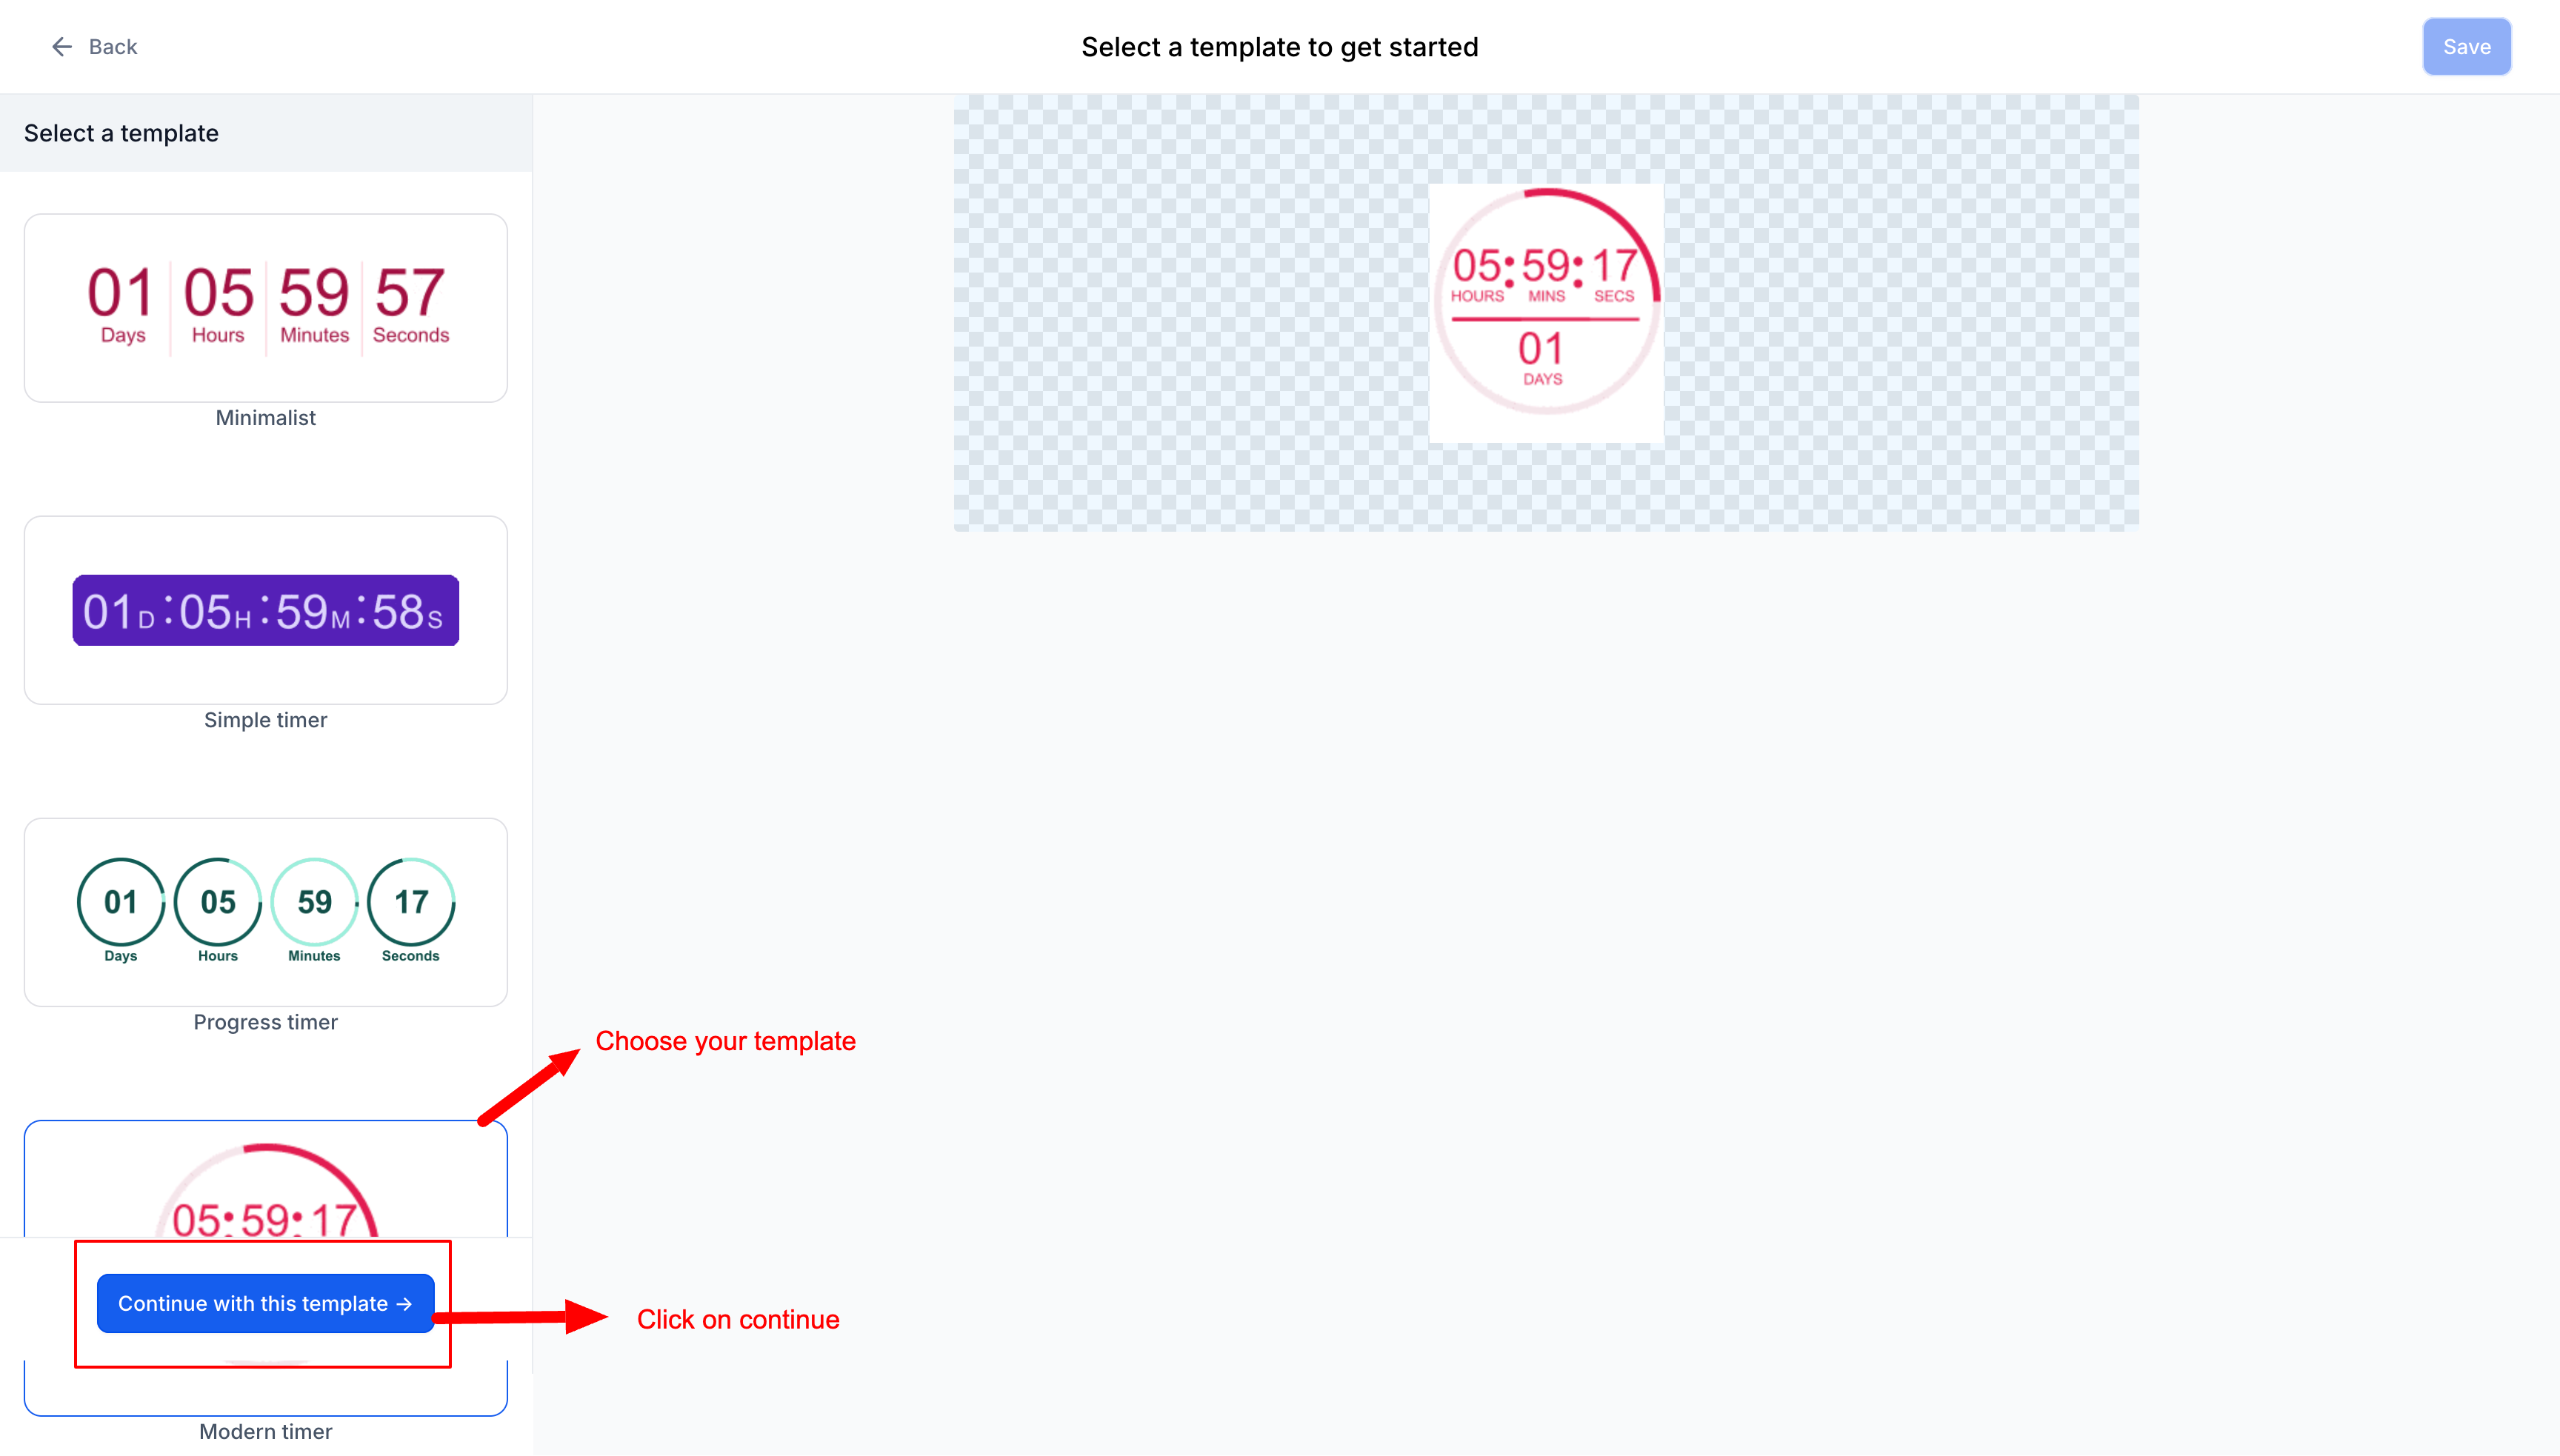
Step 3: Select a Template
Choose a design template and click "Continue with this template."
Step 4: Choose Timer Type
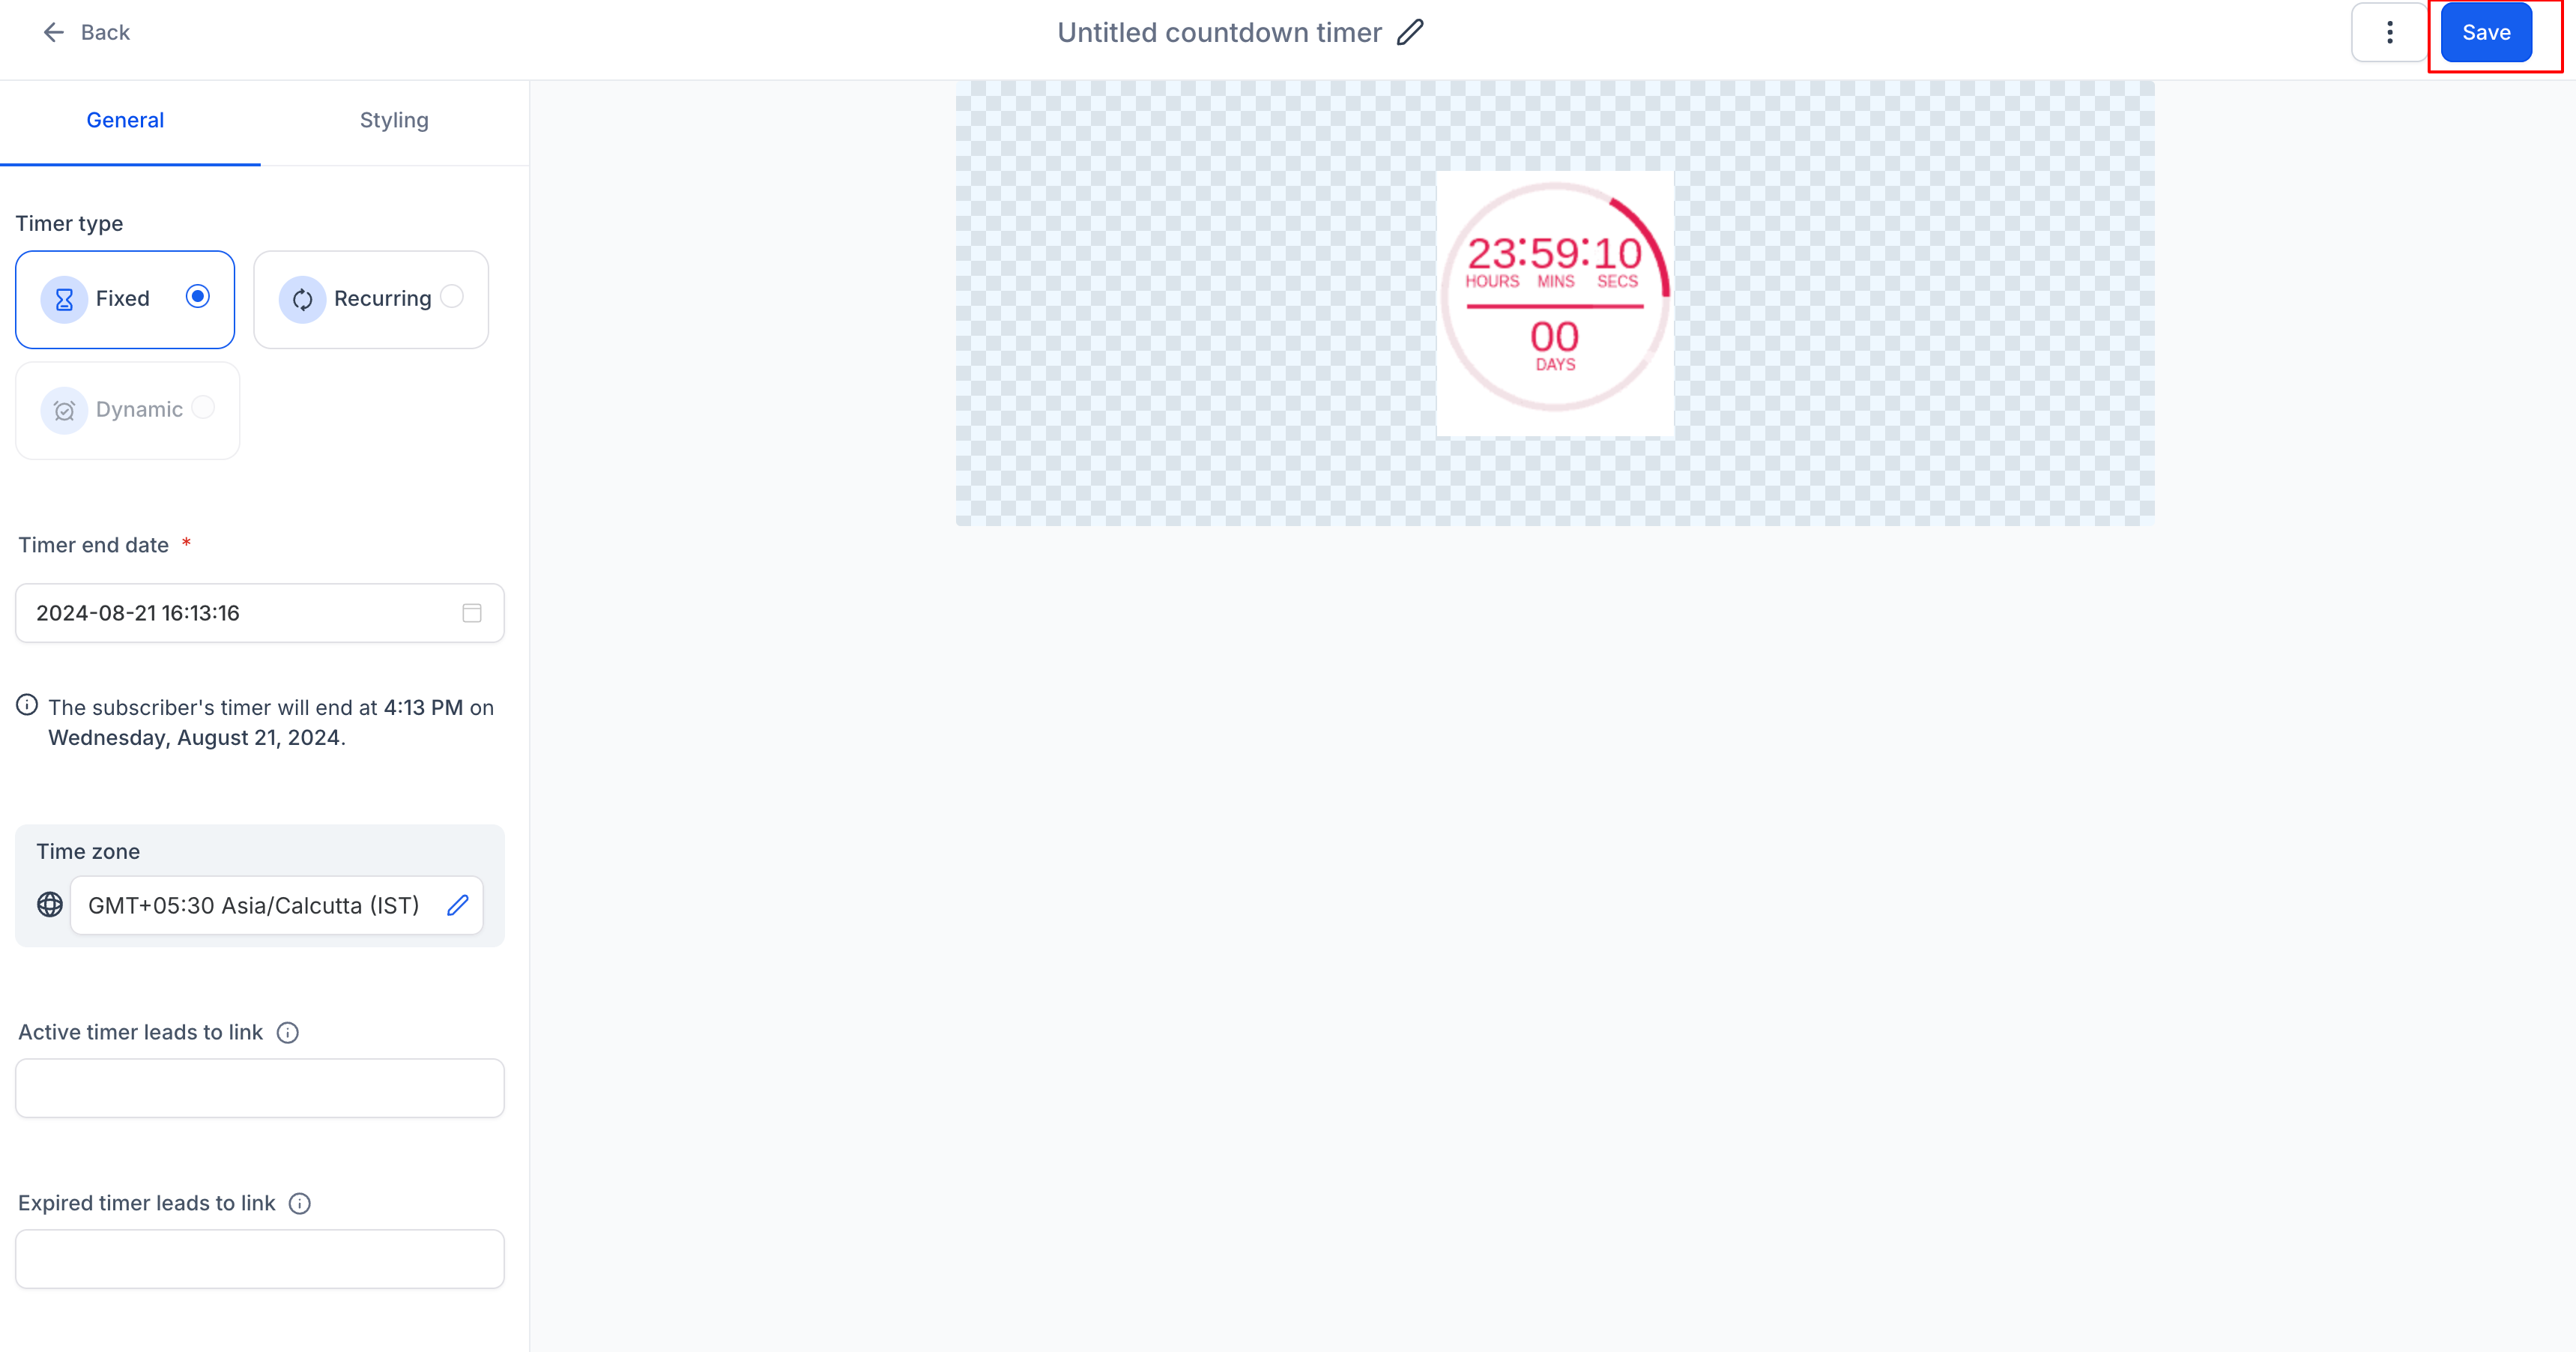
Select the type of timer you want: Fixed, Recurring, Dynamic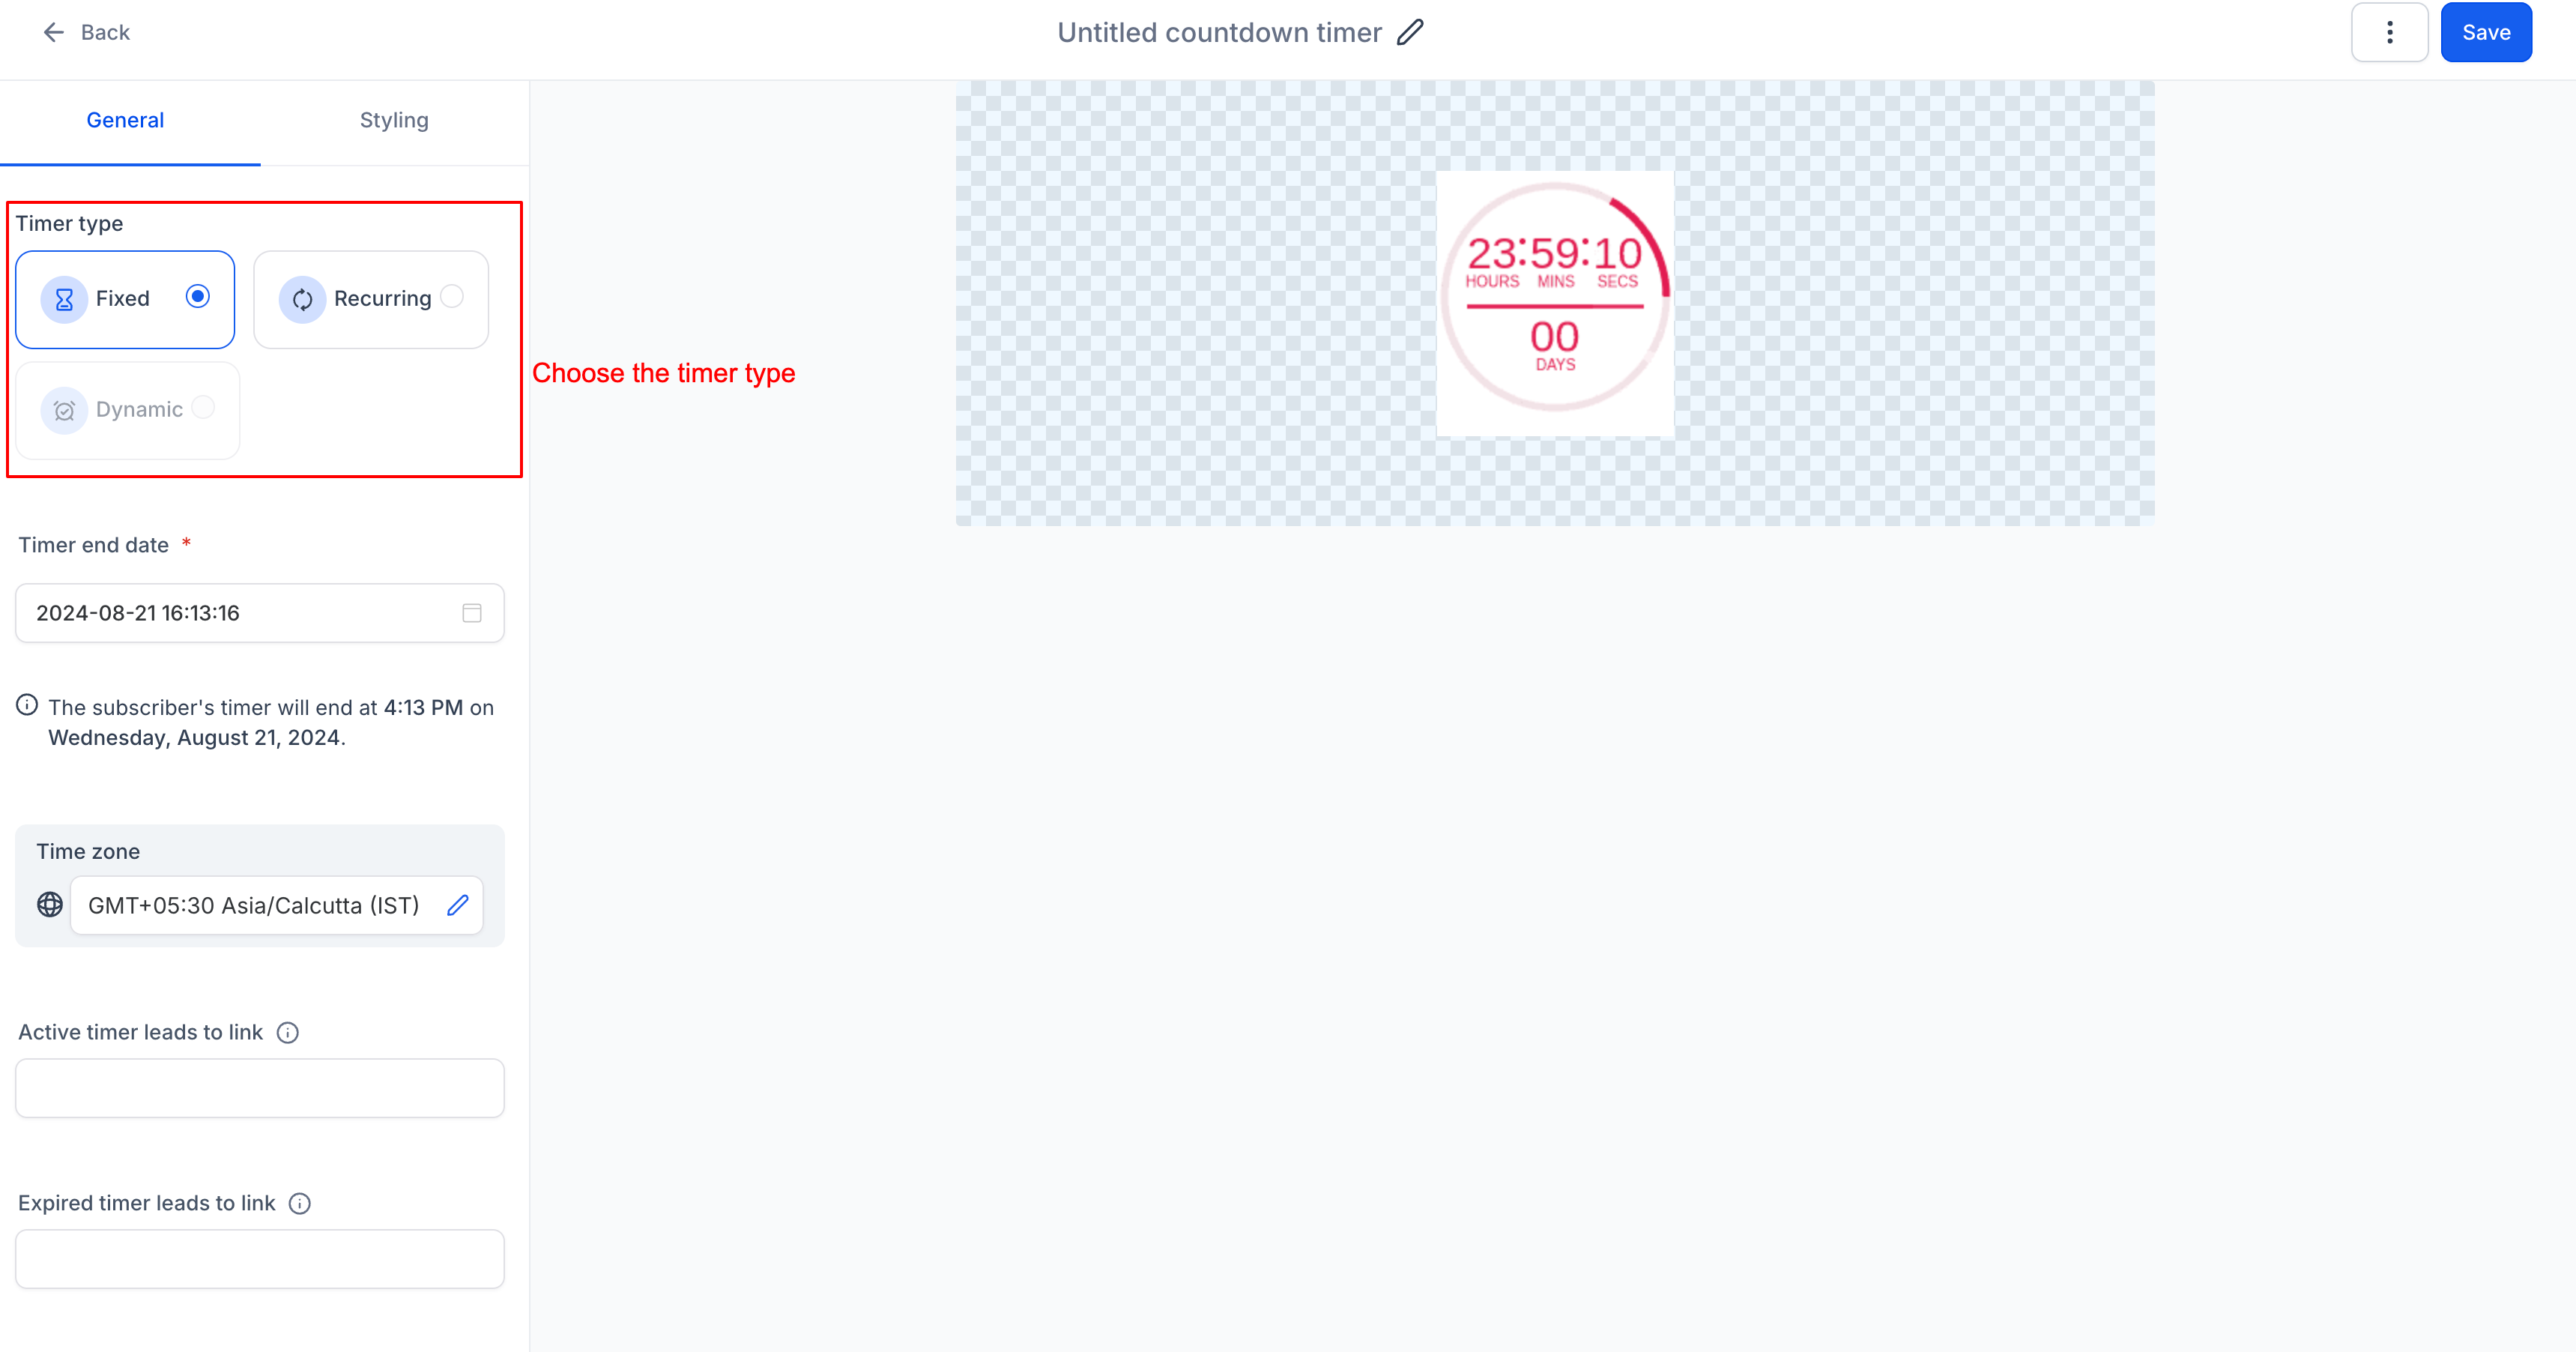
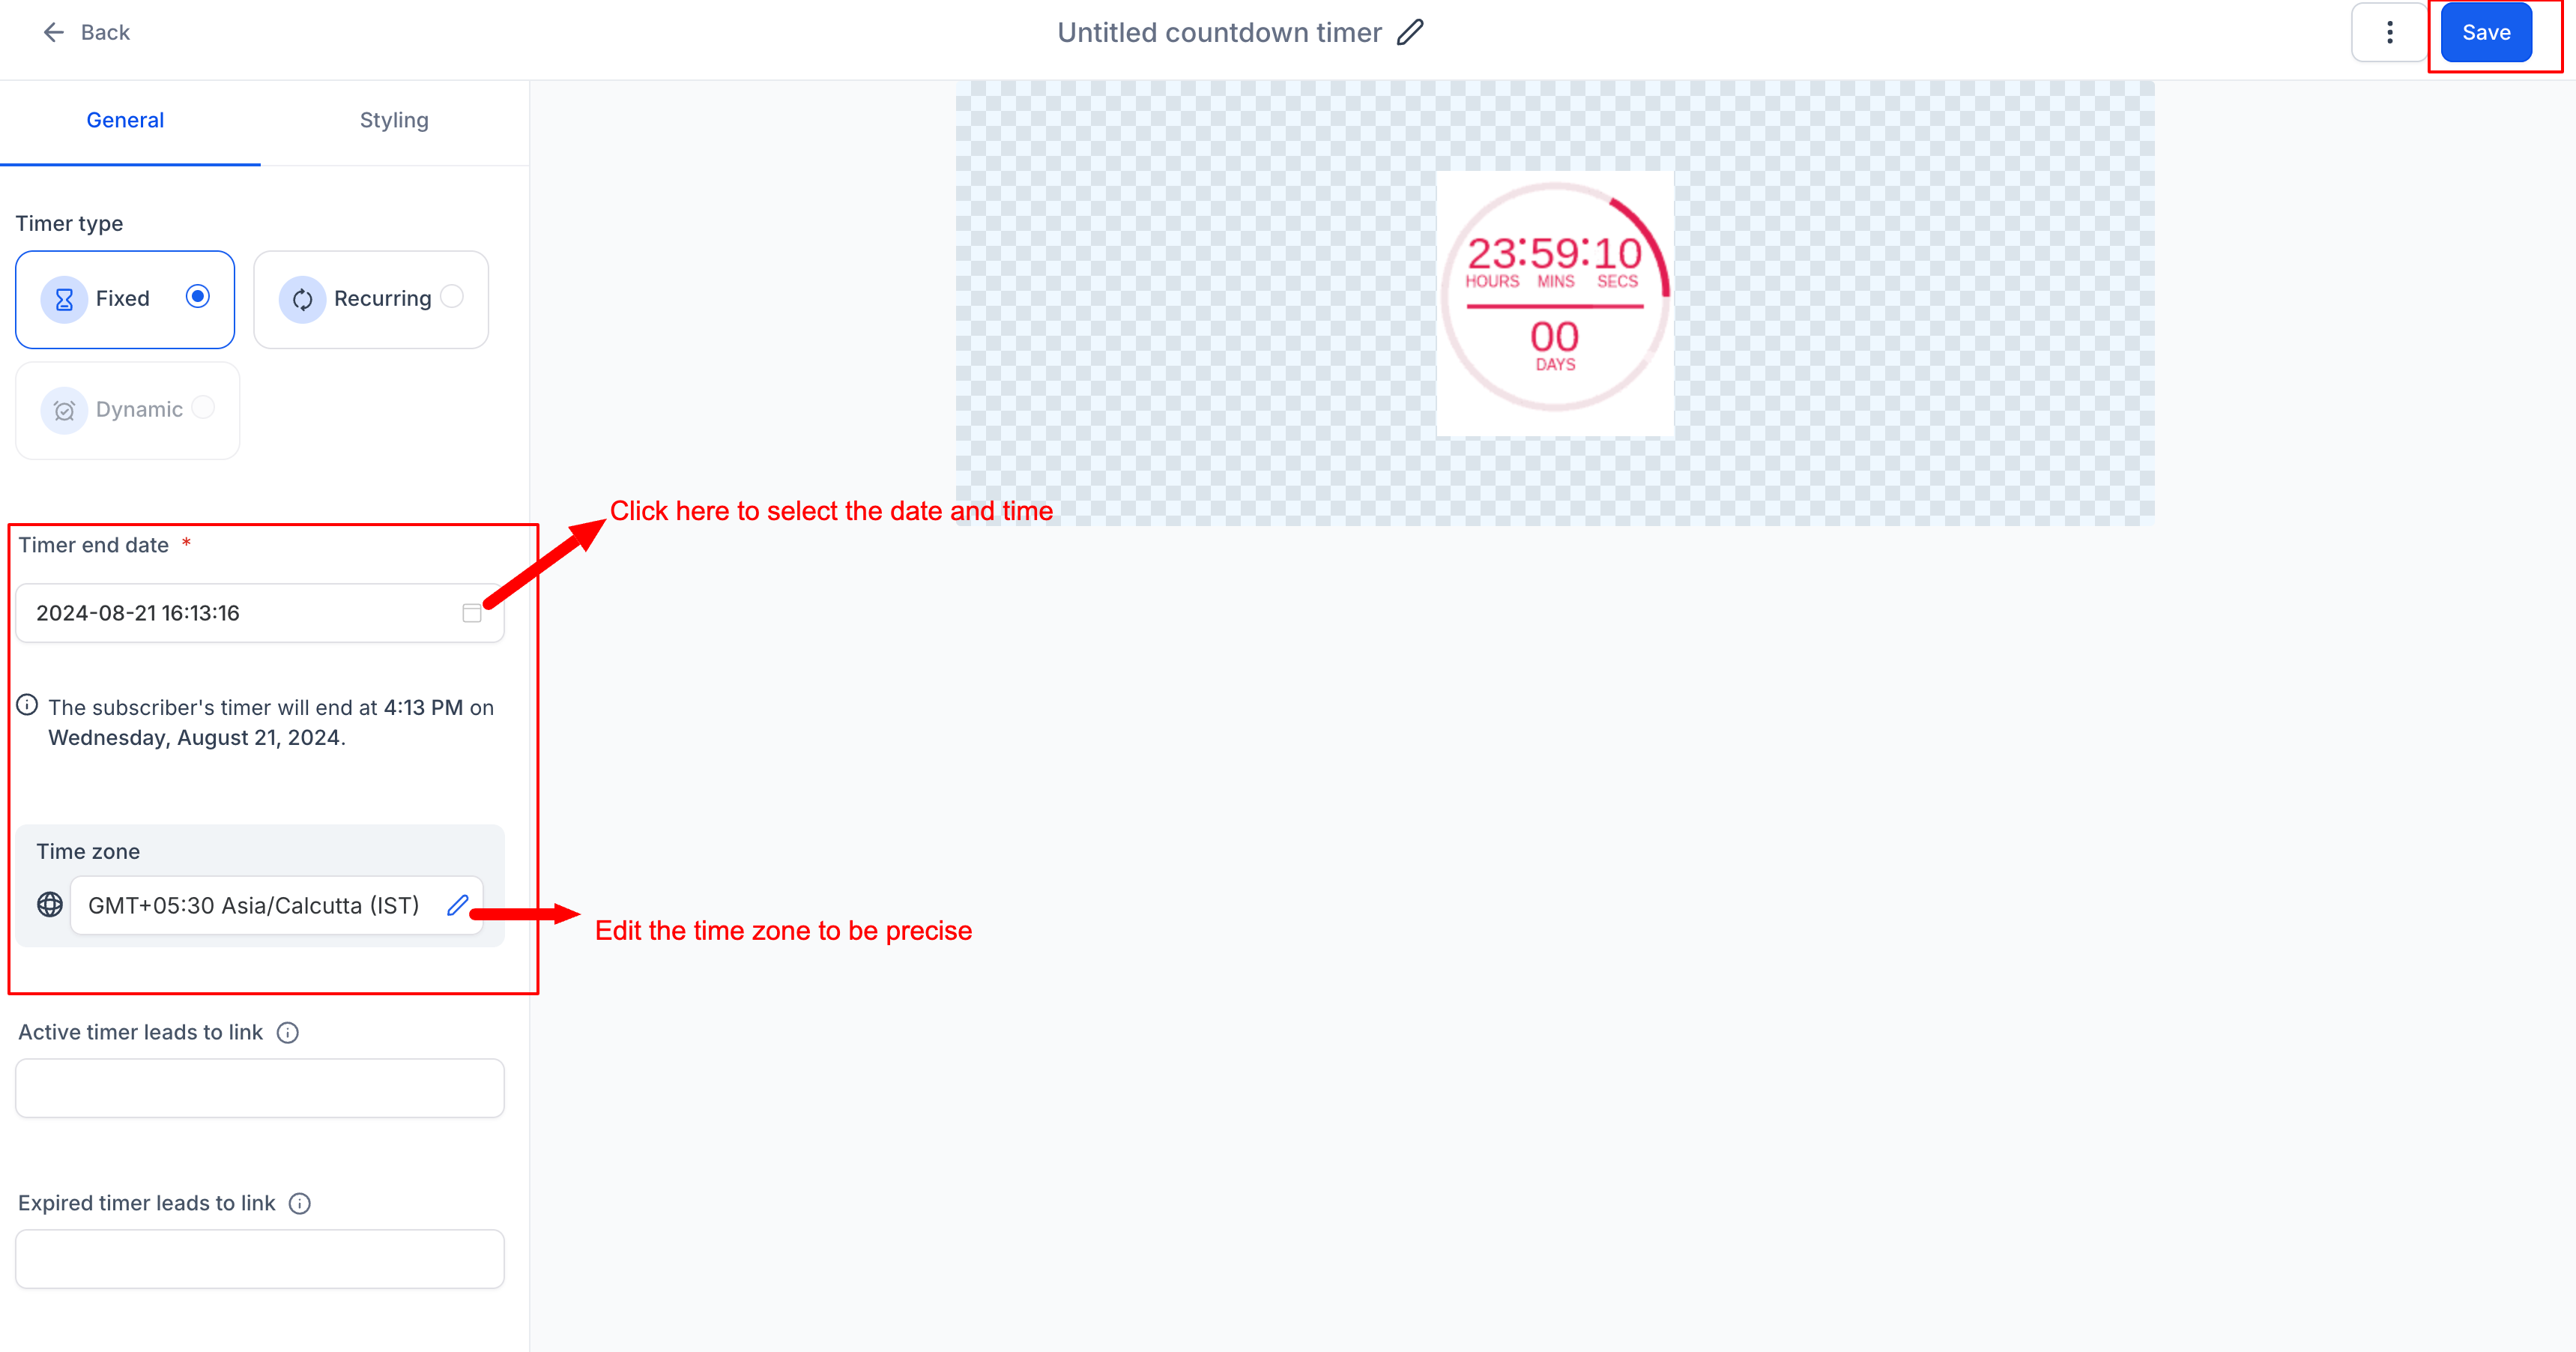
Step 5: Configure Timer Details
Set the end date and time, select a timezone, and (optional) enable Adapt to Contact Time Zone for localized deadlines.
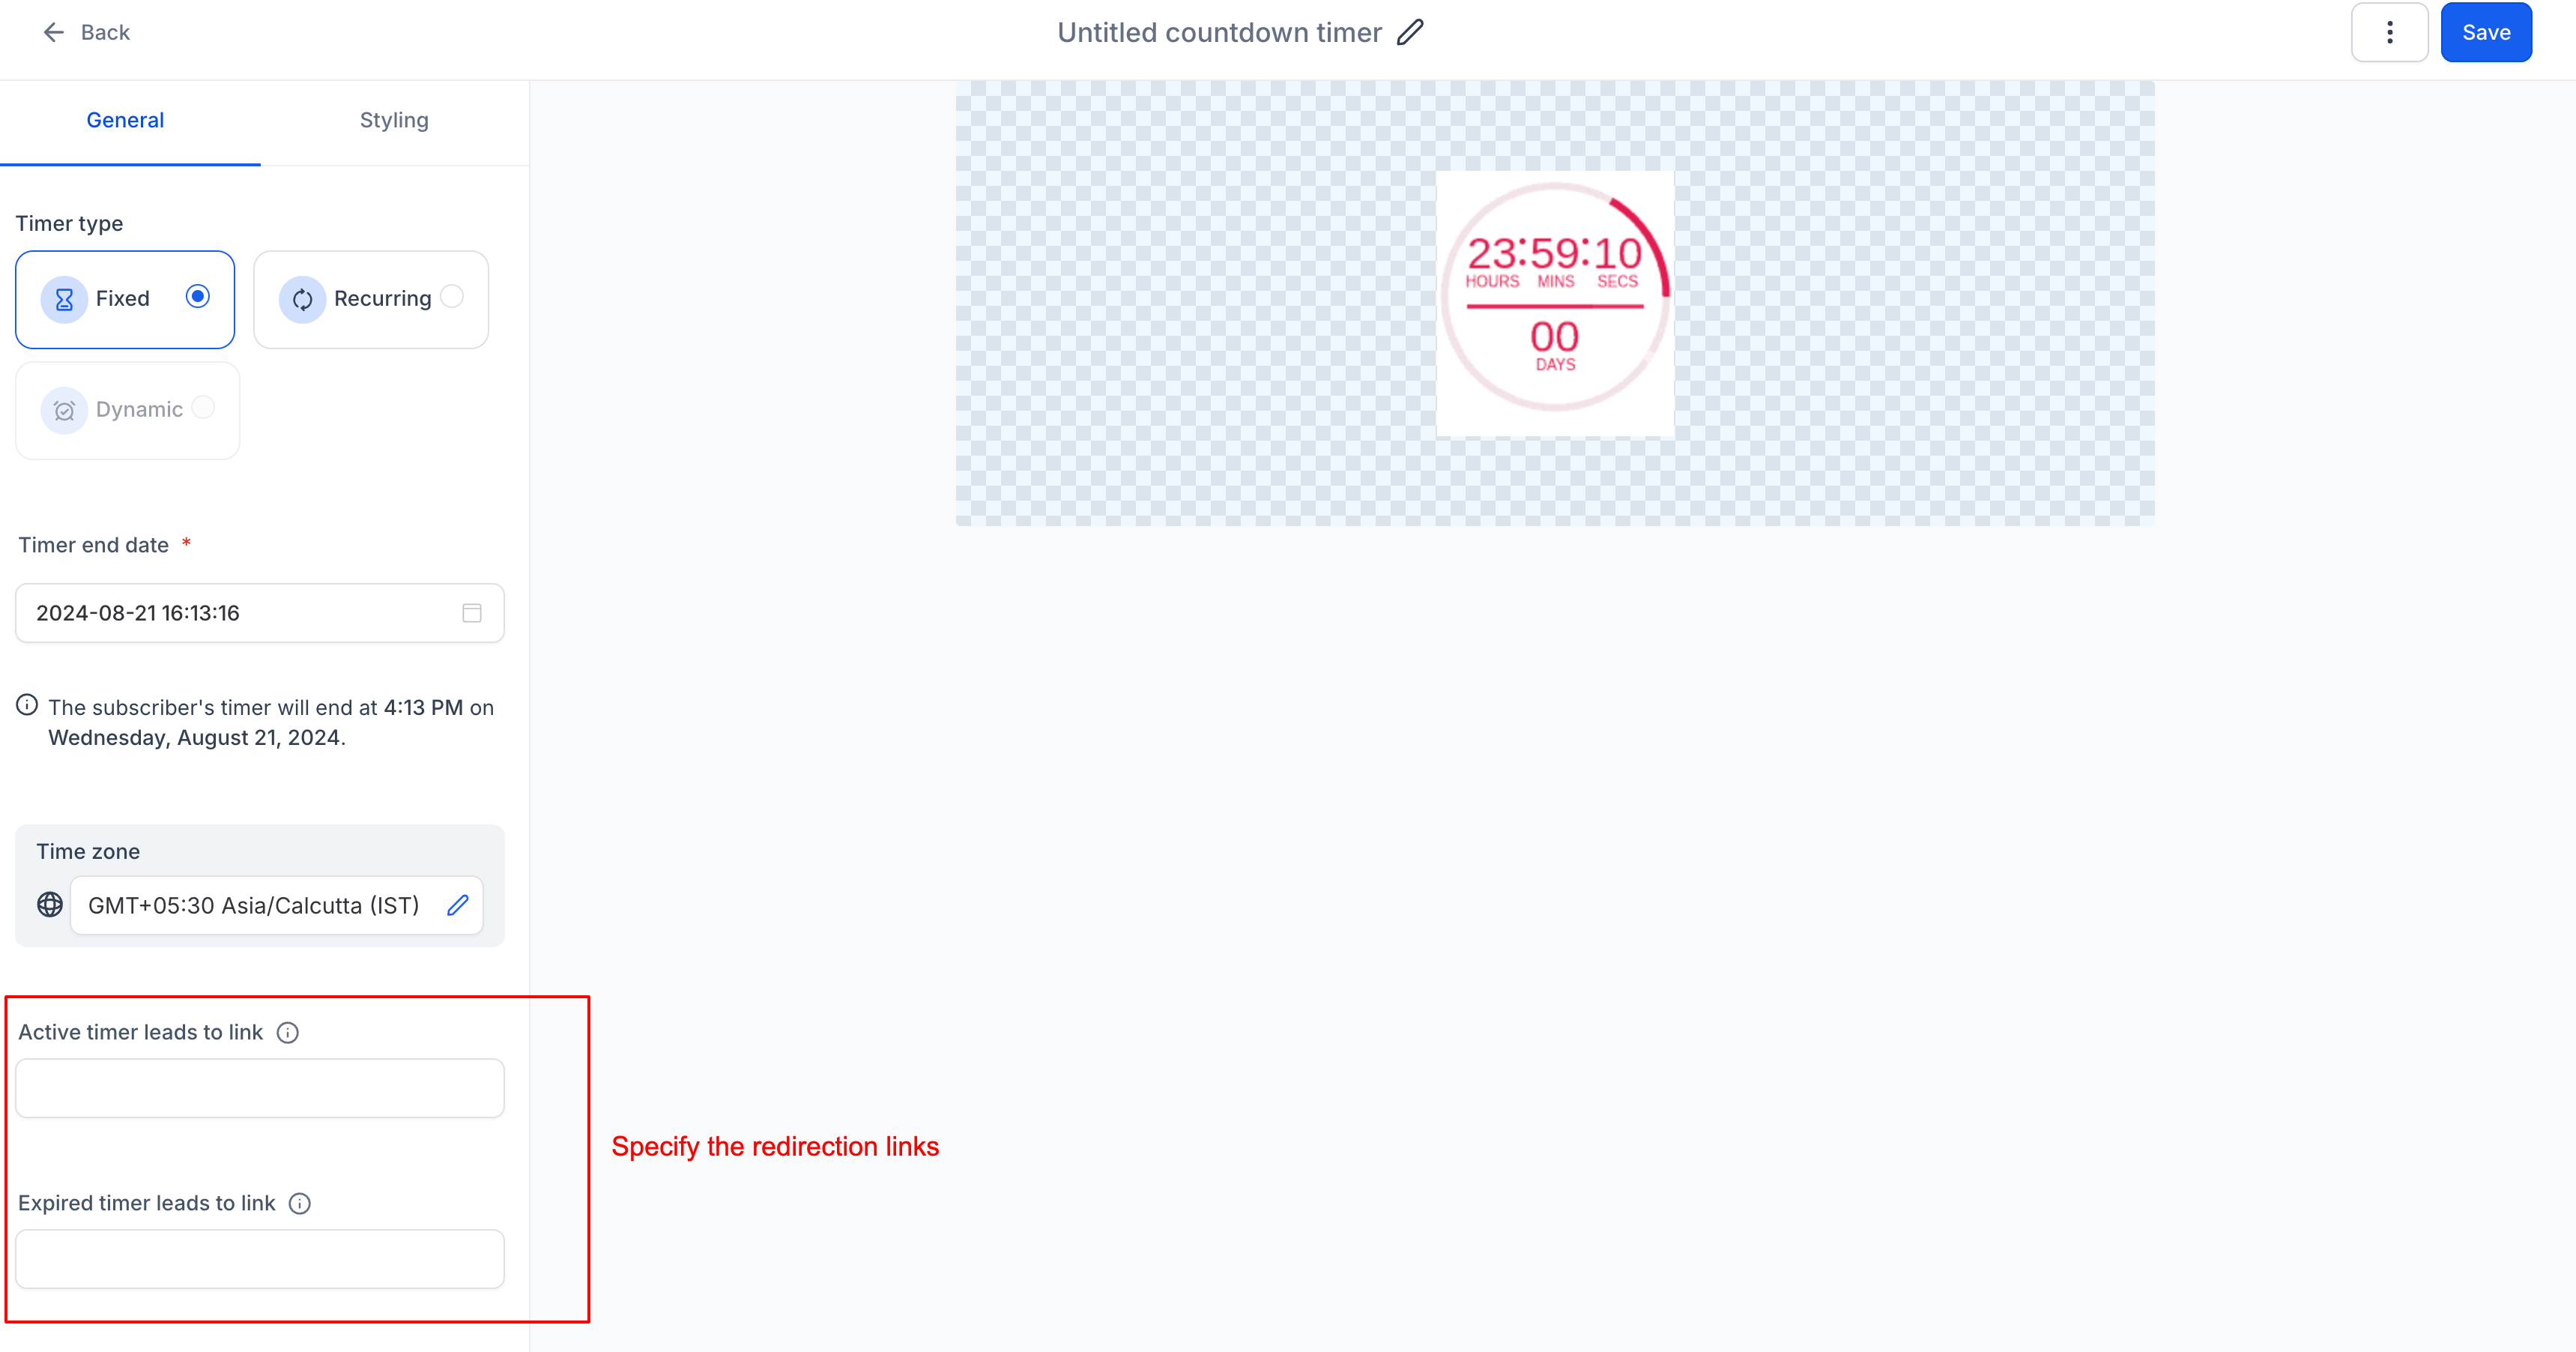
Step 6: Add Links
- Active Link: Specify the URL users will be directed to while the timer is active.
- Expired Link: Specify the URL users will land on after the timer expires.
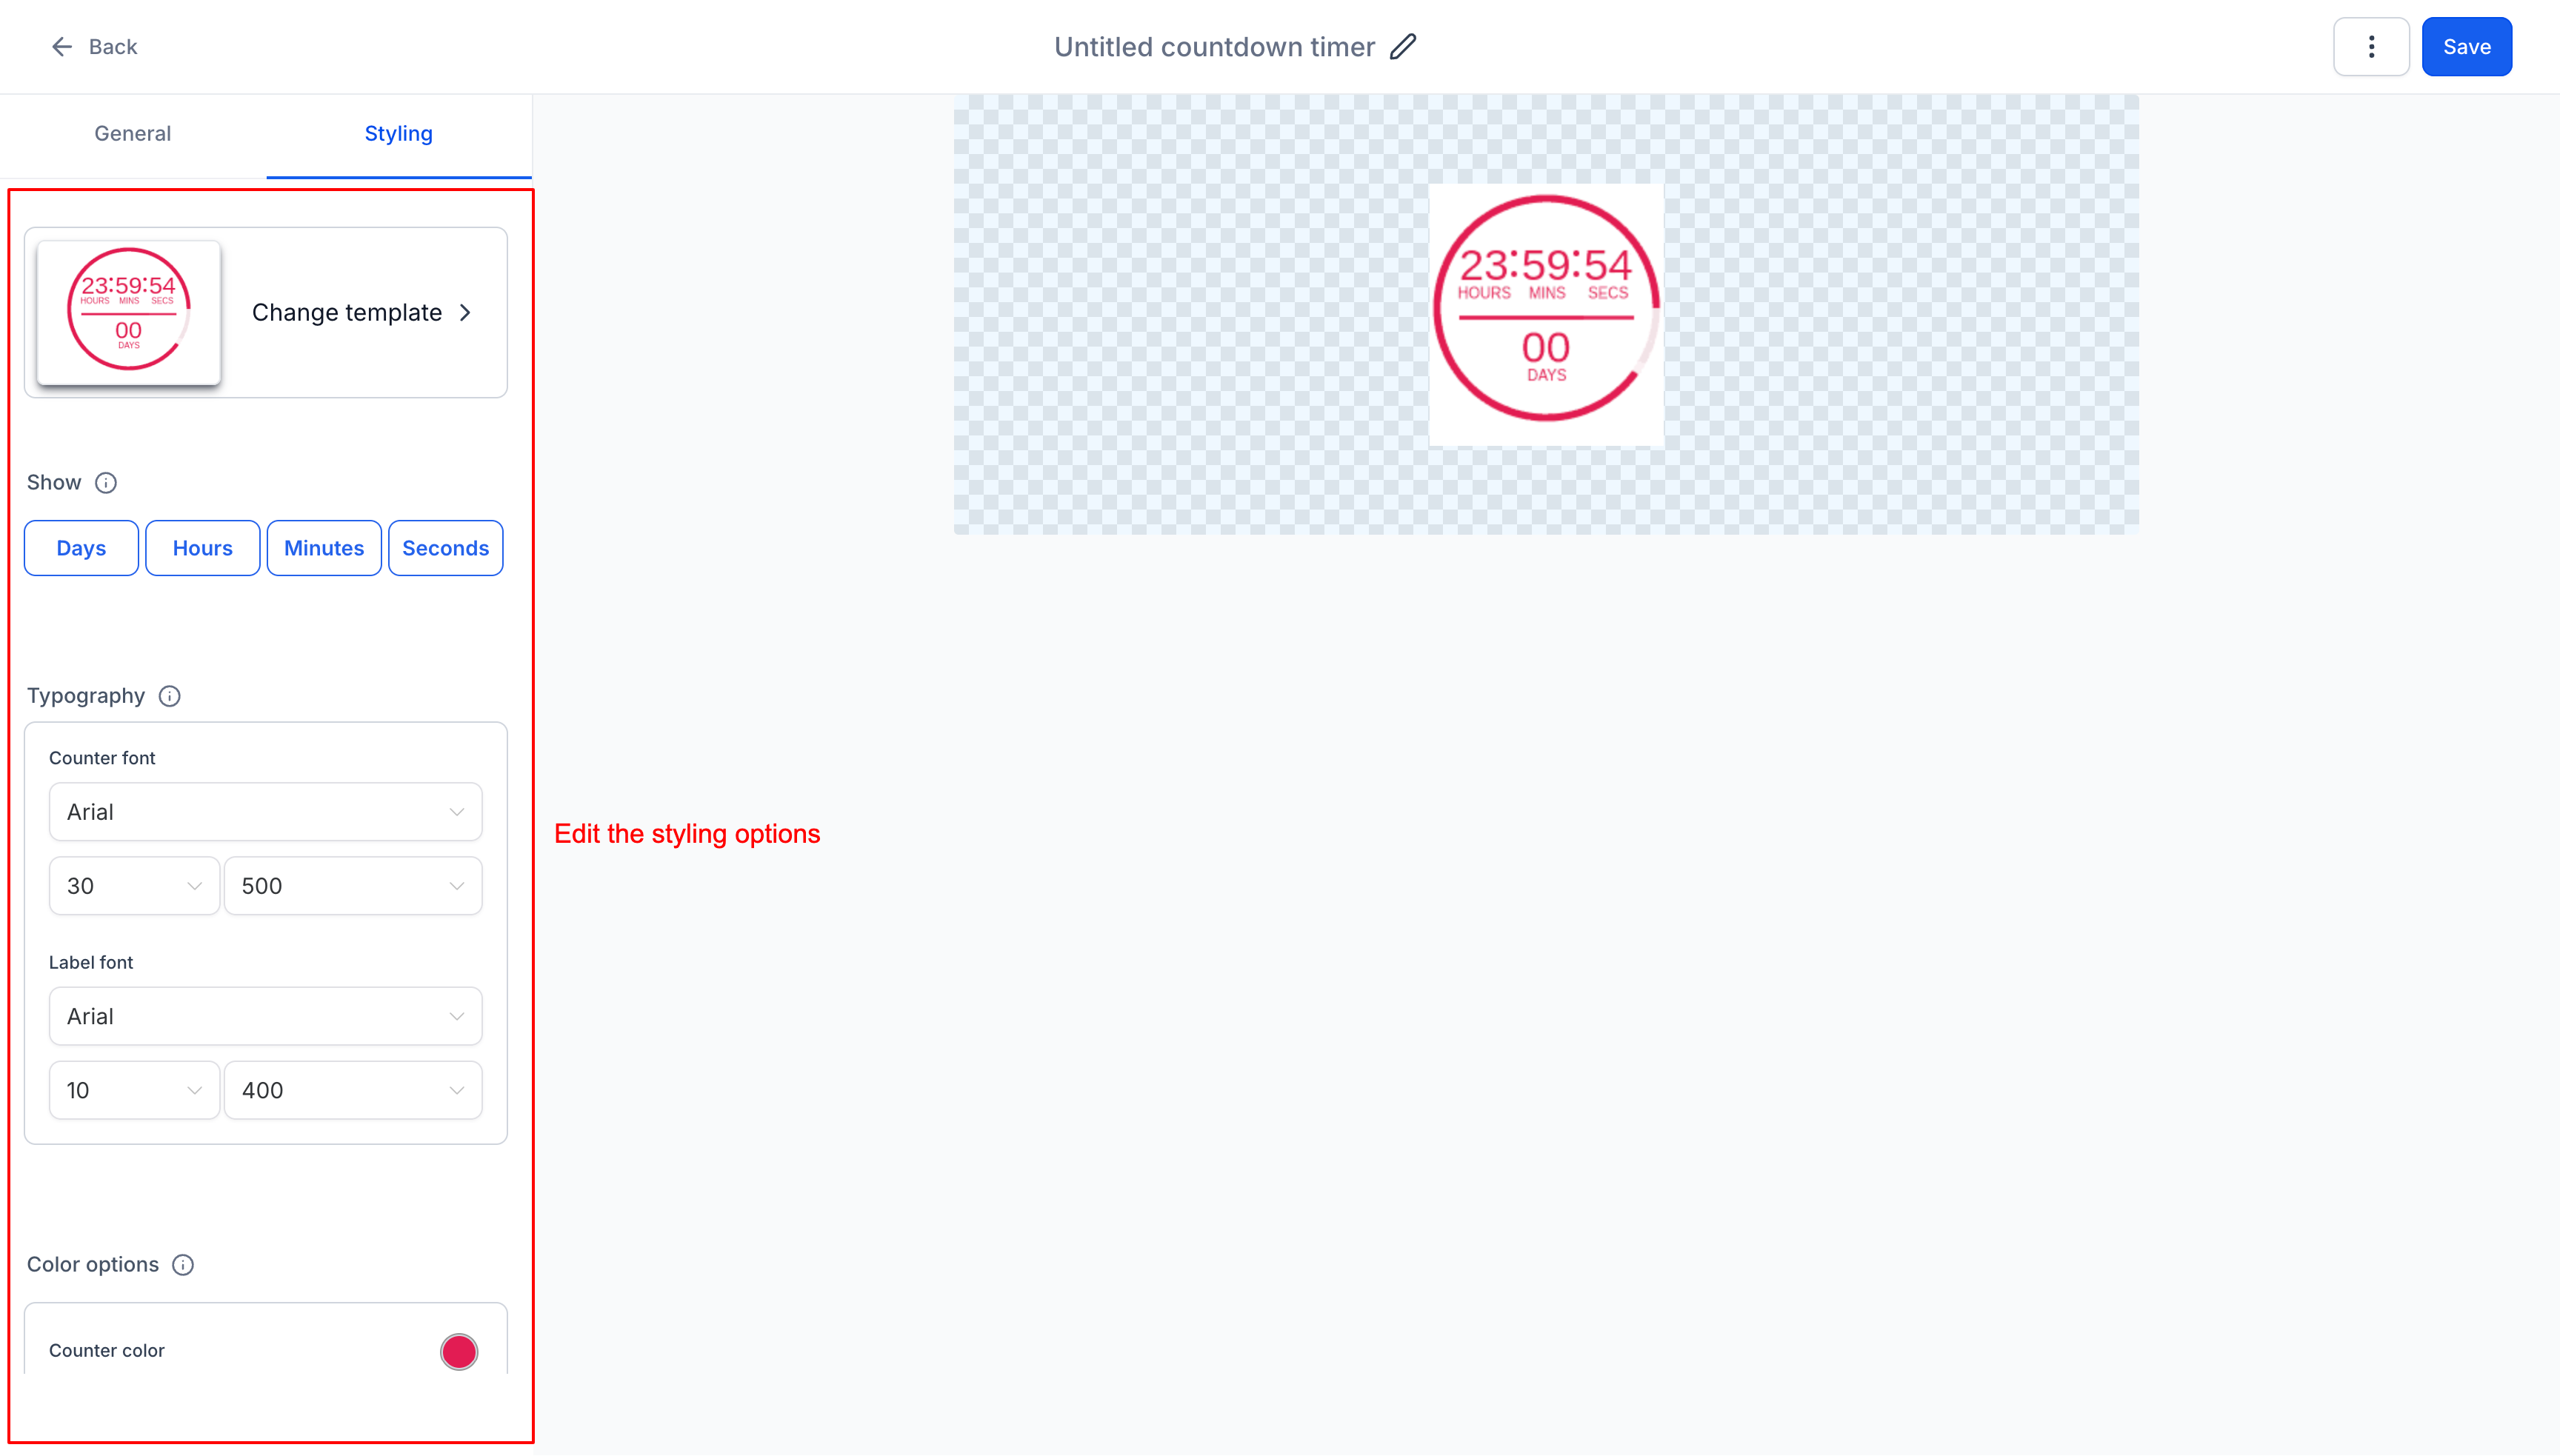
Step 7: Customize Styling
Click Styling to customize the timer's appearance, including its colors, fonts, expiry image, and time display format.
Under Color options, you can customize the Counter color, Label color, Separator color, and Background color. When you open a color picker, you can select from:
- Brand Colors from the location's default Brand Board
- Global Custom Colors configured for the location
- Default Colors available in the color picker
Click Manage next to Global Custom Colors to open Brand Boards Global Settings and add or edit your reusable colors. Colors you add from the timer color picker are saved at the location level and remain available across countdown timers.
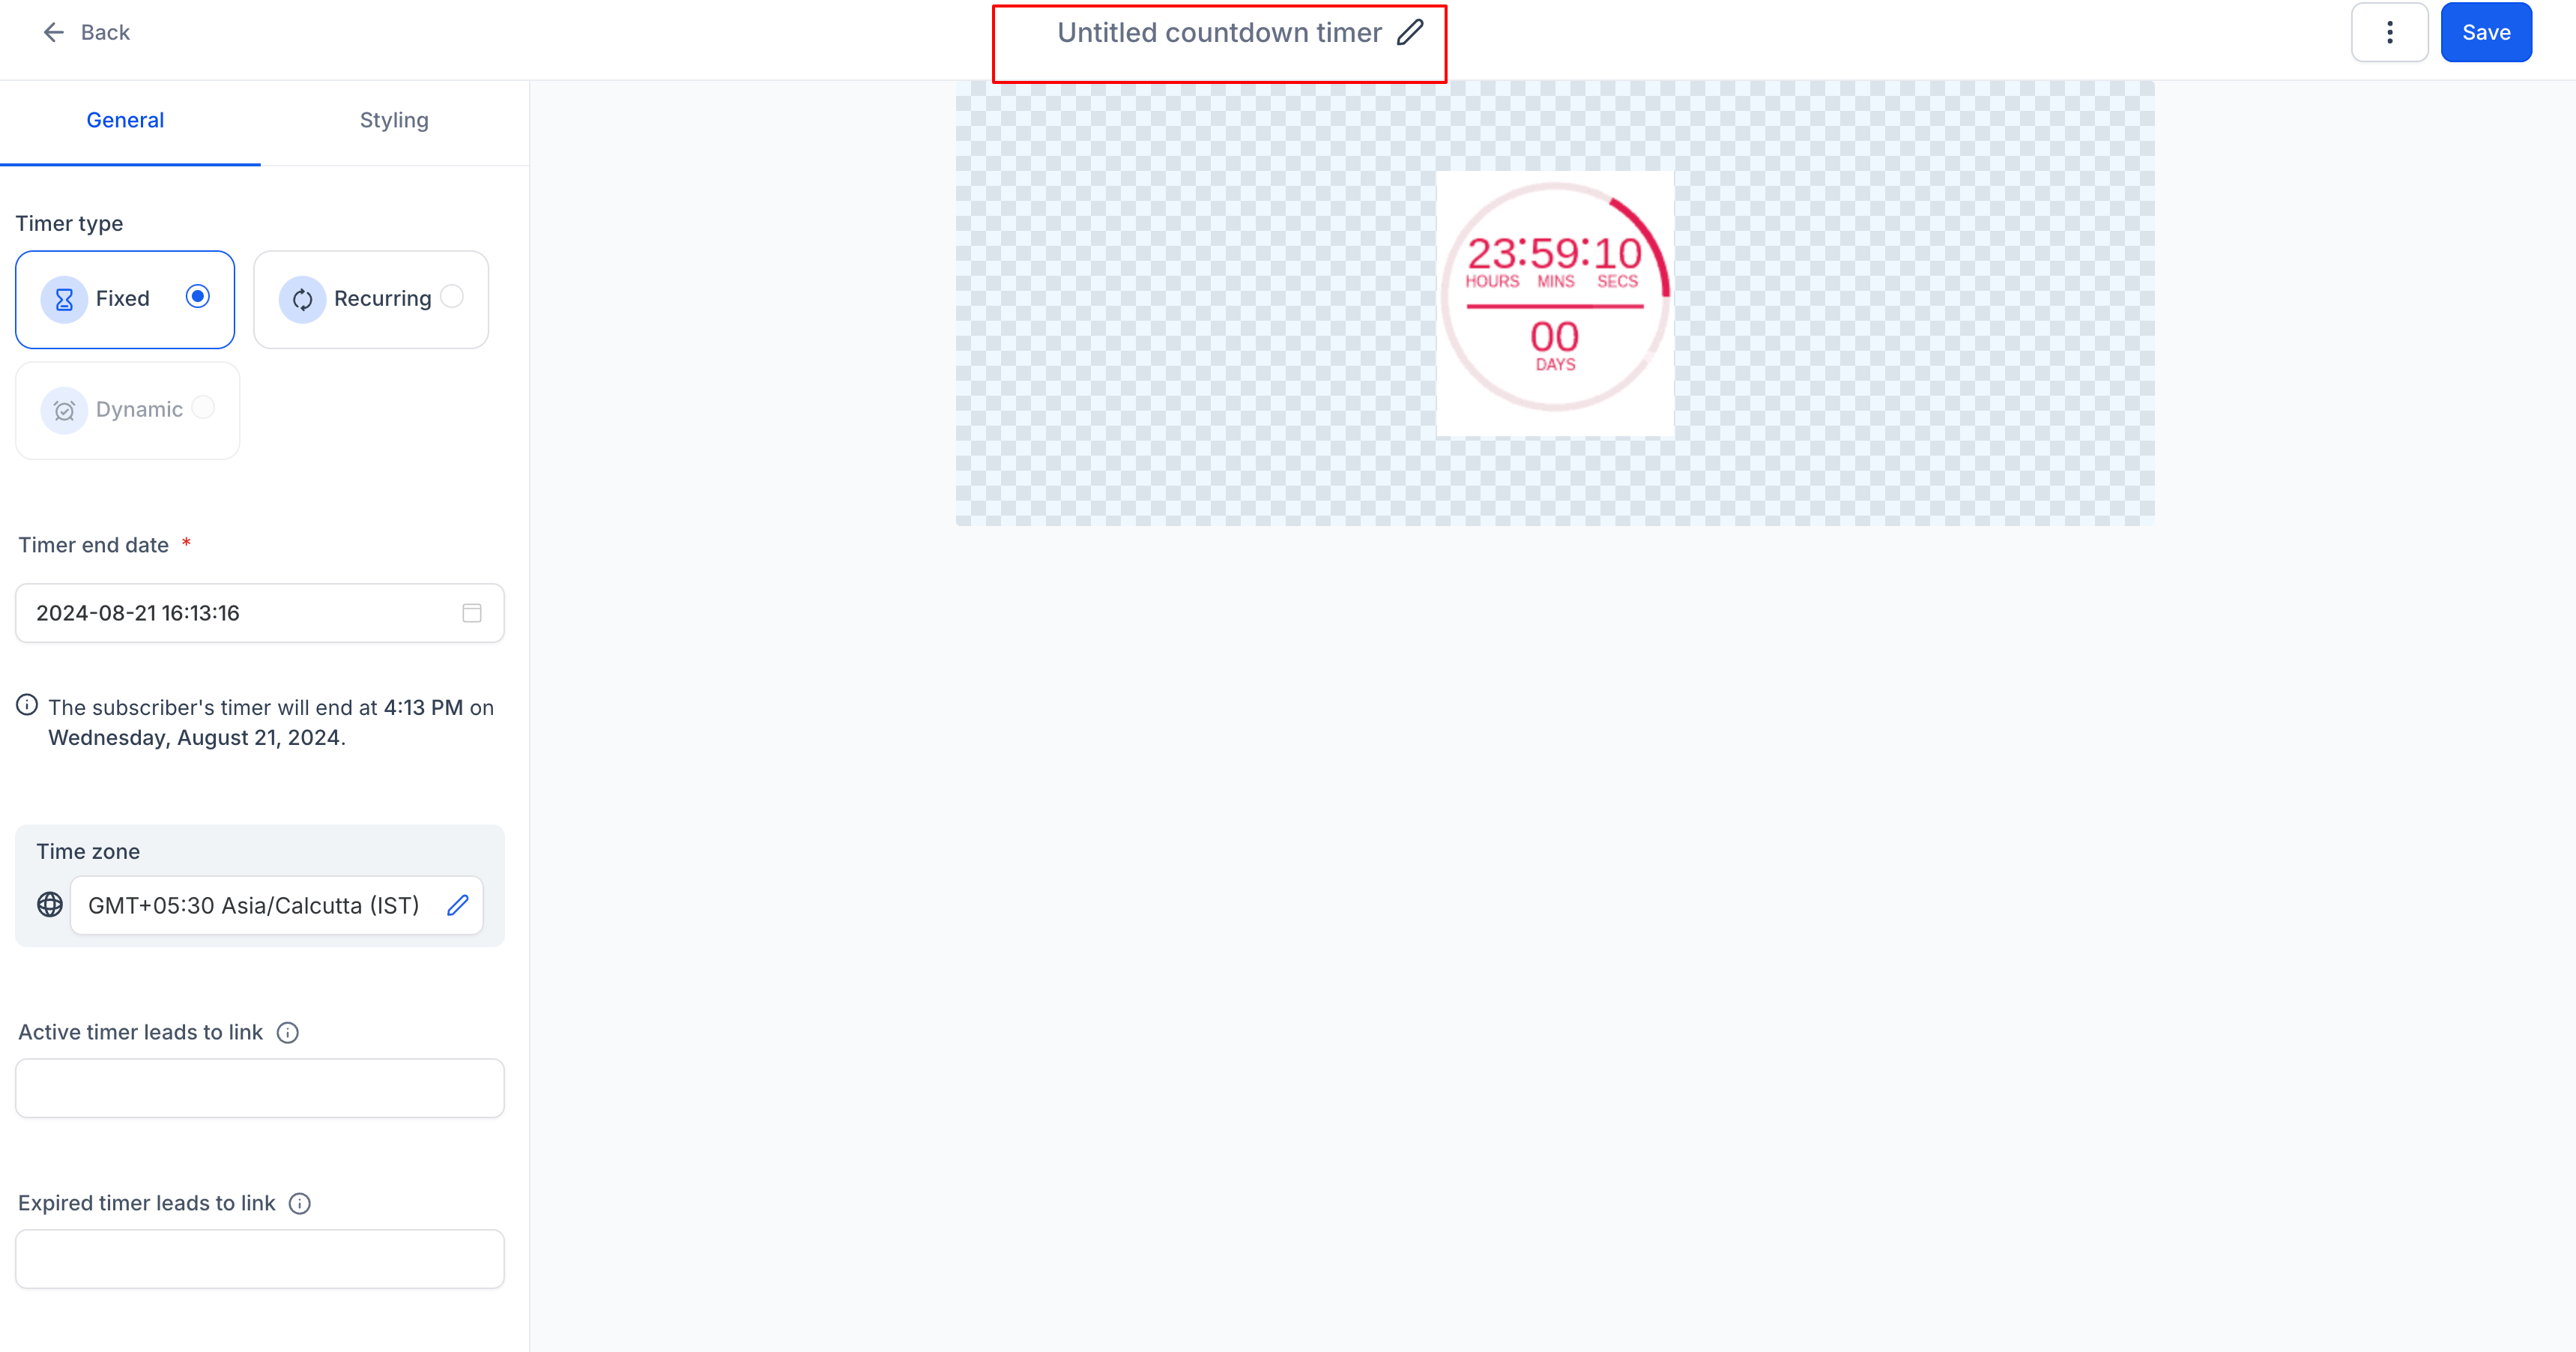
Step 8: Rename Timer
Give your timer a descriptive name by clicking on top
Step 9: Save
Click "Save" to finalize and activate your countdown timer.