
Phone Dialer Overview
The Phone Dialer lets you place and receive calls without leaving LeadConnector. This article covers instant dialing, audio device configuration, in-call controls, transfers, voicemail access, and troubleshooting basics.
You'll also learn how to manage the dialer interface, choose your outbound calling number, and use call scripts for guided conversations.
What is the Phone Dialer?
The Phone Dialer is a browser-based calling tool that lets you place and receive calls without leaving LeadConnector. It integrates with your contact records, voicemail system, and call history so you can manage conversations, transfer calls, and access voicemail from a single interface.
The dialer appears as a floating panel accessible from the phone icon in the top navigation. You can search for contacts, dial phone numbers manually, review recent calls, and listen to voicemail messages without switching tools or windows.
Key Benefits
The Phone Dialer streamlines communication by consolidating calling features inside LeadConnector. Users benefit from faster call workflows, better audio control, and integrated call management without third-party softphones.
Instant Dialing and Contact Search
The dialer's search field lets you find contacts by name or phone number and place calls immediately. This eliminates the need to navigate to a contact record first, especially useful during high-volume calling sessions or when following up on inbound inquiries.
Begin typing a contact name or phone number in the search field. Matching results appear as you type. Click a contact to view their phone numbers, then select the number you want to call. The dialer initiates the call and displays in-call controls once connected.
You can also dial a phone number manually by entering it into the search field without selecting a contact. This is useful when calling leads who are not yet in your system or when testing outbound calling functionality.
Choosing the Number You Call From
The outbound number shown to the recipient can depend on the user's assigned phone number, permissions, and available numbers in the location. Understanding the Calling From selection helps users confirm which business number will be used before placing a call.
For detailed logic about outbound number selection, see Outbound Calls with Dialer in Web App (Softphone).
Audio Device Settings
Audio device settings let users control which microphone and speaker the Web Dialer uses for calls. They can also configure an additional device to ring for inbound calls, which is useful when working with headsets, external speakers, or multiple audio devices.
Open the dialer and click the gear or settings icon.
Choose the device you want to use for call audio playback.
Optionally select an additional ring device for inbound calls.
Choose the preferred microphone from the available devices.
Test the speaker and verify microphone levels using the live meter before saving your configuration.
Audio preferences are stored locally in the browser. You must configure audio settings separately on each browser and computer you use.
Managing the Dialer on Your Screen
The Web Dialer can stay accessible while you work elsewhere in LeadConnector. Users can pin it to keep call controls visible, drag it to another part of the screen, or leave it unpinned so it minimizes automatically when working elsewhere in the platform.
A minimized dialer does not end an active call. You can continue your conversation while using other features in LeadConnector.
Managing an Active Call
Once a call connects, the dialer provides controls for managing the conversation without leaving LeadConnector. These controls let you mute your microphone, hold the call, transfer it to another user or number, and navigate IVR menus using DTMF tones.
Call Transfers
The dialer supports two types of call transfers: warm transfers and blind transfers. Understanding the difference helps you choose the appropriate method based on whether you need to speak with the receiving party before connecting the caller.
Places a second call so you can speak with the receiving person before connecting the original caller. Use this when you need to provide context or confirm availability before the transfer.
Immediately sends the caller to the selected destination without a consultation call. Use this for routine transfers to known extensions or departments.
During an active call, click the transfer button and choose the user, phone number, or extension you want to transfer to. For a warm transfer, wait until the receiving party answers before connecting the caller. For a blind transfer, the call transfers immediately after you select the destination.
Call Scripts
Call Scripts provide on-demand guidance during calls so agents can follow approved messaging, qualification questions, objection handling, or compliance language without leaving the dialer. Scripts appear directly in the dialer interface during active calls.
When a call script is configured, users see the script content in the dialer panel. This helps maintain consistency across your team and ensures important talking points or compliance statements are delivered accurately.
For instructions on creating and managing call scripts, see How to Create and Use Call Scripts in Web & App Dialers.
IVR Navigation
When calling phone numbers with Interactive Voice Response (IVR) systems, you can use the dialer's dialpad to send DTMF tones and navigate menu options. This is useful when reaching customers through business phone systems or automated attendants.
Click the dialpad icon during an active call to display the number keys. Tap or click the appropriate numbers to respond to IVR prompts. The tones are sent immediately and heard by the remote system.
Voicemail
The Voicemail section of the dialer provides access to voicemail messages based on your user permissions. Users can play messages, view transcripts when available, and manage their voicemail queue without leaving the dialer interface.
Users with appropriate permissions can view broader voicemail queues beyond their personal messages. Contact your administrator if you need access to additional voicemail mailboxes.
Recent Calls
The Recent Calls section displays your call history including outbound calls, inbound calls, missed calls, and voicemail messages. This provides a quick way to return calls or review recent communication activity.
Click any entry in the Recent Calls list to view call details or initiate a return call. You can filter the list by call type or search for specific contacts to quickly locate past conversations.
How to Set Up the Phone Dialer
Setting up the Phone Dialer requires confirming that your location has a valid phone number or approved outbound caller ID, granting browser permissions, and configuring audio devices. Follow these steps to prepare the dialer for use.
- Confirm the location has an active phone number or configured caller ID.
- Confirm the user has permission to access calling features.
- Allow microphone access in the browser.
- Connect and select the preferred speaker, headset, and microphone.
- If using browser extensions, VPNs, or restrictive network settings, test without them if the dialer does not connect properly.
Verify that the location has a phone number or approved outbound caller ID configured.
Click the phone icon in the top navigation to open the dialer panel.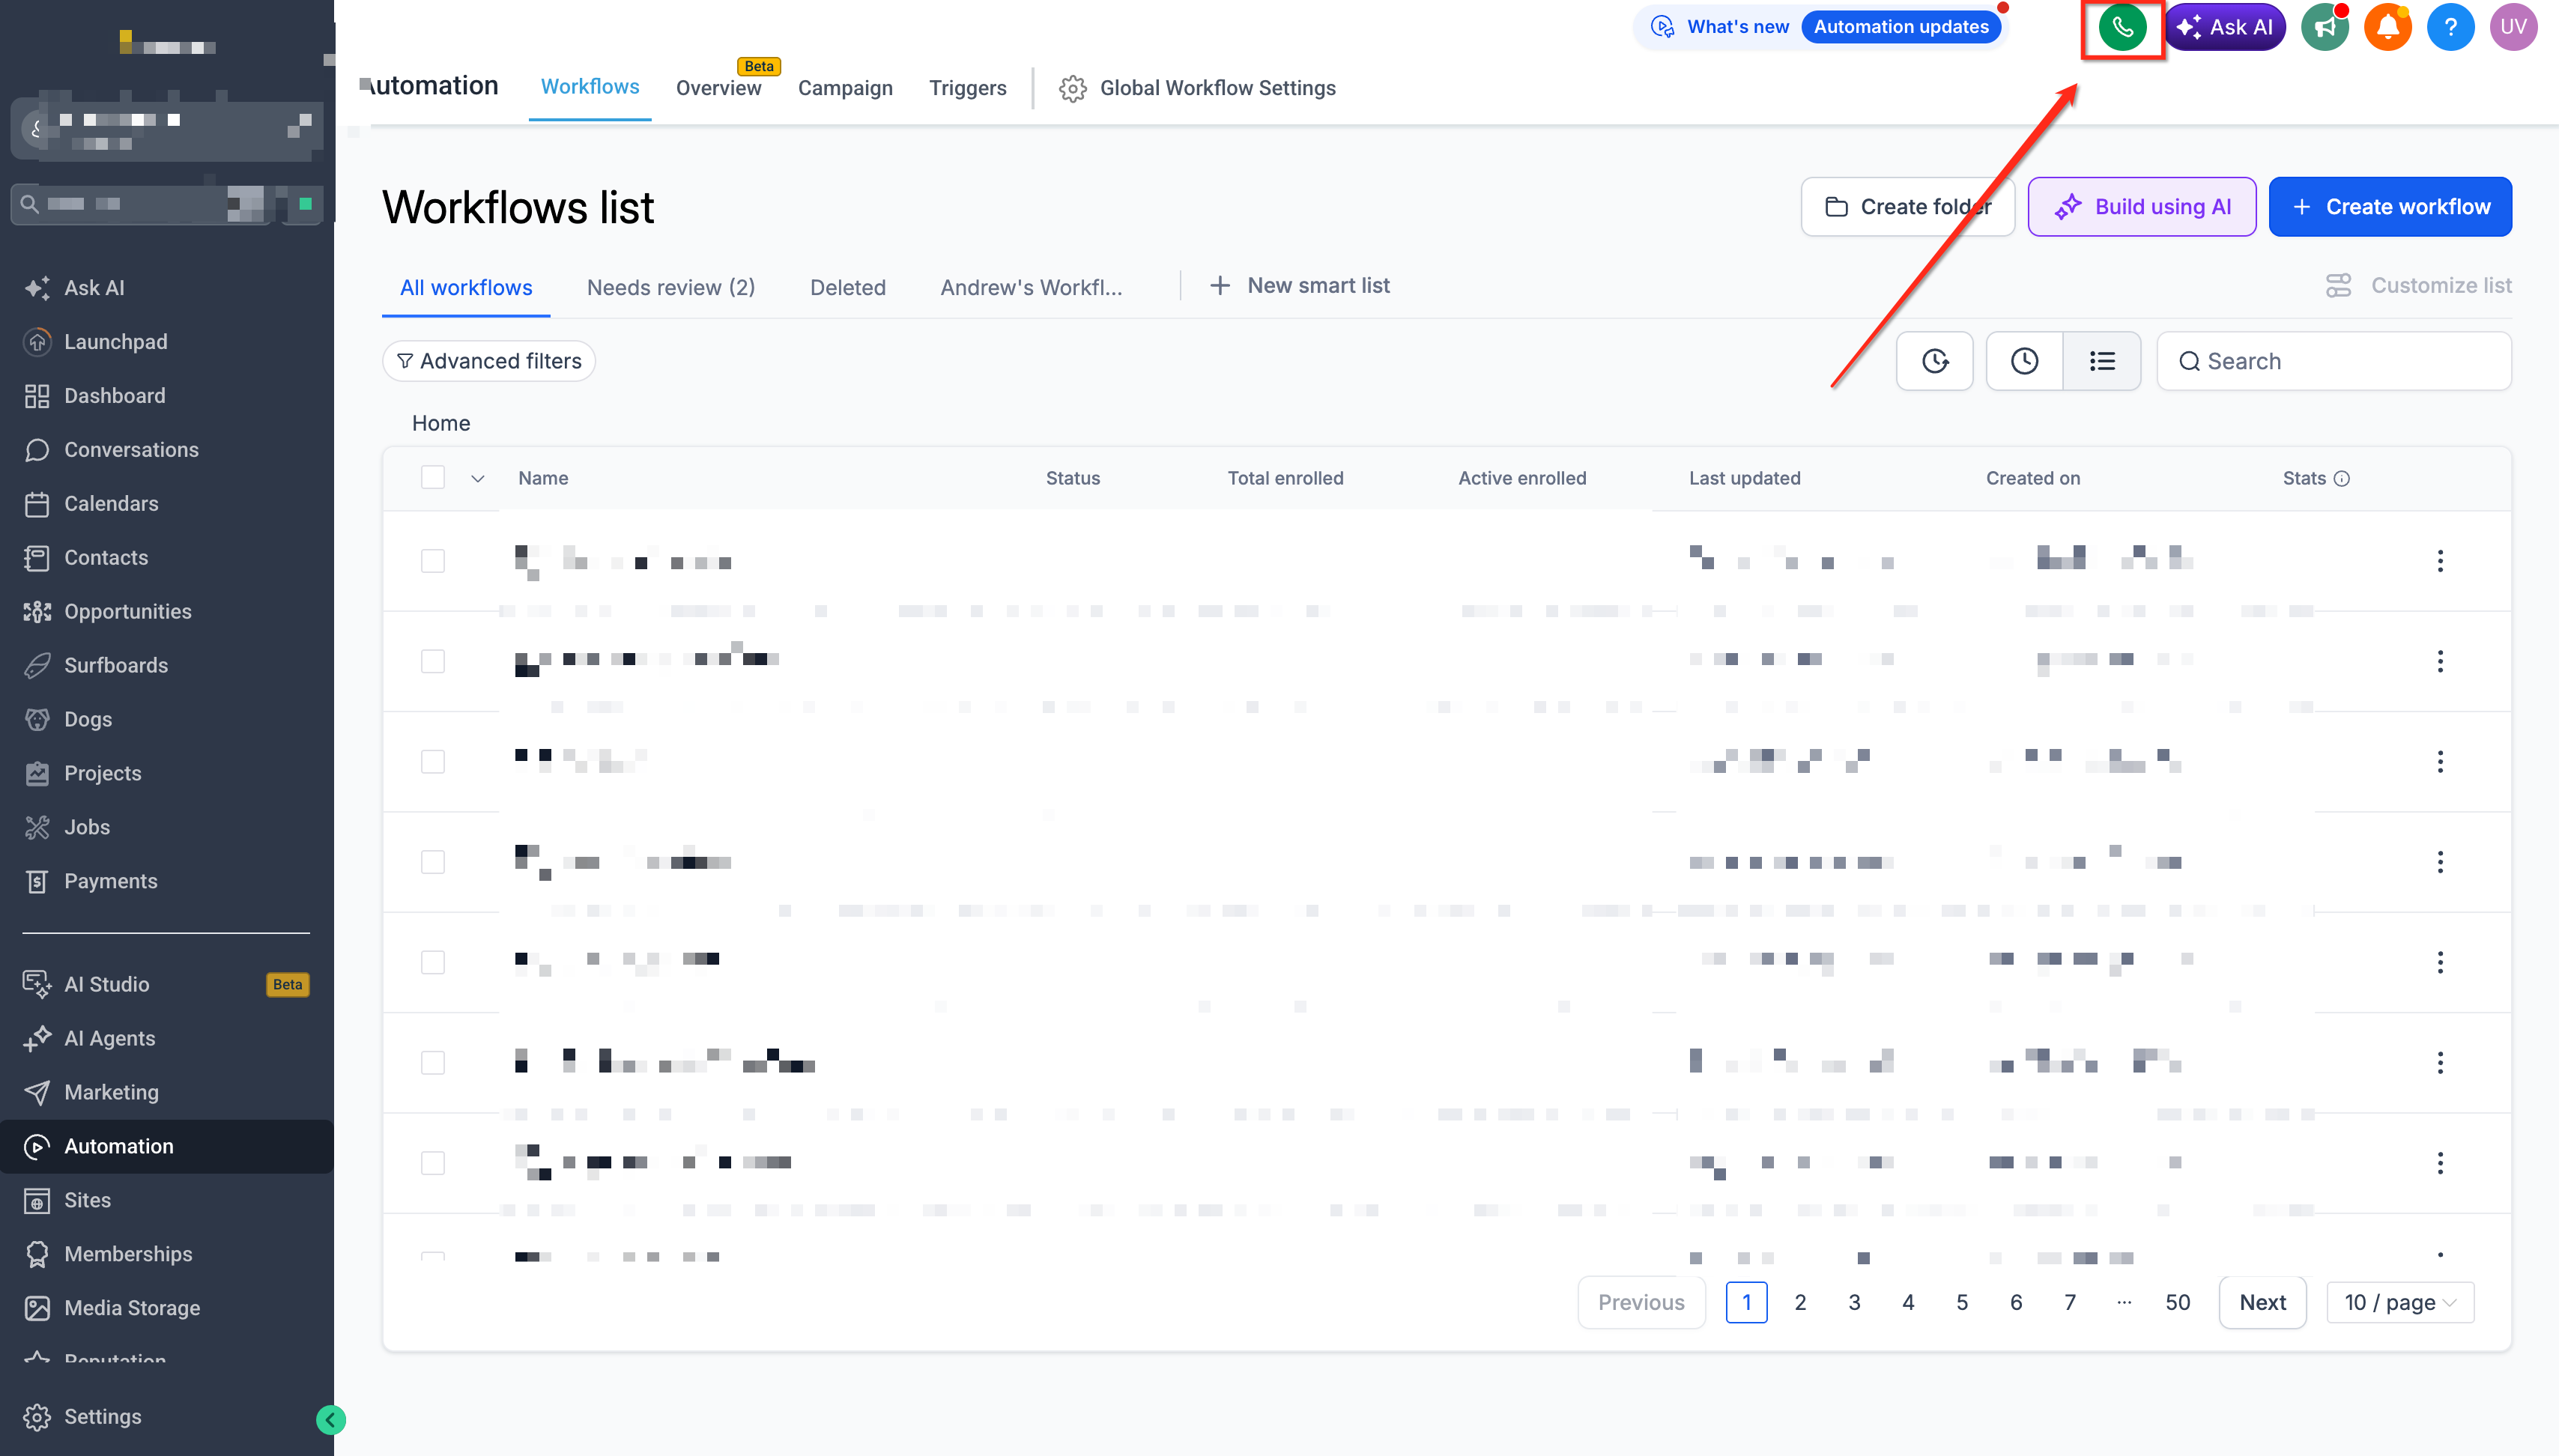
Allow microphone access when prompted by your browser.
Open the dialer settings and select your preferred speaker, microphone, and optional additional ring device.
Verify the Calling From number shown in the dialer matches your intended outbound number.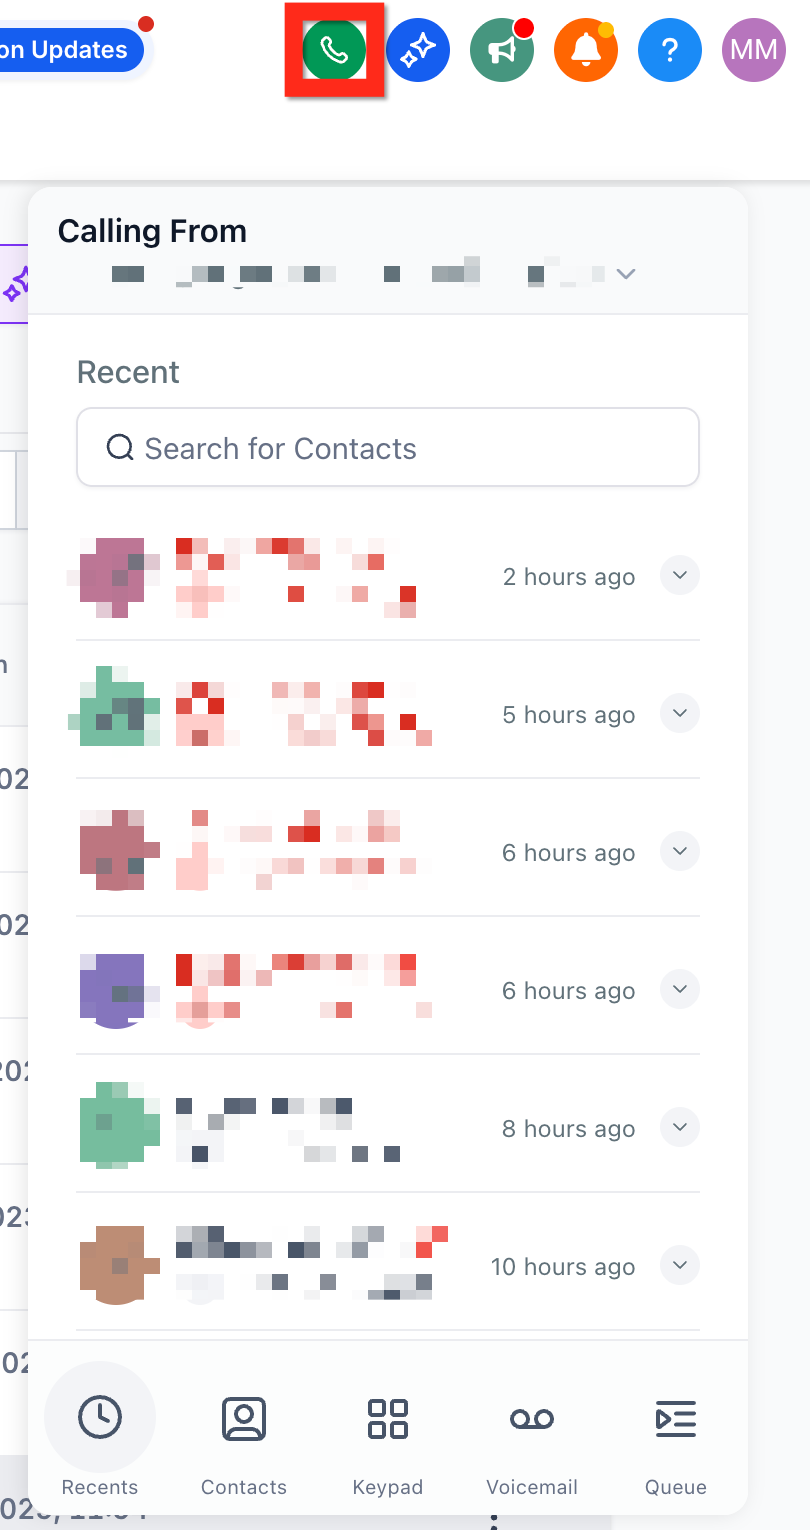
Search for a contact or enter a phone number and place a test call to confirm the dialer is working properly.
Troubleshooting the Phone Dialer
Most dialer problems are caused by browser permissions, audio device configuration, extensions, network interference, or outbound phone settings. Check these items before escalating the issue.
Check browser permissions and Audio Device Settings. Confirm the microphone is enabled in your operating system settings.
Use the dialer gear icon to choose and test the correct audio devices.
Confirm a valid outbound number is available and review the Calling From setting. Verify the location has an active phone number or approved caller ID.
Test without browser extensions or VPNs. Confirm outbound call timeout settings and network firewall rules are not blocking WebRTC traffic.
Reconfigure audio permissions and device preferences in that browser. Audio settings are stored locally per browser and device.
If the dialer continues to fail after checking