
Phone numbers can be moved between a platform-managed phone service and a connected phone provider or between supported sub-accounts. The exact information required depends on the migration direction and whether the number is US-based or international.
Support coordinates supported cross-account migrations end-to-end. Preparing the correct Account SID, Location ID, phone numbers, and applicable regulatory information before submitting the request helps prevent delays.
This guide explains which migration path to use, what information to prepare, how to submit the migration request, and what to verify after the numbers move.
Do not manually delete, release, disable, or disconnect a phone number while a migration is in progress unless Support specifically instructs you to do so. Wait until the move is confirmed and the number has been tested in the destination environment.
What is Phone Number Migration Across Accounts?
Phone number migration moves an existing phone number from one supported phone environment to another without requiring you to purchase a replacement number. Supported migrations can include moving a platform-managed number to a connected provider, moving a provider-managed number into the platform, or moving platform-managed numbers between supported sub-accounts.
This process is different from porting. Migration is used when moving numbers between compatible phone environments. If the number is currently held by an unsupported external carrier, use the phone-number porting process instead.
Key Benefits of the Phone Number Migration Process
A coordinated migration allows businesses to retain established phone numbers while changing the account or phone environment that manages them. Preparing the required information before submitting the request helps reduce delays and makes post-migration validation easier.
- Keep Existing Numbers: Move eligible phone numbers instead of replacing numbers customers already know.
- Centralized Coordination: Support coordinates supported cross-account moves from request through cutover.
- Clearer Migration Planning: Required account identifiers and regulatory details can be prepared before the request is submitted.
- Support for Multiple Numbers: Multiple eligible numbers can be included in the same migration request.
- Post-Migration Validation: Calls, SMS, compliance, routing, and number assignments can be verified after cutover before normal traffic resumes.
Supported Migration Scenarios
The correct migration path depends on the phone environment currently holding the number and where the number needs to go. Identify the source and destination before collecting account identifiers or submitting a migration request.
| Migration | When to Use It | Process |
|---|---|---|
| Platform-Managed → Connected Provider | Move a platform-managed number into a supported external phone-provider account. | Support coordinates the migration. |
| Connected Provider → Platform-Managed | Move a supported provider-managed number into a platform-managed sub-account. | Support coordinates the migration. |
| Platform-Managed → Platform-Managed, Different Parent Accounts | Move a phone number between sub-accounts that belong to different parent accounts. | Support coordinates the cross-account move. |
| Platform-Managed → Platform-Managed, Same Parent Account | Move a number between supported sub-accounts under the same parent account. | Use the in-app Move Numbers tool when available. |
| External Carrier → Platform | The number is held by a carrier outside the supported migration environments. | Use the phone-number porting process. |
A separate provider-support request is not required for the supported cross-account scenarios covered here. Submit the required information to Support so the migration can be coordinated end-to-end.
What You Need Before Migrating
Gathering the correct identifiers before contacting Support prevents unnecessary back-and-forth. The information required changes depending on the migration direction, so confirm the source and destination before submitting your request.
| Scenario | Prepare |
|---|---|
| Platform-Managed → Connected Provider | Gaining provider Account SID, Location ID for the affected source sub-account, phone number(s), and preferred cutover window. |
| Connected Provider → Platform-Managed | Losing provider Account SID, destination Location ID, phone number(s), and preferred cutover window. |
| Platform-Managed → Platform-Managed, Different Parent Accounts | Destination Location ID, phone number(s), preferred cutover window, and source Location ID when available. |
| International Number | Applicable Regulatory Bundle SID, Address SID, destination Location ID when applicable, phone number(s), country, number type, and preferred cutover window. |
Provide each phone number in E.164 format whenever possible. For example, a US number should be submitted as +1XXXXXXXXXX.
Security: Do not include an Auth Token, password, payment information, or other sensitive credentials in a standard migration request unless Support specifically provides an approved method for submitting that information.
How to Set Up a Phone Number Migration Across Accounts
The migration begins by identifying the source and destination, collecting the required account identifiers, and submitting one complete request to Support. Providing all required details in the initial request gives the migration team the information needed to coordinate the cutover.
Step 1: Identify the Migration Direction
Confirm whether the number is moving from the platform-managed phone service to a connected provider, from a connected provider into the platform-managed phone service, or between supported platform-managed sub-accounts. This determines which Account SID or Location ID must be included.
Step 2: Find the Provider Account SID When Required
The Account SID identifies the connected provider account involved in a supported US migration. Only the Account SID should be provided for the standard migration request; do not provide an Auth Token unless explicitly requested through a secure process.
- Platform-Managed → Connected Provider: Provide the gaining Account SID for the destination provider account.
- Connected Provider → Platform-Managed: Provide the losing Account SID where the number currently resides.
- Platform-Managed → Platform-Managed across different parent accounts: A provider Account SID is generally not required for this move.
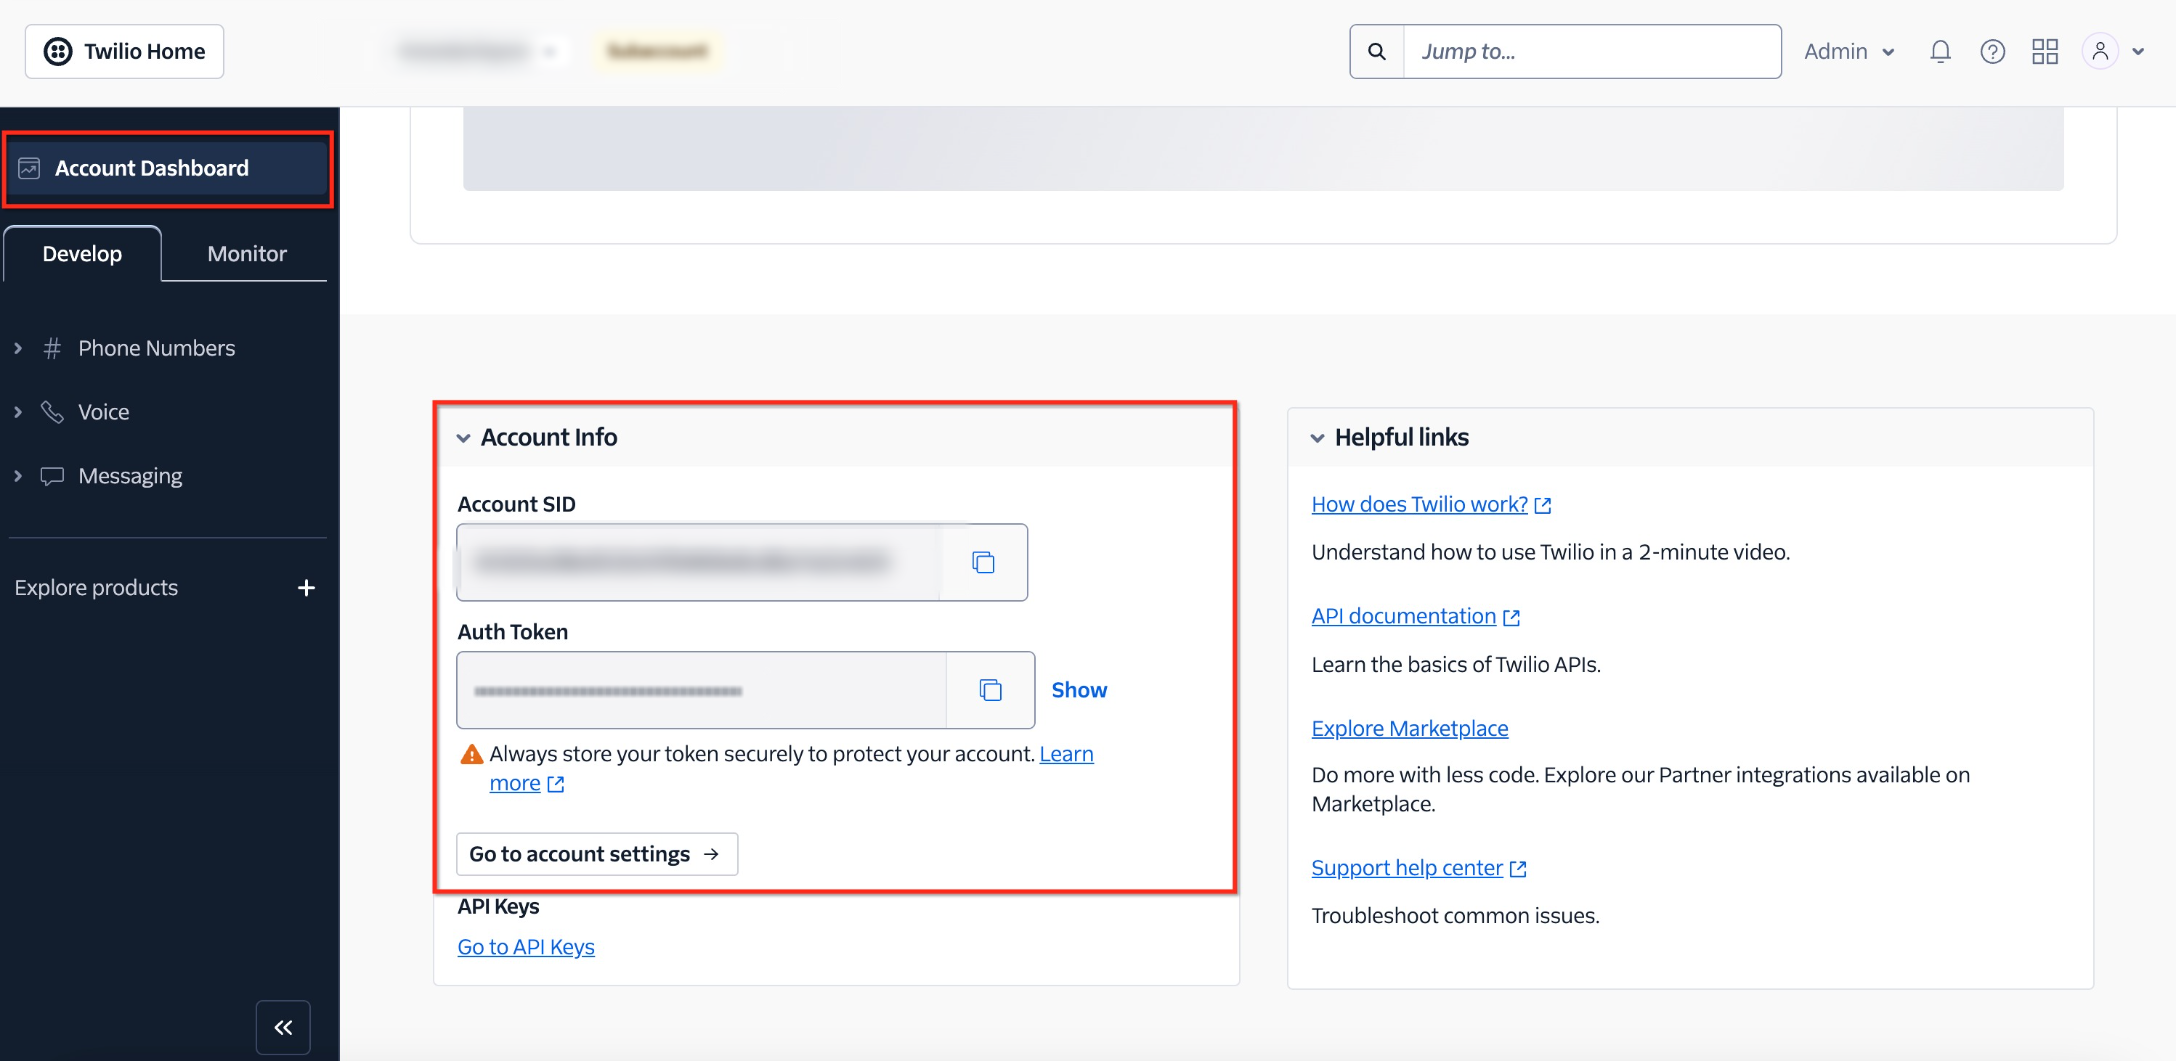
The Account SID is available from the connected provider's account dashboard under Account Info. Only the Account SID is required for the standard migration request.
Step 3: Find the Location ID
The Location ID identifies the sub-account involved in the migration. For provider-to-platform and cross-parent-account moves, the destination Location ID is especially important. For platform-to-provider moves, include the Location ID of the affected source sub-account so Support can identify where the number currently resides.
- Open the applicable sub-account.
- Go to Settings → Business Profile.
- Locate and copy the Location ID.
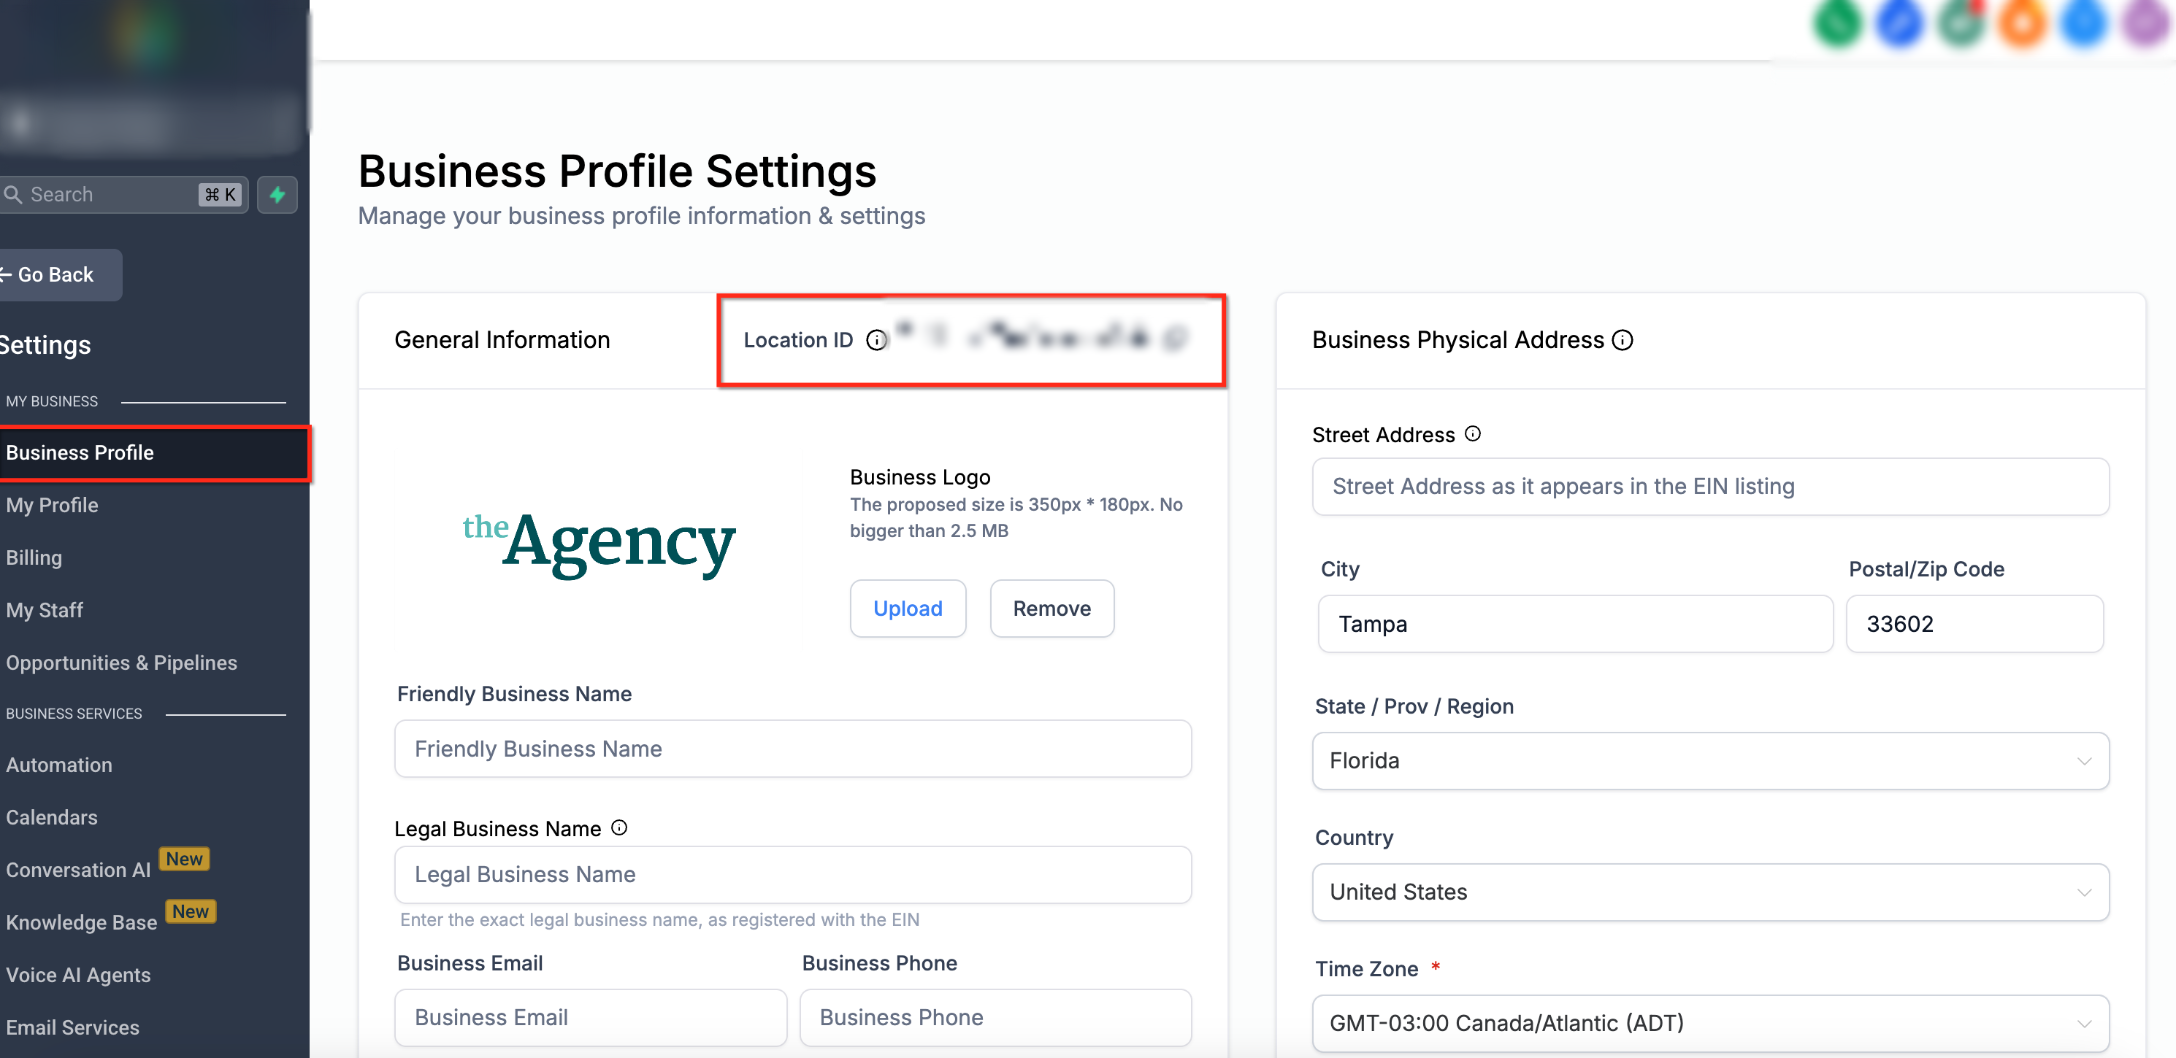
The Location ID is available in the Business Profile settings for the applicable sub-account.
Step 4: Submit the Migration Request to Support
Submit one Support request containing all migration details. Support will coordinate the supported cross-account migration and notify you when the number is ready for validation.
- Migration direction
- Phone number(s) in E.164 format
- Applicable connected-provider Account SID for supported US provider migrations
- Applicable Location ID(s)
- Regulatory Bundle SID and Address SID for applicable international numbers
- Country and number type for international numbers
- Your preferred cutover window
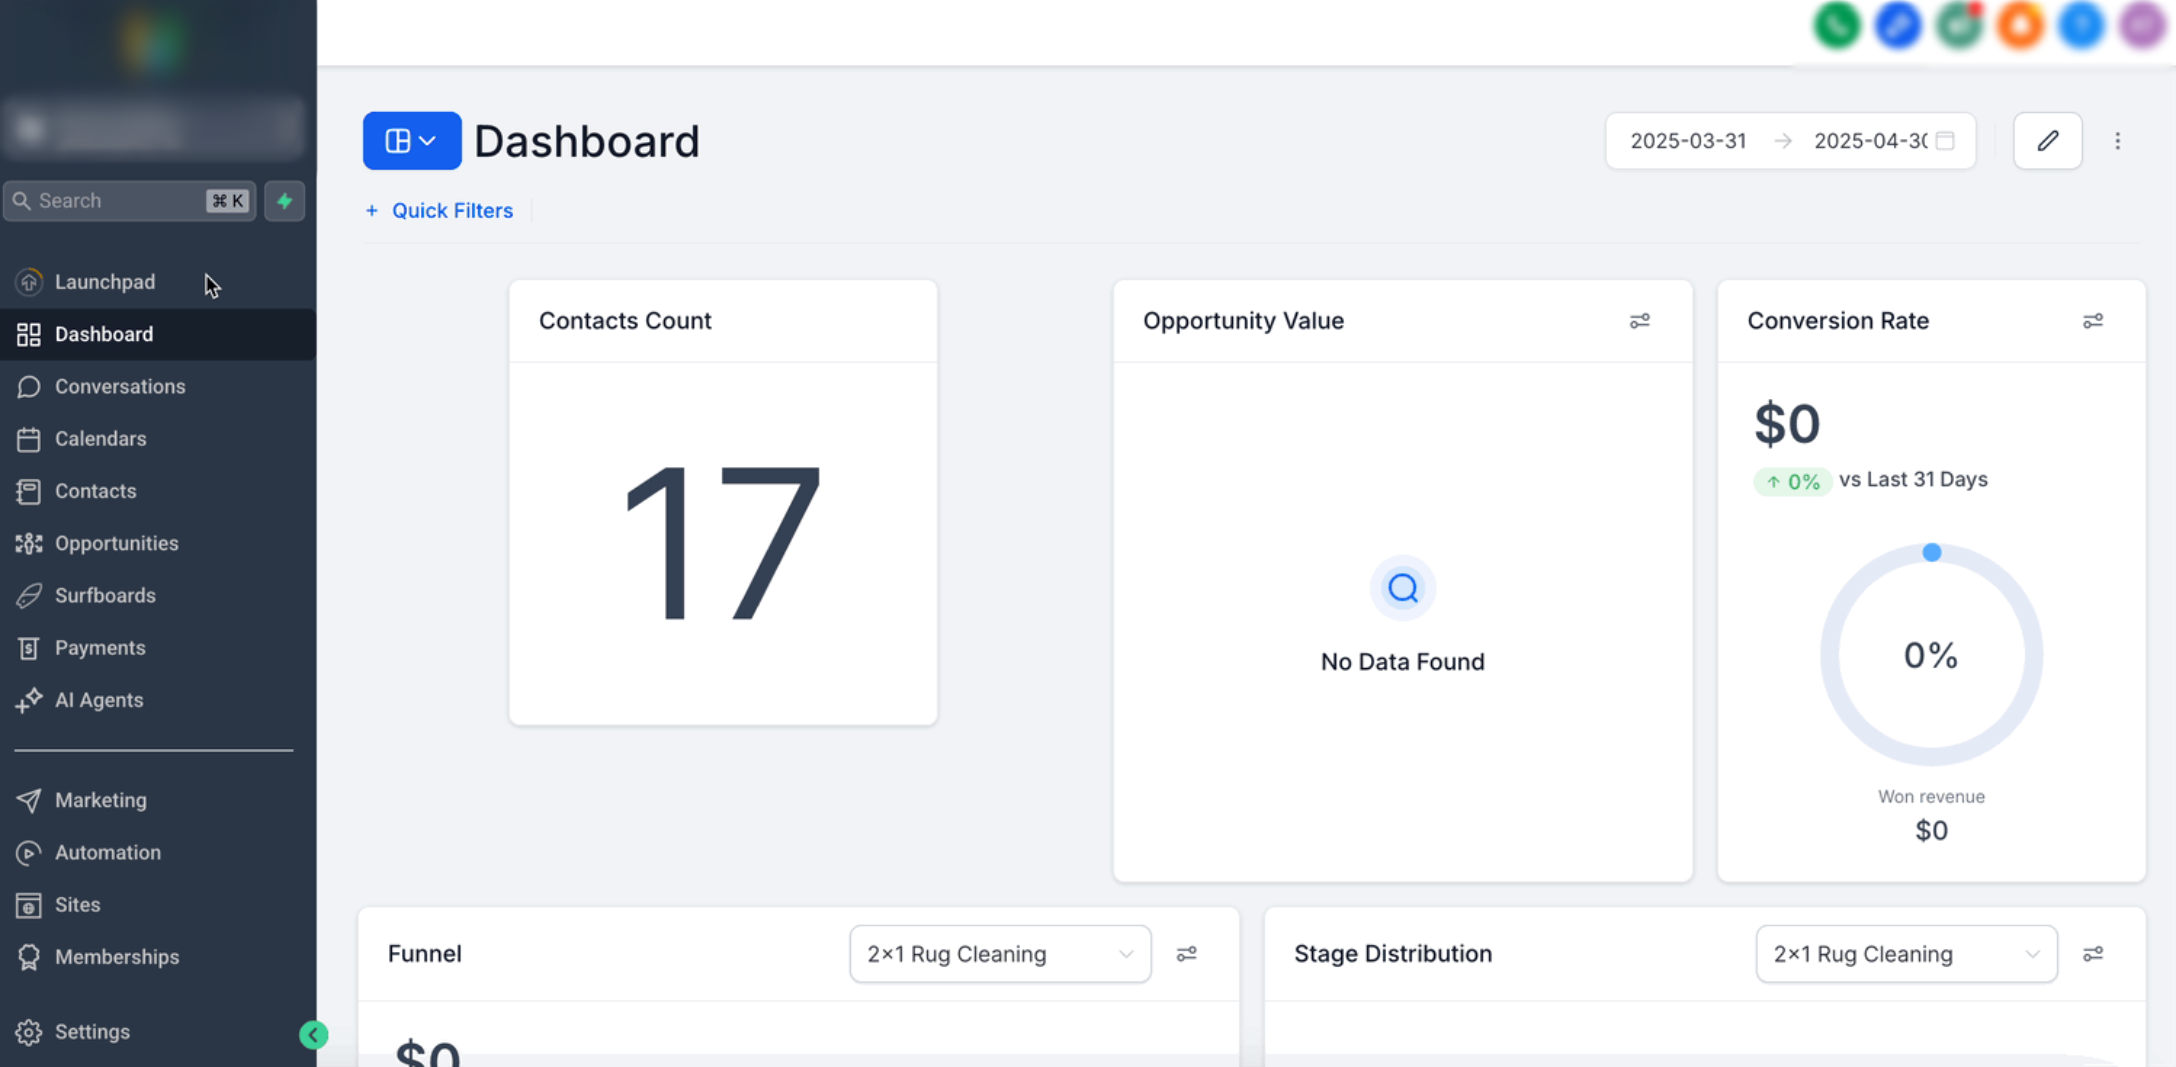
Contact Support and provide all migration details in one request so the phone team can coordinate the move.
Moving International Phone Numbers
International phone numbers can require country- and number-type-specific regulatory information before they can be moved. Preparing the correct Regulatory Bundle and Address information before submitting the migration request helps prevent the transfer from being delayed by compliance requirements.
- Regulatory Bundle SID applicable to the number's country and number type
- Address SID
- Destination Location ID when applicable
- Phone number(s), including country code
- Country and number type, such as local, mobile, or toll-free
- Preferred cutover window
Check Regulatory Approval Before the Move
Regulatory requirements vary by country and number type. Confirm that any required Address or Regulatory Bundle is current and approved and that submitted documentation matches the destination requirements before requesting the migration.
What to Check After the Migration
A successful number move does not guarantee that every routing, messaging, compliance, or user setting in the destination environment is already configured. Validate the number immediately after Support confirms the migration so issues can be identified before normal call or SMS traffic resumes.
- Confirm the number appears in the destination environment.
- Place an inbound test call from another phone.
- Place an outbound test call from the migrated number.
- Test inbound and outbound SMS when messaging is enabled.
- Review call routing, forwarding, voicemail, user assignments, and workflow references.
- Review A2P 10DLC status. A2P registration is associated with the account or sub-account environment and should not be assumed to transfer with the number. Verify or complete registration in the destination and attach applicable numbers to the approved campaign.
- Review Toll-Free Verification and country-specific compliance. Confirm that the migrated number meets the destination environment's current requirements before relying on SMS.
- Keep the migration request open until validation is complete.
Historical recordings and voicemails: Moving the phone number does not migrate historical recordings or voicemail assets into a new phone environment. Download any historical assets you need to retain before losing access to the source environment.
Troubleshooting Phone Number Migrations
Migration delays are commonly caused by missing identifiers, regulatory requirements, incorrect destination information, or post-migration configuration. Start with the migration request and confirm that the source, destination, and phone numbers match the original request.
Confirm that the request includes the phone numbers, migration direction, applicable Account SID, Location ID, and regulatory information for international numbers.
Verify that the applicable Regulatory Bundle and Address are approved for the correct country and number type. Country-specific requirements can delay the move until compliance information is complete.
Review the destination's A2P 10DLC, Toll-Free Verification, SMS permissions, and other applicable compliance requirements. A phone-number move does not automatically guarantee messaging compliance in the destination account.
Review the destination number's forwarding settings, voicemail, user assignments, call routing, and any workflows or automations that reference the number.
Do not use the cross-account Support process when both eligible platform-managed sub-accounts belong to the same parent account. Use the available in-app Move Numbers tool instead.
Frequently Asked Questions
Need Help?
If a migration is delayed, a phone number does not appear in the destination, or calls and SMS do not work as expected after cutover, gather the migration details below before contacting Support.
- Confirm the source and destination phone environments.
- Confirm all affected phone numbers in E.164 format.
- Verify the applicable Account SID and Location ID.
- For international numbers, confirm Regulatory Bundle and Address approval.
- Verify A2P 10DLC, Toll-Free Verification, or other destination messaging requirements.
- Test inbound and outbound calls.
- Test inbound and outbound SMS when messaging is enabled.
Include the following information when contacting Support so the migration can be reviewed efficiently:
- Migration direction
- Affected phone number(s)
- Applicable Account SID
- Source and destination Location IDs when applicable
- Country and number type for international numbers
- Regulatory Bundle SID and Address SID when applicable
- Preferred or previously confirmed cutover window
- Whether inbound/outbound calls are working
- Whether inbound/outbound SMS is working
- Any errors or screenshots showing the issue