
The Call Details workflow trigger lets the platform respond automatically when a call matches specific outcomes or call information. You can target incoming or outgoing calls, specific statuses, phone numbers, number pools, and custom dispositions. This makes it easier to automate missed-call follow-up, voicemail handling, sales callbacks, internal notifications, and other call-based processes.
What is the Call Details Workflow Trigger?
Call Details is an event-based workflow trigger that enrolls a contact when a call log matches the conditions you configure. Instead of manually reviewing calls and deciding what should happen next, the platform can evaluate the call information and automatically start the appropriate workflow.
The trigger can evaluate information such as call direction, call status, the phone number involved, an associated Number Pool, and a Custom Disposition. Combining these filters makes it possible to create targeted automations for specific calling scenarios.
A workflow could enroll a contact only when an incoming call has a status of busy, voicemail, or no-answer. The workflow could then send an internal notification, create a callback task, apply a tag, or begin another follow-up sequence.
Key Benefits of the Call Details Workflow Trigger
Call-based automation helps teams respond consistently without requiring someone to monitor call logs throughout the day. Precise filters also make it possible to separate different calling scenarios and apply the right follow-up automatically.
- Automated follow-up: Start callbacks, notifications, tasks, tagging, or messaging when a qualifying call occurs.
- Precise call targeting: Narrow enrollment using call direction, status, phone numbers, Number Pools, and custom dispositions.
- Consistent handling: Apply the same response every time a missed call, voicemail, or other configured call outcome occurs.
- Reduced manual monitoring: Let workflows react to qualifying call events instead of requiring users to review call records manually.
- Flexible sales and support automation: Build different workflows for incoming leads, outbound sales calls, missed calls, callback requests, and other call outcomes.
How the Call Details Trigger Works
Each qualifying call is evaluated against the filters configured on the trigger. Adding more filter types narrows the conditions the call must satisfy before the contact can enter the workflow.
Call Status vs. Custom Disposition
These filters represent different types of call information. Choosing the correct one prevents workflows from relying on the wrong outcome data.
| Filter | What It Represents | Examples |
|---|---|---|
| Call Status | A system-recorded call outcome. | Busy, voicemail, no-answer, completed |
| Custom Disposition | A defined post-call classification selected for the call. | Follow Up, Qualified, No Answer, Voicemail, Requested Callback |
Custom Dispositions are separate from system Call Status values. If your automation is intended to react to an agent-selected call outcome, use the Custom Disposition filter rather than relying on manual call-status behavior.
Available Call Details Filters
Filters determine which calls qualify for the workflow. Use only the conditions necessary for the automation so that valid calls are not unintentionally excluded.
| Filter | Purpose | Example |
|---|---|---|
| Call Direction | Separates incoming and outgoing call scenarios. | Incoming |
| Call Status | Matches selected system call outcomes. | Busy, voicemail, no-answer |
| In Number Pool | Limits the trigger to calls associated with a selected Number Pool. | Paid Search Tracking Pool |
| Custom Disposition | Matches a call classification recorded after the call. | No Answer, Voicemail |
| In Phone Number | Restricts the trigger to one or more selected phone numbers. | Main Sales Number |
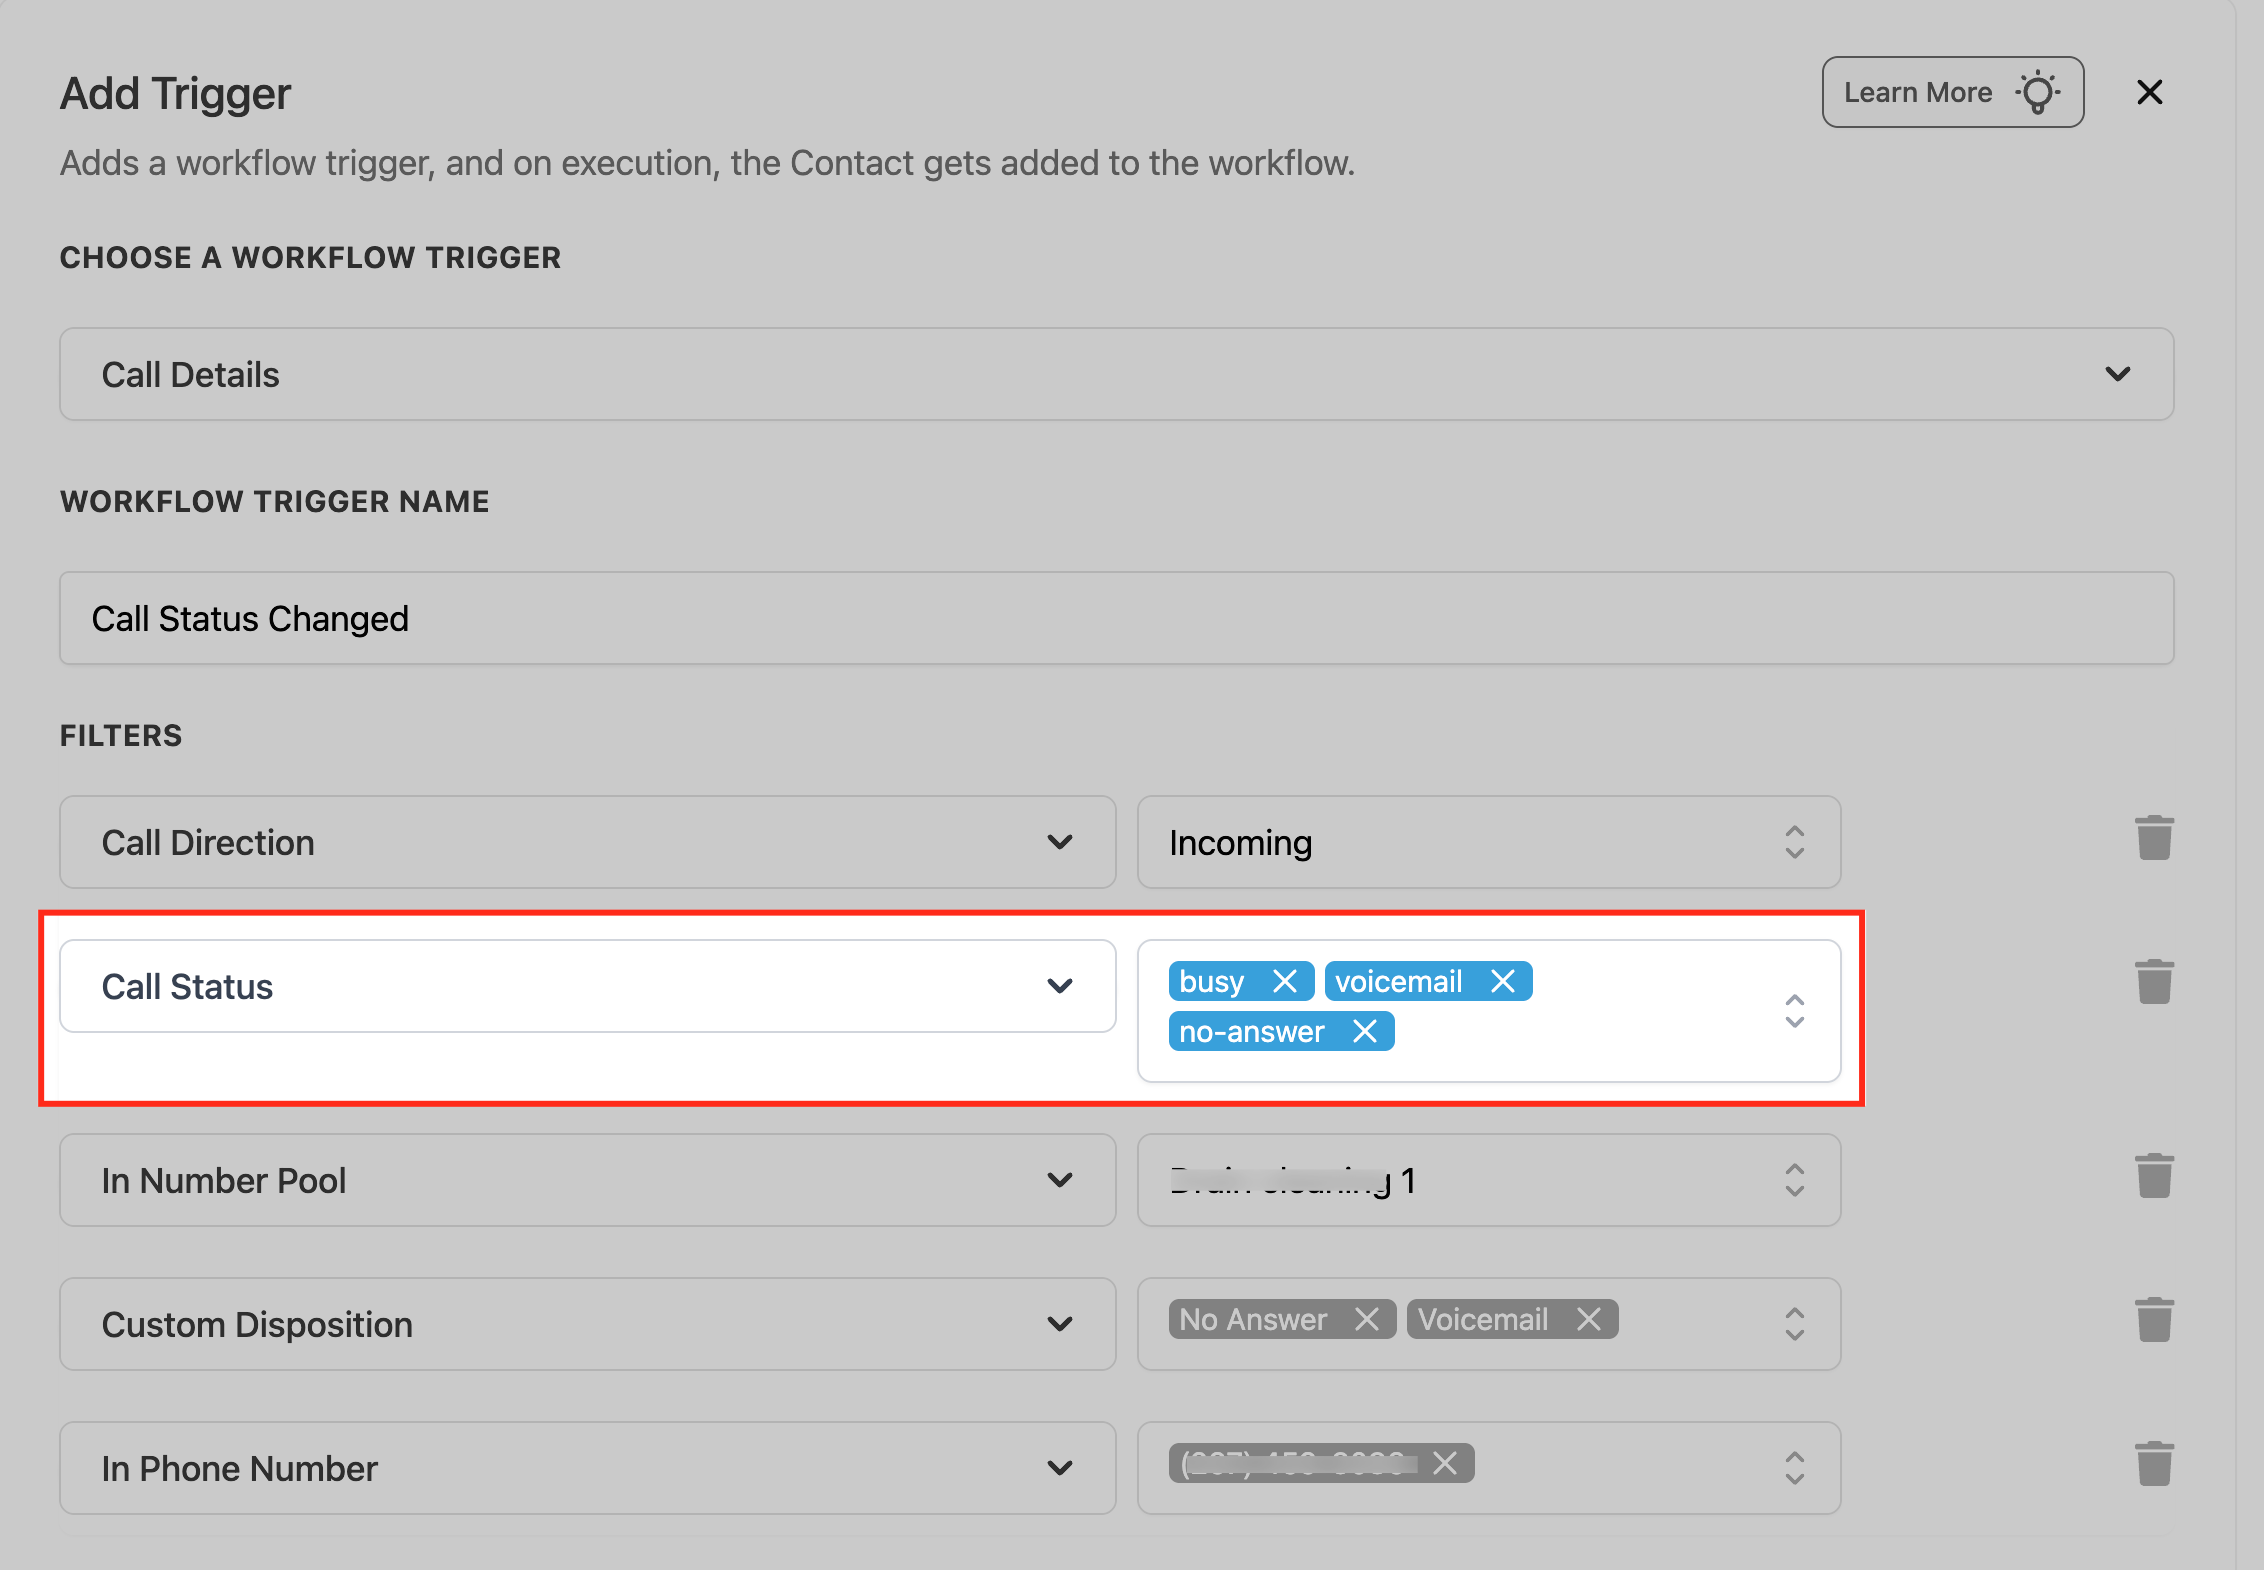
If Call Direction = Incoming and Call Status includes busy, voicemail, and no-answer, the call must be incoming and match one of the selected call-status outcomes before the trigger qualifies.
How to Set Up the Call Details Workflow Trigger
Proper trigger configuration ensures contacts enter the workflow only for the call scenarios you intend to automate. Build the trigger from the Workflow Builder, configure the required call filters, then test the workflow before publishing it.
Step 1: Open or Create a Workflow
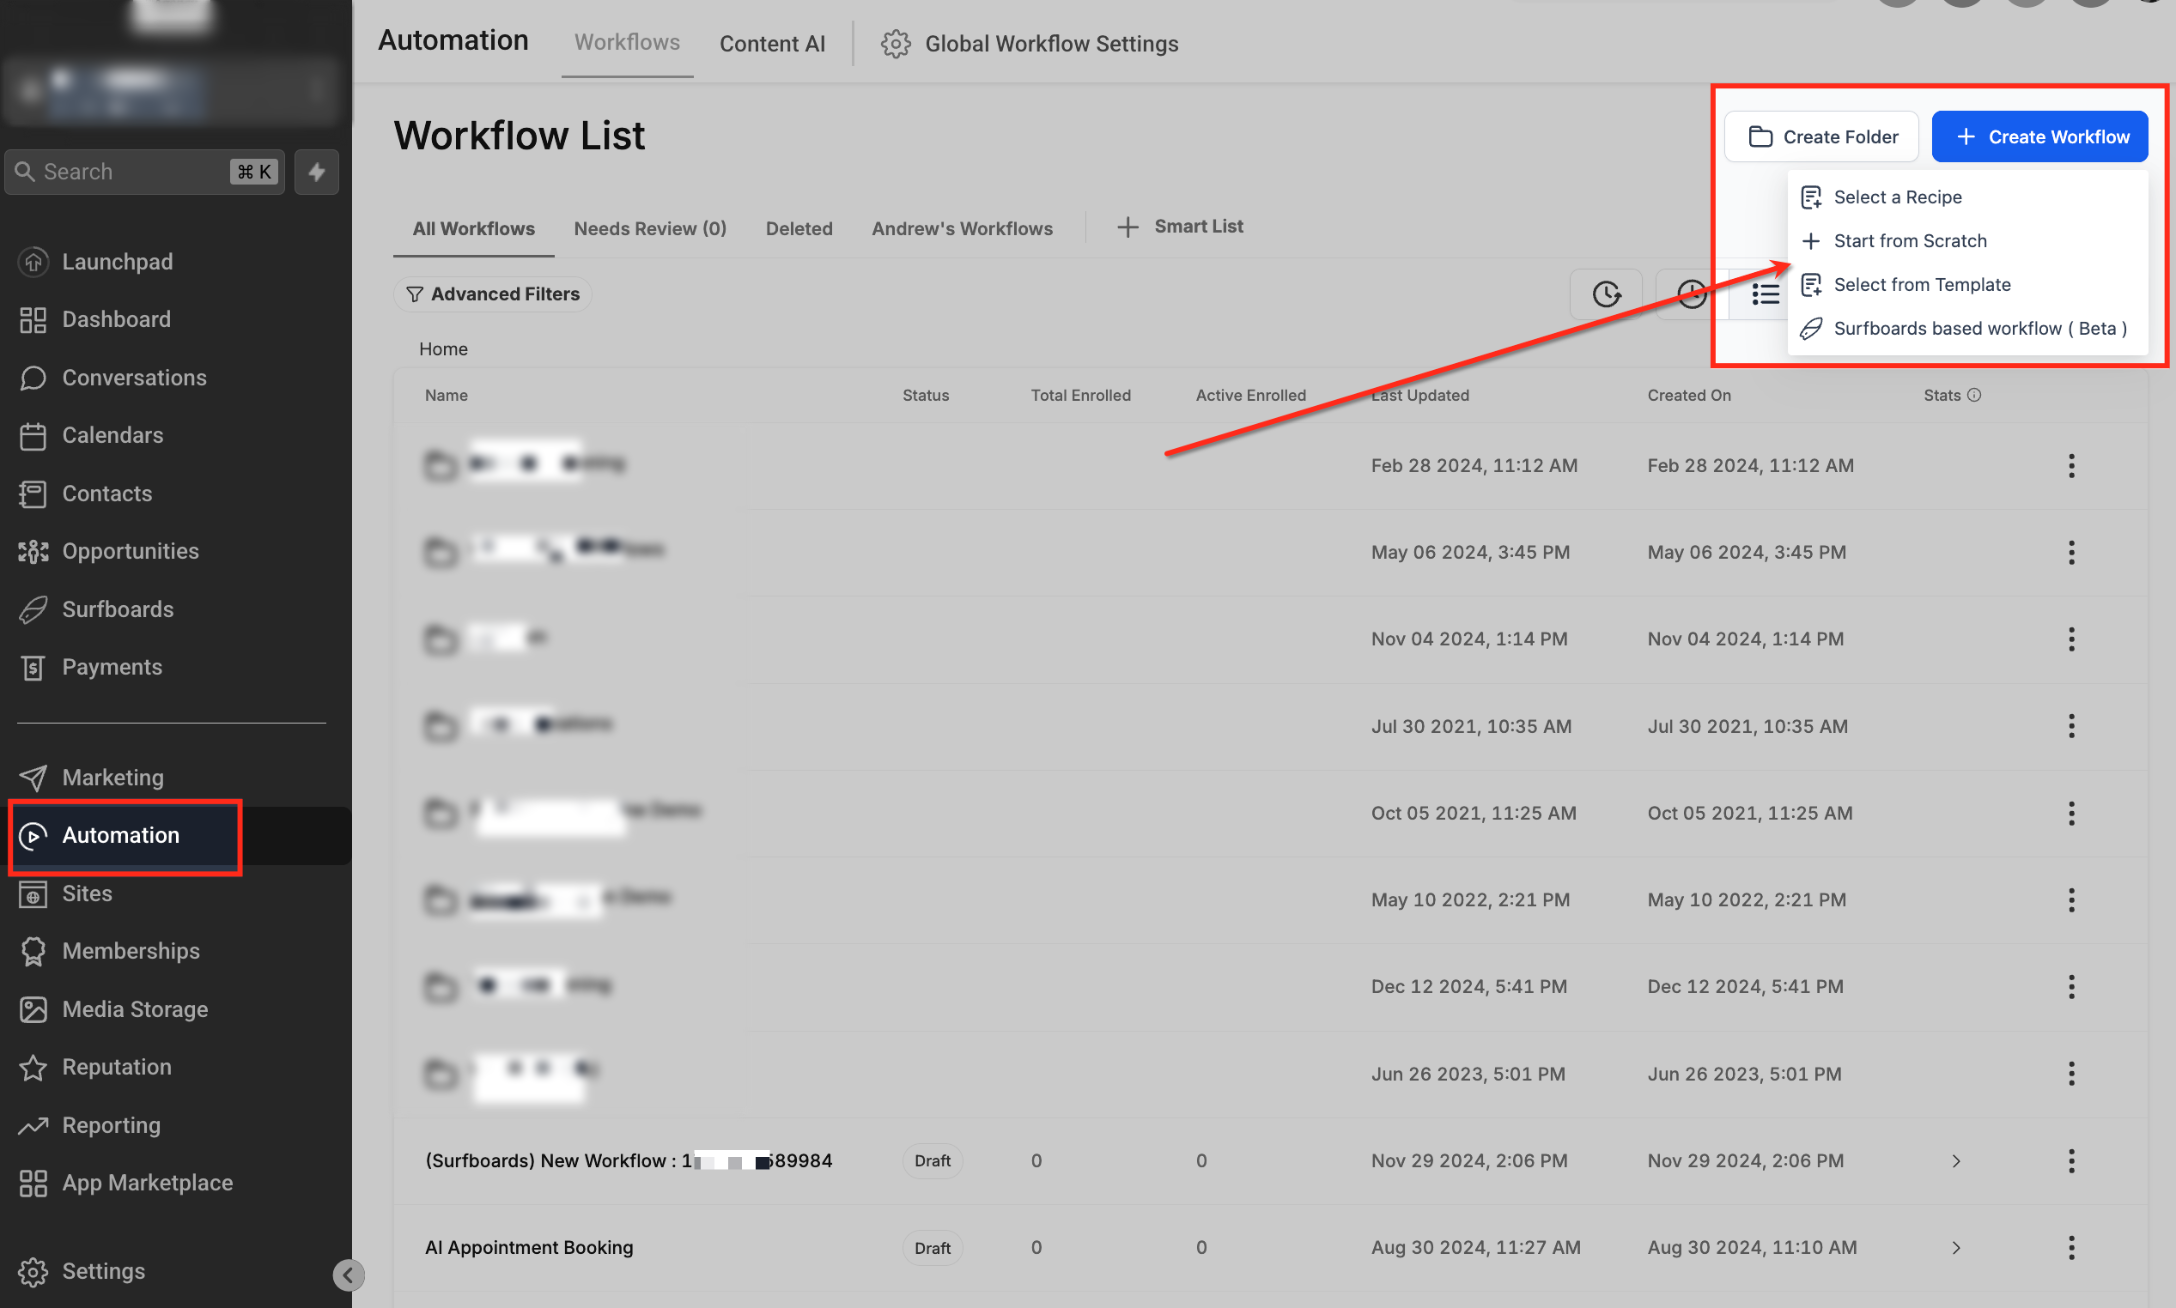
Navigate to Automation → Workflows. Open an existing workflow or click Create Workflow and choose Start from Scratch to build a new automation.
Step 2: Add the Call Details Trigger
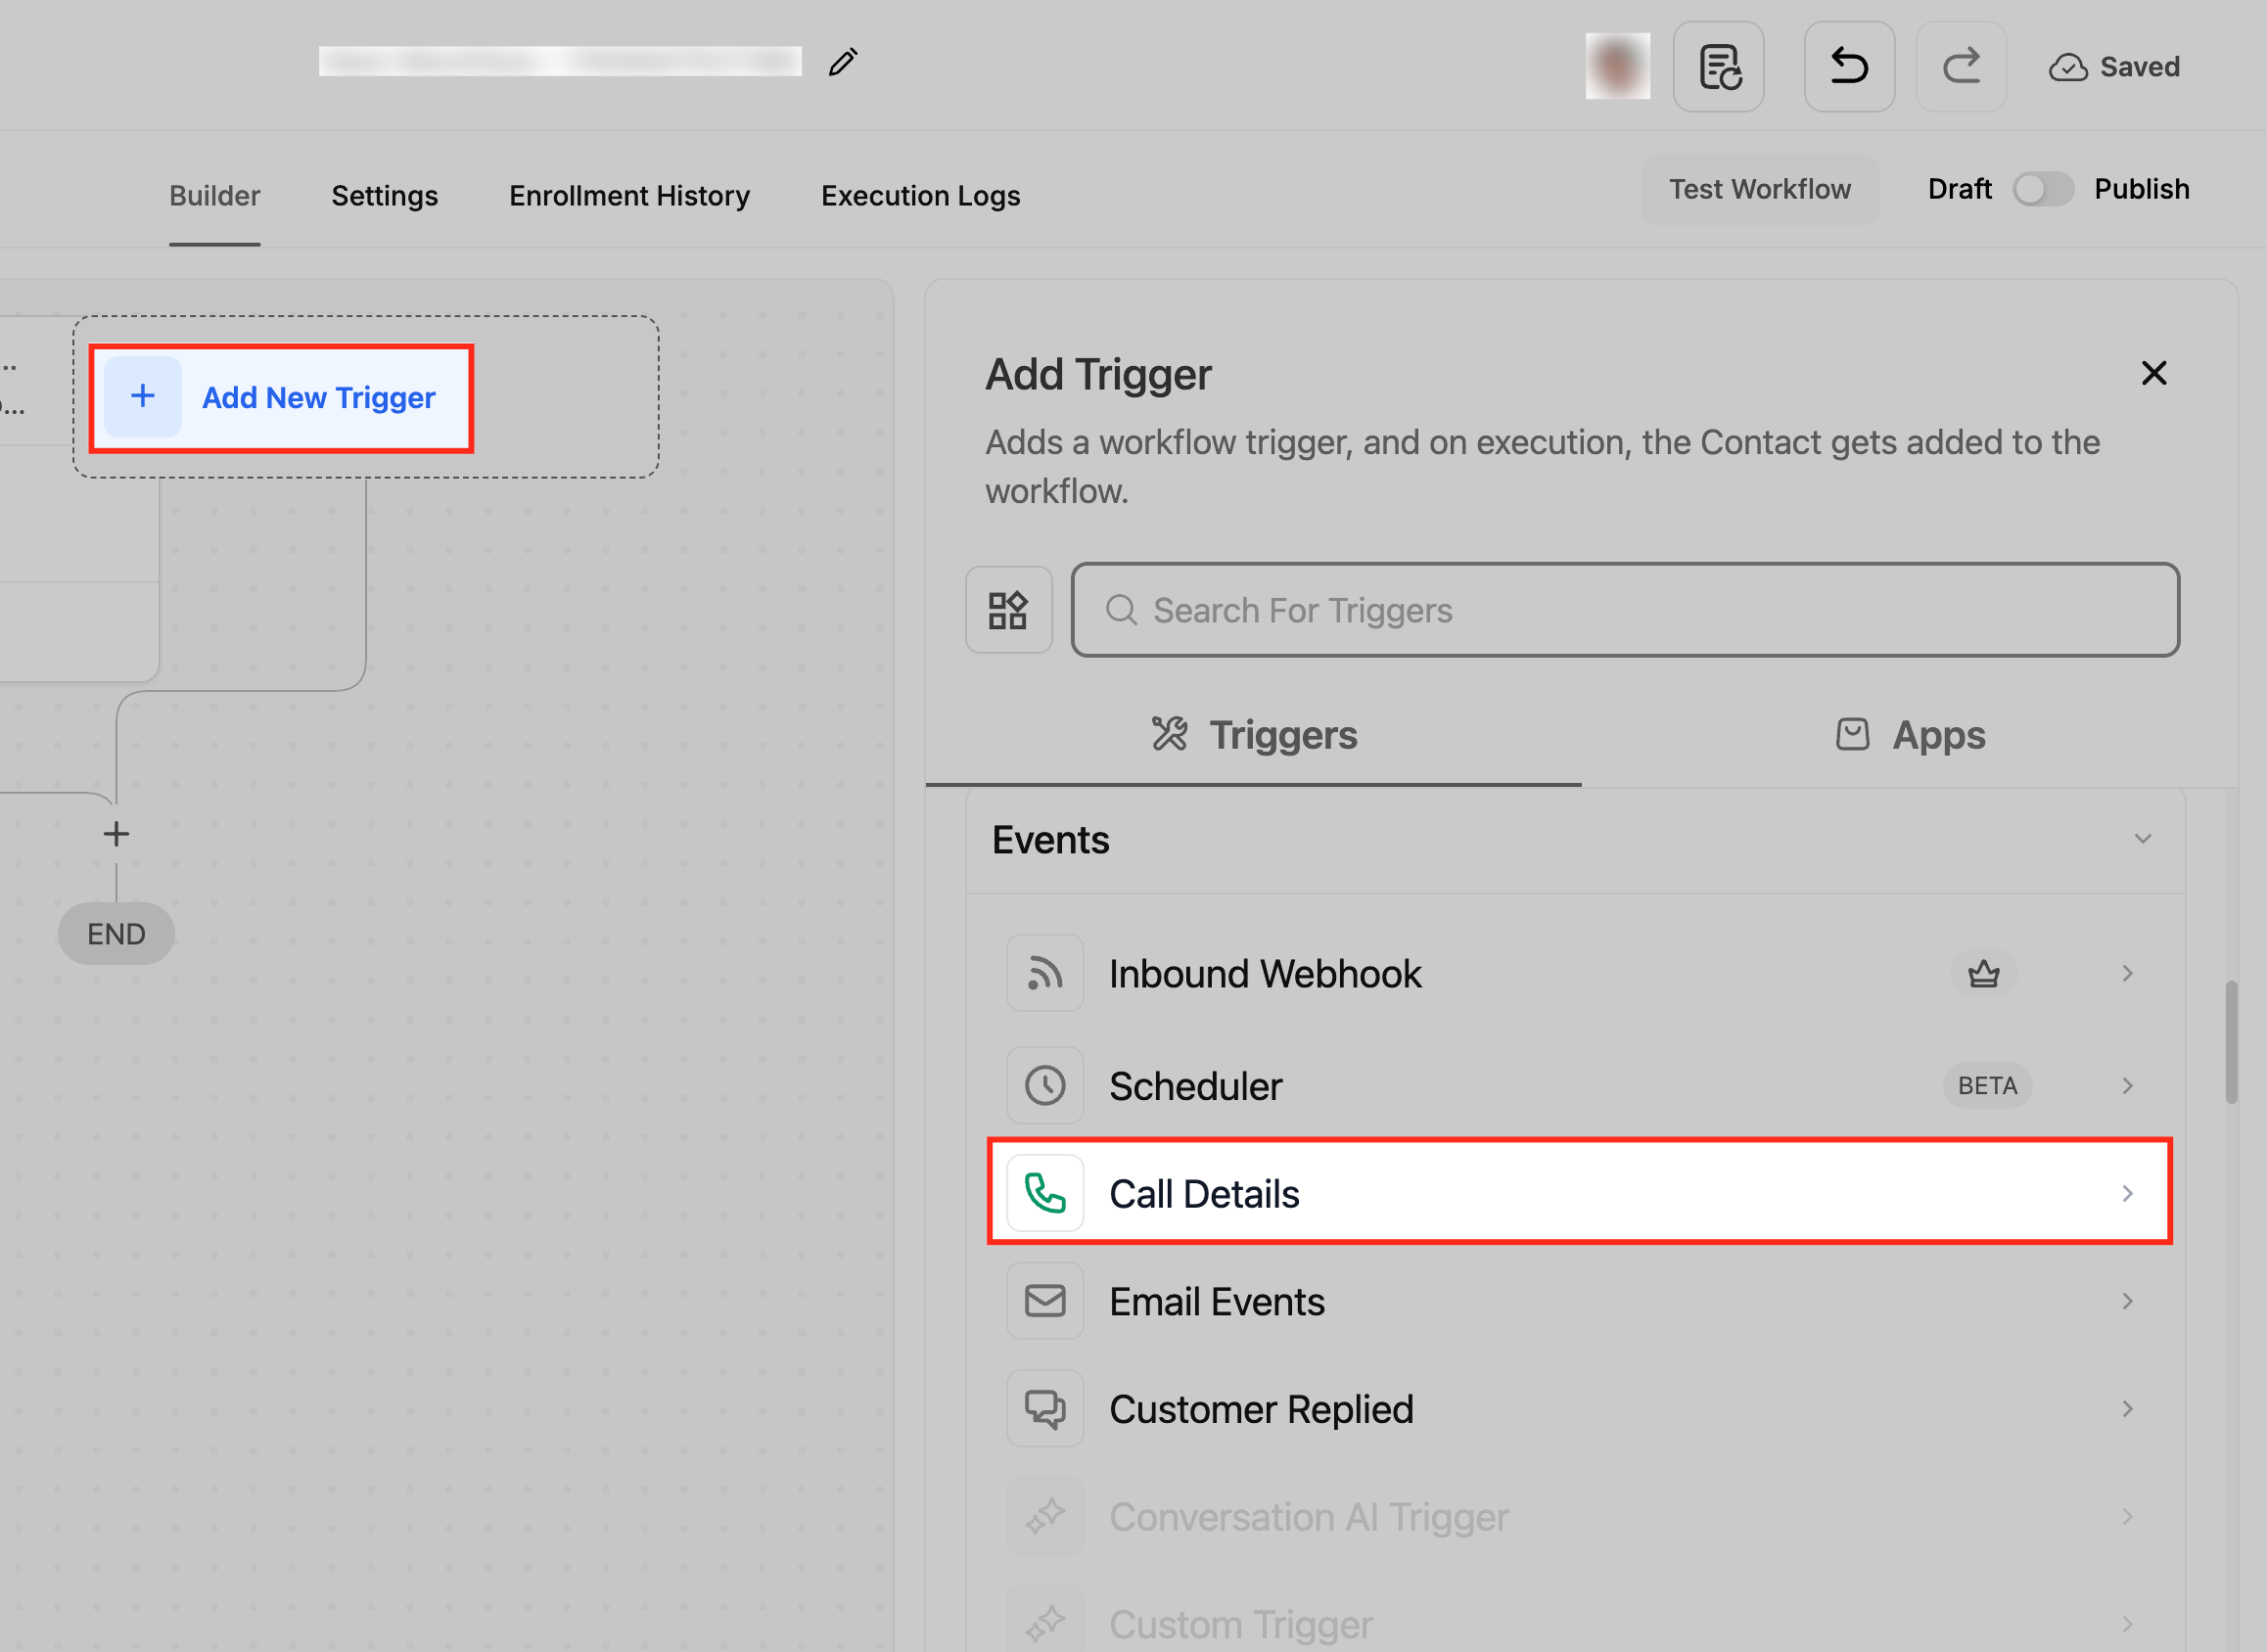
In the Workflow Builder, click Add New Trigger. Under the Events trigger category, select Call Details.
Step 3: Name the Trigger
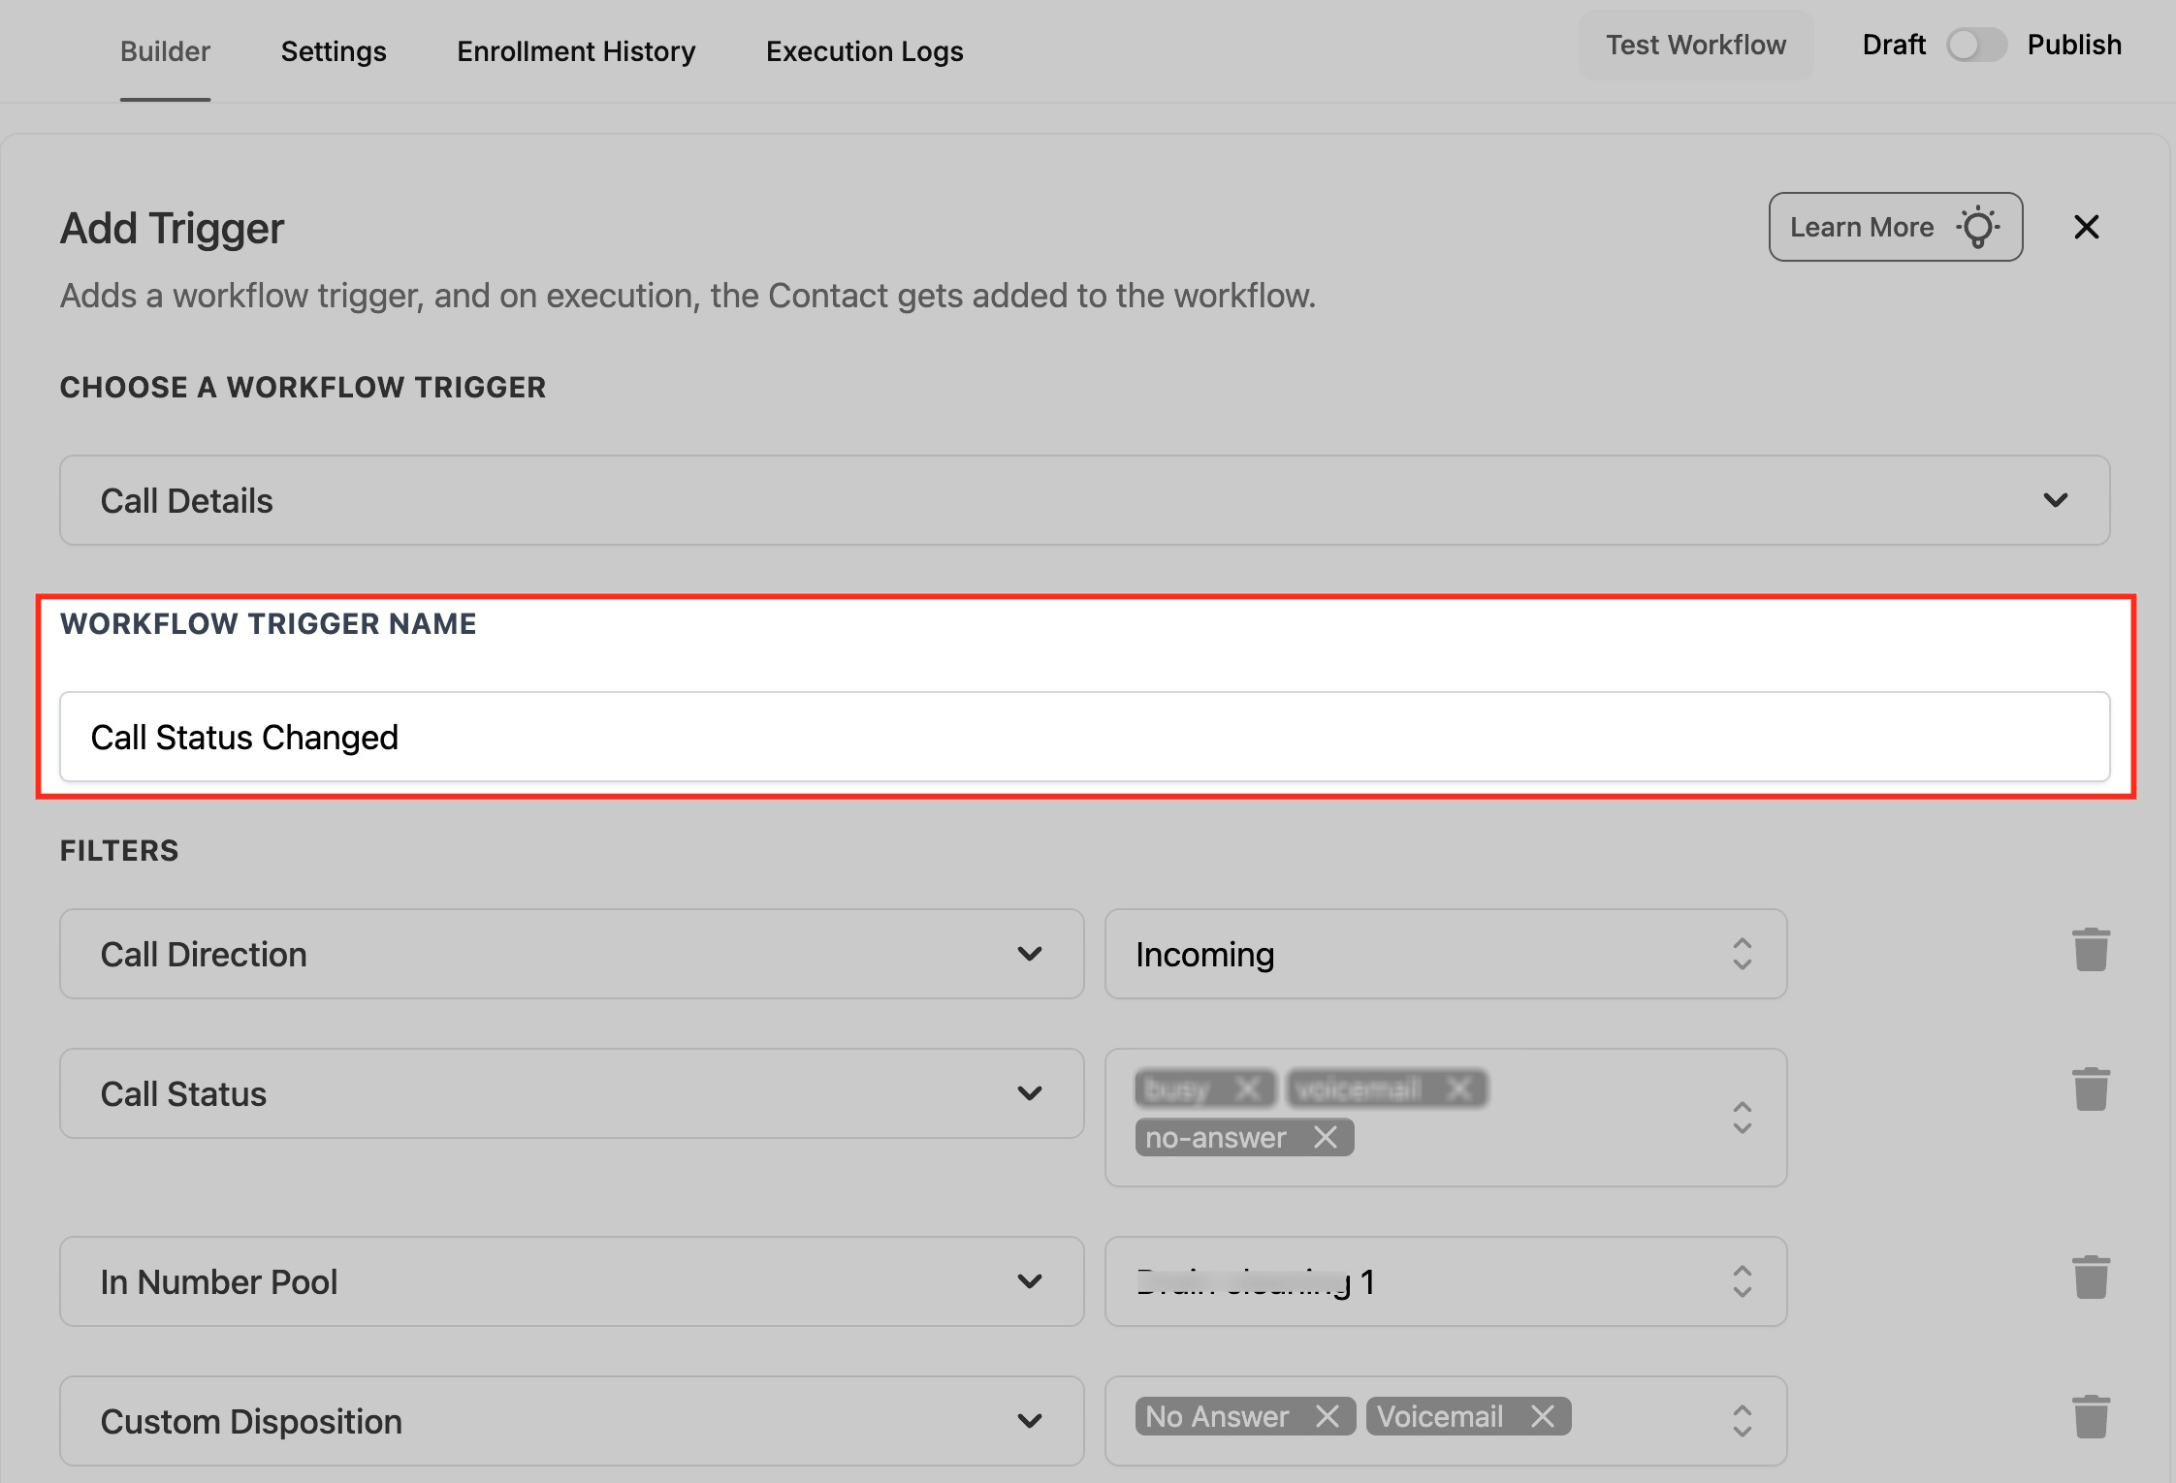
Enter a descriptive Workflow Trigger Name. The name does not change how the trigger executes, but clear names make workflows easier to understand and maintain.
For example, use a name such as Incoming Missed Call, Voicemail Follow-Up, or Call Status Changed.
Step 4: Configure Call Direction
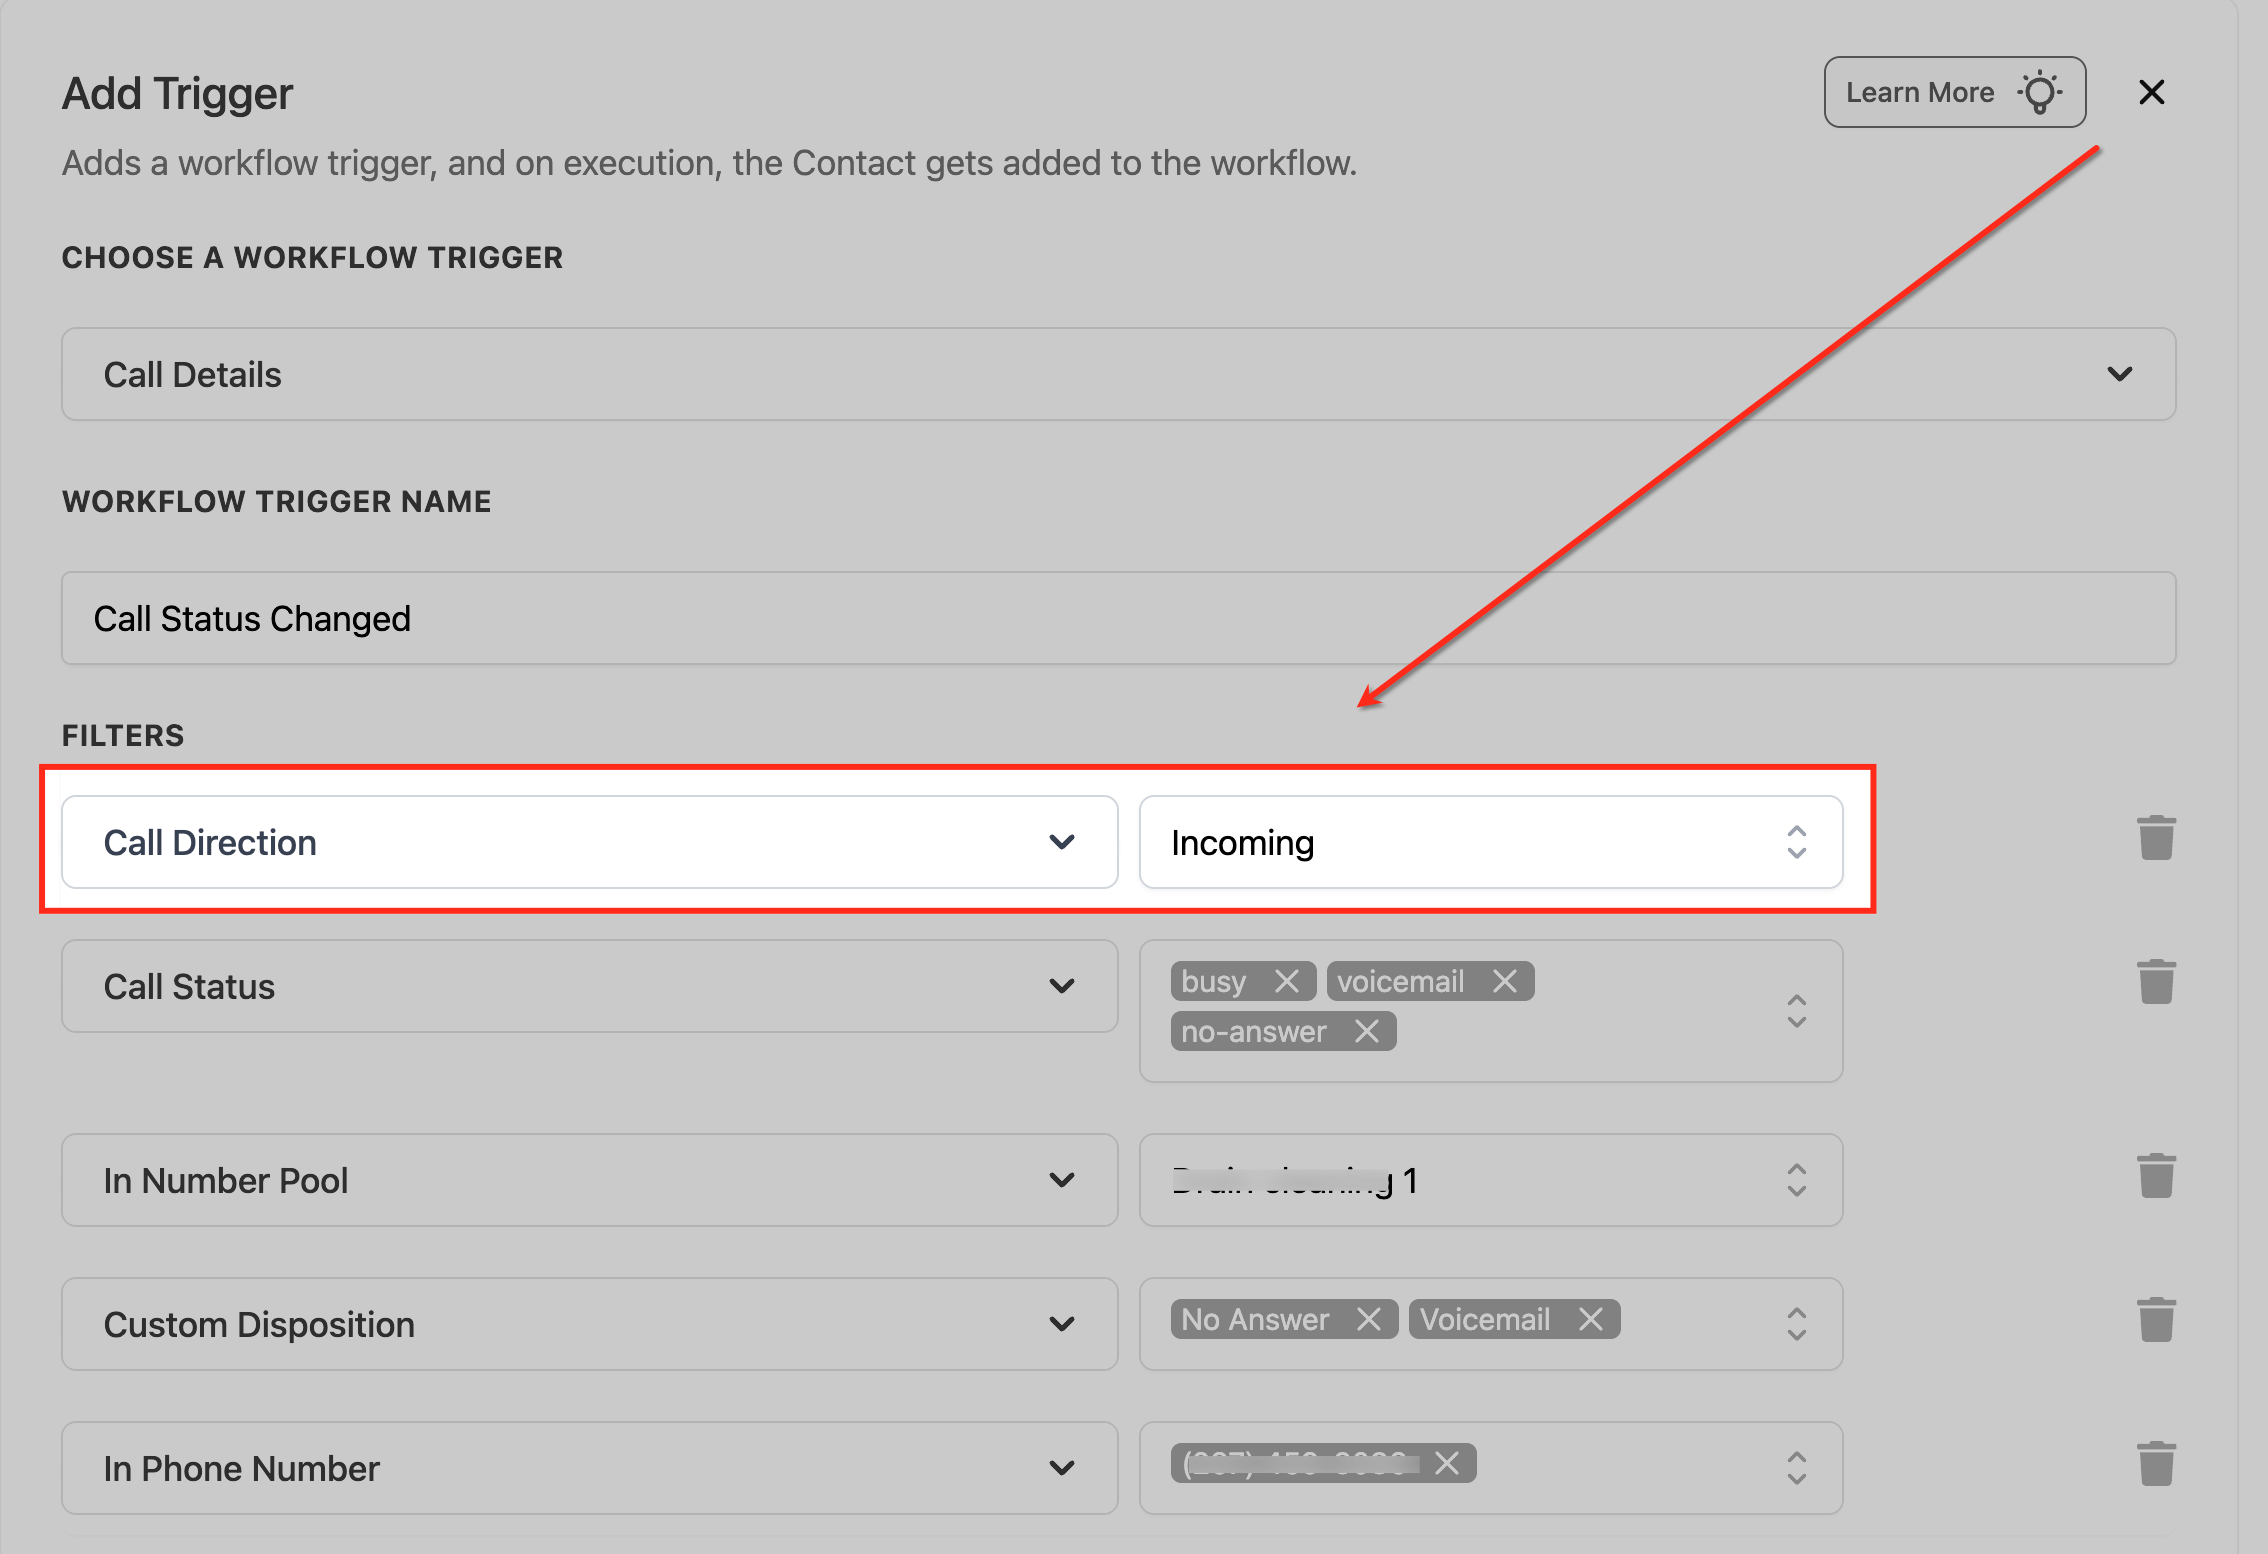
Add the Call Direction filter when the workflow should apply only to incoming or outgoing calls. This is especially useful when inbound follow-up and outbound sales processes require different automations.
Step 5: Configure Call Status
Use Call Status to select the system-recorded call outcomes that should qualify. You can select applicable outcomes such as busy, voicemail, or no-answer.
Step 6: Add a Number Pool Filter When Needed
Use In Number Pool when the automation should apply only to calls attributed to a specific call-tracking Number Pool. This helps separate automations by campaign, traffic source, or tracking configuration.
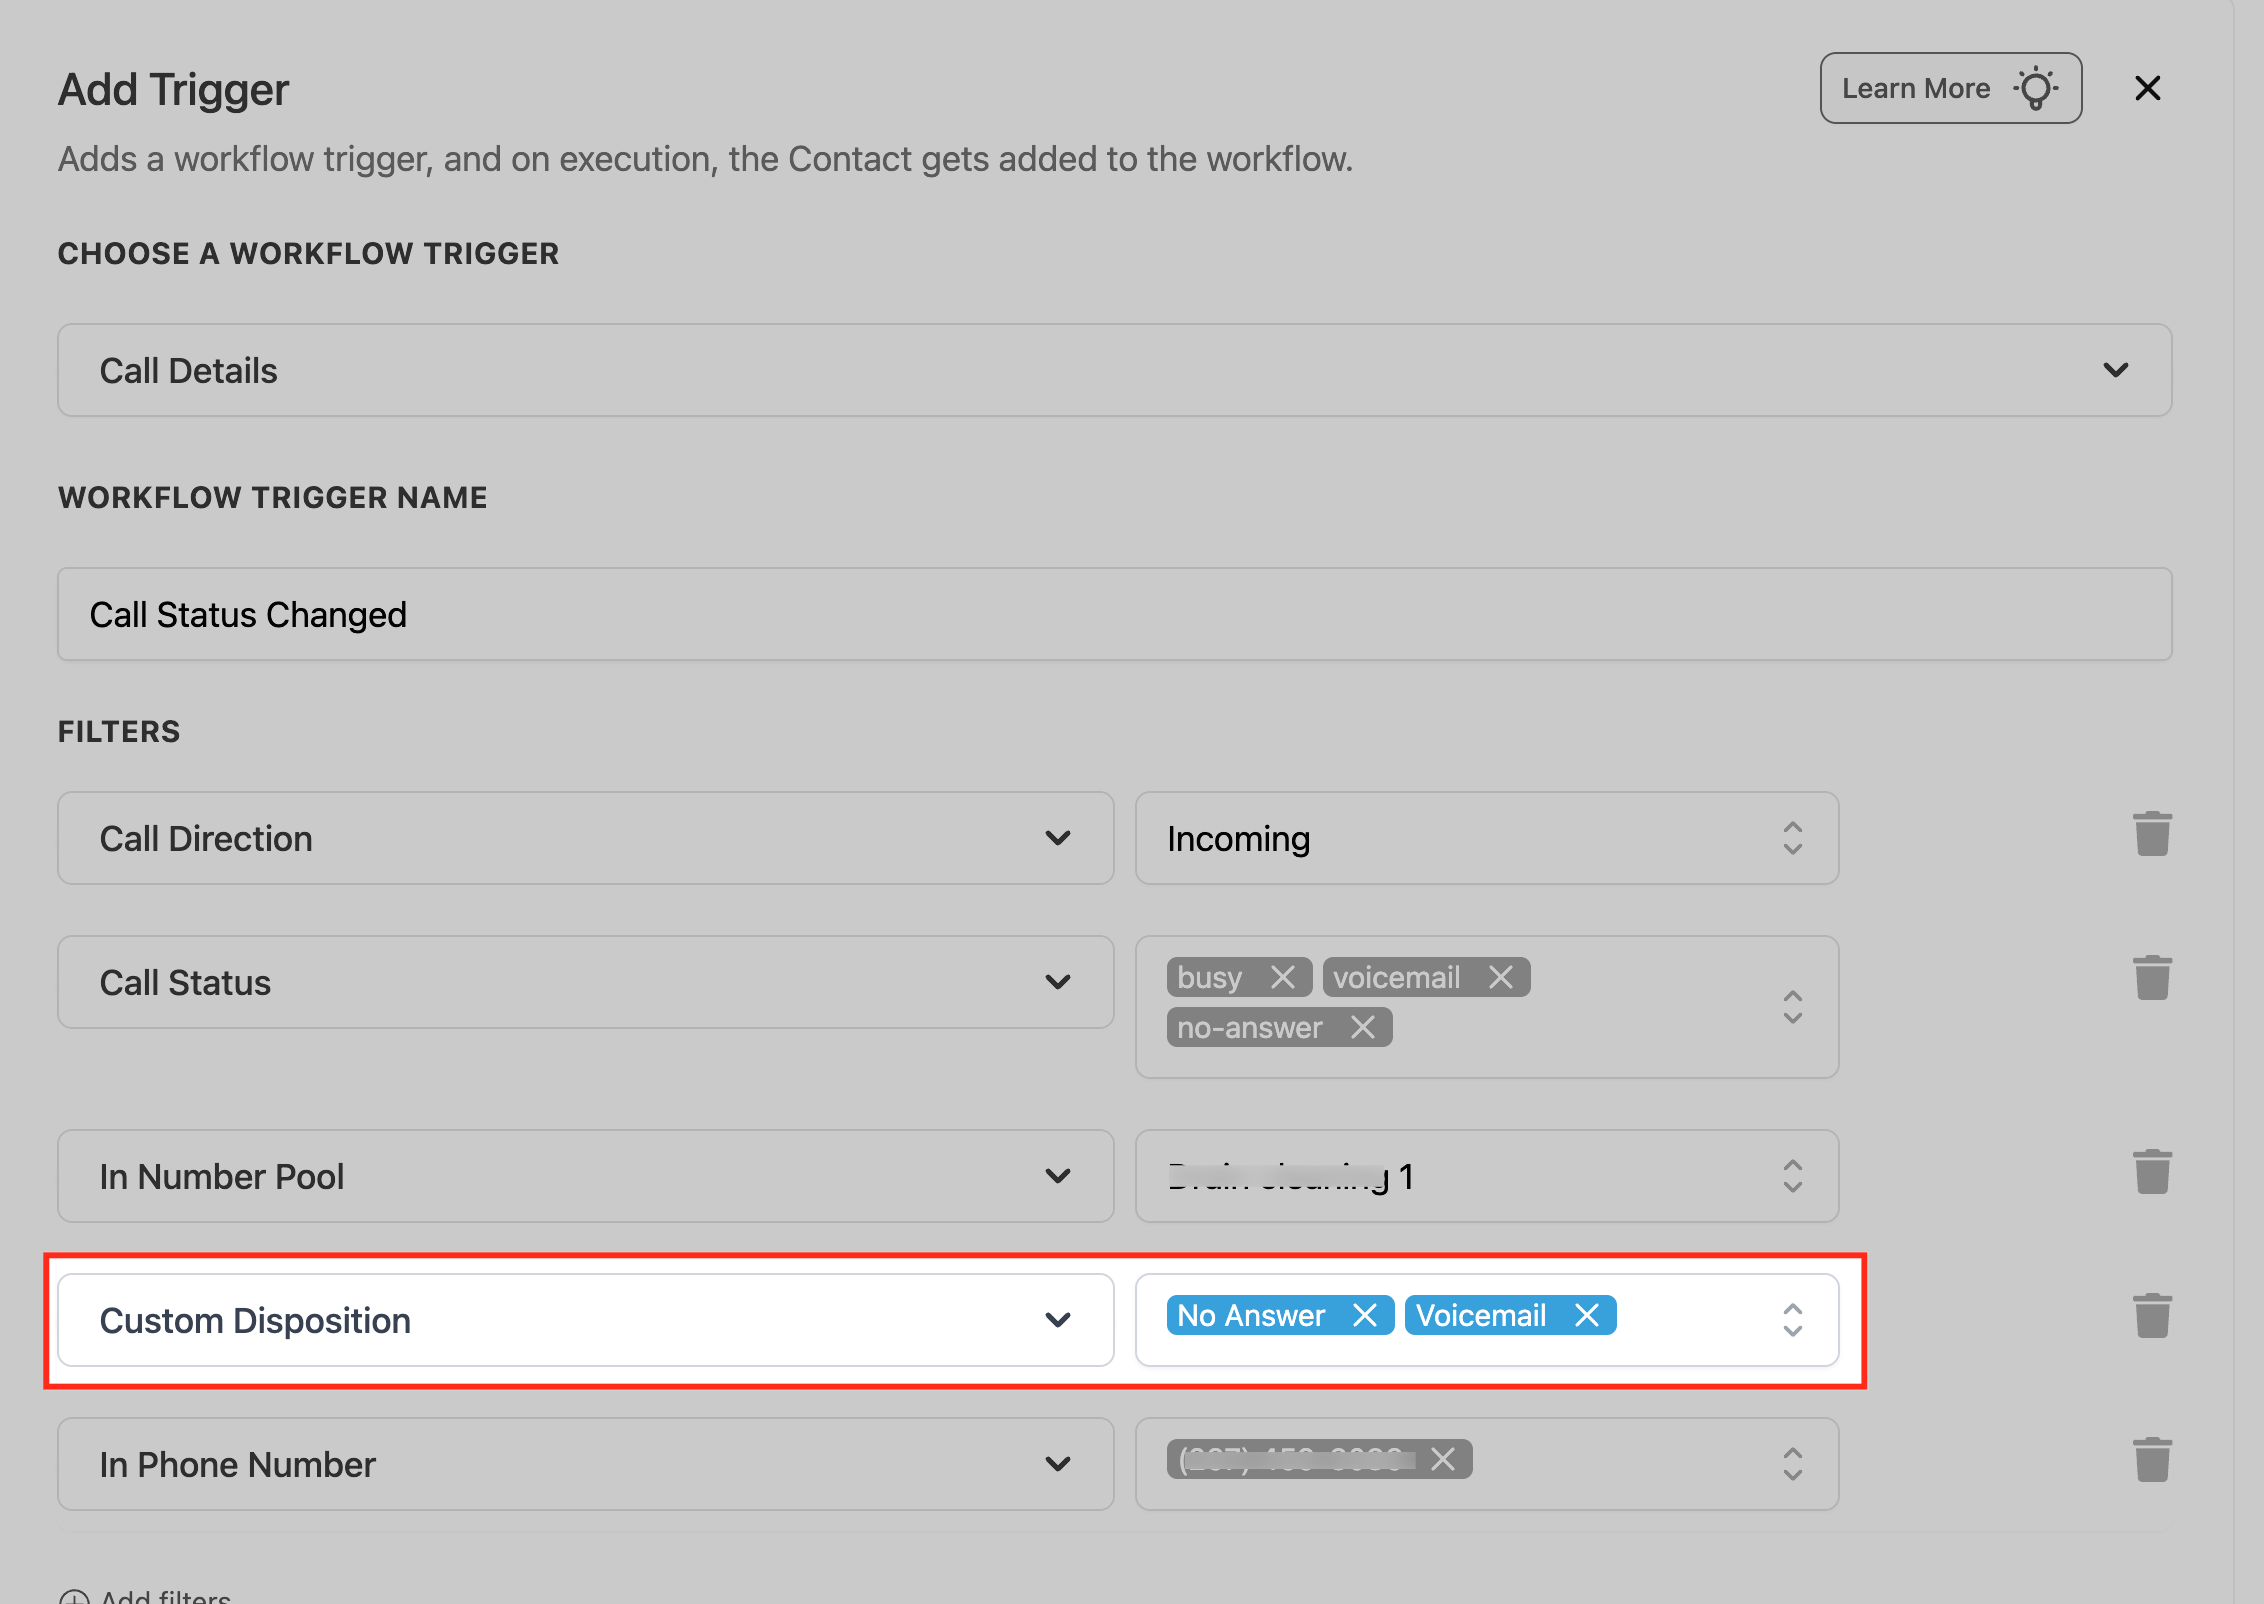
Step 7: Add a Custom Disposition Filter When Needed
Select Custom Disposition when the workflow should respond to a post-call classification such as No Answer, Voicemail, Follow Up, or another disposition configured for your account.
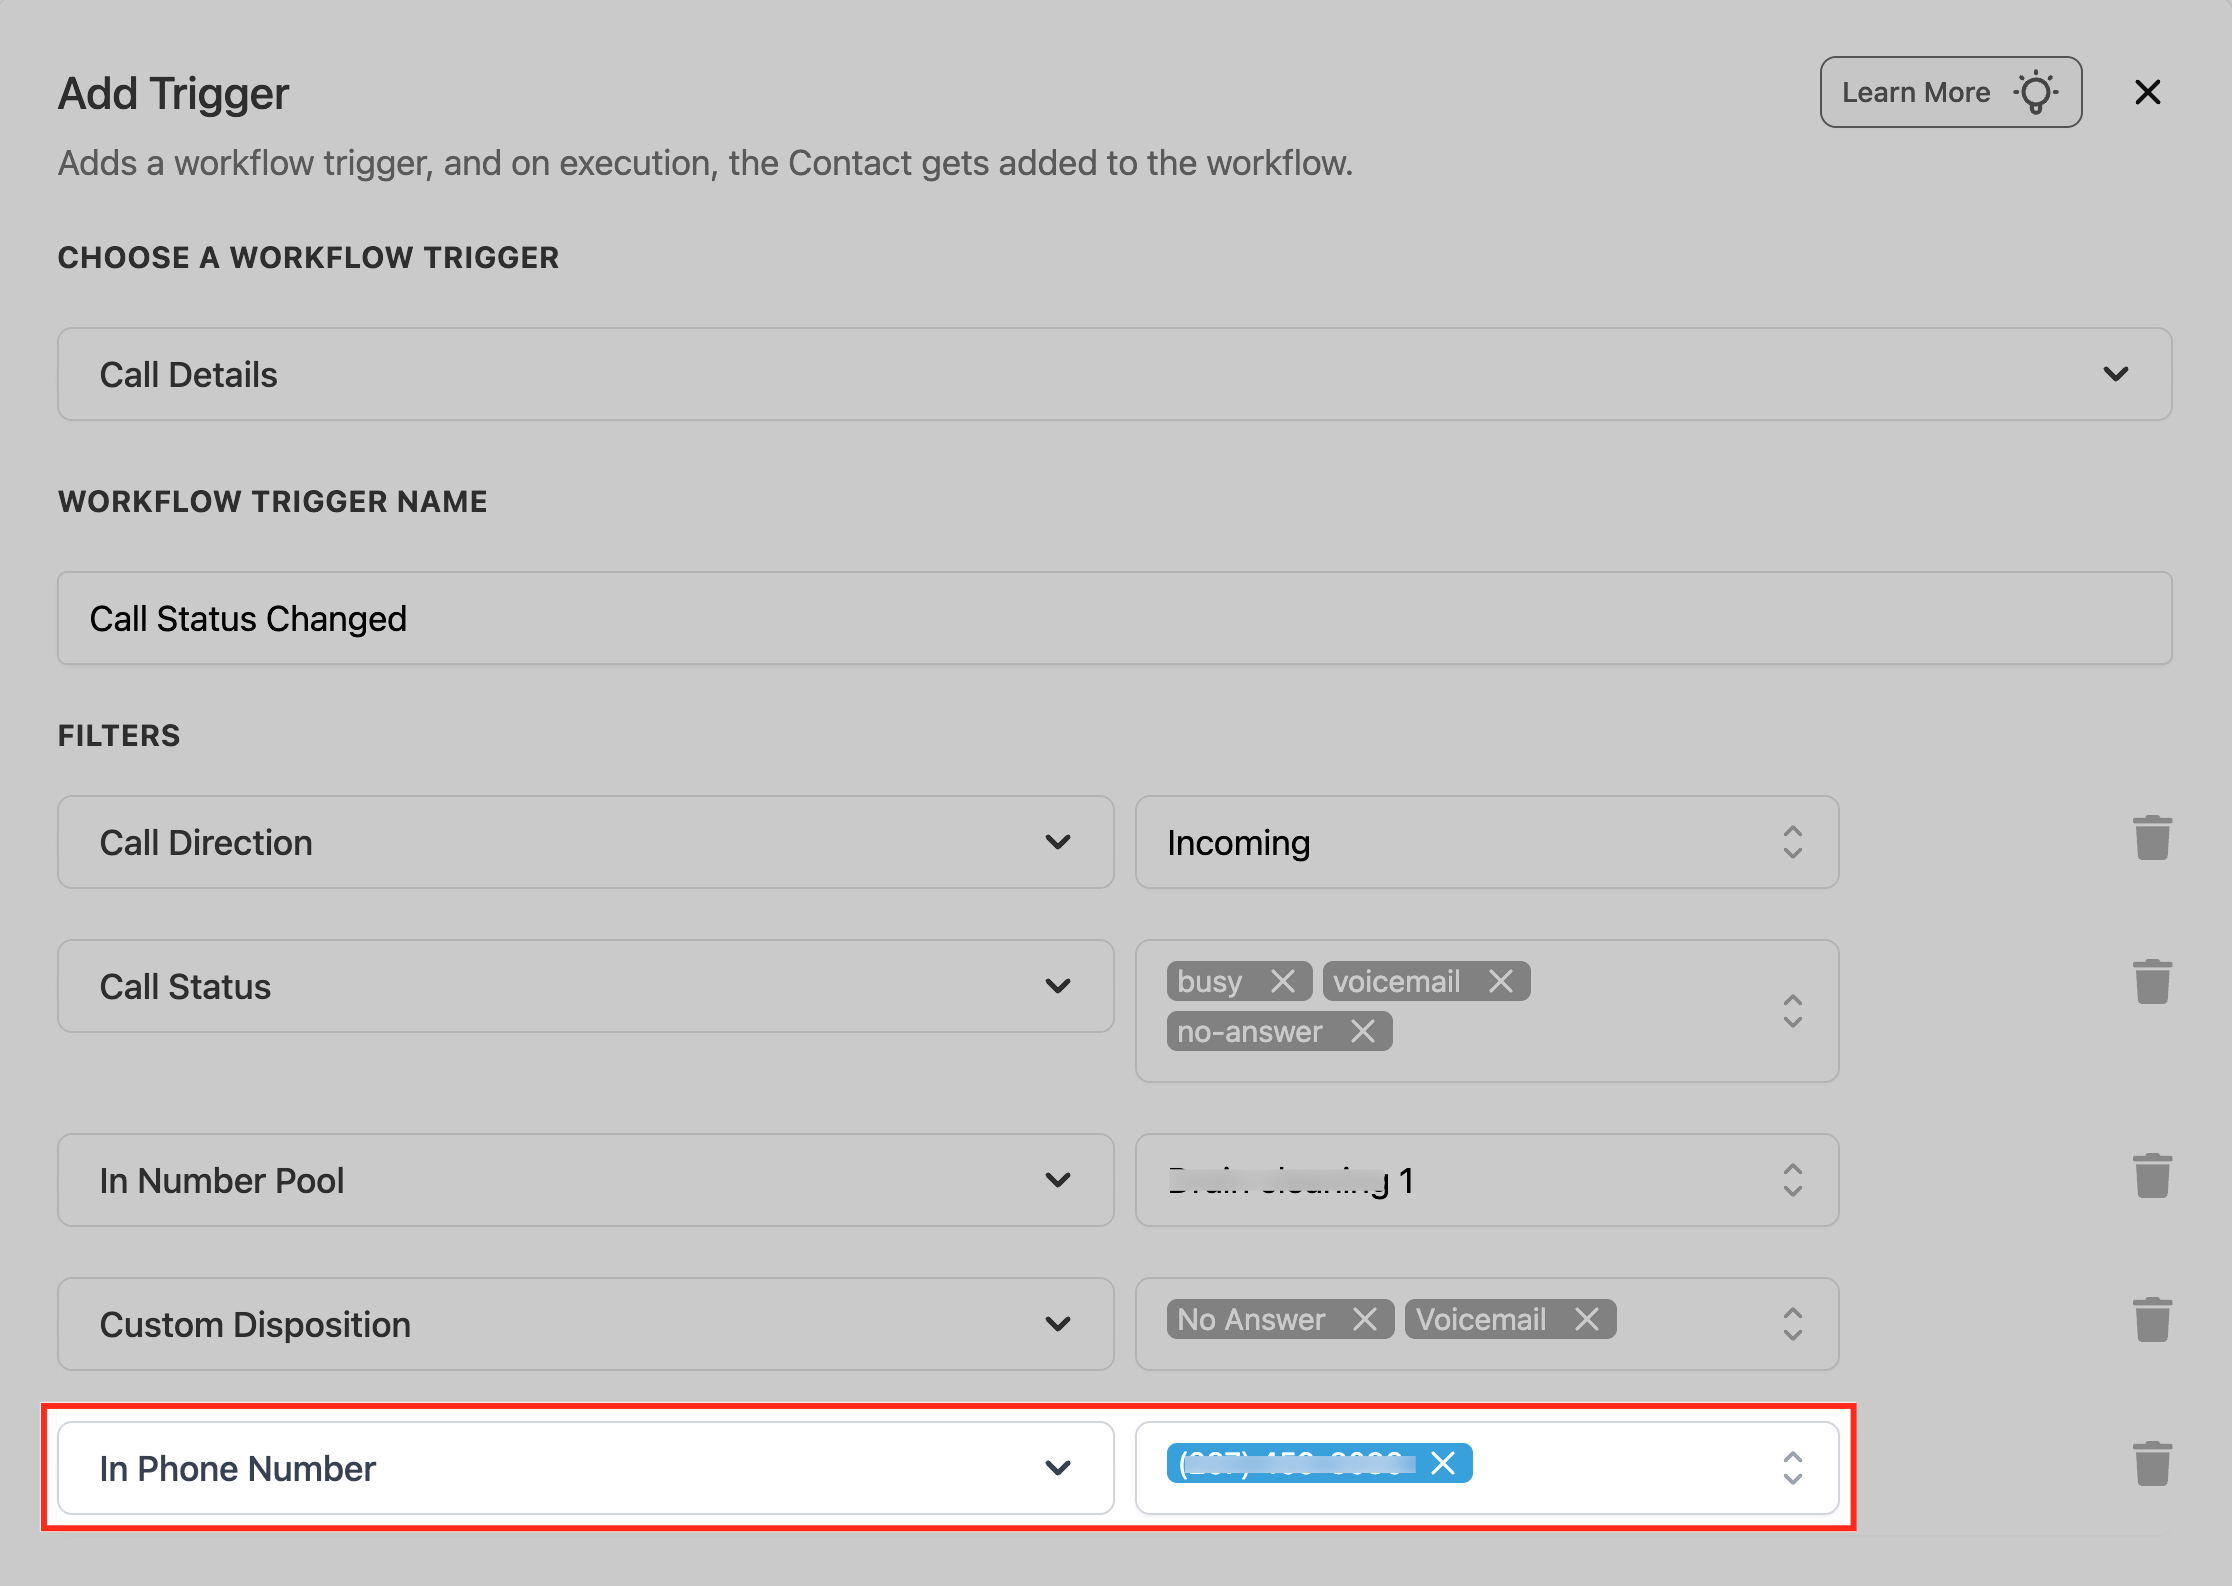
Step 8: Restrict the Trigger to a Phone Number When Needed
Use In Phone Number when the workflow should apply only to calls associated with a specific selected phone number. This is useful when different business lines require different call automations.
Step 9: Save, Test, and Publish
Save the trigger after the required filters are configured. Add the workflow actions that should run after enrollment, then use the workflow testing tools and a representative call scenario to confirm the automation behaves as expected.
Once testing is complete, switch the workflow from Draft to Publish so qualifying live calls can enroll contacts.
Common Use Cases
The best trigger configuration depends on what should happen after the call. These examples show how call information can be turned into targeted follow-up automation.
| Scenario | Example Trigger Setup | Possible Actions |
|---|---|---|
| Missed inbound call | Direction = Incoming; Status = busy or no-answer | Notify team, create callback task, send follow-up |
| Voicemail follow-up | Status = voicemail | Notify assigned user or create follow-up task |
| Disposition-based sales follow-up | Custom Disposition = Follow Up or Requested Callback | Create task, move opportunity, send follow-up message |
| Campaign-specific calls | In Number Pool = selected tracking pool | Apply campaign-specific tags or internal routing |
| Dedicated business line | In Phone Number = selected line | Run a workflow designed only for that department or line |
Testing and Troubleshooting
When a qualifying call does not produce the expected automation, check both the trigger conditions and the workflow's enrollment settings. Most issues can be isolated by comparing the actual call record with every filter configured on the trigger.
- Confirm the workflow is published. Draft workflows do not process live trigger events as published automations.
- Compare the call with every trigger filter. Verify direction, status, Number Pool, phone number, and disposition values as applicable.
- Review Custom Disposition usage. A disposition-based trigger requires the expected disposition to actually be recorded for the call.
- Check Allow Re-entry. A new qualifying call does not automatically mean a contact can enroll again. Workflow Settings determine whether completed or manually removed contacts may re-enter.
- Check whether the contact is already active. A contact cannot re-enter the same workflow while still active in it under normal re-entry behavior.
- Review Enrollment History and Execution Logs. Use these tabs to confirm whether the contact entered the workflow and whether any subsequent action was skipped or failed.
- Test with a simplified trigger if needed. Temporarily remove unnecessary filters to identify which condition is preventing qualification, then rebuild the required filter set.
If your automation depends on a Completed status representing a true human connection, review your call connection settings. Call connection controls can improve the accuracy of call outcomes used for reporting and automation.
To review repeat-enrollment behavior, open the workflow's Settings tab and check Allow Re-entry. Re-entry controls whether an eligible contact can enter the workflow again after a previous enrollment.
Frequently Asked Questions
Need Help?
Before Contacting Support
If the Call Details workflow trigger is not behaving as expected, verify the workflow and call data before escalating the issue. This helps isolate whether the problem is caused by a filter mismatch, enrollment setting, or workflow configuration.
- Confirm the workflow is published.
- Verify the call direction and call status recorded for the call.
- Confirm the selected phone number or Number Pool matches the actual call.
- Verify the expected Custom Disposition was recorded when using that filter.
- Review the workflow's Allow Re-entry setting if the contact previously entered the workflow.
- Check Enrollment History to confirm whether the contact entered the workflow.
- Check Execution Logs for skipped or failed workflow actions.
Still Need Help?
Contact Support and include the workflow name, affected contact, approximate call date and time, call direction, call status, selected filters, and screenshots of the trigger configuration. Providing these details helps Support review the issue more efficiently.