
Copy and Delete Workflow Triggers
This article explains how to copy and delete workflow triggers in LeadConnector, helping you maintain organized automation while reducing the time needed to create similar trigger configurations.
You'll discover how to duplicate triggers with all their settings intact and remove triggers that are no longer relevant to your workflows.
What Are Workflow Triggers?
Workflow triggers are the starting points of your automation sequences. They define the specific events or conditions that initiate a workflow, such as a form submission, contact tag addition, appointment booking, or opportunity stage change.
Each workflow can have multiple triggers, allowing the same automation sequence to start from different entry points. Managing these triggers effectively ensures your workflows remain organized and respond to the right events.
Key Benefits
The ability to copy and delete workflow triggers provides several advantages for managing your automation:
How to Copy a Workflow Trigger
Follow these steps to duplicate an existing workflow trigger:
Navigate to Automation in your LeadConnector account, then select Workflows. Open the workflow containing the trigger you want to copy.
Find the trigger you want to copy in the workflow builder. Click the copy icon on the trigger card.
From the dropdown menu, select Copy. A duplicate trigger will be created immediately below the original trigger.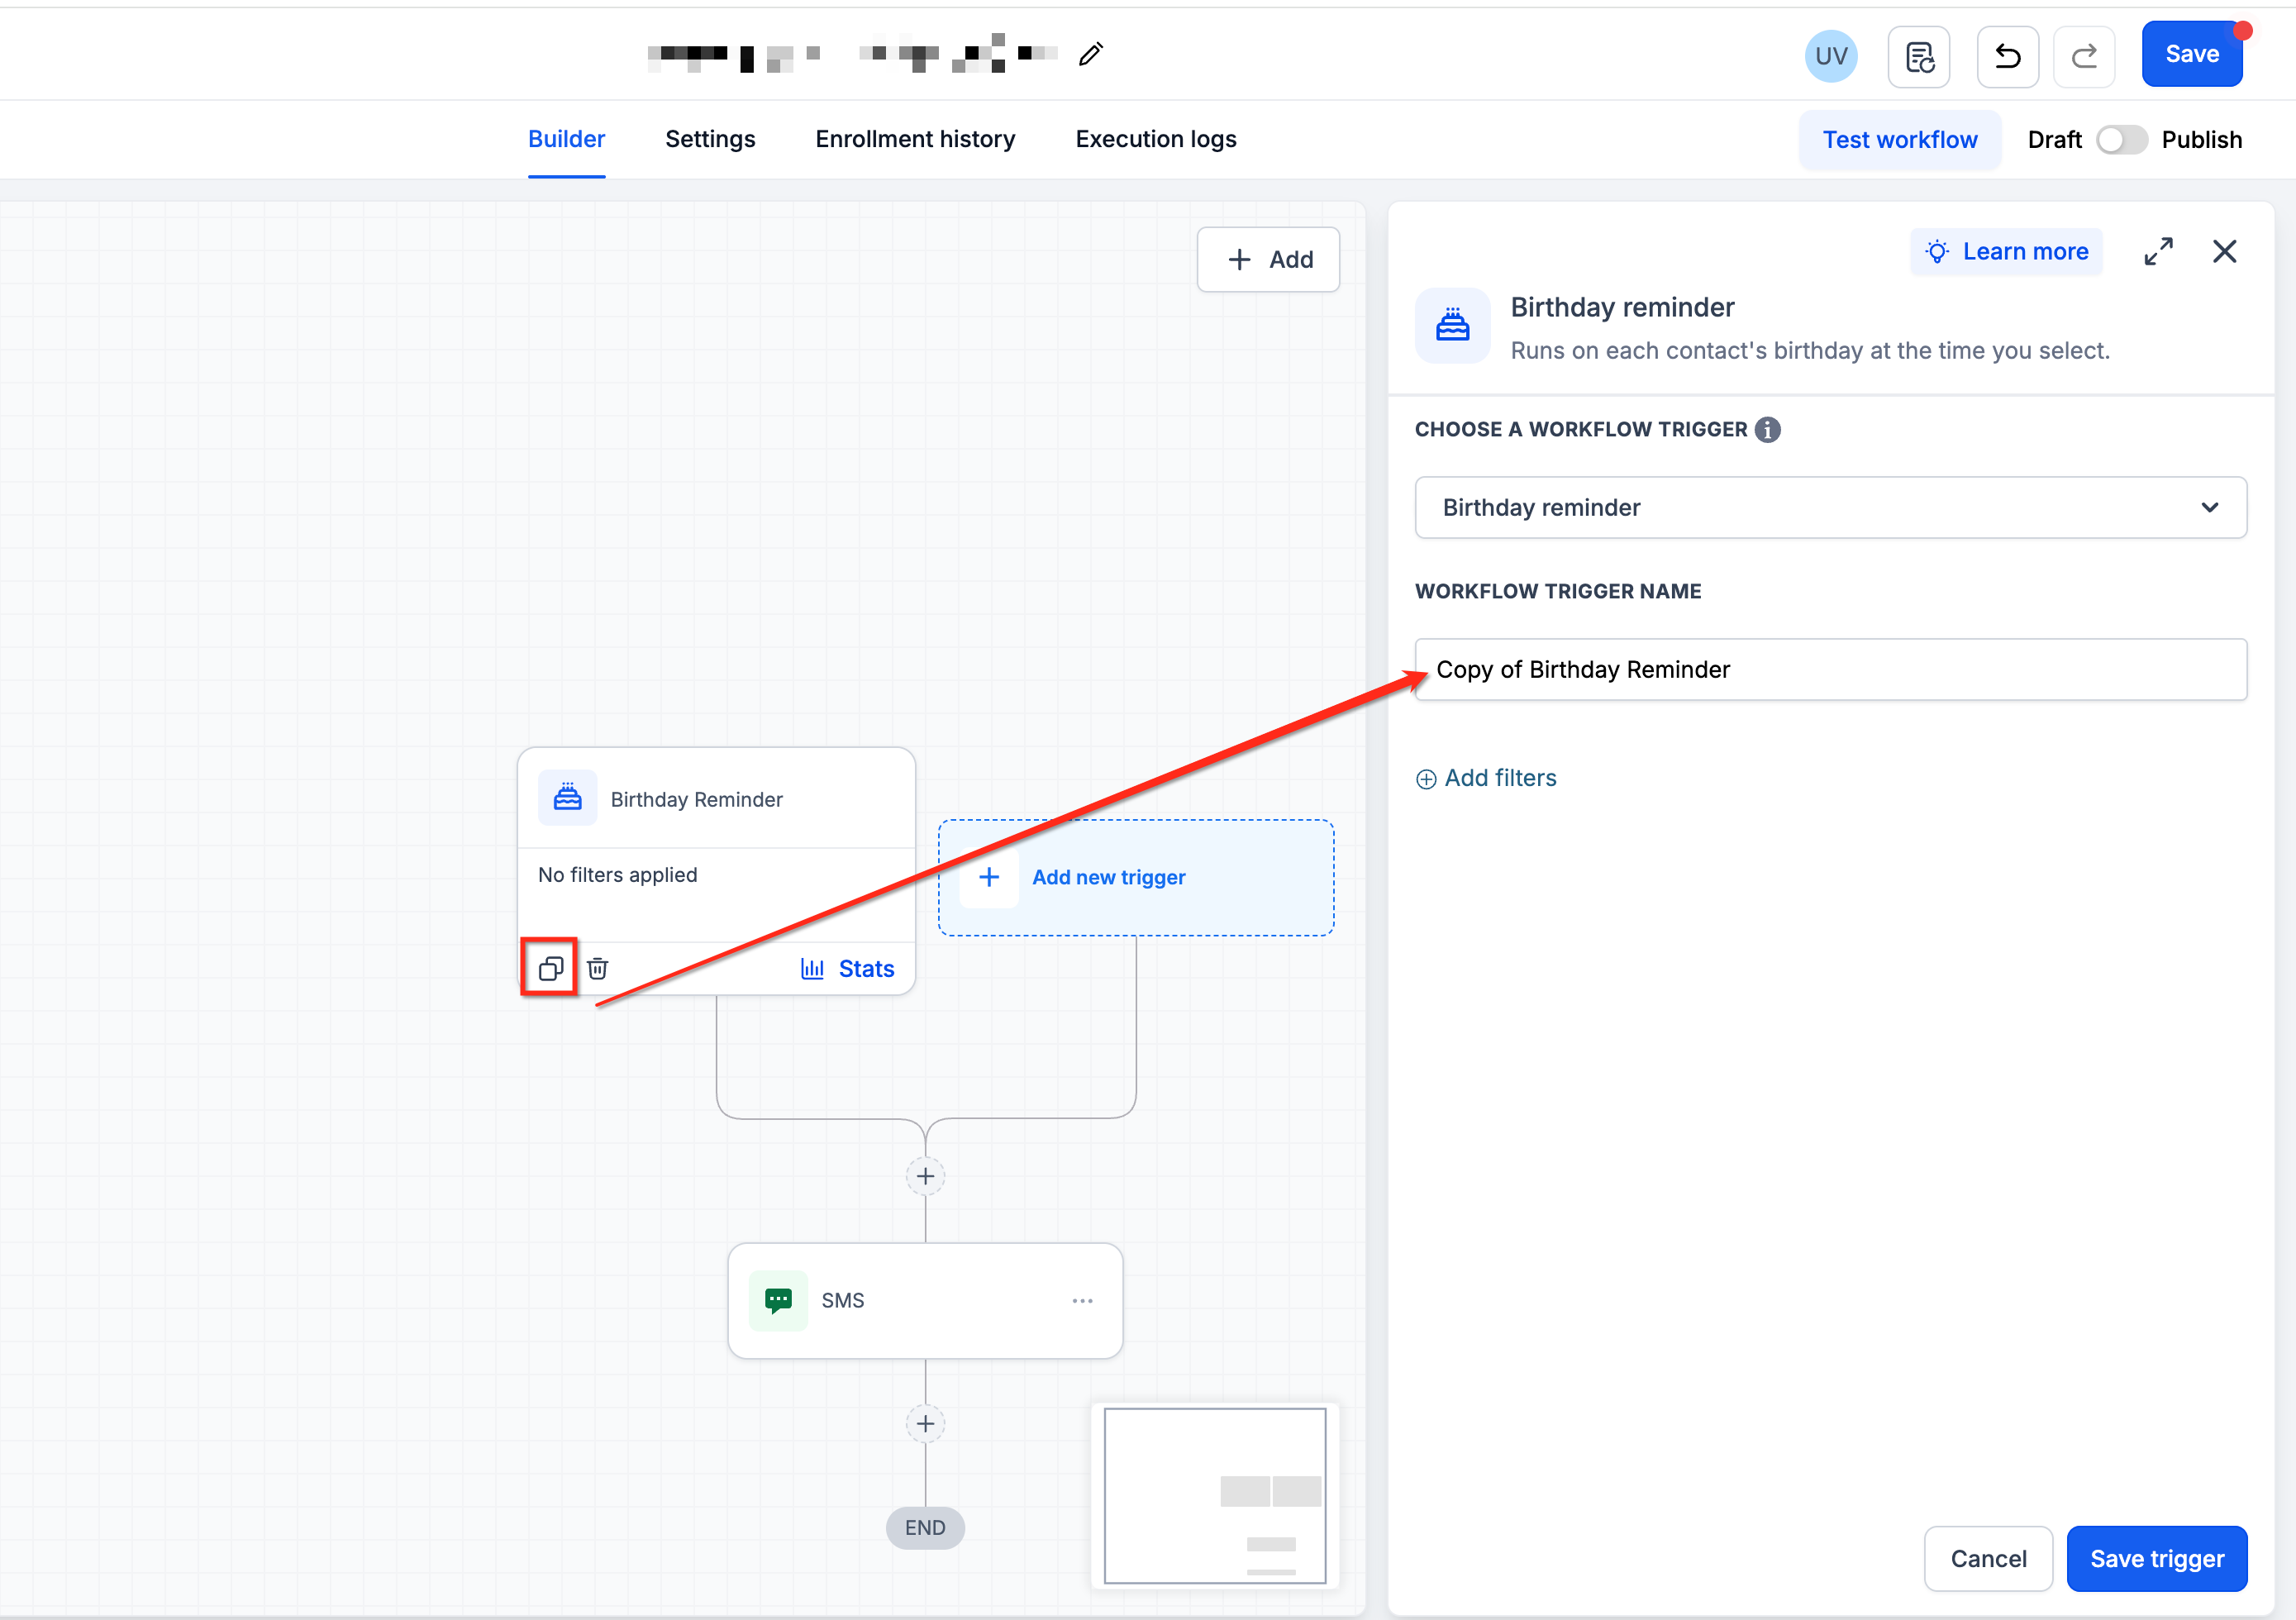
Click on the newly created trigger to open its settings. Update any filters, conditions, or settings to match your requirements. The copied trigger retains all configuration from the original but can be customized independently.
After making your modifications, click Save to preserve the changes. The workflow will respond to both the original and copied triggers according to their respective configurations.
When copying triggers with complex filter conditions, verify all filter settings in the copied version to ensure they match your intended configuration.
How to Delete a Workflow Trigger
Remove triggers that are no longer needed by following these steps:
Go to Automation → Workflows and select the workflow containing the trigger you want to remove.
Locate the trigger you want to delete. Click the bin menu icon on the trigger card.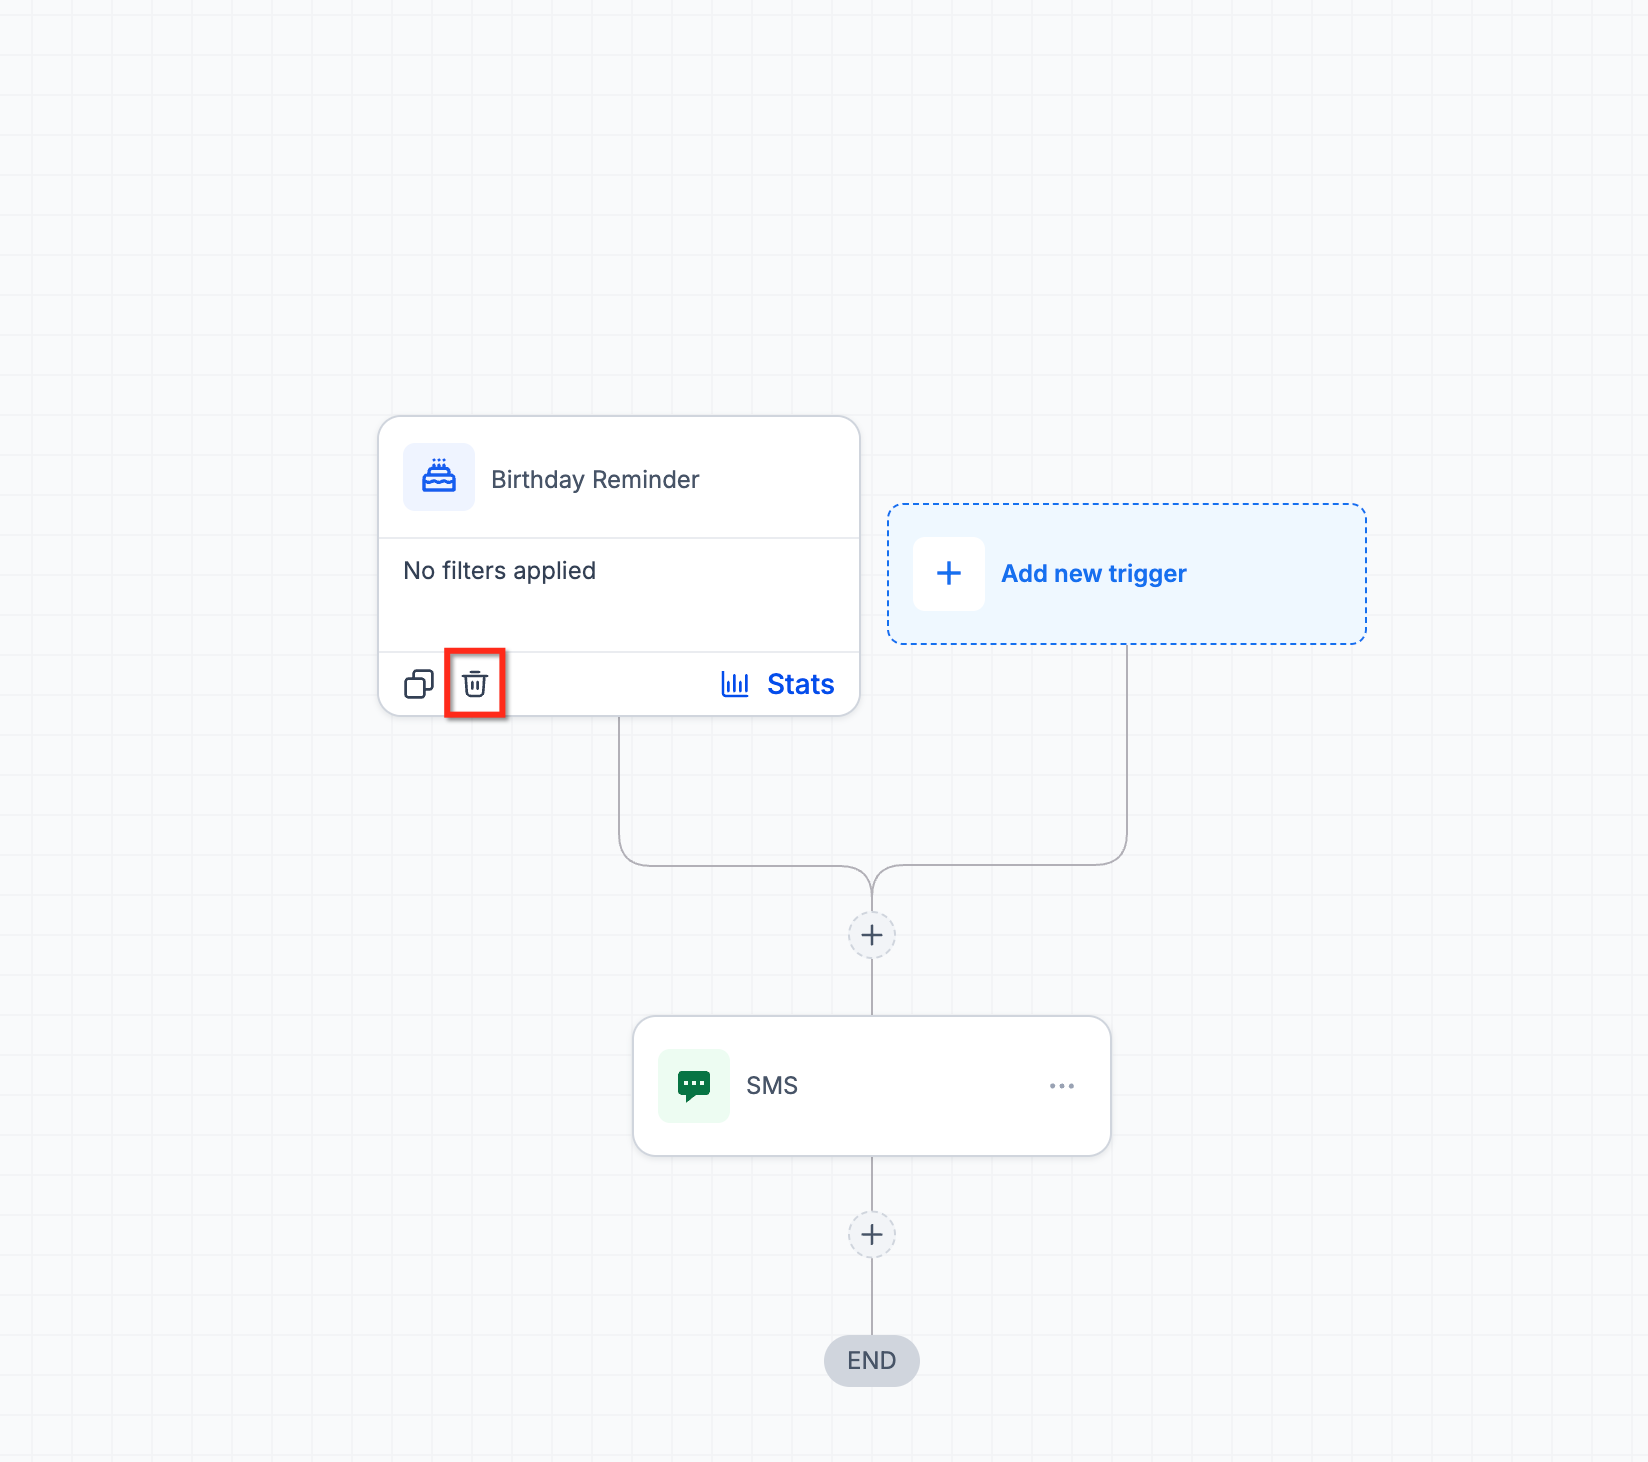
Select Delete. A confirmation dialog will appear.
Review the trigger details to ensure you're deleting the correct one. Click Confirm to permanently remove the trigger from the workflow.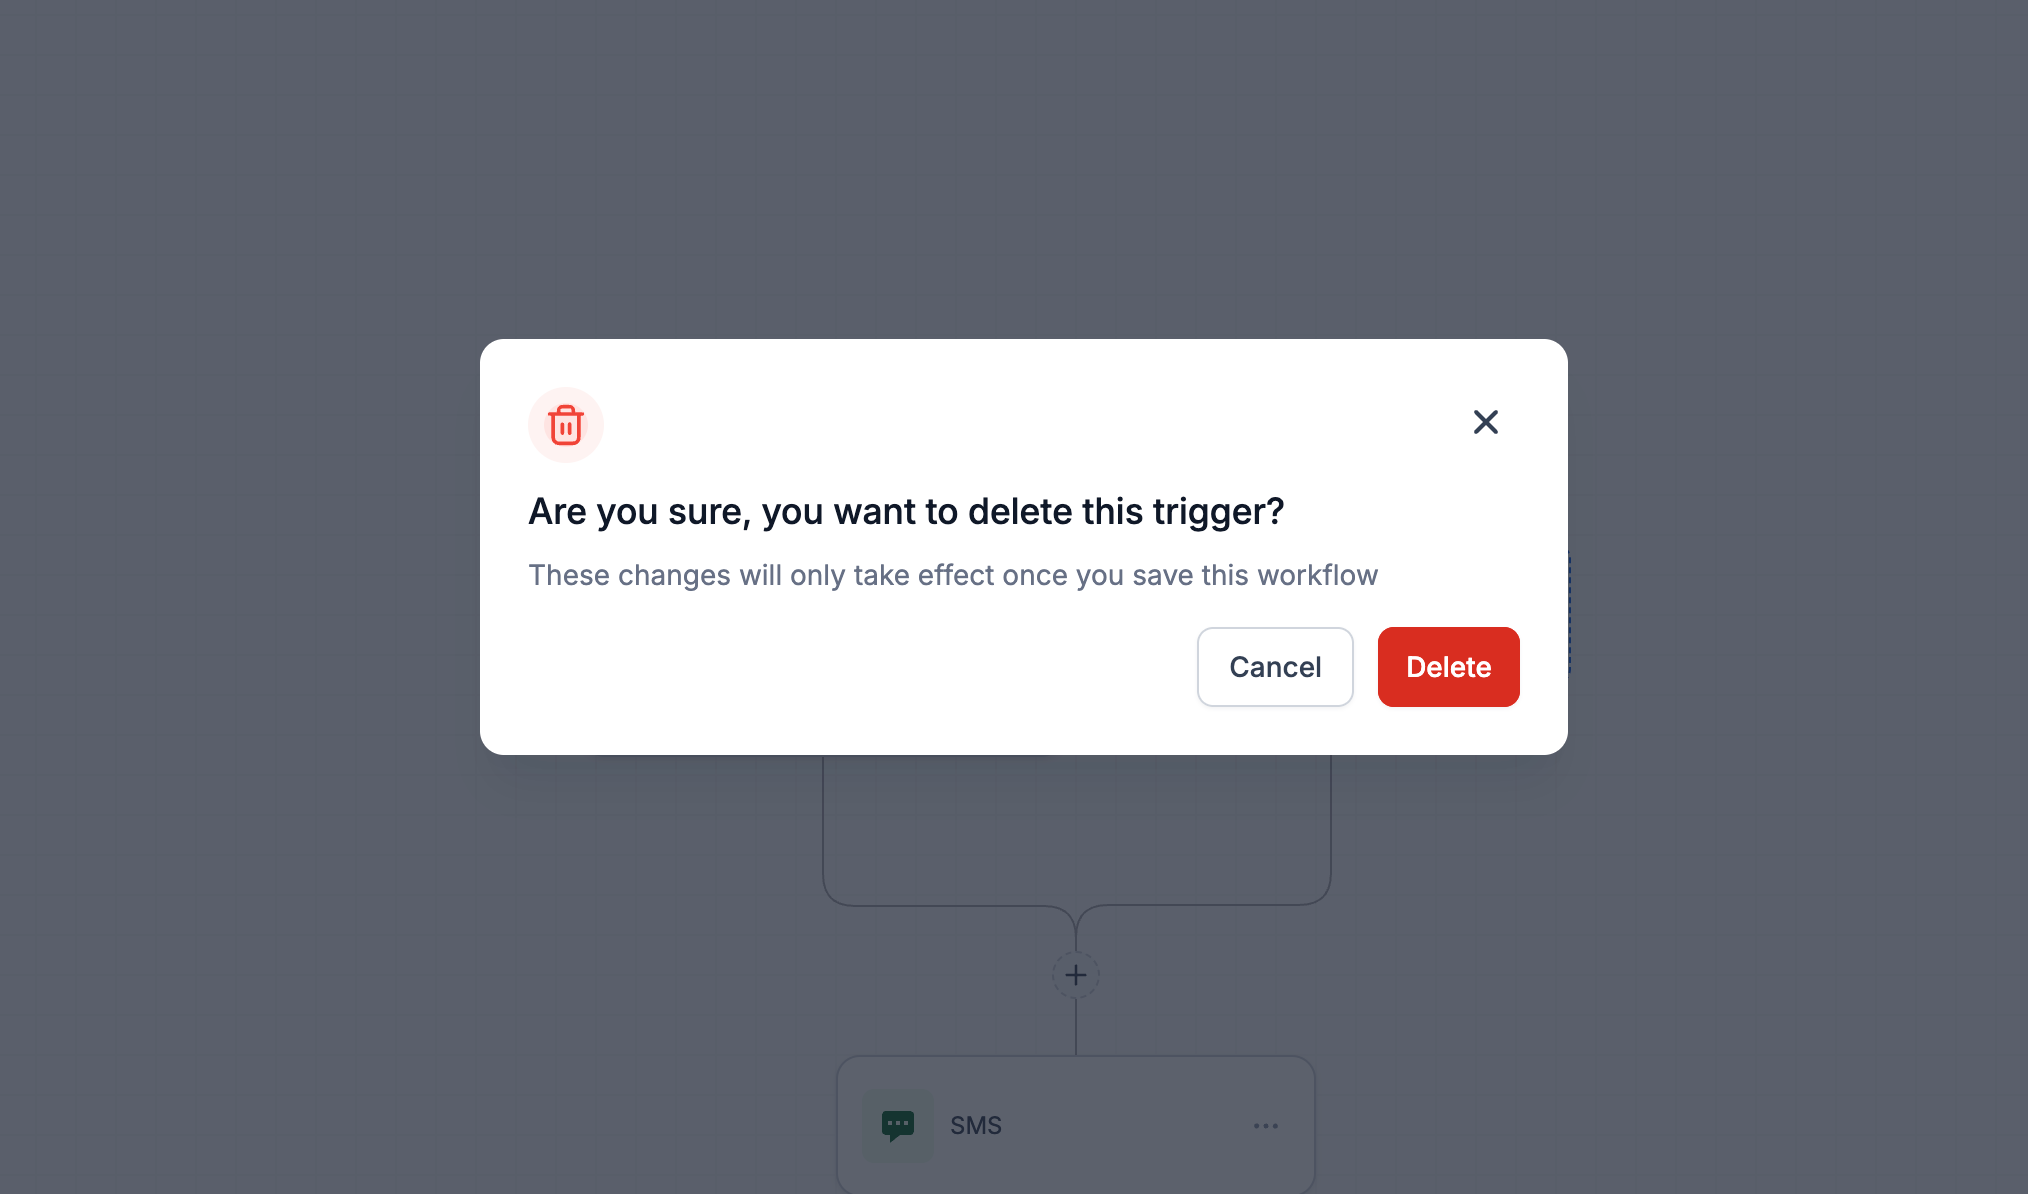
Deleting a trigger is permanent and cannot be undone. The workflow will no longer start from the deleted trigger's event. Existing workflow enrollments from that trigger will continue to run, but no new enrollments will occur from the deleted trigger.
Best Practices
Follow these recommendations to effectively manage workflow triggers:
When copying triggers, update the trigger name to clearly indicate its purpose. This prevents confusion when managing multiple similar triggers and makes workflow maintenance easier.
Before deleting a trigger, review your workflow analytics to understand how many contacts have entered through that trigger. This helps you assess the impact of removal.
After copying and modifying a trigger, test the workflow with a sample contact to ensure the trigger activates correctly and applies the intended filters.
Periodically review your workflows to identify and remove triggers that are no longer aligned with your business processes. This keeps your automation efficient and easier to manage.
When copying or deleting triggers, consider documenting the reason in your workflow notes. This provides context for future team members who may need to understand your trigger strategy.
If you encounter issues with copying or deleting workflow triggers, try these steps:
- Refresh your browser and try the operation again
- Verify you have edit permissions for the workflow
- Check that the workflow is not currently processing enrollments that might lock editing
- Contact LeadConnector support through the in-app chat if the issue persists