
User roles and permissions determine which features and data each user can access. You can control module access, assign custom visibility rules, and configure granular permissions for areas such as AI Agents, Calendars, Conversations, and Workflows.
Each user is assigned one of two roles: Admin or User. You can further customize access using granular permissions and visibility controls such as Only Assigned Data.
You can also copy permissions from one user to another and restrict access on a per-module basis.
TABLE OF CONTENTS
- What Are User Roles and Permissions?
- Key Benefits of User Roles and Permissions
- How to Set Up User Roles and Permissions
- Restrict Visibility With Only Assigned Data
- Assigning Roles and Permissions
- Copy Permissions Between Users
- Module-Specific Granular Permissions
- Frequently Asked Questions
What Are User Roles and Permissions?
User roles determine a user's overall level of access, while permissions control which features and modules they can use.
You can use roles and permissions to:
Restrict access to contacts, pipelines, and other data.
Hide modules that a user does not need.
Control which features individual users can view and manage.
Apply an existing permission configuration to another user.
Limit users to data specifically assigned to them.
Key Benefits of User Roles and Permissions
Data Security: Restrict contacts, pipelines, and other information to approved users.
Cleaner Interface: Hide unused modules so users can navigate more efficiently.
Accountability: Associate actions with individual users for clearer activity tracking.
Faster Onboarding: Copy an existing user's permissions instead of configuring each permission manually.
How to Set Up User Roles and Permissions
Configure roles and permissions so each user can access only the features and information they need.
Step 1: Go to Settings → Users
From Settings, select Users.
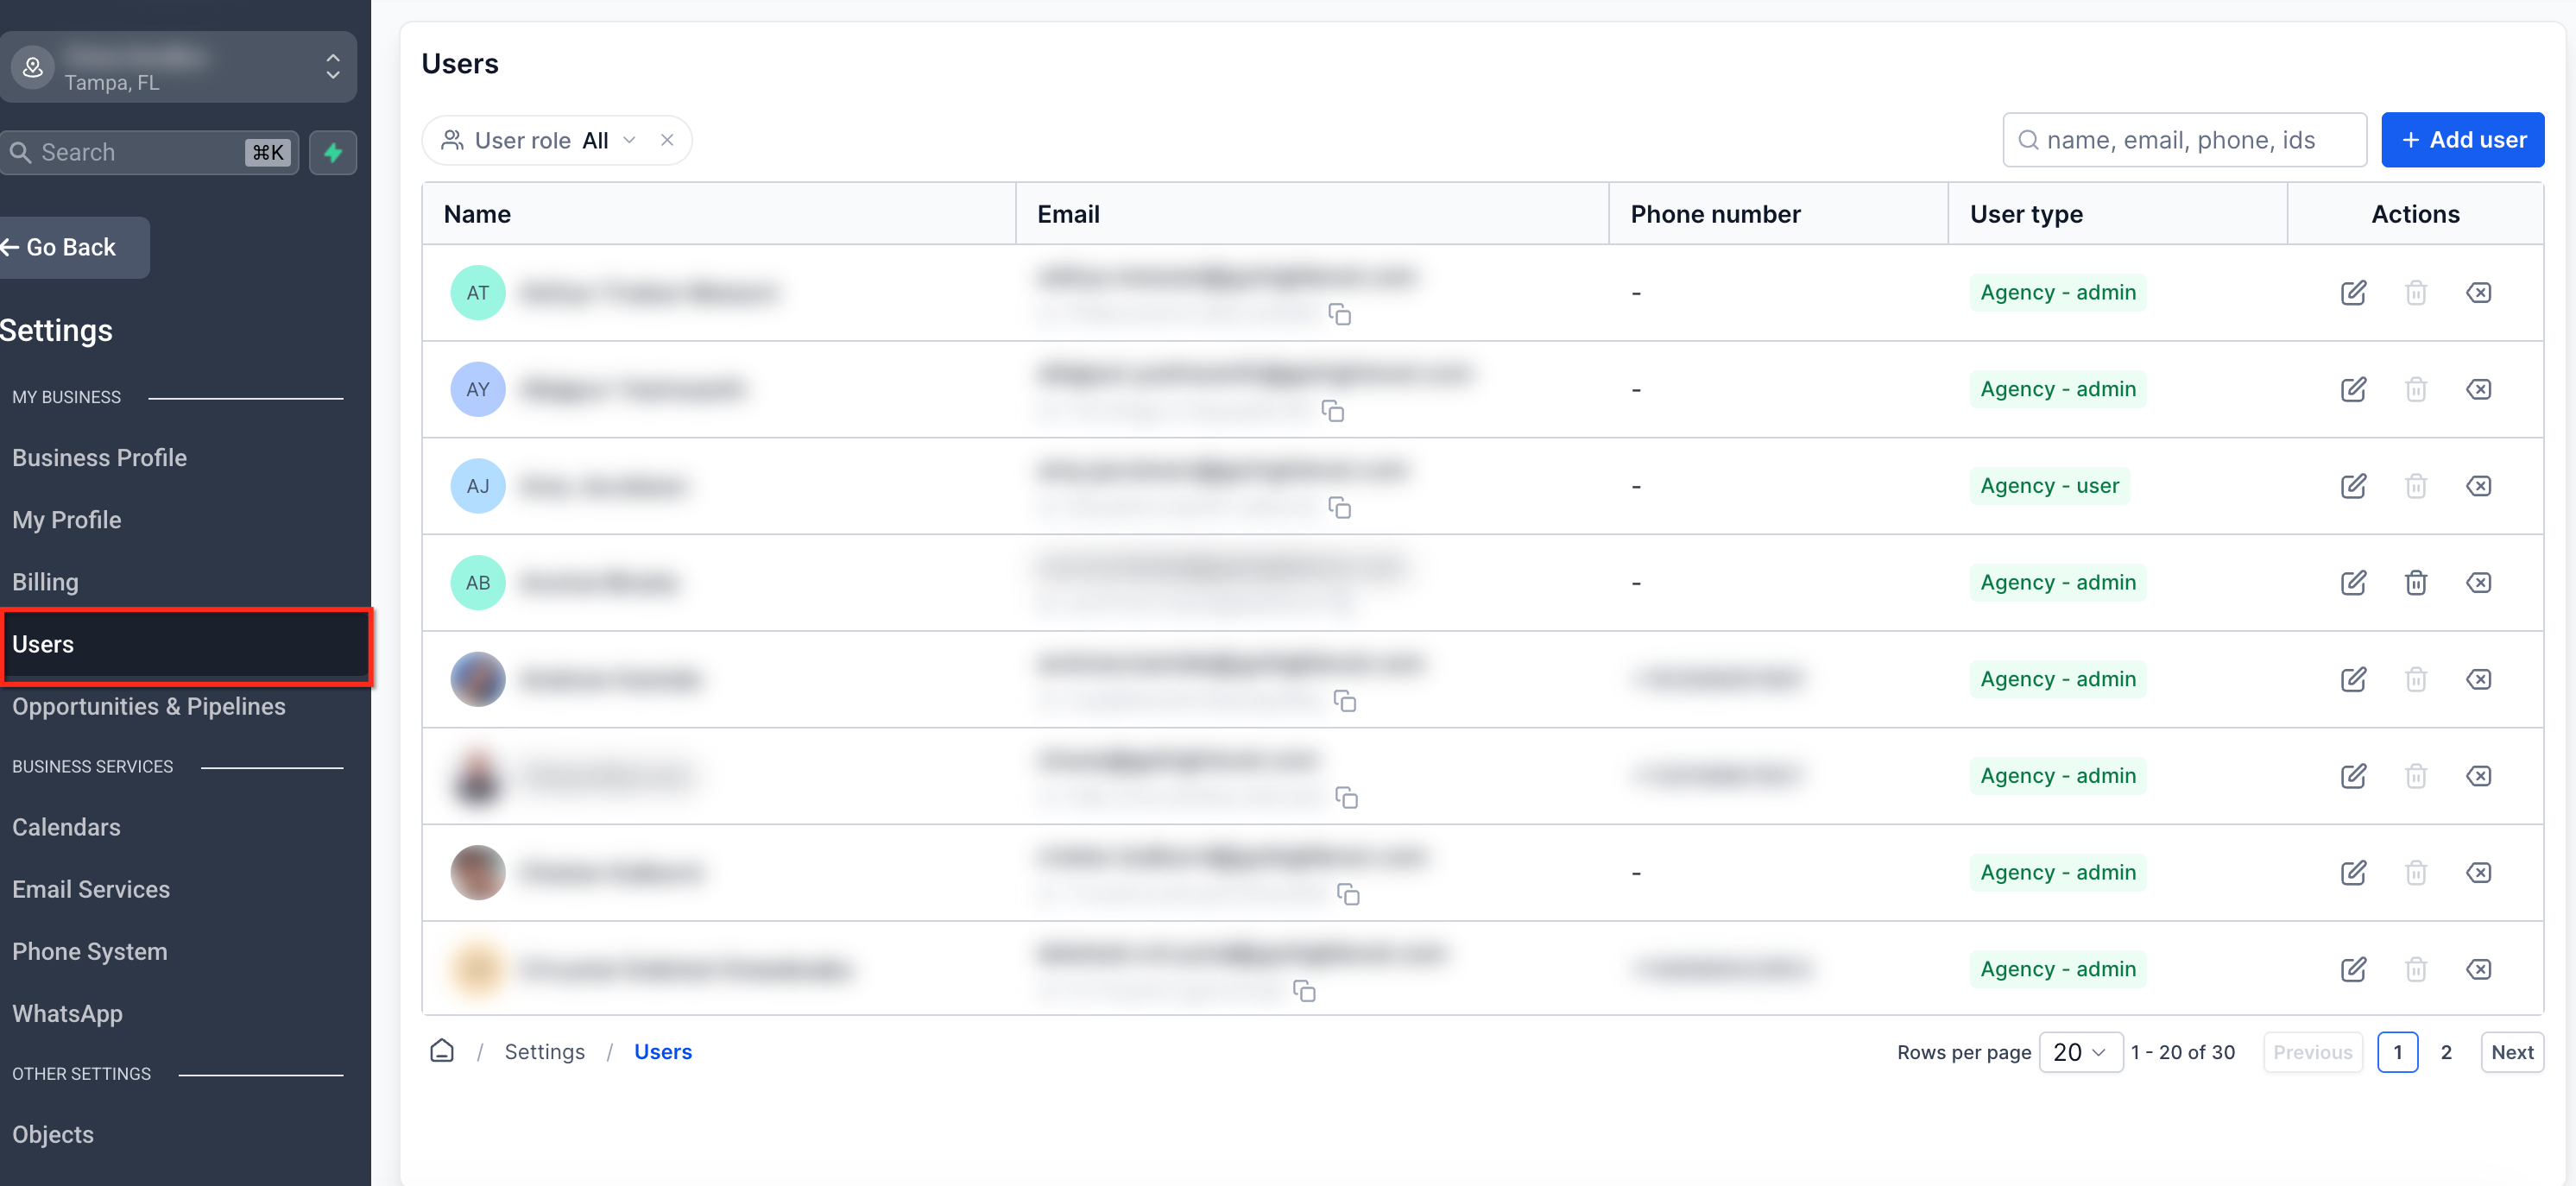
Step 2: Select or Create a User
Click the Edit pencil icon next to an existing user, or select + Add Employee to create a new user.
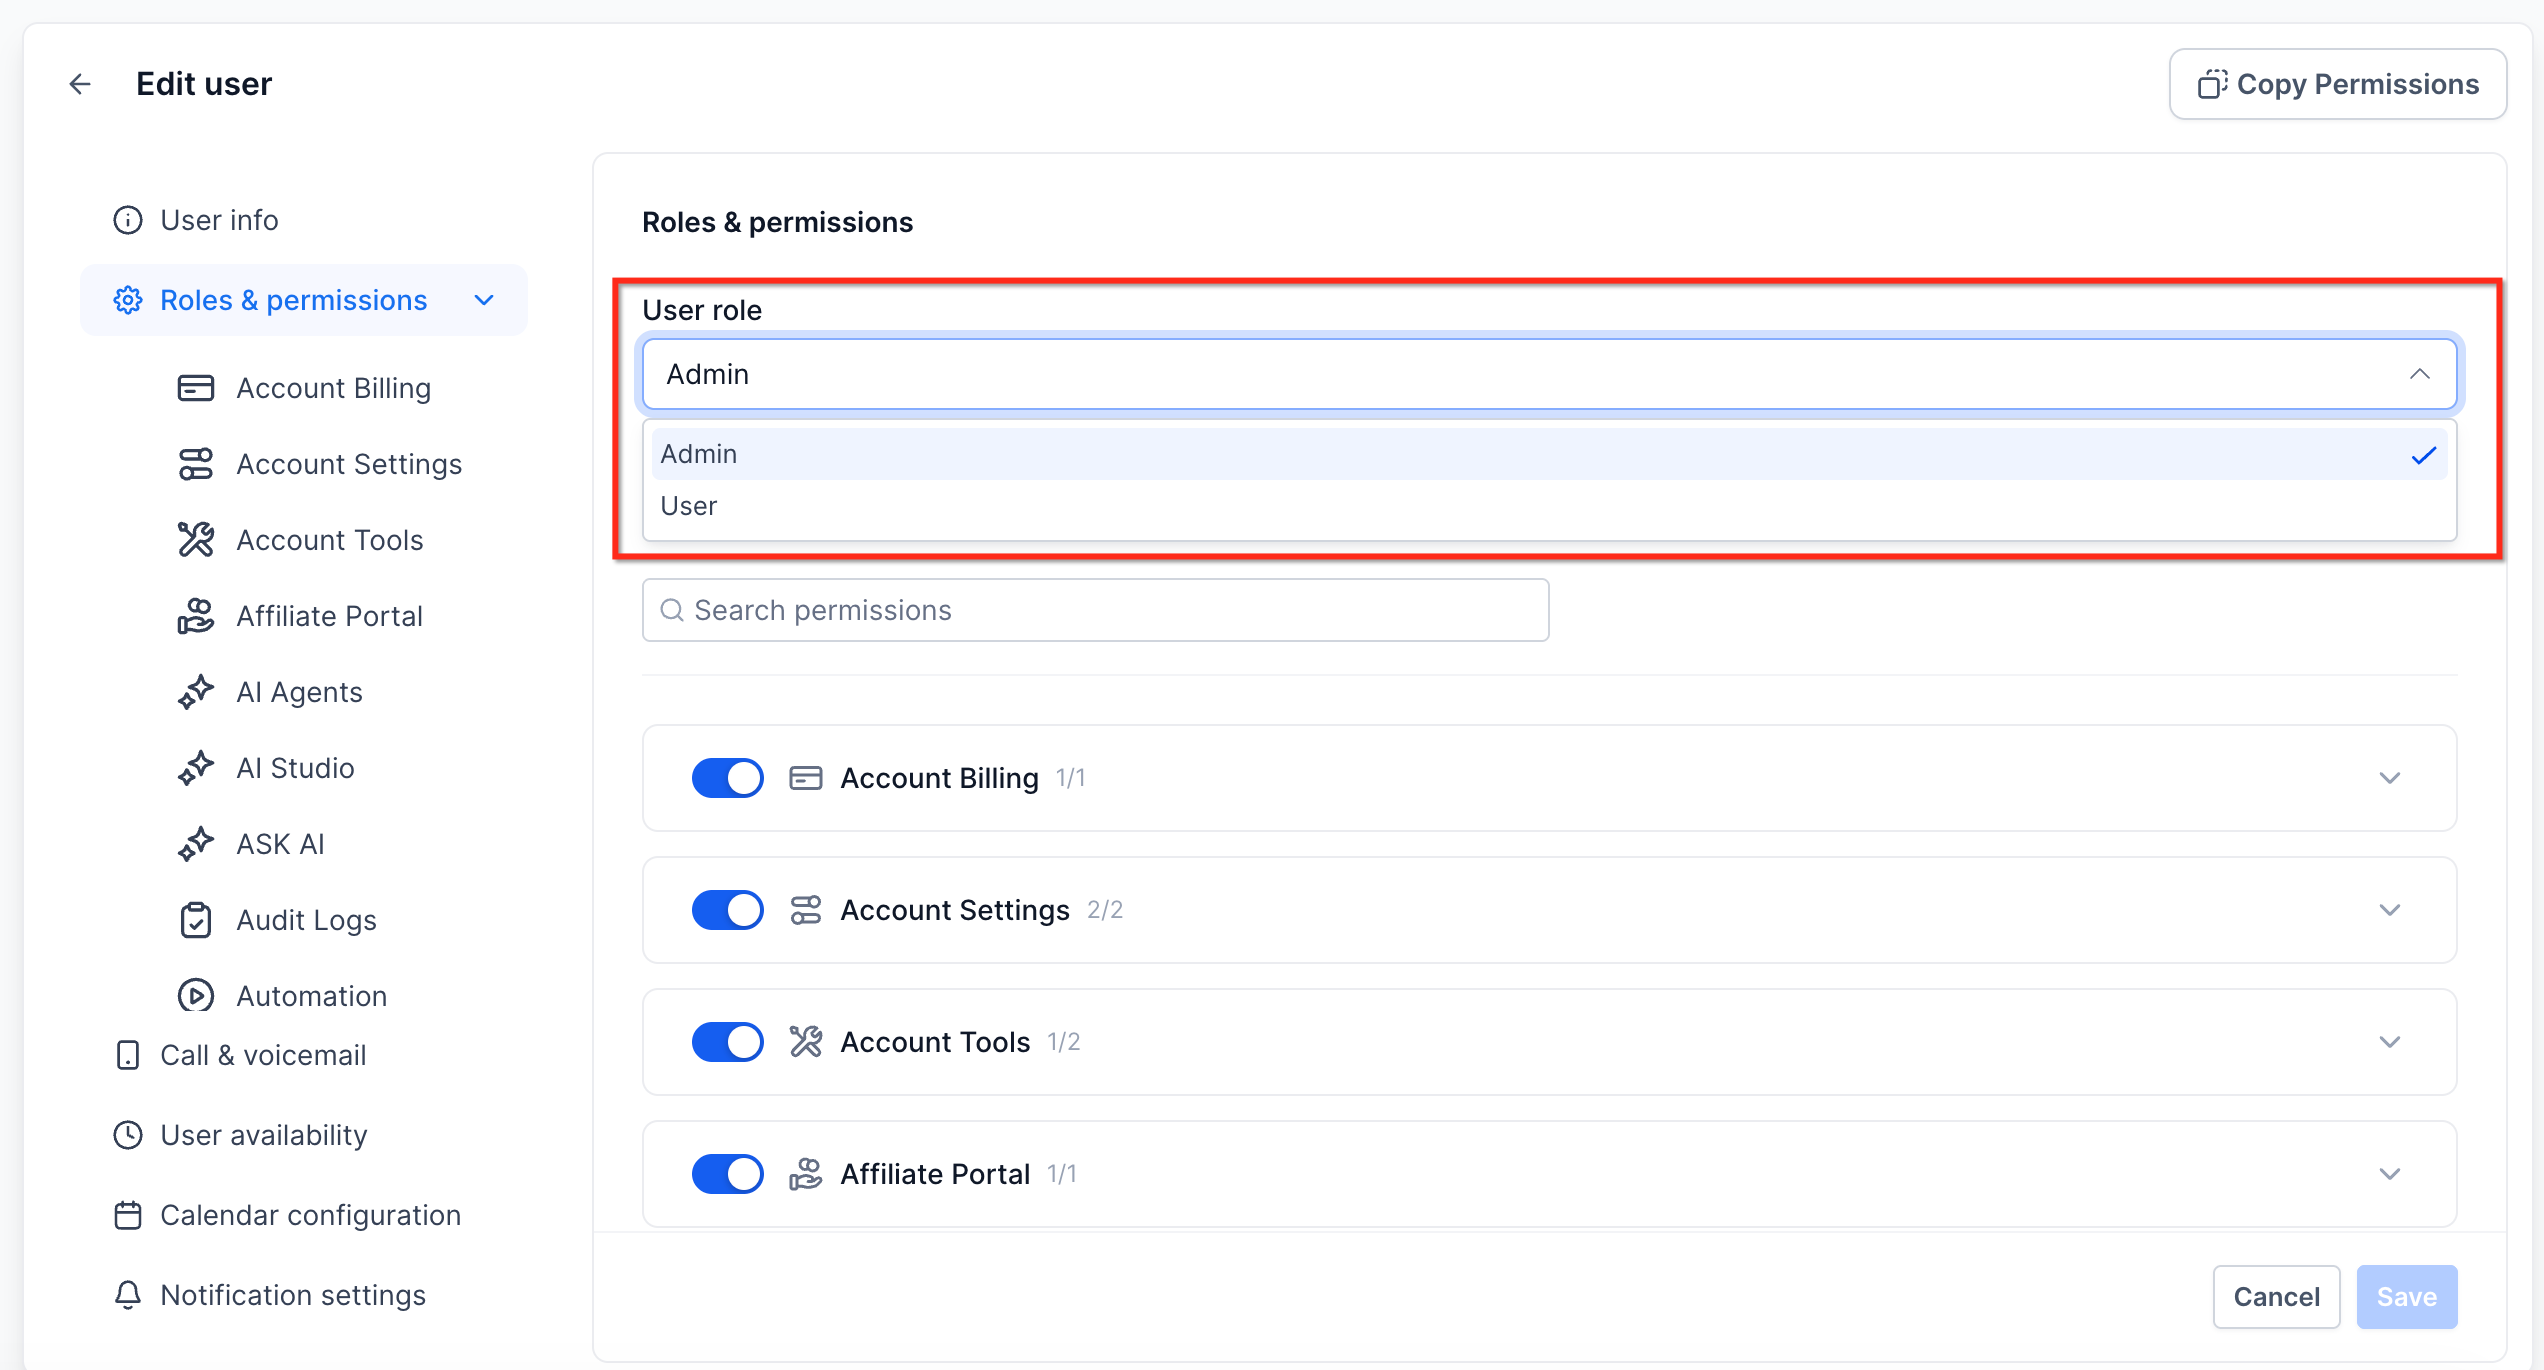
Step 3: Assign an Admin or User Role
Select the Roles and Permissions tab.
From the Role dropdown, select one of the following:
- Admin: Provides full access to available modules and settings.
- User: Provides access based on the permissions configured for that user.
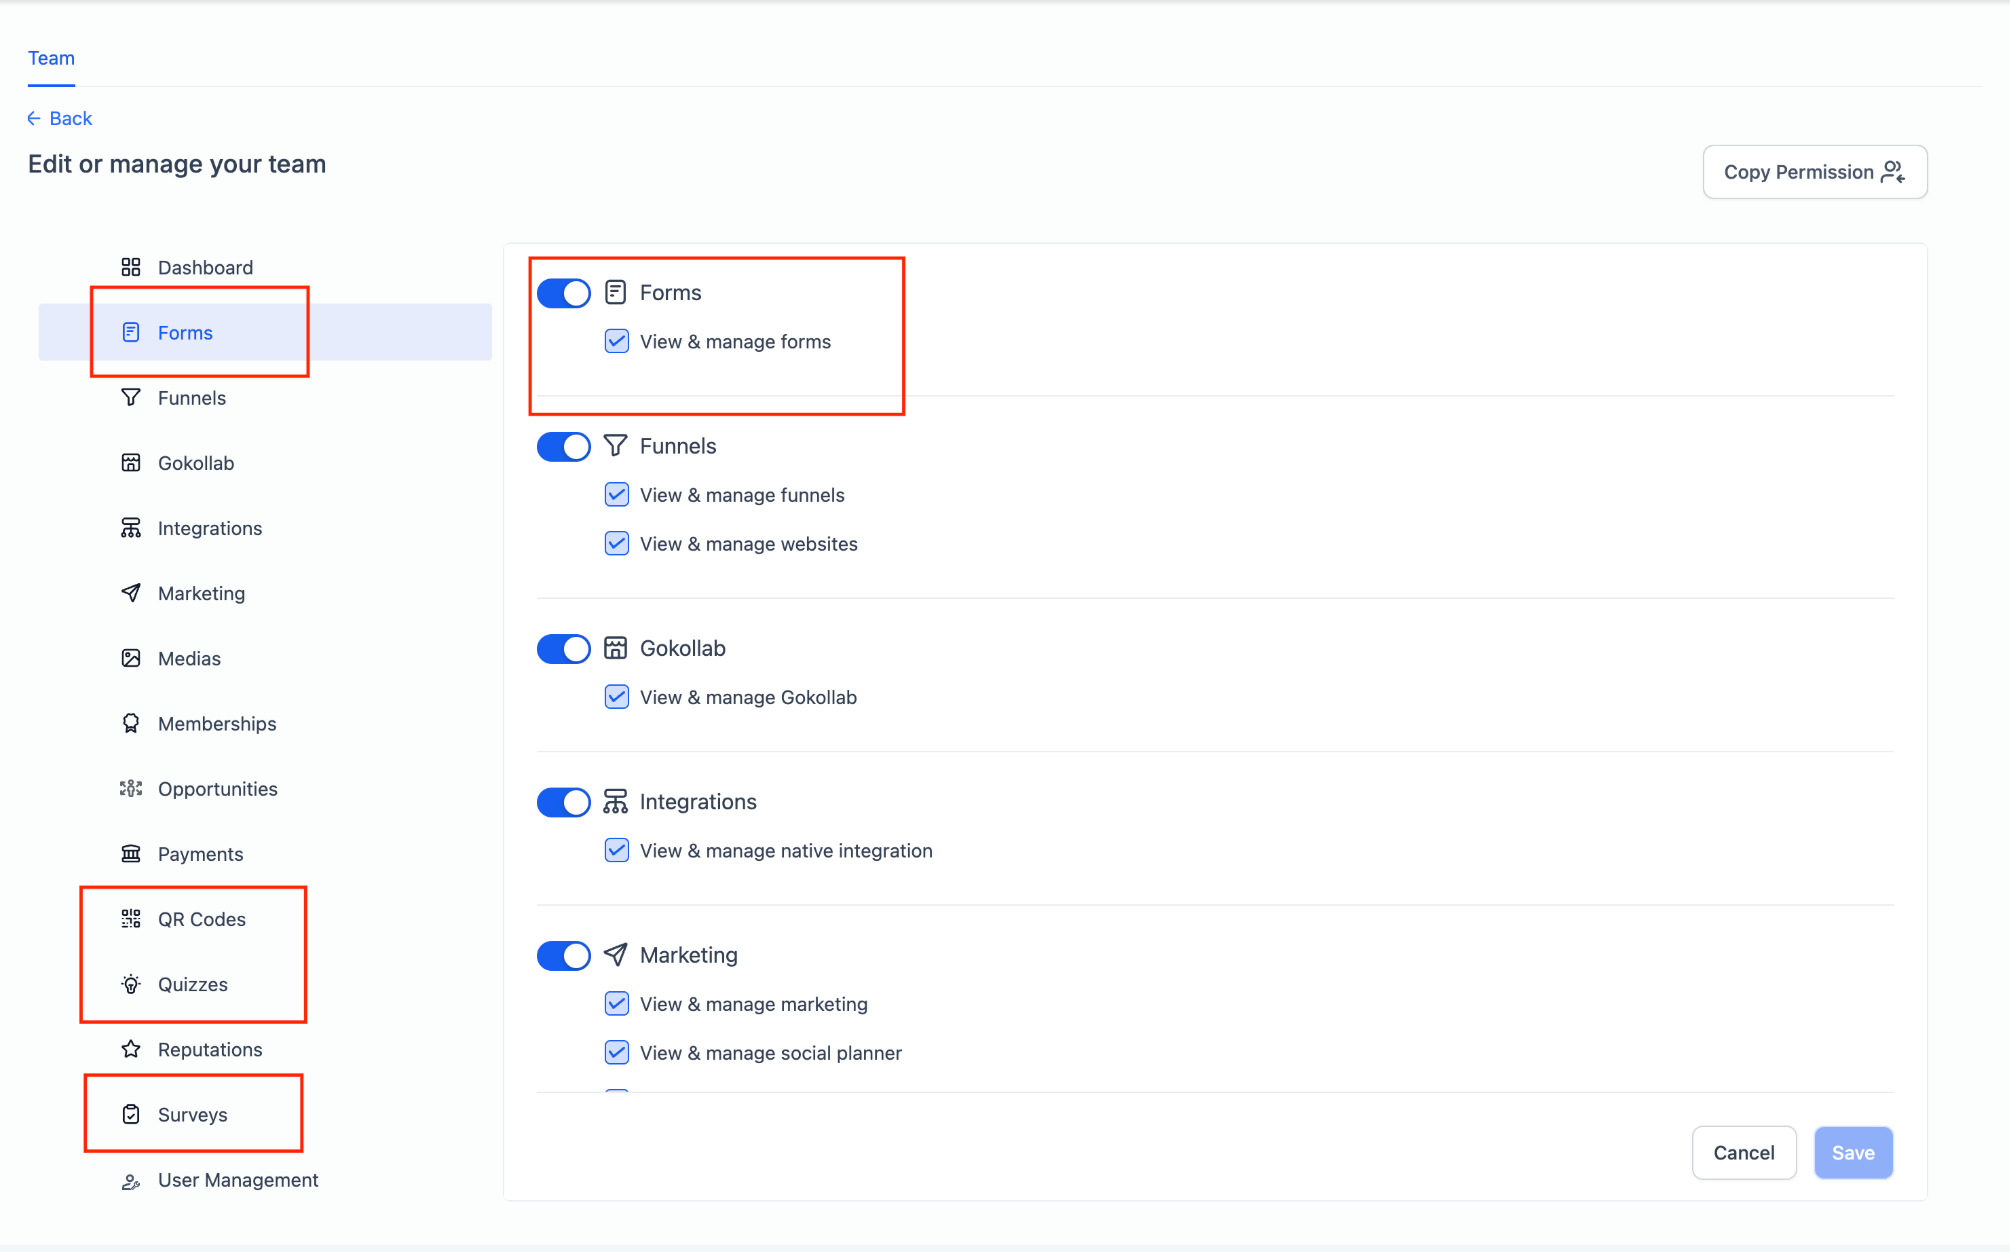
Step 4: Configure Module Access
Use the available permission controls to grant or restrict access to individual modules.
Supported modules include Forms, Surveys, Quizzes, QR Codes, AI Agents, Conversations, Workflows, Calendars, and other available areas.
For Forms, Surveys, Quizzes, and QR Codes, enable or disable the module and use the available View & manage permission to control access.
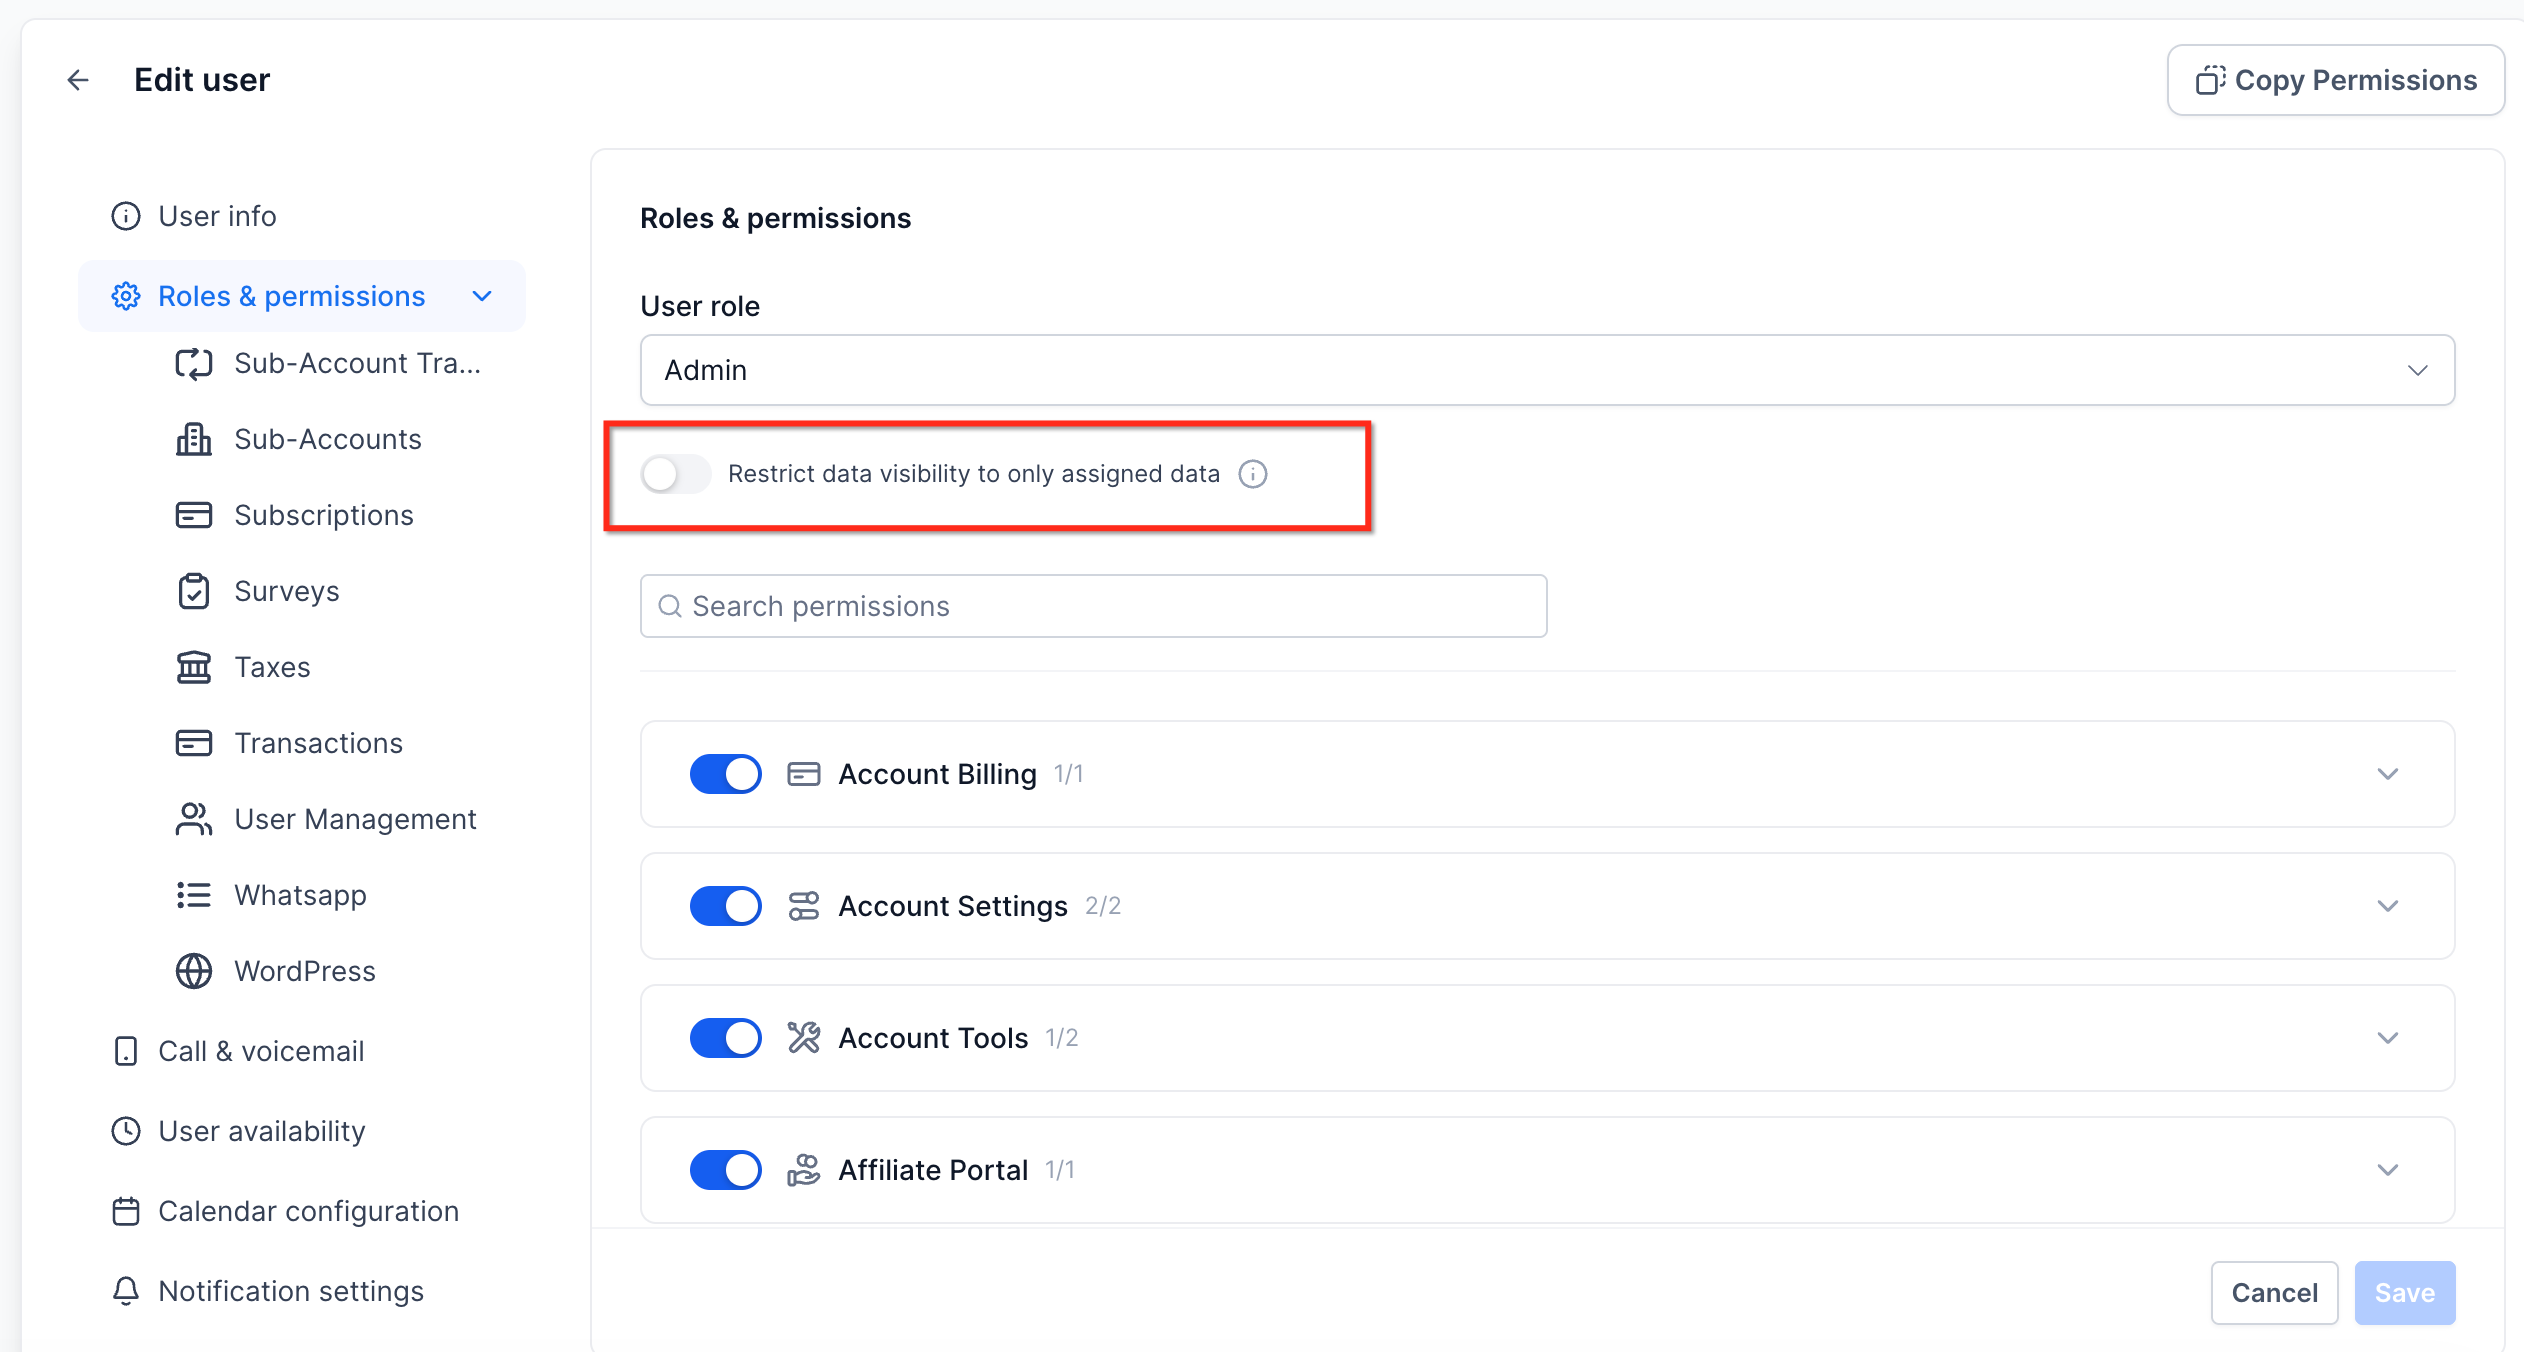
Step 5: Configure Only Assigned Data
Enable Only Assigned Data when you want to restrict a user's visibility to leads, opportunities, and other data assigned to that user.
Step 6: Save Your Changes
Select Update or Save to apply the permission configuration.
Restrict Visibility With Only Assigned Data
Only Assigned Data limits users to information associated with them.
When this setting is enabled, the user can see:
Contacts assigned to them.
Opportunities where they are the owner.
Appointments or tasks associated with them.
For example, this setting can help sales representatives focus on their own contacts and opportunities without viewing data assigned to other users.
Assigning Roles and Permissions
Roles define a user's overall level of access, while individual permissions determine which modules and features the user can access.
The available roles are:
Admin: Provides full access to available tools, settings, and data.
User: Provides access according to configured permissions and can be restricted using Only Assigned Data.
Use granular permissions when users need access to some features but not others.
Copy Permissions Between Users
You can copy an existing user's permission configuration when creating or updating another user.
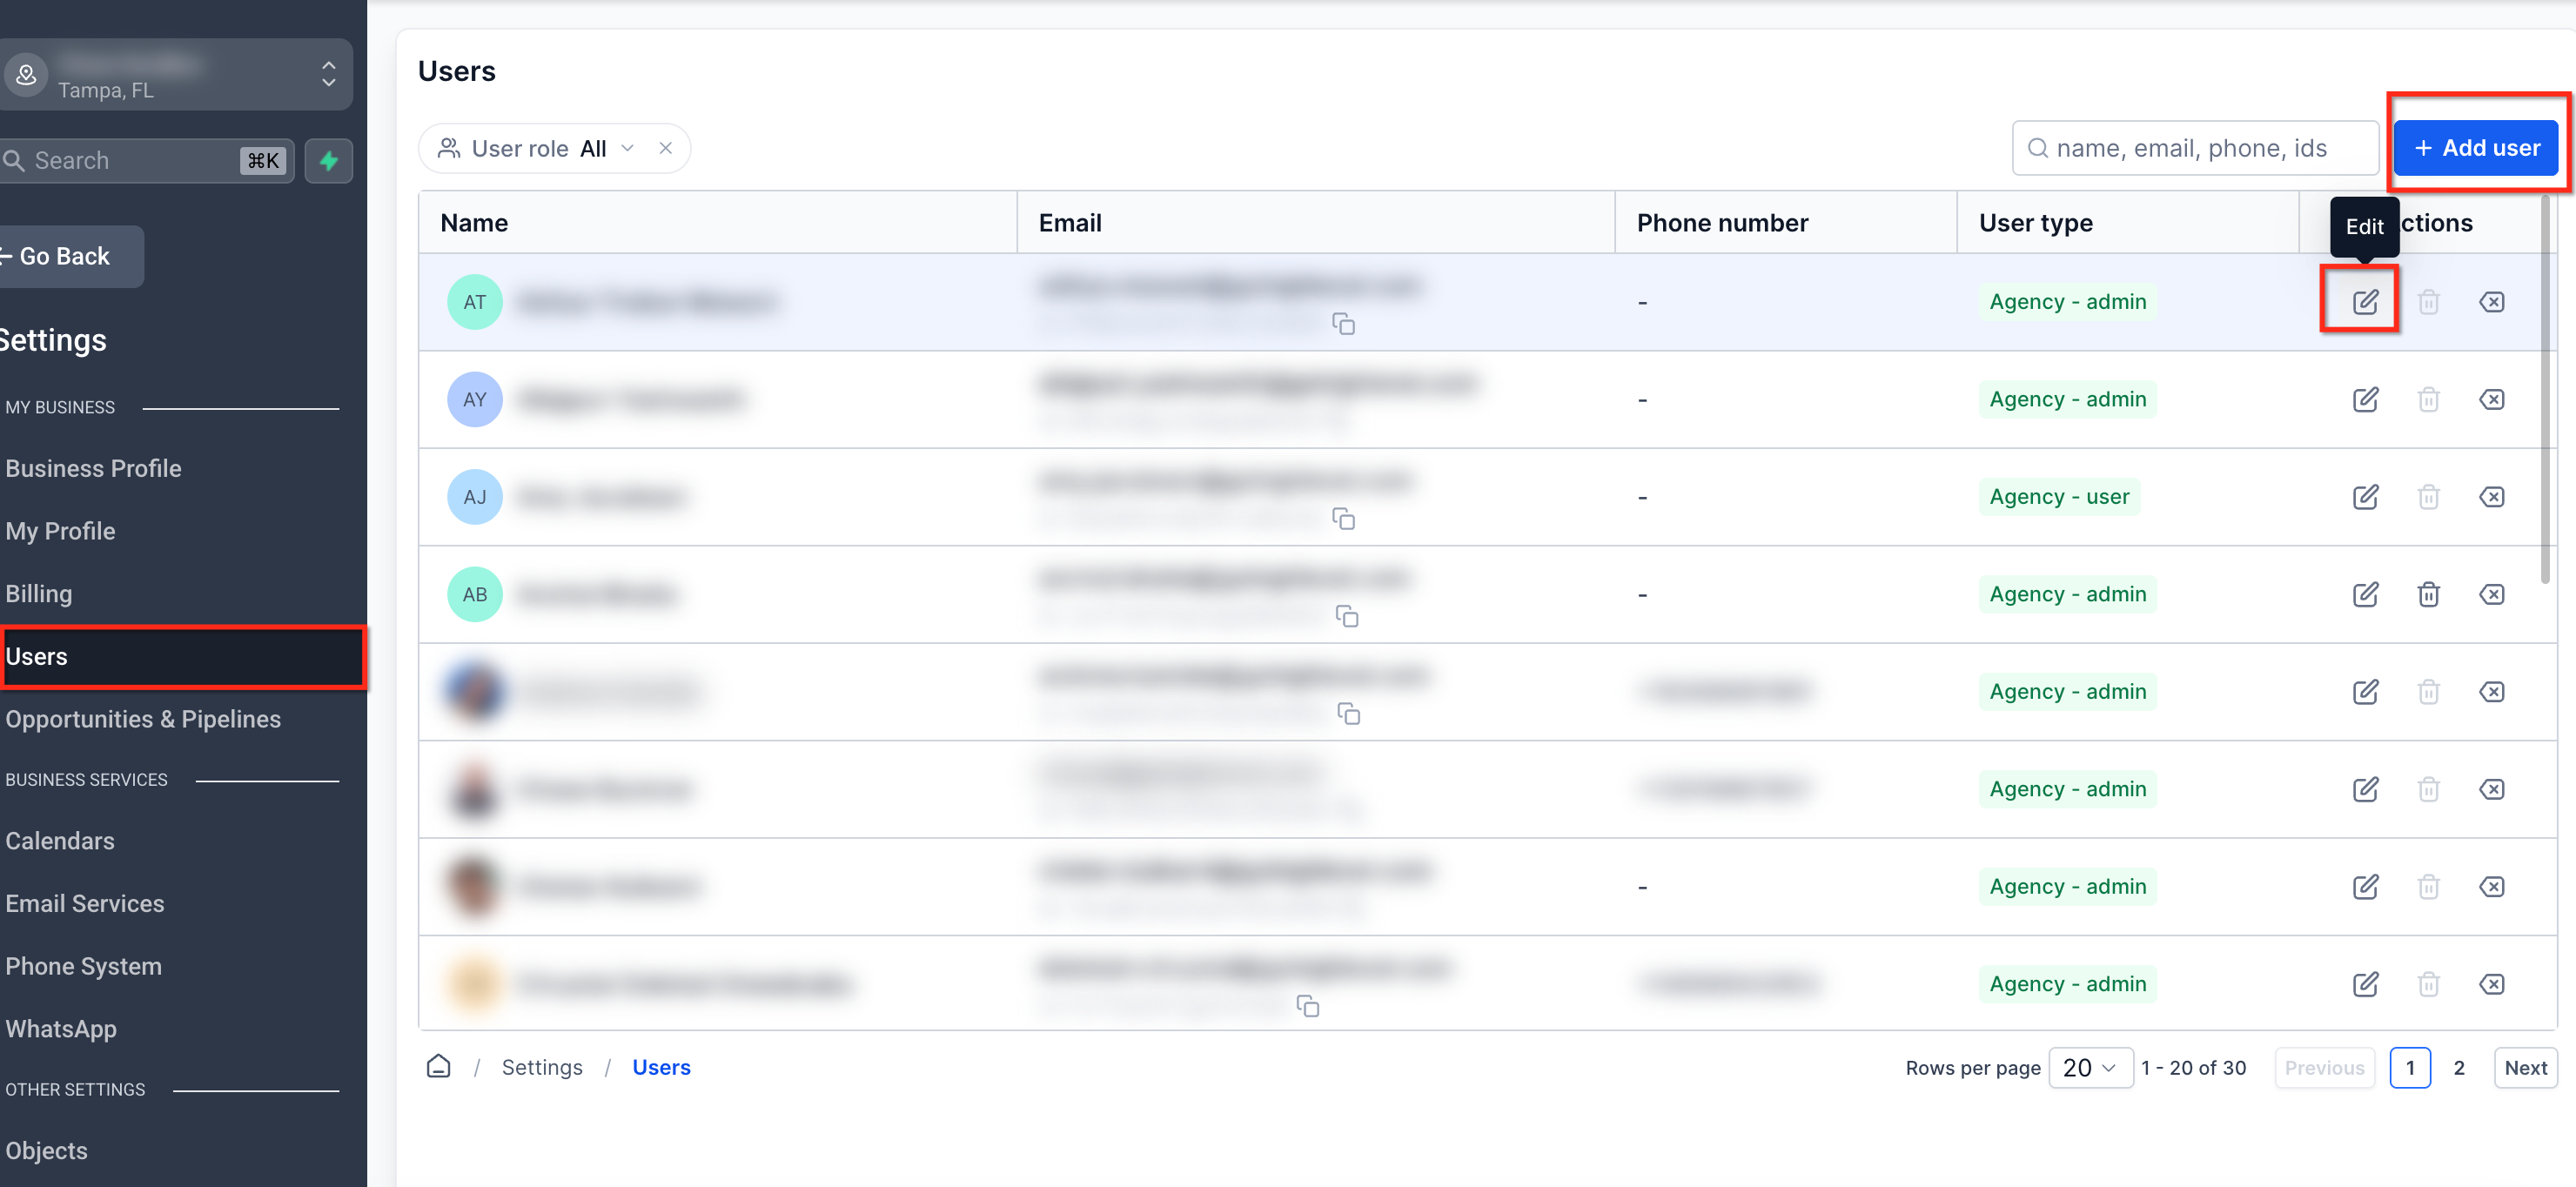
Go to Settings → Users.
Click the Edit pencil icon next to an existing user, or select + Add Employee to create a new user.
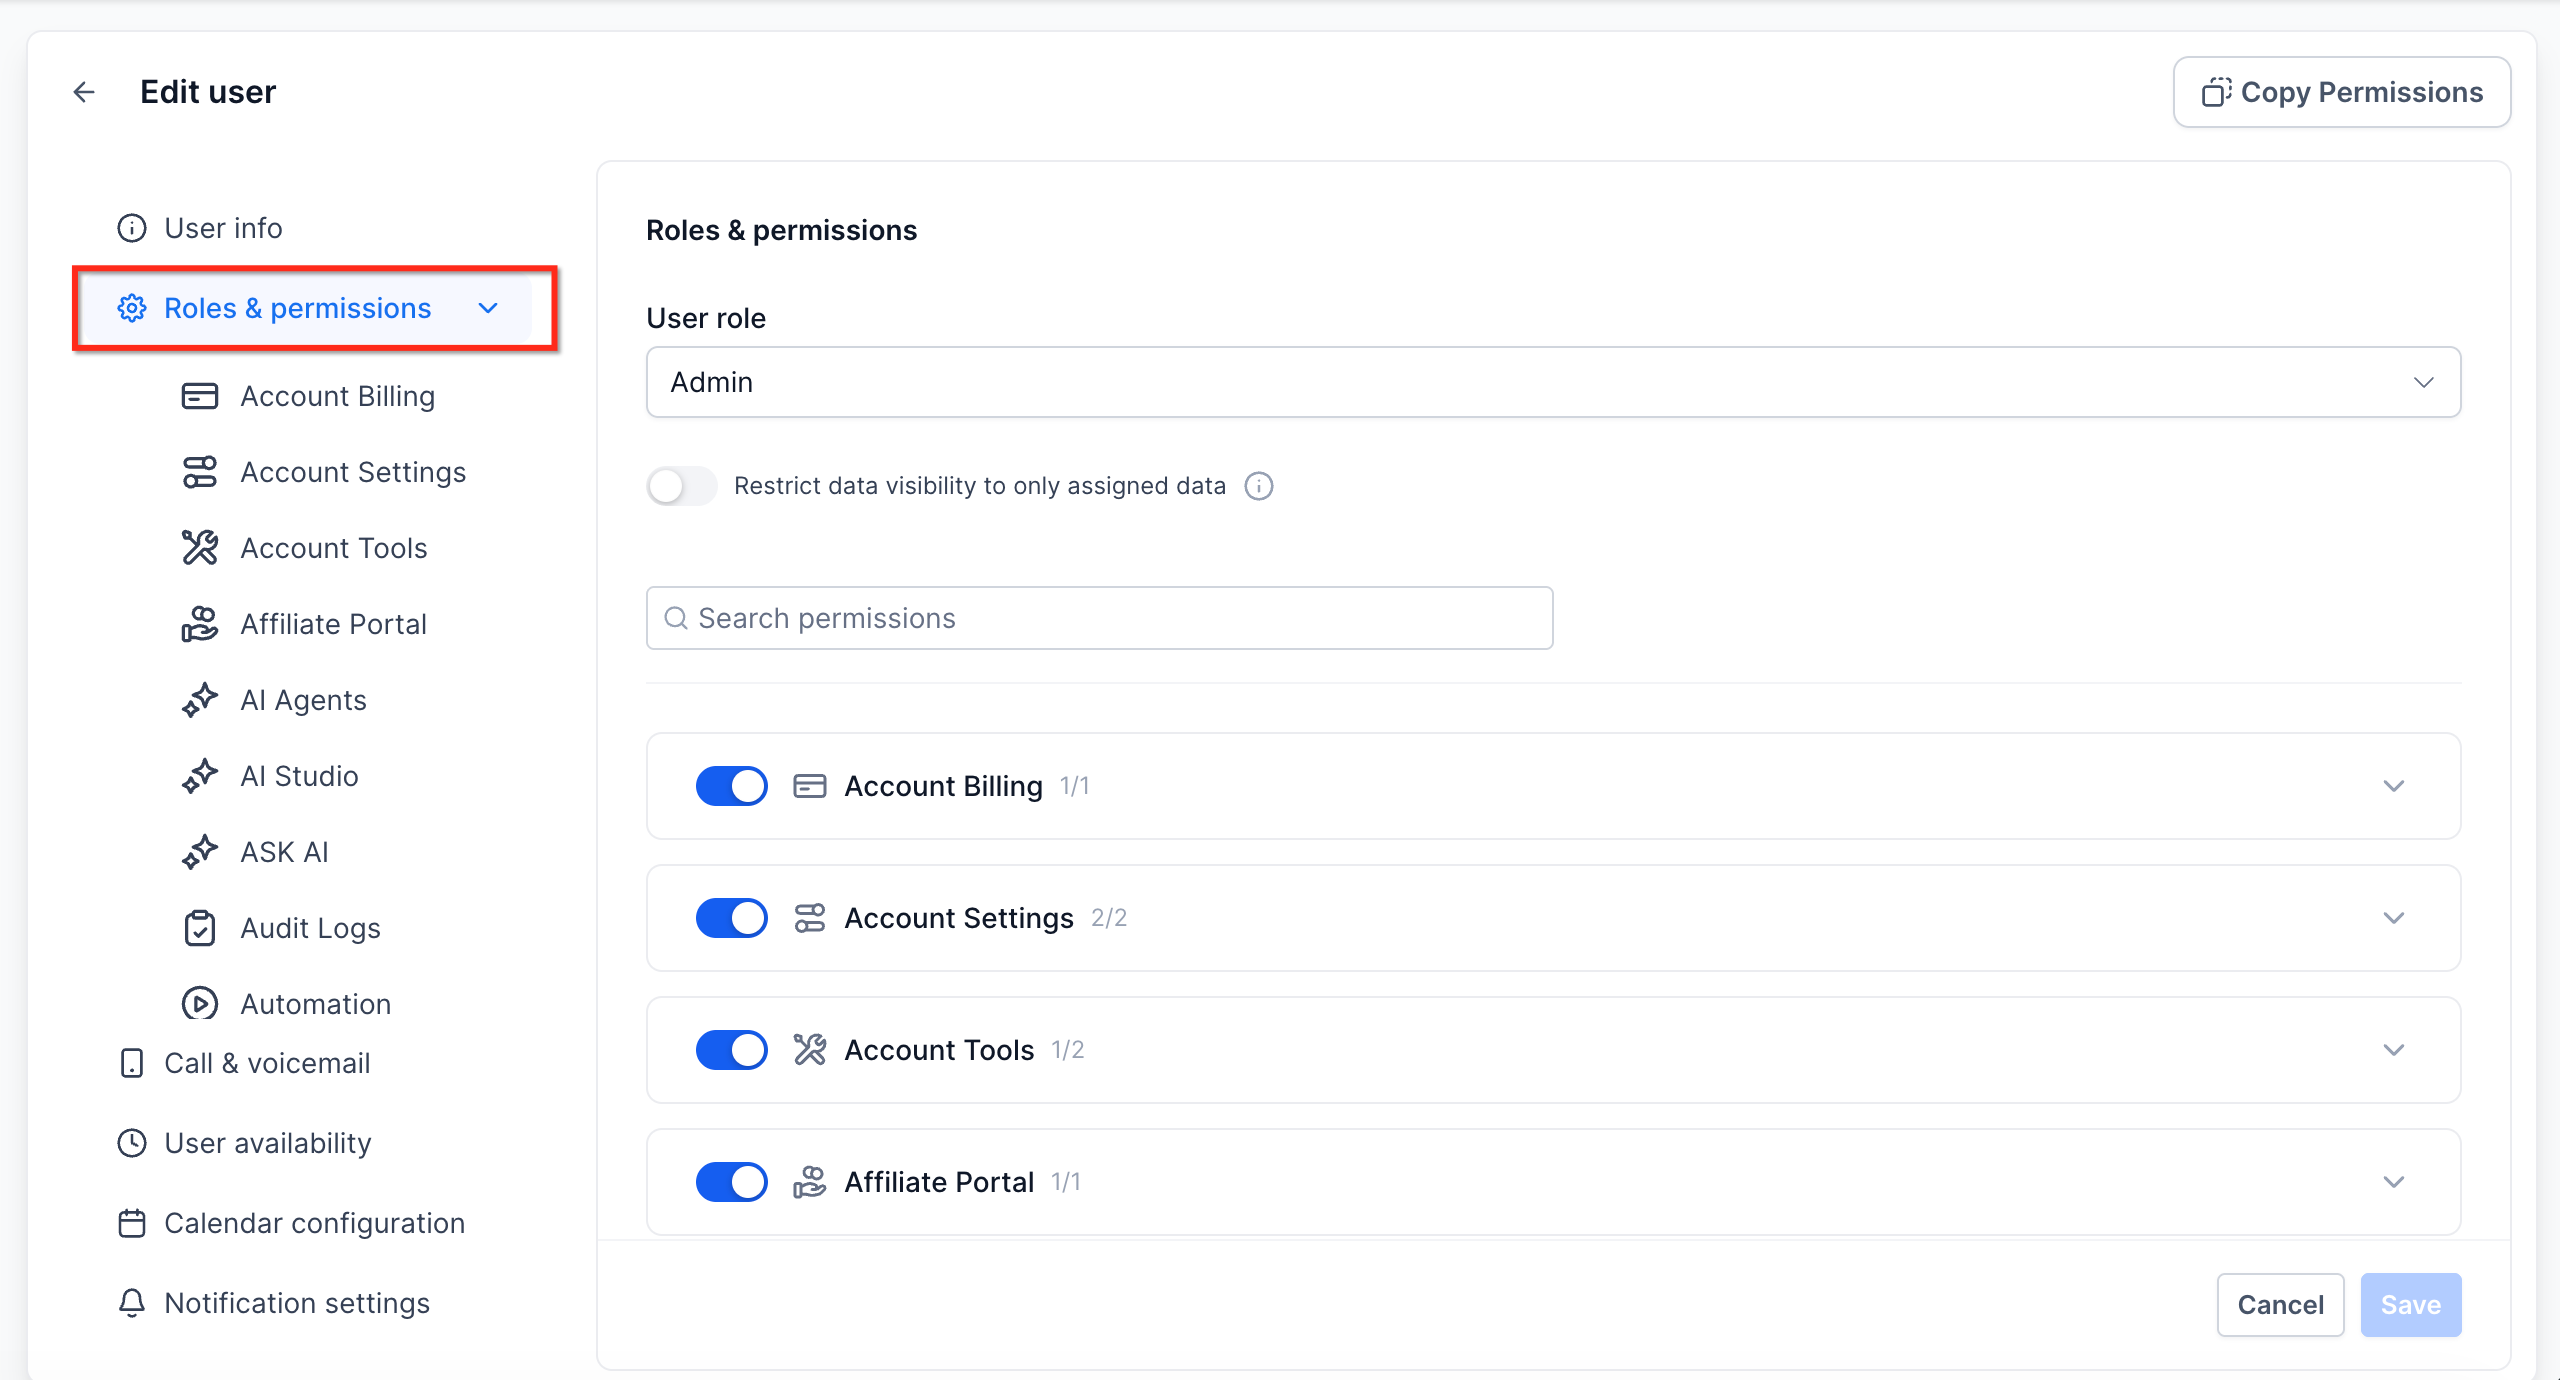
Select the Roles and Permissions tab.
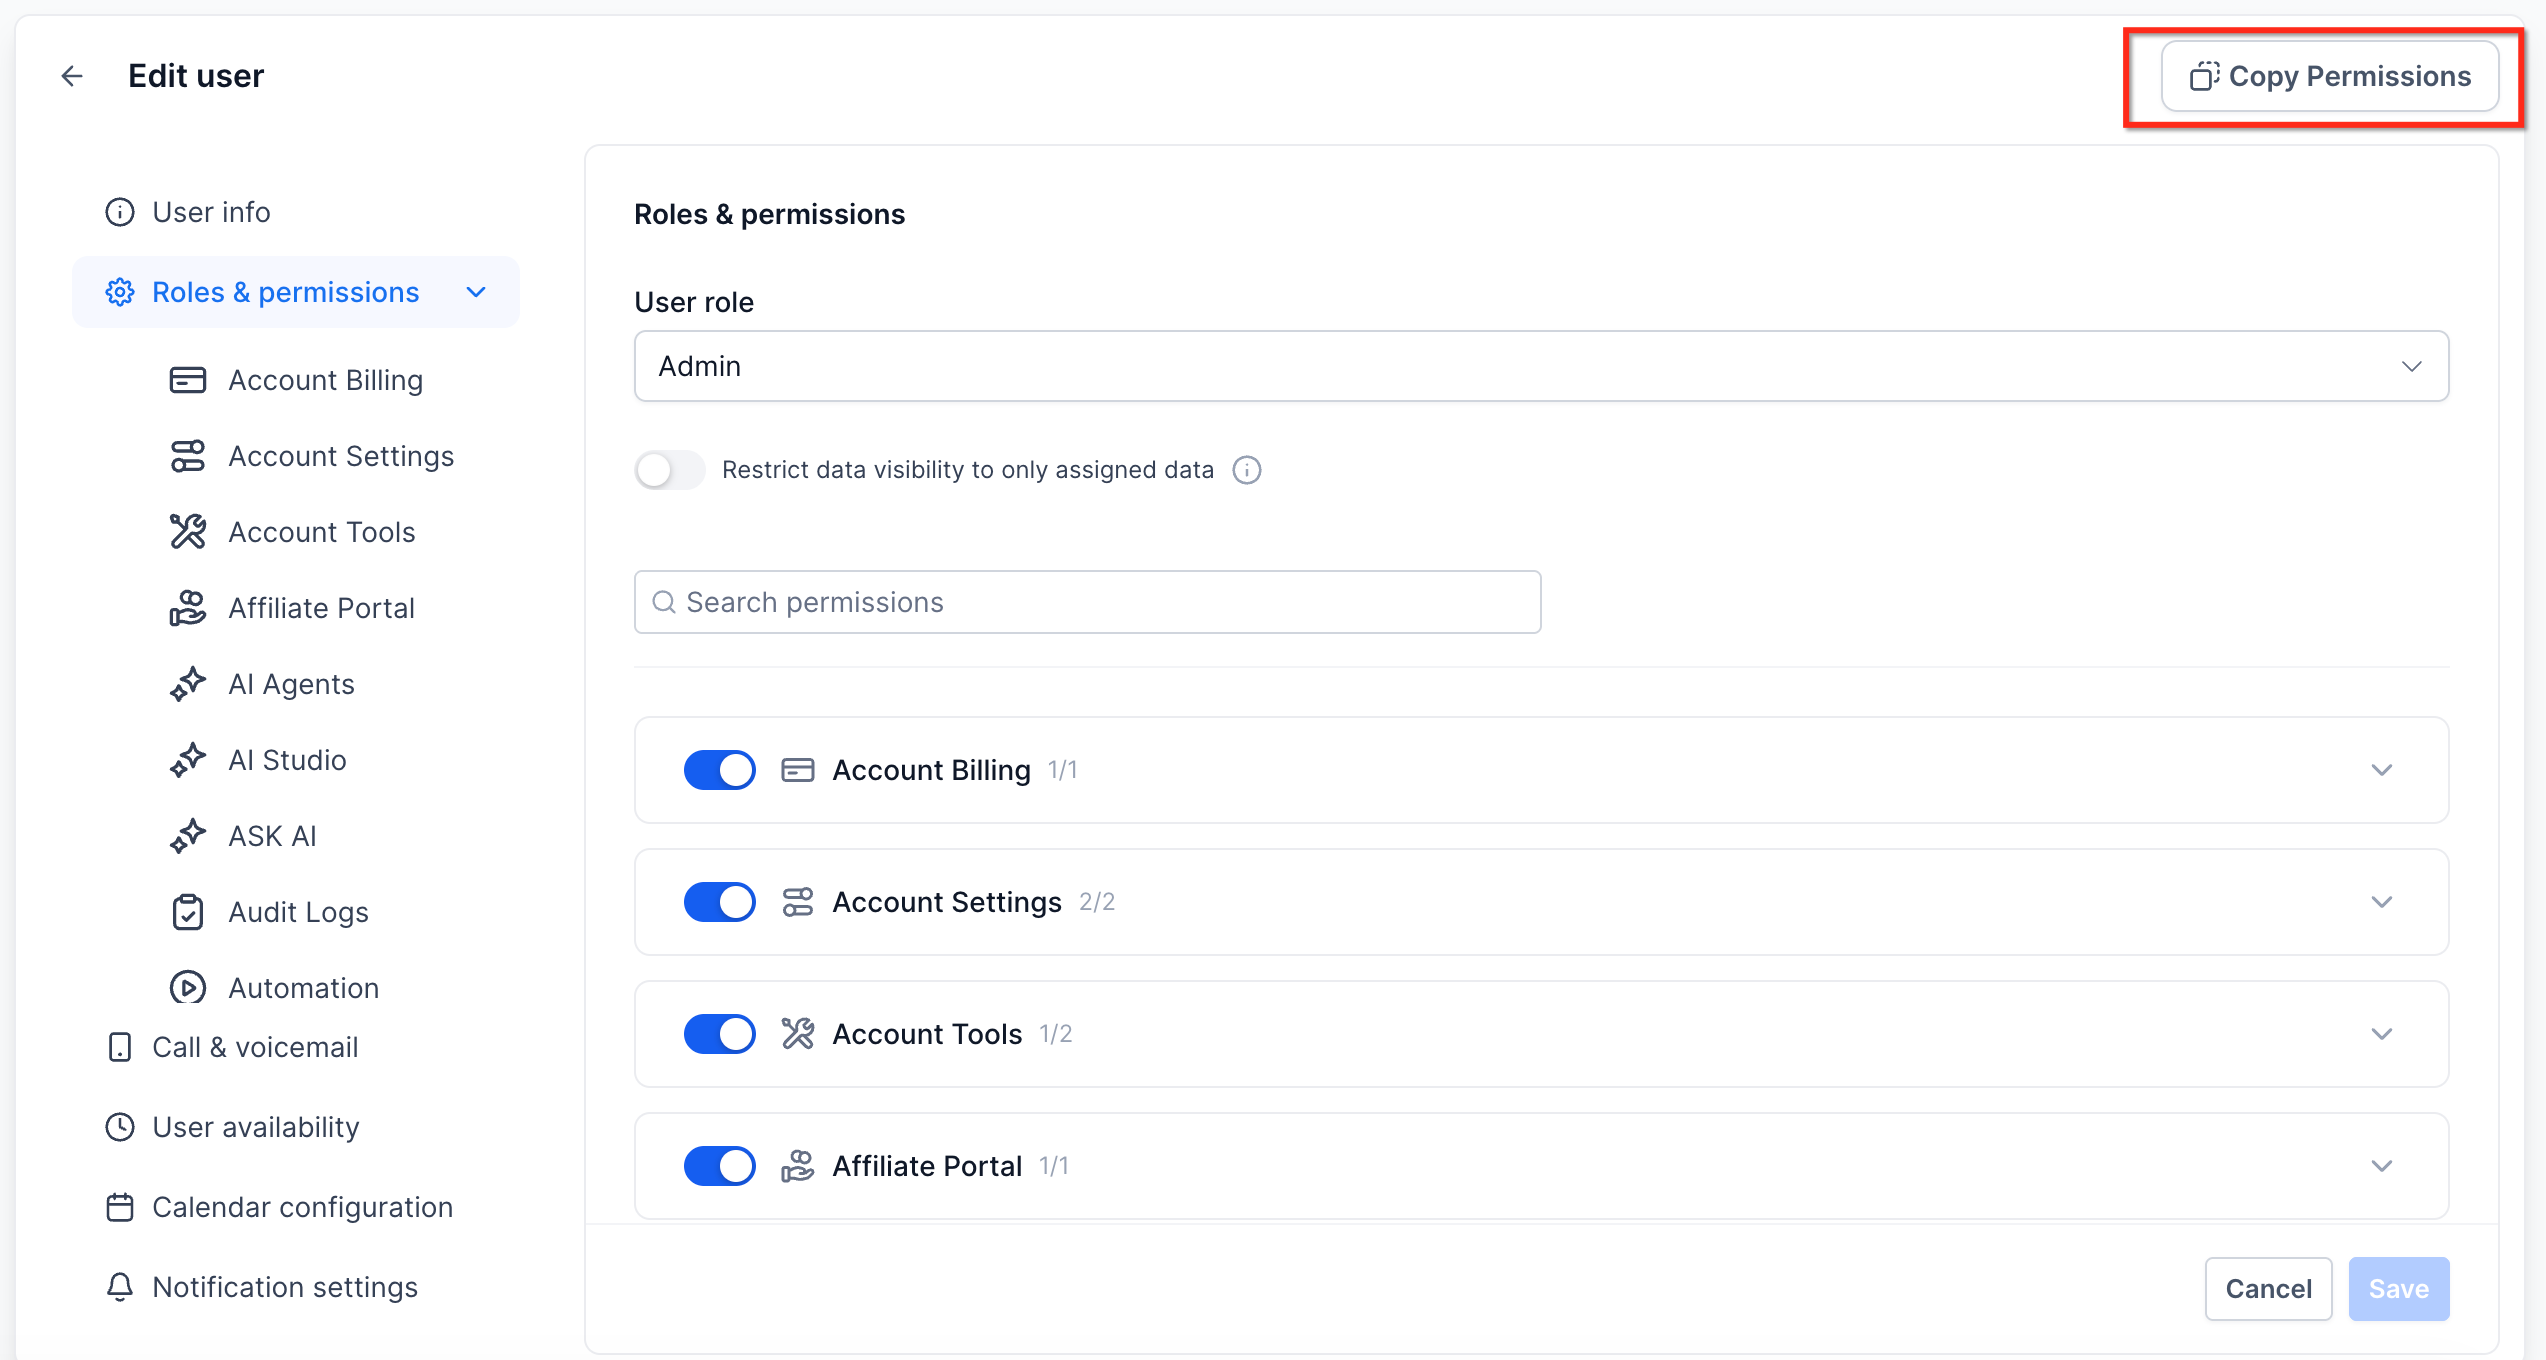
Click Copy Permissions in the upper-right corner.
Use the Copy Permissions dropdown to select the user whose permissions you want to copy.
Click Copy to apply those permission settings.
Module-Specific Granular Permissions
Granular permissions let you control access to individual areas and features.
For Forms, Surveys, Quizzes, and QR Codes, you can control whether a user can access and manage each module from the user's Roles and Permissions settings.
The Export data permission controls whether a user can export dashboard widget data. Restricting this permission can help limit unnecessary downloads or sharing of reporting data.
Granular permissions are available for areas including:
AI Agents — Managed Agents, Voice, and Chat
AI Studio
Account Settings
Account Tools
Automation, including Workflows
Blogs
Calendars
Certificates
Communities
Contacts
Conversations
Forms
Funnels
Gokollab
Integrations
Marketing
Medias
Memberships
Opportunities
Payments
QR Codes
Quizzes
Dashboard
Reputations
Surveys
User Management
WordPress
Frequently Asked Questions
Q. What happens if I disable a module for a user but that module is used in a workflow?
The user cannot see or interact with the disabled module. Existing workflows can continue to run. Ensure another authorized user has access to manage those automations.
Q. Can I assign different permissions for each calendar?
Yes. Calendar permissions can be configured individually. You can provide booking access to specific calendars or grant broader calendar management permissions.
Q. Can I assign the same permissions to multiple users at once?
No. Use Copy Permissions to copy an existing permission configuration to users individually.