
Learn how to enable Eliza Service access, configure bypass and Send to Eliza tags, send contacts to Eliza through workflows, and troubleshoot common access and routing issues.
The Send to Eliza tag and Send to Eliza Agent Platform workflow action do not behave the same way. The tag waits for a new inbound message, while the workflow action sends the contact to Eliza when that workflow step runs.
2. Key Benefits of Eliza Agent Platform Settings
3. Prerequisites and Limitations
4. How To Enable Eliza Service Access
5. How To Configure the Eliza Bypass Tag
6. How To Configure the Send to Eliza Tag
7. How To Send Contacts to Eliza Using a Workflow
8. Troubleshooting
9. Frequently Asked Questions
10. Need Help?
What Are Eliza Agent Platform Settings?
Eliza Agent Platform settings control user access and how contacts move from a sub-account into Eliza.
These settings let you:
- Give authorized users access to Eliza Service.
- Prevent selected contacts from entering Eliza.
- Send only selected inbound conversations to Eliza.
- Send a contact to Eliza immediately through a workflow.
Connection Requirement: These settings work with a sub-account that has already been added to the Eliza Agent Platform.
Key Benefits of Eliza Agent Platform Settings
Eliza routing controls help agencies decide who can configure Eliza and which contacts should enter the platform instead of sending every conversation through the same process.
- Control User Access: Give Eliza configuration access only to users who need it.
- Exclude Selected Contacts: Use an Eliza Bypass tag when specific contacts should not enter Eliza.
- Route Selected Contacts: Use a Send to Eliza tag when only certain inbound conversations should enter Eliza.
- Automate Immediate Routing: Use a workflow action when a contact should be sent to Eliza without waiting for an inbound message.
- Manage Routing from the CRM: Configure core Eliza routing rules without relying only on the Eliza Agent Platform interface.
Prerequisites and Limitations
Confirming Eliza access and routing requirements before configuration helps prevent missing settings and contacts being routed differently than expected.
- The applicable sub-account must already be added to the Eliza Agent Platform.
- The user must have access to the applicable sub-account.
- Users who configure Eliza settings must have the Eliza Service permission enabled.
- The user's email address should also be configured for the applicable location in the Eliza Agent Platform.
- Create or identify the contact tags you want to use before configuring tag-based routing.
Routing Difference: A Send to Eliza tag waits for a new inbound message before routing the contact. The Send to Eliza Agent Platform workflow action sends the contact when that workflow step executes.
How To Enable Eliza Service Access
Eliza Service permission controls whether a user can access the Eliza settings available inside the assigned sub-account.
- Switch to Agency View.
- Click Settings.
- Select Team.
- Locate the applicable user and open the user's settings.
- Open Roles & Permissions.
- Locate Eliza Service.
- Enable the permission.
- Save the user's changes.

After access is enabled, switch to the applicable sub-account and open:
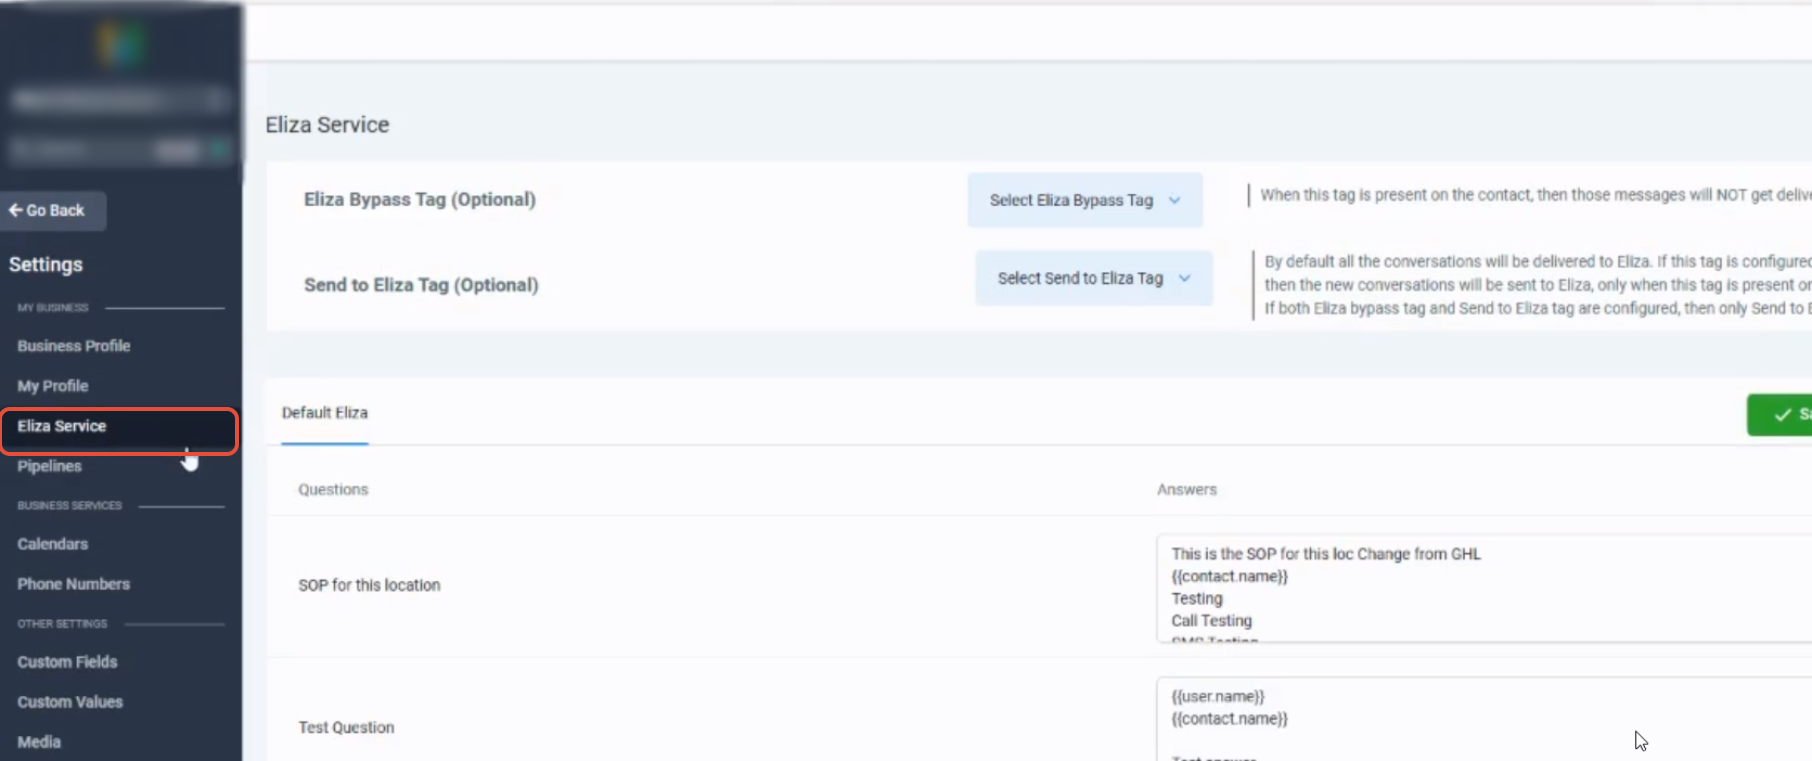
Settings → Eliza Service
How To Configure the Eliza Bypass Tag
The Eliza Bypass tag prevents selected contacts from having new inbound conversations forwarded to the Eliza Agent Platform.
Create or identify the contact tag you want to use before configuring the routing rule.
- Open the applicable sub-account.
- Click Settings.
- Select Eliza Service.
- Locate the Eliza Bypass Tag setting.
- Select the tag you want to use.
- Save the configuration.
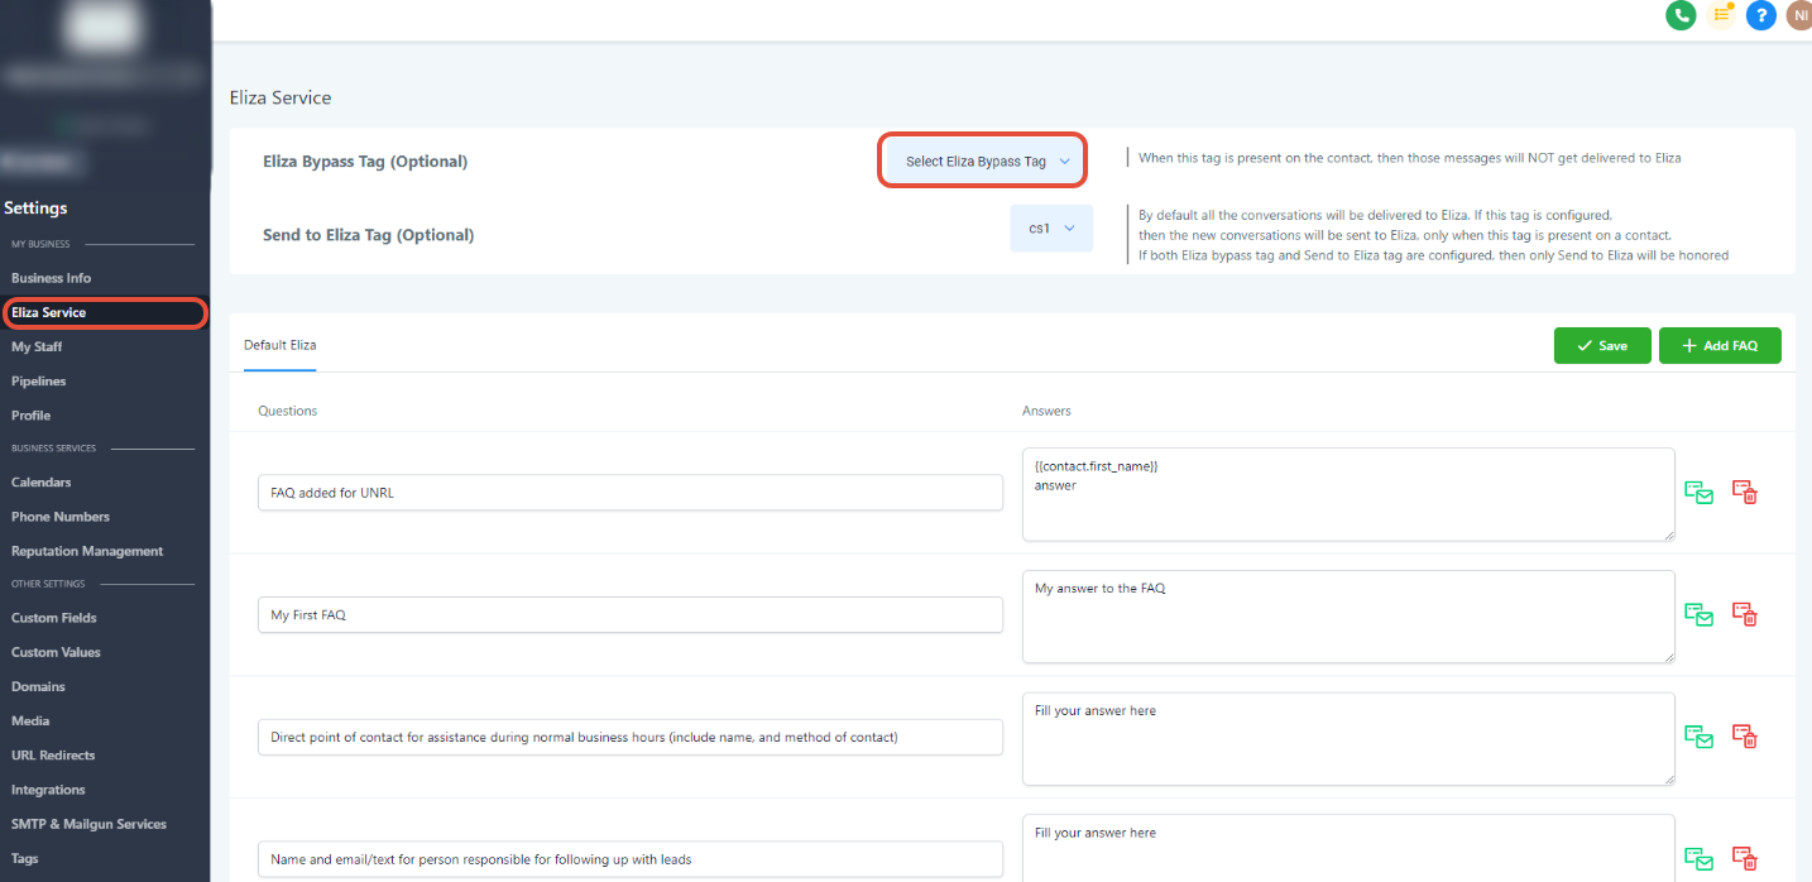
When a new inbound message arrives, the system checks the contact for the configured bypass tag. If the tag is present, the inbound conversation is not forwarded to Eliza.
Existing Eliza Conversation: If the conversation is already in Eliza, it can be removed from the agent queue when the agent navigates to it. The closed conversation uses the Bypass tag assigned disposition.
How To Configure the Send to Eliza Tag
The Send to Eliza tag is useful when you want only selected contacts with new inbound conversations to enter Eliza.
- Open the applicable sub-account.
- Click Settings.
- Select Eliza Service.
- Locate the Send to Eliza Tag setting.
- Select the tag you want to use.
- Save the configuration.
- Apply the tag to contacts whose inbound conversations should be sent to Eliza.
You can apply the tag manually or through a workflow. For example, use an Add Contact Tag action when a contact meets your routing criteria.
Important: Applying the Send to Eliza tag does not immediately send the contact to Eliza. The contact is sent when a new inbound message is received.
If Both Tags Apply: When both the Eliza Bypass tag and Send to Eliza tag apply, the system honors the Send to Eliza tag so the conversation is not unintentionally excluded.
How To Send Contacts to Eliza Using a Workflow
Use the Send to Eliza Agent Platform workflow action when a contact should be sent to Eliza as soon as the workflow reaches that step instead of waiting for a new inbound message.
Step 1: Open the Workflow
Start with the workflow and trigger that determine which contacts should be sent to Eliza.
- Open the applicable sub-account.
- Click Automation.
- Select Workflows.
- Open an existing workflow or create a workflow.
- Configure the trigger that determines which contacts should enter the workflow.
Step 2: Add the Send to Eliza Agent Platform Action
The Eliza workflow action sends the contact to the connected Eliza Agent Platform when execution reaches that step.
- Click the + icon where you want to add the action.
- Open the available workflow actions.
- Locate the Eliza Actions section.
- Select Send to Eliza Agent Platform.
- Configure the action as needed.
- Save the action.
- Save or publish the workflow.

Workflow Behavior: The Send to Eliza tag is not required for this workflow action to send the contact. If a Send to Eliza tag is configured for the location, that tag can also be applied before the contact is sent.
Troubleshooting
Most Eliza routing issues come from missing permissions, incomplete Eliza location access, or confusion between tag-based routing and the workflow action.
Check all required access conditions before assuming the Eliza connection is unavailable.
- Confirm the sub-account has been added to your Eliza Agent Platform account.
- Confirm the user has access to the applicable sub-account.
- Confirm the same user's email address is configured for that location in the Eliza Agent Platform.
- Confirm Eliza Service permission is enabled for the user.
After correcting access, reload the sub-account and check Settings again.
If you are using the Send to Eliza tag, the contact must receive a new inbound message before the conversation is sent to Eliza. If the contact should be sent immediately, use the Send to Eliza Agent Platform workflow action instead.
Confirm the configured Eliza Bypass tag is applied to the contact. Also check whether the contact is simultaneously meeting the Send to Eliza tag criteria. When both routing settings apply, the Send to Eliza behavior takes priority.
Frequently Asked Questions
Need Help?
- Eliza Service is missing: Confirm the sub-account is connected to Eliza, the user has sub-account access, and Eliza Service permission is enabled.
- A Send to Eliza tag is not routing the contact: The contact must receive a new inbound message before tag-based routing occurs.
- The contact should be sent immediately: Use the Send to Eliza Agent Platform workflow action instead of relying on the tag.
- A bypassed contact is still reaching Eliza: Confirm the bypass tag is applied and check whether a Send to Eliza tag also applies.
- The workflow is not sending the contact: Confirm the workflow is published, the contact reaches the Eliza action, and the sub-account is connected to the correct Eliza account.