
Send bulk emails directly from selected Company or Custom Object records without rebuilding the same audience under Contacts. The platform uses the records' associations to determine which Contacts should receive the message. You can also personalize emails with Company or Custom Object data and use the existing bulk email creation, delivery, and reporting experience.
Learn how to build a bulk email audience from Company or Custom Object associations, choose the right recipients, personalize the message, select a delivery method, and review results.
What Is Bulk Email to Associated Contacts?
Bulk Email to Associated Contacts lets you select Company or Custom Object records and email the Contacts associated with those records.
For Custom Objects, you can choose one or more association labels and send to the most recently associated Contact, earliest associated Contact, or all associated Contacts. For Companies, the platform automatically uses the Contact association.
Supported Company and Custom Object fields can also be used as merge fields so each email can include information from the source record.
Key Benefits of Bulk Email to Associated Contacts
Association-based bulk email turns existing CRM relationships into ready-to-use audiences without requiring the same segment to be recreated under Contacts.
- Email From Existing Records: Start from selected Companies or supported Custom Object records.
- Target Specific Relationships: Use Custom Object association labels to control which Contacts qualify.
- Control Recipient Selection: Send to the earliest, most recent, or all associated Contacts.
- Personalize With Source Data: Insert supported Company or Custom Object fields into the message.
- Prevent Duplicate Sends: Contacts qualifying through multiple selected association labels are de-duplicated.
- Use Existing Bulk Email Tools: Compose, test, schedule, batch-send, and track the email through the standard bulk email experience.
Prerequisites and Limitations
Bulk email relies on existing Contact associations and normal email eligibility rules, so the required records and relationships should already be in place before sending.
- Selected Company or Custom Object records must have associated Contacts.
- A Custom Object must have an association with Contacts before Send email is available.
- For Companies, the platform automatically selects the Contact association.
- For Custom Objects, one or more applicable association labels can be selected.
- The final recipient list is resolved when the bulk action runs.
- Contacts qualifying through multiple selected association labels receive only one email.
- Contacts without an eligible email address or restricted by applicable email settings may be skipped.
- Existing permissions, consent requirements, deliverability protections, rate limits, and other bulk-email restrictions still apply.
How To Set Up Bulk Email to Associated Contacts
Start from the Company or Custom Object records that define the audience, then use their associations to resolve recipients before composing and sending the email.
Step 1: Select the Source Records
Select only the records that should contribute Contacts to the recipient audience.
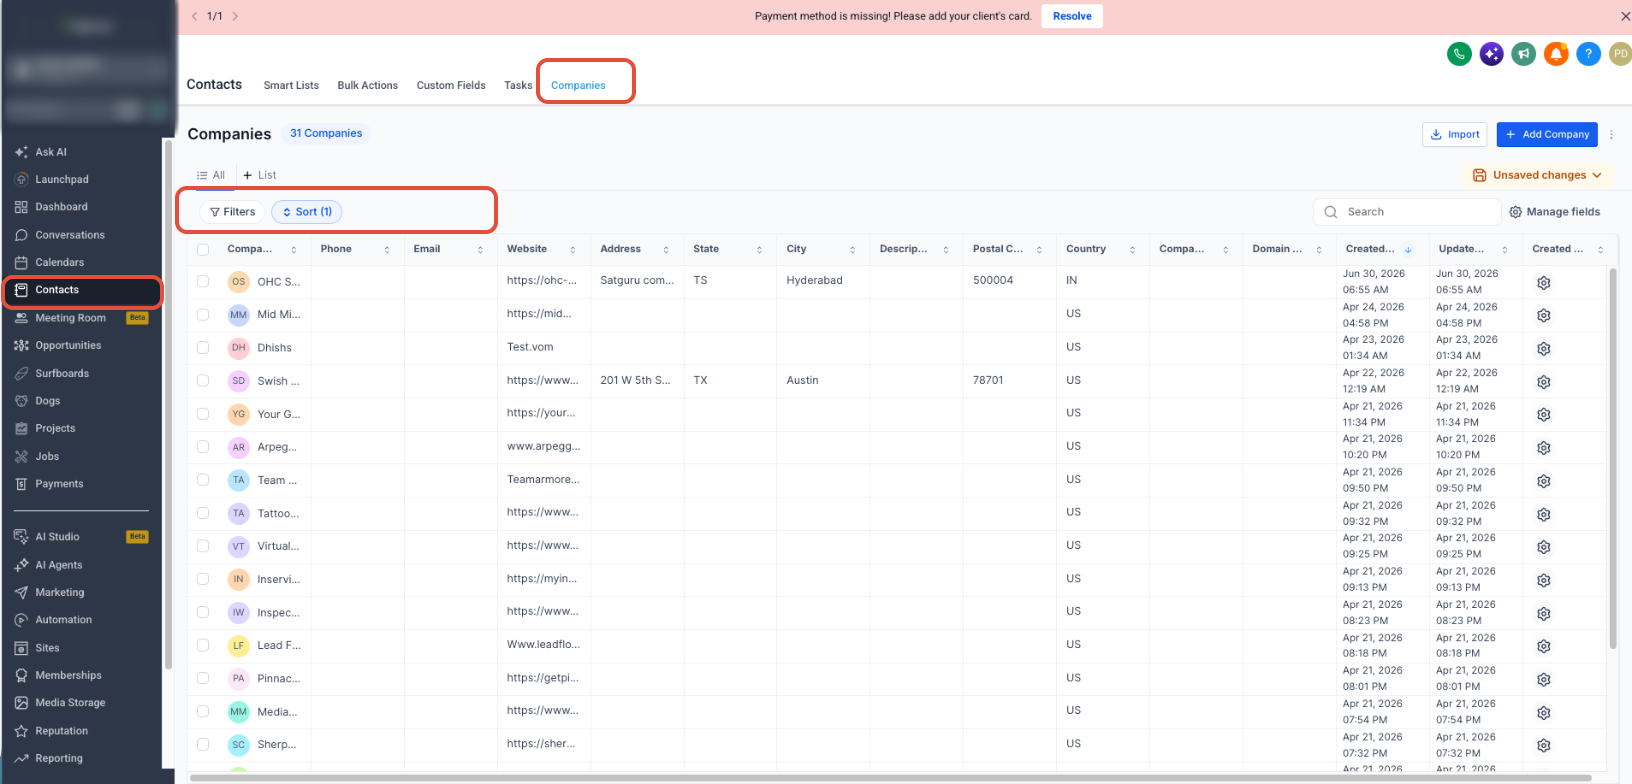
- For Companies, go to Contacts → Companies. For a Custom Object, open the applicable object from the sub-account navigation.
- Use filters or a Smart List when needed to narrow the records.
- Select the records whose associated Contacts should receive the email.
Step 2: Start the Bulk Email
The confirmation step verifies the selected source records before the platform resolves their associated Contacts.
- Click Send email from the bulk action bar.
- Review the number of selected records.
- Click Confirm and proceed.
Recipient count: The exact recipient list is resolved when the bulk action runs. Final numbers appear in the bulk action's statistics.
Step 3: Choose the Association and Recipients
Association labels control which Custom Object relationships qualify, while the recipient setting determines how many associated Contacts are selected from each source record.
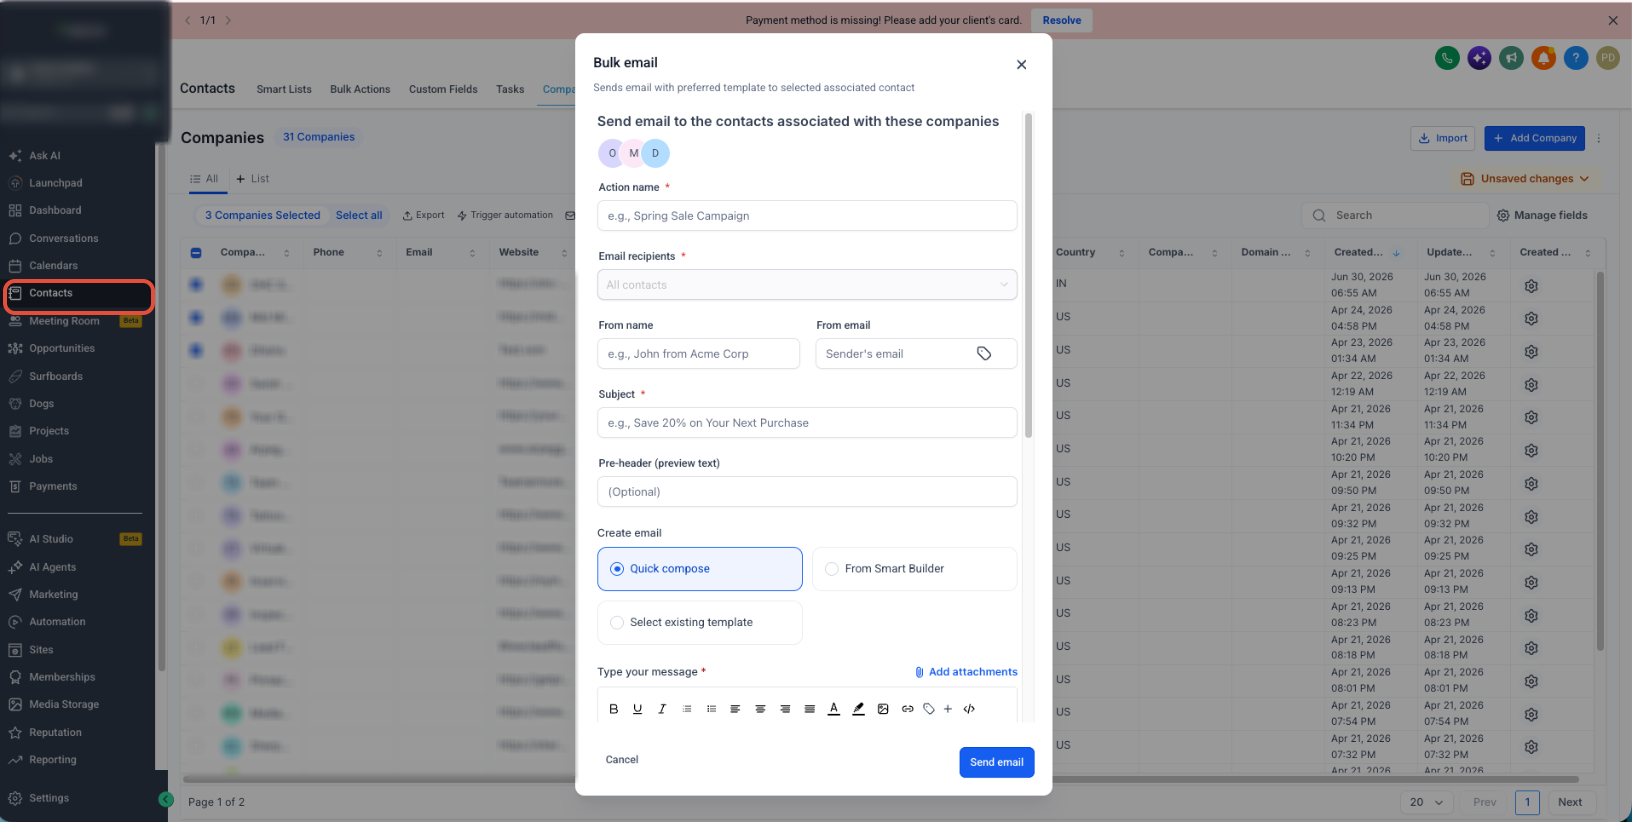
- Enter an Action name.
- For a Custom Object, select one or more Association label values. For Companies, the Contact association is selected automatically.
- Select Most recently associated contact, Earliest associated contact, or All associated contacts under Email recipients.
Step 4: Compose and Send the Email
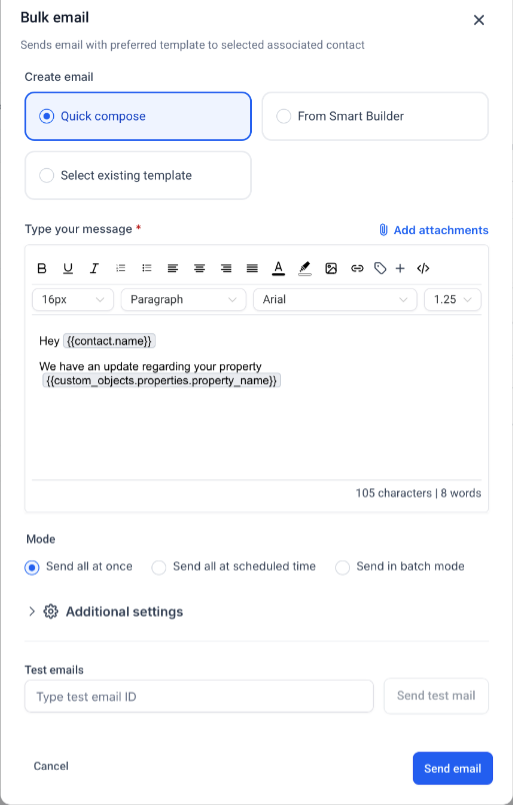
Use the standard Bulk Email Builder to create the message, personalize it with supported source-record fields, test it, and choose when it should be delivered.
- Enter the required sender information, subject, and optional pre-header.
- Choose Quick Compose, From Smart Builder, or Select existing template.
- Create the email and insert Contact, Company, or Custom Object merge fields when needed.
- Add attachments and send a test email when needed.
- Open Additional settings if you need options such as click tracking or UTM tracking.
- Choose Send all at once, Send all at scheduled time, or Send in batch mode.
- Review the configuration, complete any required consent acknowledgment, and click Send email.
Step 5: Track Results
Bulk email statistics show which recipients were processed successfully and where delivery or engagement issues occurred.
Open the applicable send under Contacts → Bulk Actions to review metrics such as Accepted, Delivered, Opened, Clicked, Replied, Unsubscribed, Complained, Bounced, Failed, and Skipped.
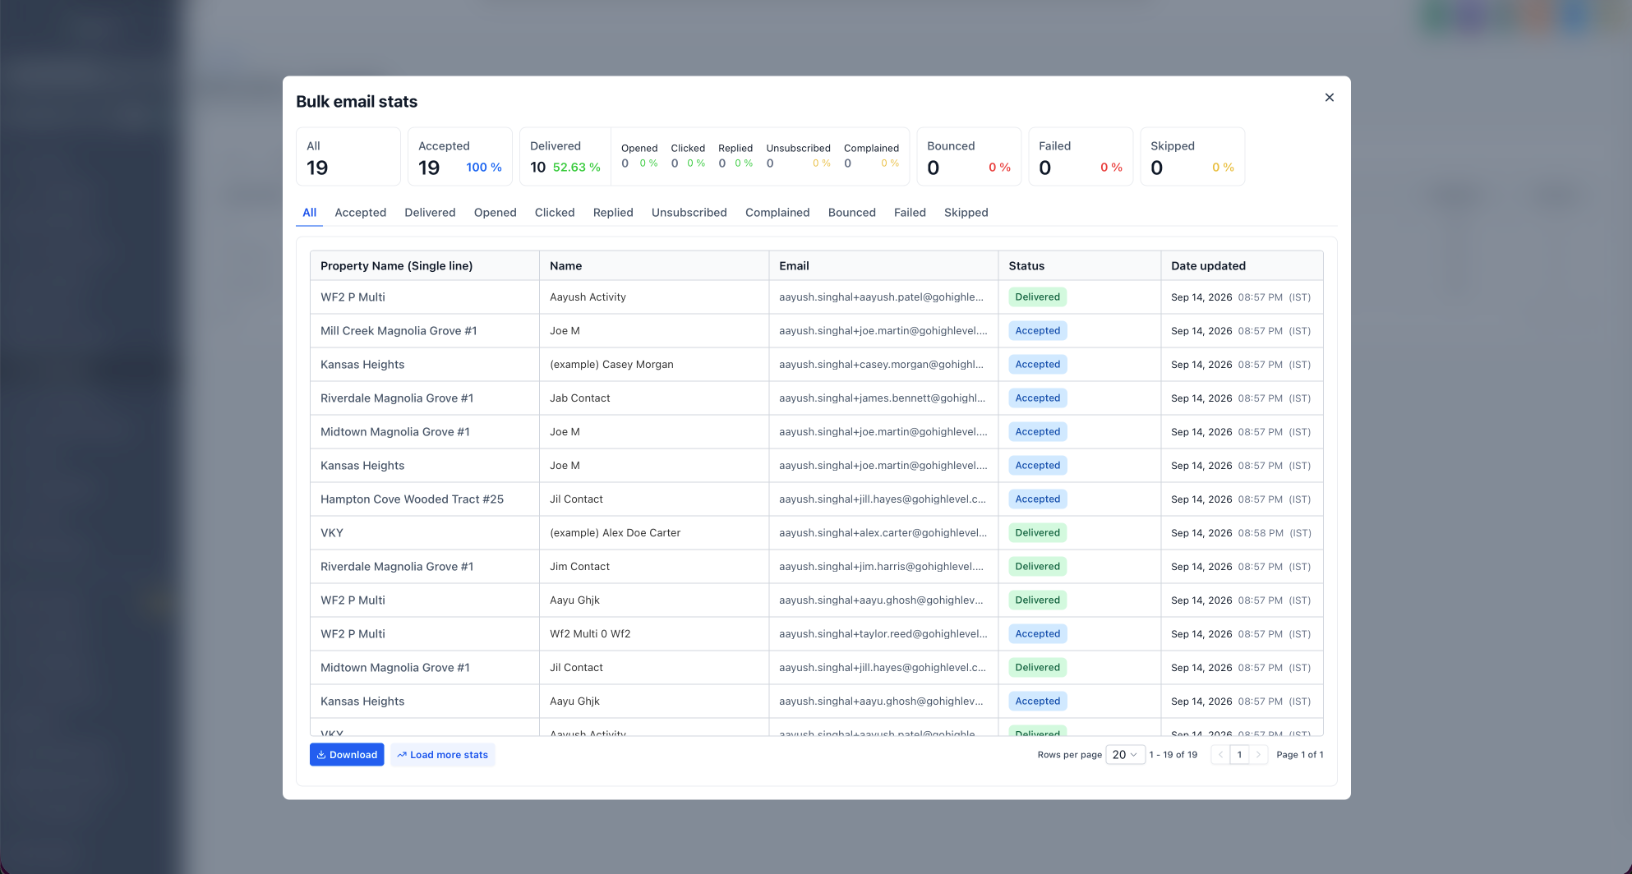
For broader reporting, use Load More Stats from the bulk action or go to Marketing → Emails → Statistics and select Bulk Action Campaigns from the source filter.
Common Use Cases
This feature is most useful when your audience is naturally organized around Companies or business-specific Custom Object records.
- Real Estate: Select Property records and email Contacts associated as Potential Buyers.
- Insurance: Select Policies approaching renewal and email associated Policy Holders.
- B2B: Filter Companies by relevant criteria and email their associated Contacts.
- Pets or Veterinary: Select Pet records and email associated owners with reminders or updates.
- Smart List Segments: Build a Company or Custom Object Smart List, select its records, and email the associated Contacts directly.
Frequently Asked Questions
Need Help?
- Send email is missing: Confirm the Custom Object has an existing association with Contacts.
- Expected Contacts are missing: Review the selected association labels and recipient option, then confirm the Contacts have eligible email addresses.
- A Contact was skipped: Check email eligibility, permissions, consent settings, and other sending restrictions.
- Personalization is not displaying as expected: Confirm the selected merge field exists on the Contact, Company, or Custom Object record used for the send.
- Results are still processing: Review the applicable send under Contacts → Bulk Actions for the latest recipient-level status.