
Ecommerce Stores let businesses display products, accept payments, manage orders, and customize the shopping experience directly from a website. You can use Ask AI for guided onboarding or configure the Store manually using products and Store elements. This guide covers the core setup process, Store pages, checkout behavior, order fulfillment, and Store management.
Learn how to create an Ecommerce Store, add products, use Ask AI for guided setup, customize the five Store pages, understand the current checkout experience, manage orders, and delete a Store when needed.
What Is an Ecommerce Online Store?
An Ecommerce Online Store gives customers a storefront where they can browse products, review product details, manage a cart, complete checkout, and receive an order confirmation.
Store owners can configure products under Payments → Products, customize Store pages inside the Website Builder, connect a payment provider, manage orders and transactions, and fulfill purchases from the same sub-account.
Key Benefits of an Ecommerce Store
Ecommerce Stores connect product management, checkout, payments, and order processing into one customer journey while giving businesses control over how their storefront looks and operates.
- Centralized Product Management: Create products, pricing, variants, descriptions, images, and videos under Payments.
- Customizable Storefront: Style Store pages and Store elements to match the website and brand.
- Guided Setup: Use Ask AI to work through supported Store onboarding tasks.
- Flexible Checkout: Collect required customer information, apply eligible coupons, offer available fulfillment options, and accept payment.
- Order Management: Review orders, transactions, refunds, and fulfillment details from Payments.
- Automated Customer Journey: Connect Store purchases to supported receipts, payment events, and order-related automation.
How To Set Up an Ecommerce Store
A complete Store requires products, Store pages, a domain, and a connected payment provider. Ask AI can guide supported onboarding tasks, while some account-level setup must still be completed manually.
Set Up Your First Store With Ask AI
Ask AI uses your Store setup progress to recommend the next supported task when the account does not already have a Store.
- From the Sub-Account view, select Sites.
- Select Stores in the top navigation.
- Click Complete Setup in the Store setup banner.
- Select the setup task you want to complete, or work through the full Store setup.
- Answer the questions Ask AI presents.
- Review confirmation requests before Ask AI creates or changes Store data.
- Continue through the recommended tasks until the supported setup steps are complete.
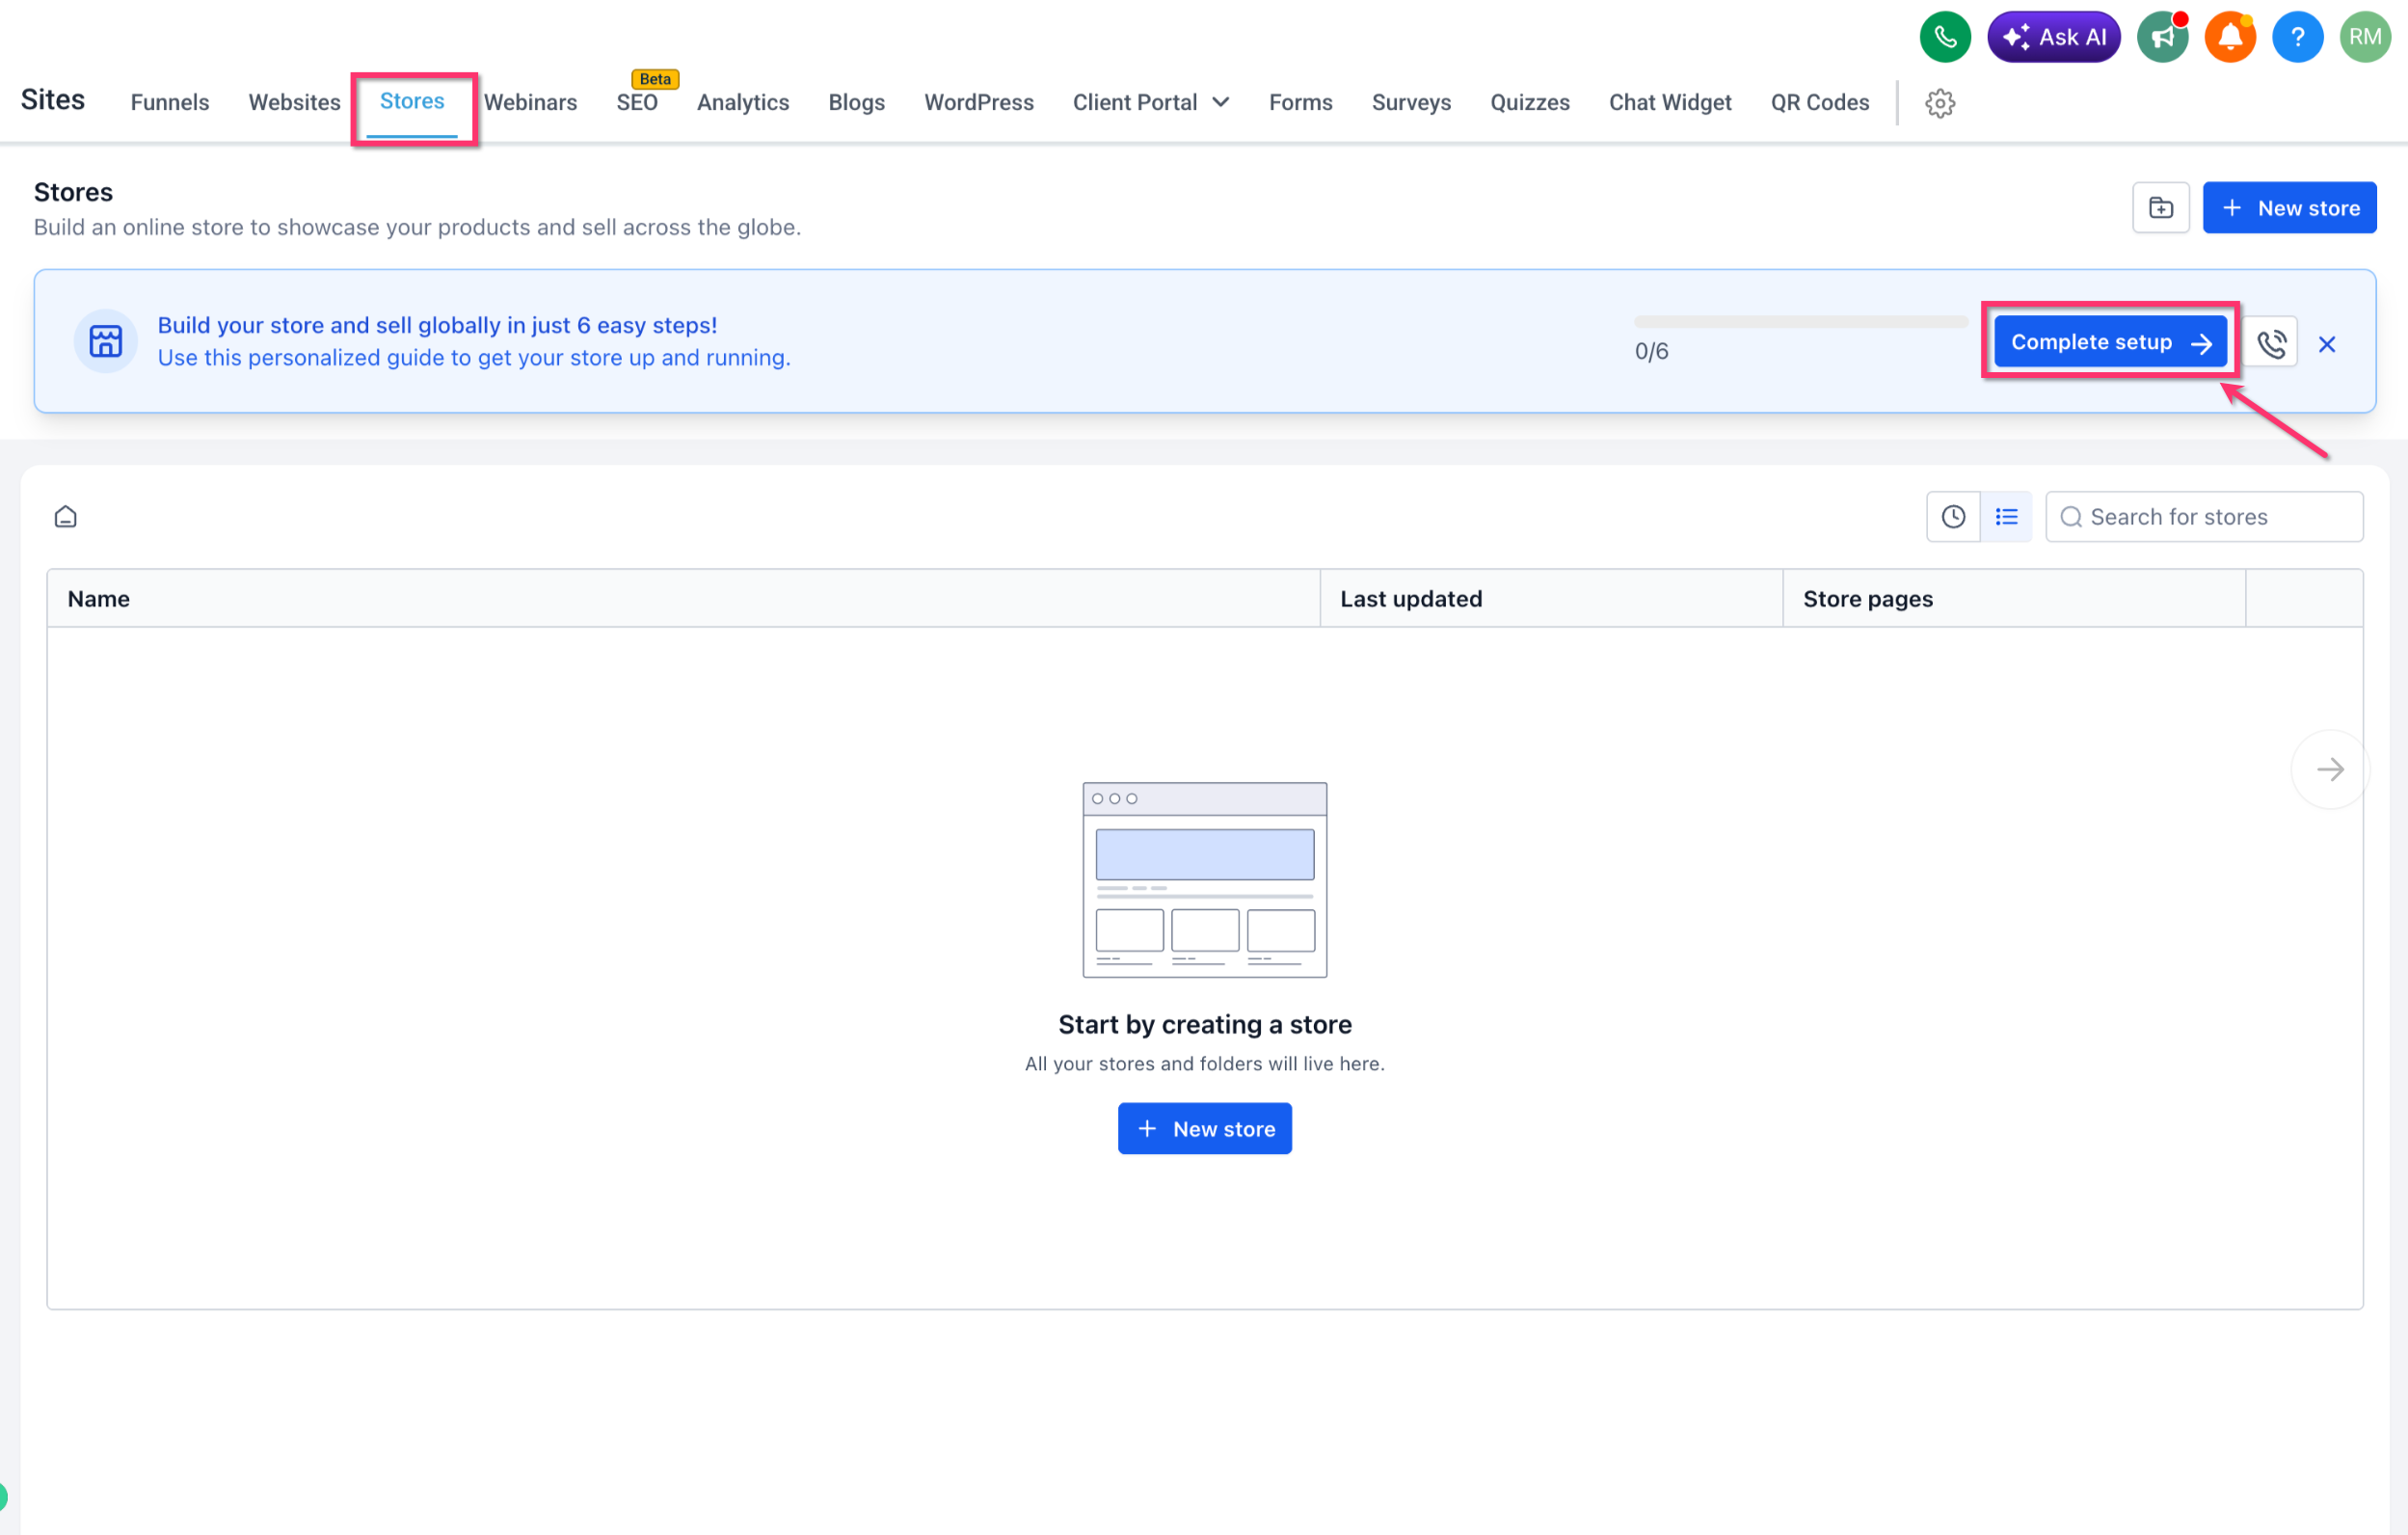
Continue later: You do not need to complete Store onboarding in one session. Return to Sites → Stores → Complete Setup to continue from the remaining tasks.
Complete Domain and Payment Setup
Domain and payment setup can require manual actions outside the Ask AI workflow, so confirm these items before publishing the Store.
- Existing Domain: Ask AI can assist with connecting an existing account domain to the Store.
- New Domain: Setting up a new domain remains a manual step.
- Payment Provider: Connecting a payment provider is completed manually. Ask AI does not collect or configure payment-provider credentials.
Create and Configure Store Products
Product configuration controls what customers see in the Store and gives you the information needed for pricing, variants, media, and product presentation.
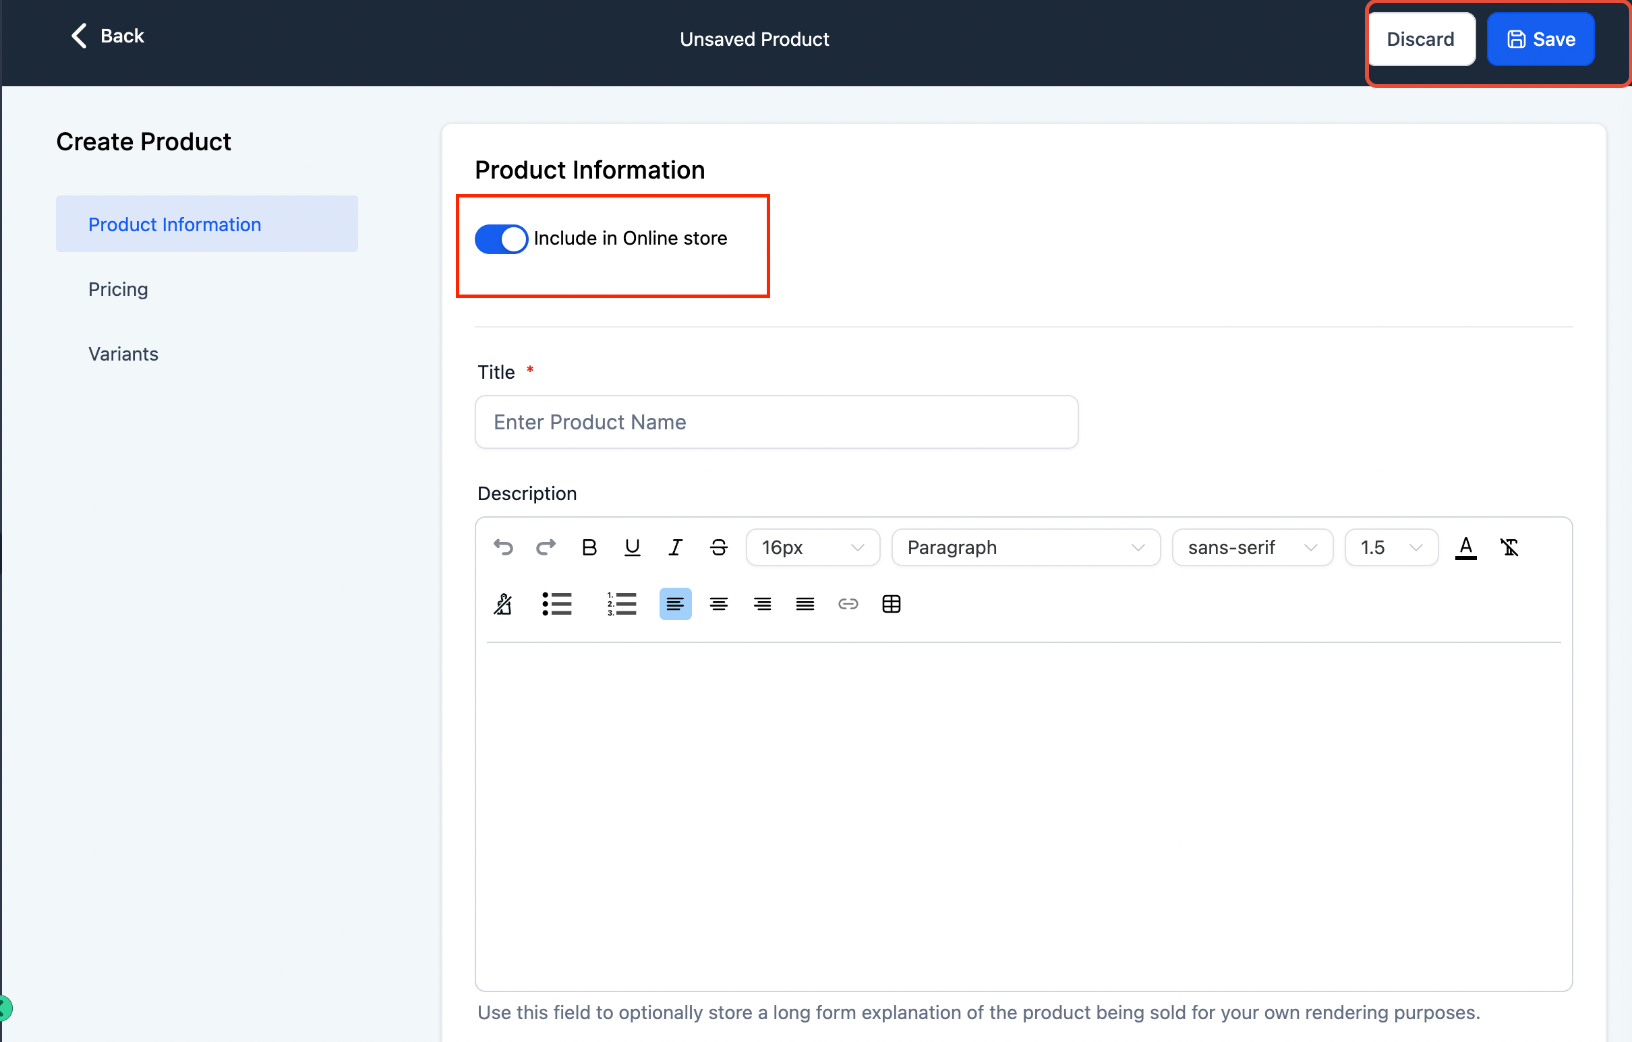
- Go to Payments → Products.
- Create or open a product.
- Configure the product name, description, media, pricing, and variants as needed.
- Enable Include in Online Store for products that should be available in the Store.
- Save the product.
Add the Store to a Website
Adding the first Store element or pre-built Store section to a website starts Store creation and generates the required Store pages.
- Open the required website in the Website Builder.
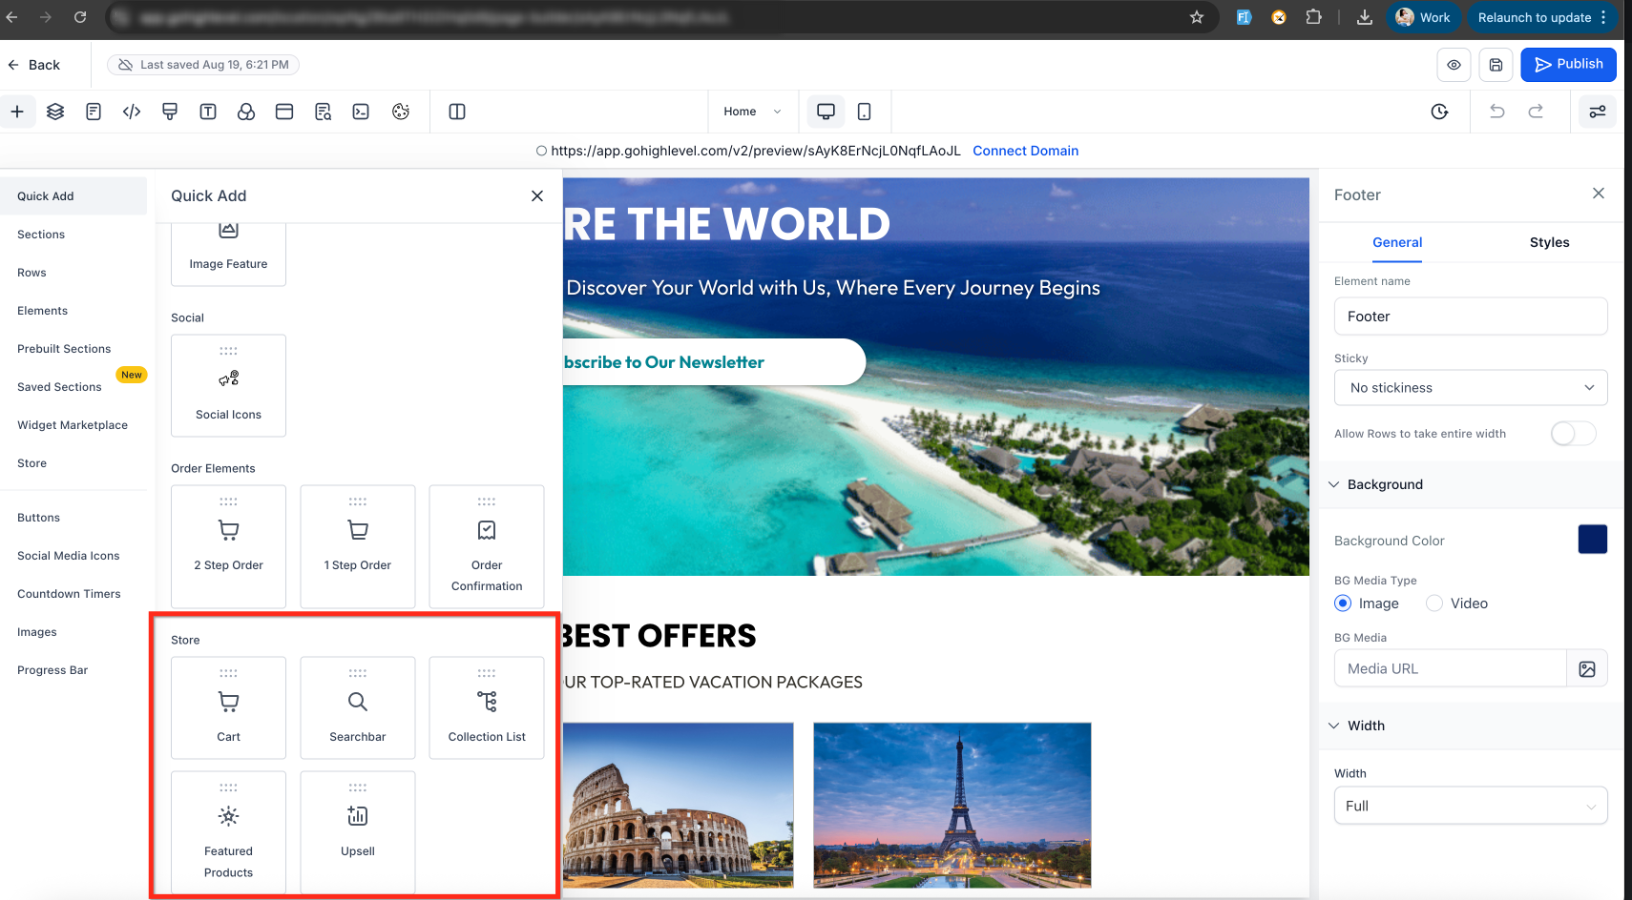
- Click Add element.
- Drag a Store element, such as Cart, Collections List, or Featured Products, onto the page. You can also use a pre-built Store section.
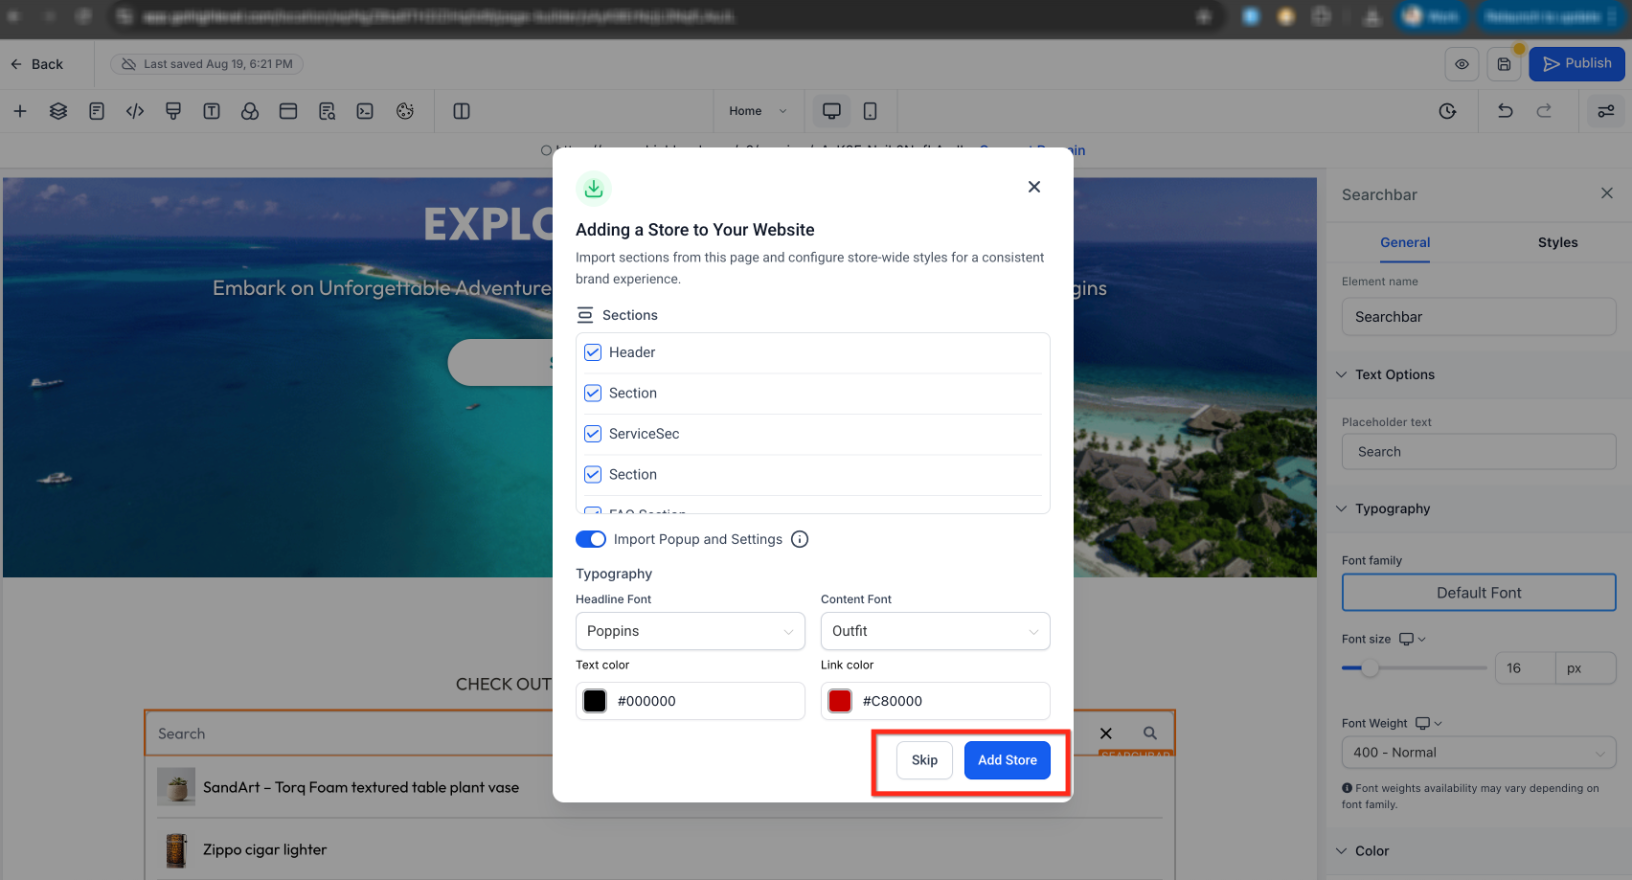
- When the import modal appears, choose:
- Add Store: Creates the Store and imports supported design settings from the current page.
- Skip: Creates the Store without importing the current page's theme settings.
- Continue customizing the generated Store pages and Store elements.
Store Pages and Checkout Experience
The platform creates five Store pages that work together to move customers from product discovery through checkout and order confirmation. These pages can be customized with additional website elements and Store-specific settings.
Products List Page: Displays the products or services available for customers to browse.
Product Details Page: Displays detailed product information, media, pricing, and available variants to help customers make a purchase decision.
Cart Page: Gives customers a summary of the items they intend to purchase and lets them adjust the cart before checkout.
Checkout Page: This allows customers to enter the required contact and address information, select available fulfillment options, apply eligible coupon codes, and complete payment. When Pickup in Store is available and selected, the platform hides the Shipping Details section and uses the selected pickup location as the shipping address.
Thank You Page: Displays an order confirmation after the purchase is completed successfully.

Store elements can be customized using their available General and Advanced settings so the Store matches the rest of the website.
Manage Orders and Fulfillment
Order and payment records provide the information needed to review purchases, process supported refunds, and track fulfillment after a customer completes checkout.
- Go to Payments → Orders to review Ecommerce Store orders.
- Go to Payments → Transactions to review payment activity.
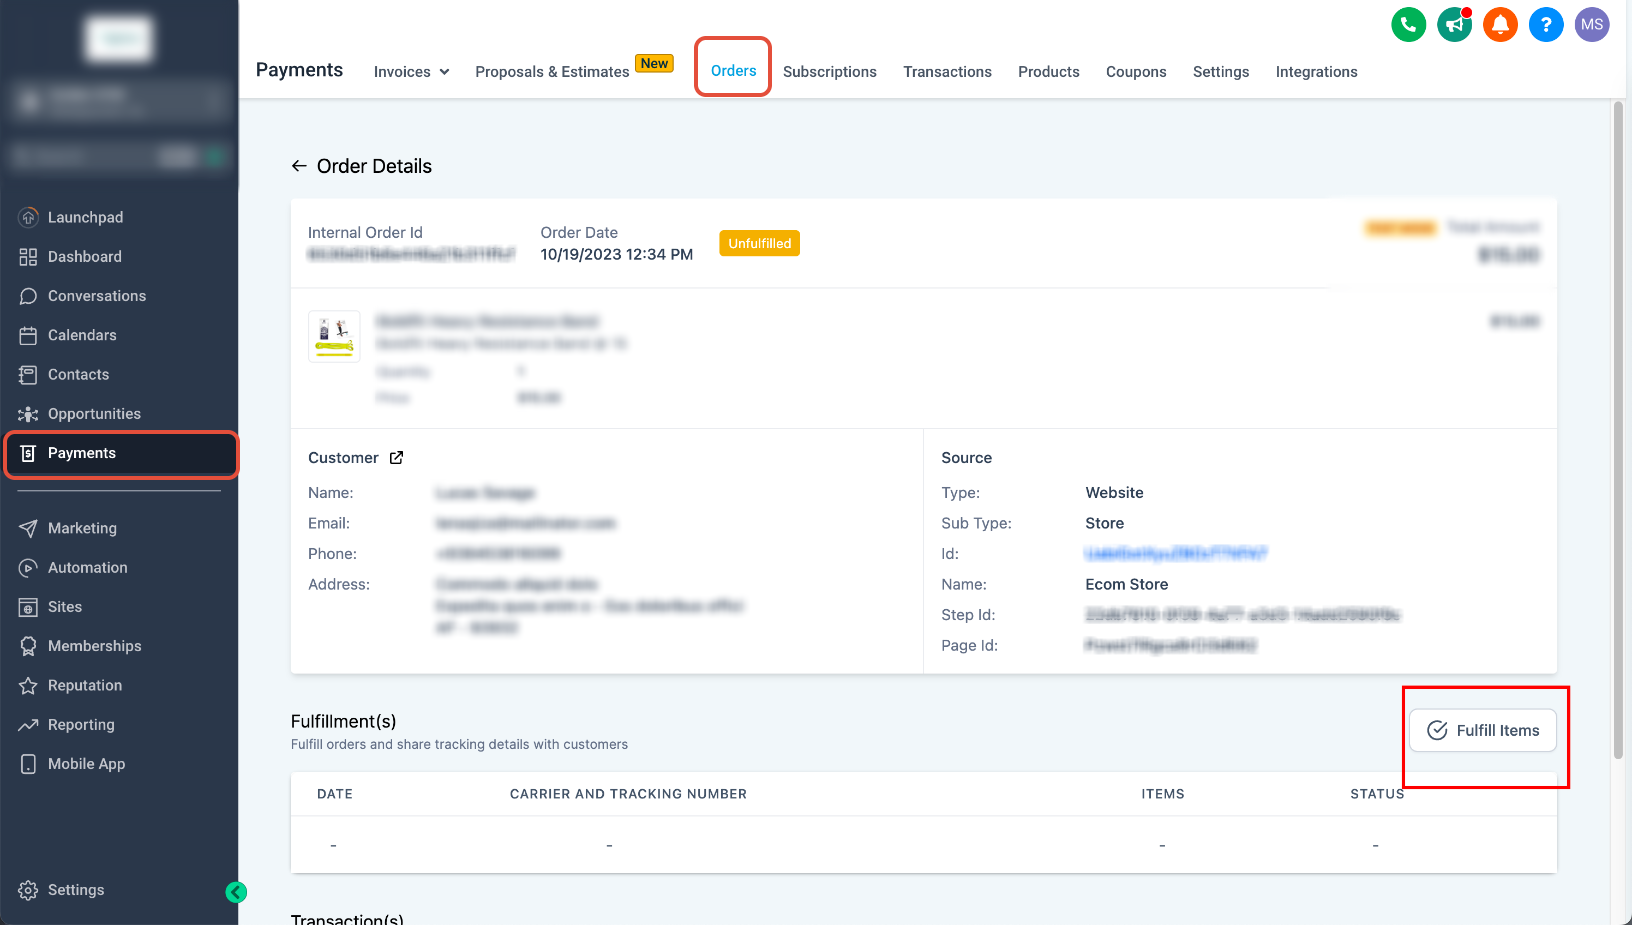
- Orders initially requiring fulfillment can be managed from the Order Details page.
- When fulfilling applicable orders, add shipment details such as the tracking number, provider, and tracking URL.
- Fulfillment details remain available on the order after the order is marked fulfilled.
Delete a Store
Store deletion removes the pages belonging to that Store without deleting unrelated website pages, helping protect the rest of the website.
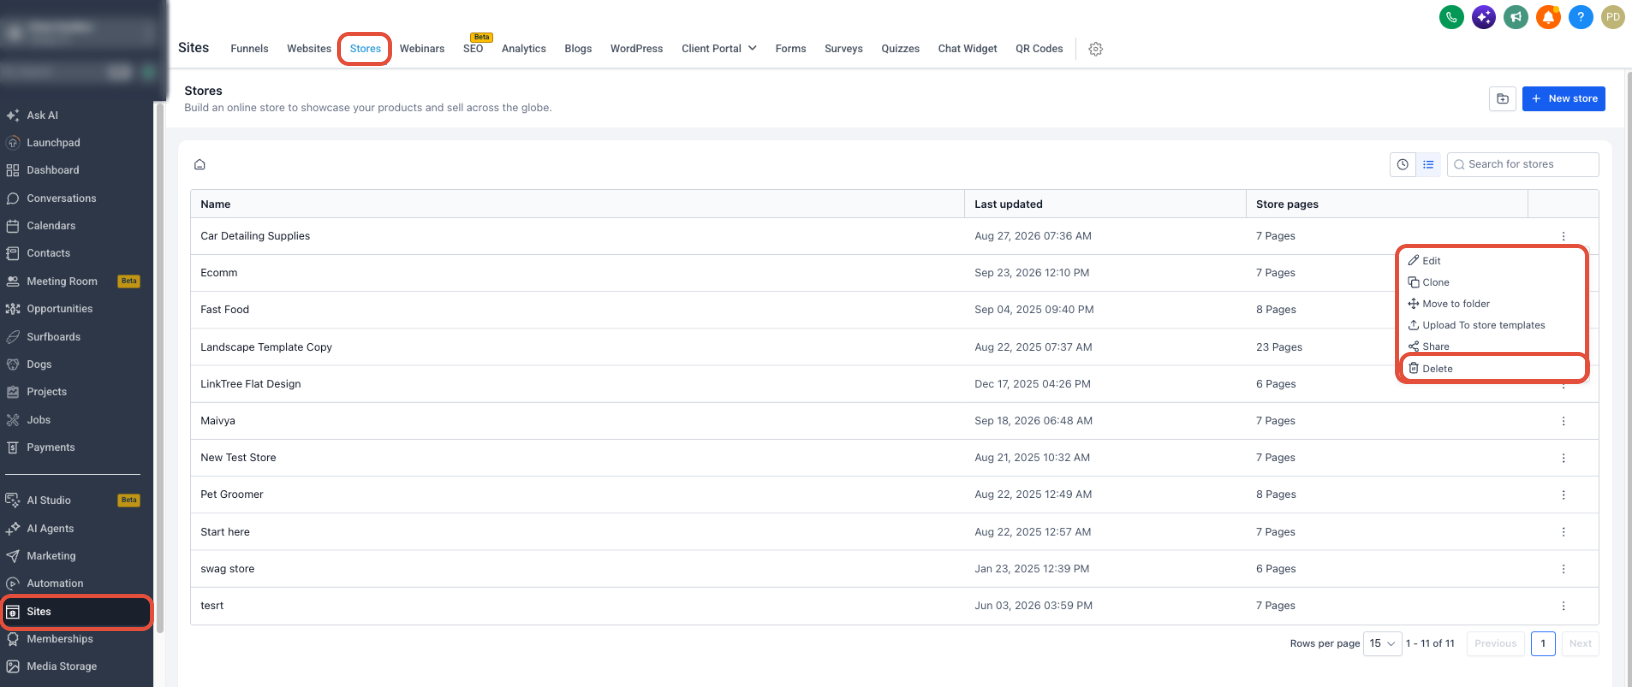
- Go to Sites → Stores.
- Open the Store's three-dot menu, or open Store Settings.
- Select Delete Store.
- Type DELETE in the confirmation modal.
- Click Delete.
Important: Store-related pages such as Products List, Product Details, Cart, Checkout, and Thank You are removed. Other website pages remain unchanged. Manually deleting a Store page can also remove the Store pages associated with that Store.
Frequently Asked Questions
Need Help?
- A product is missing from the Store: Open Payments → Products and confirm Include in Online Store is enabled.
- Checkout is not working as expected: Confirm the payment provider, domain, Store pages, and applicable fulfillment settings are configured.
- Pickup in Store is missing: Confirm at least one eligible pickup location is configured and enabled.
- An order needs shipment information: Open the order under Payments → Orders and add the applicable fulfillment and tracking details.
- Store setup is incomplete: Return to Sites → Stores → Complete Setup to continue supported onboarding tasks.