
Create and manage affiliate campaigns using Affiliate Manager. Configure campaign sources, customize commissions, assign affiliates, and manage tracking settings from one place.
This guide walks you through creating an affiliate campaign, setting up commission structures, and publishing your campaign.
TABLE OF CONTENTS
- Step-by-Step Guide to Creating an Affiliate Campaign
- Step 1: Create a New Affiliate Campaign
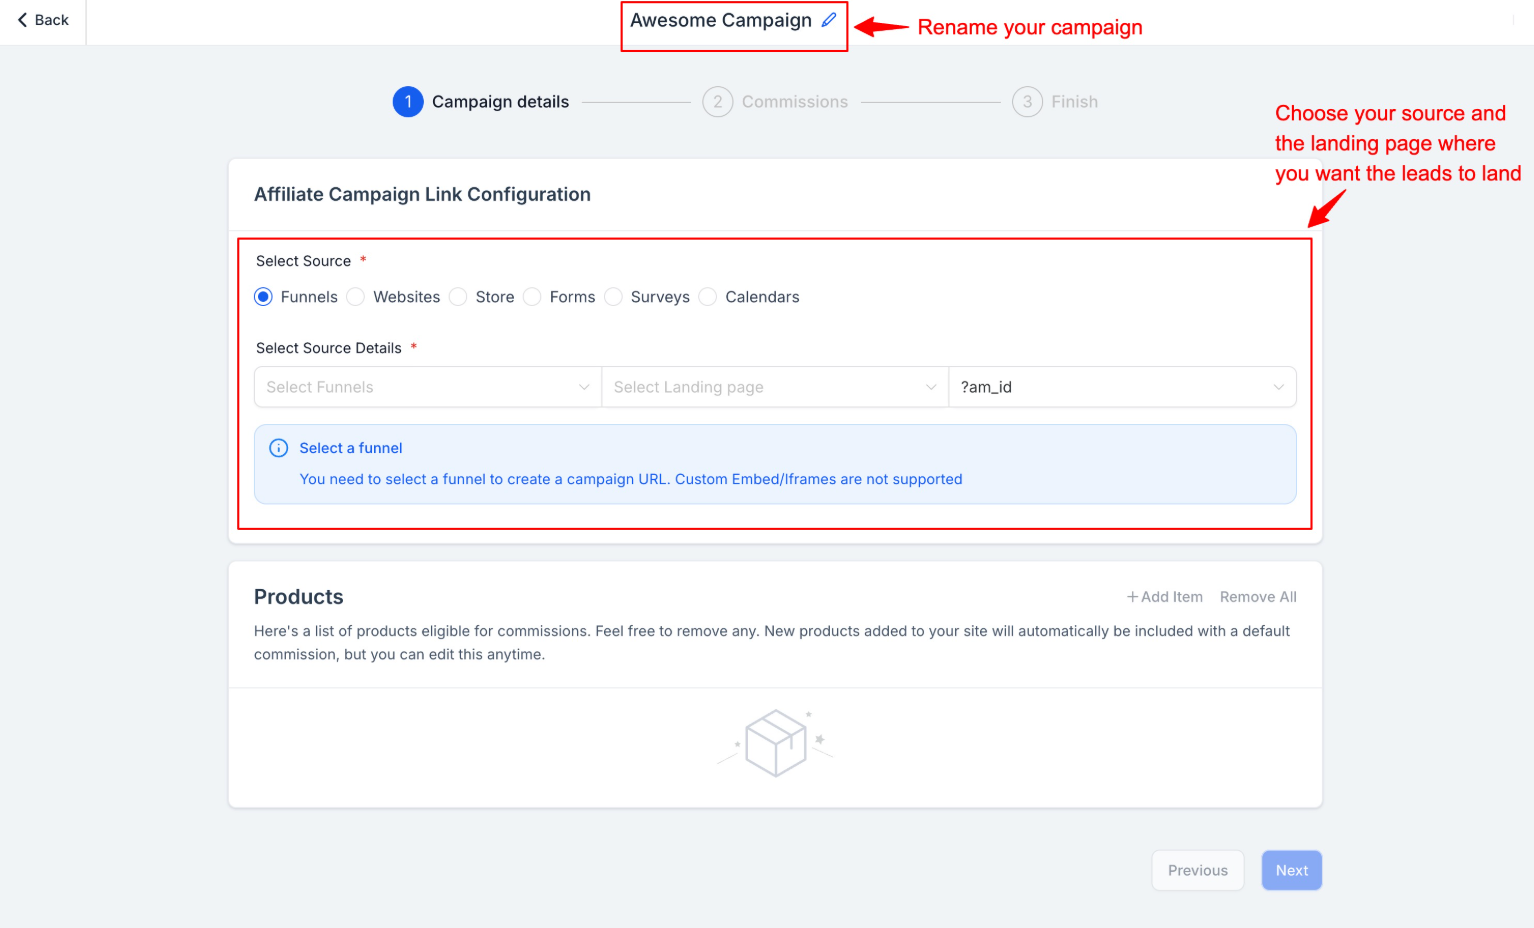
- Step 2: Choose Your Campaign Source
- Step 3: Configure Source Details
- Step 4: Review Your Product List
- Step 5: Set the Default Commission
- Step 6: Customize Product-Level Commissions (Optional)
- Step 7: Enable Multi-Tier Commissions
- Step 8: Configure Tier-Specific Commissions
- Step 9: Add a Campaign Description (Optional)
- Step 10: Assign Affiliates Directly
- Step 11: Adjust Additional Settings
- Step 12: Publish or Save as Draft
- Changing the Source in an Existing Campaign
Step-by-Step Guide to Creating an Affiliate Campaign
Step 1: Create a New Affiliate Campaign
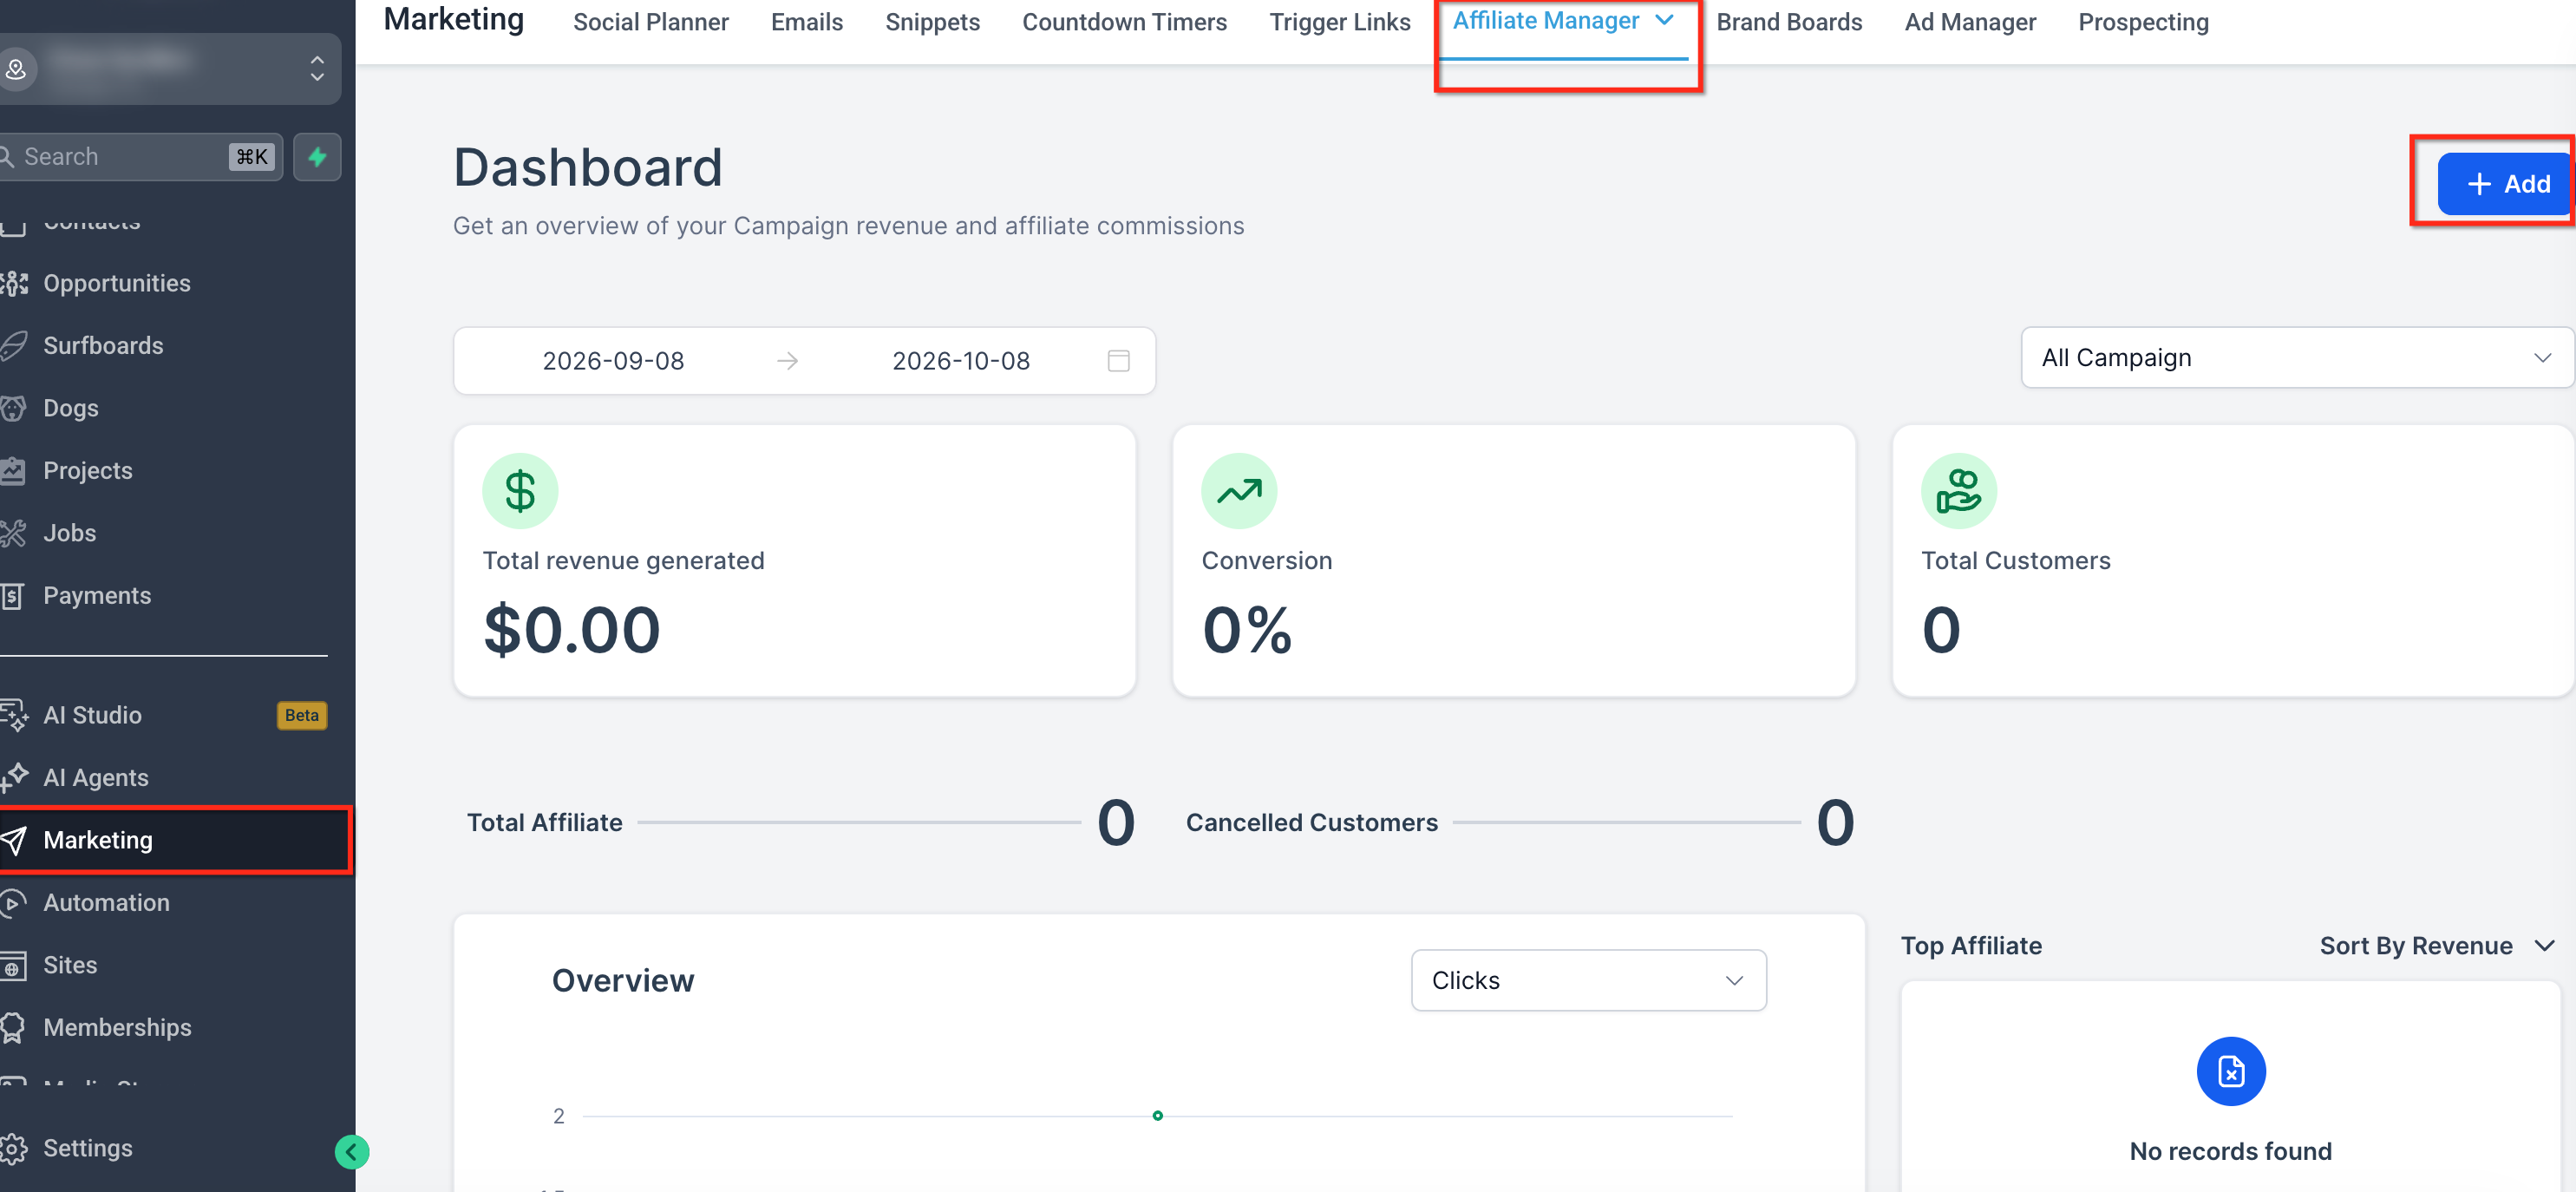
Navigate to Marketing > Affiliate Manager > Campaigns.
Click + Add to create a new campaign.
Step 2: Choose Your Campaign Source
Select the source for your affiliate campaign, such as a funnel, website, or store where your products are listed.
Step 3: Configure Source Details
Select the landing page where potential customers will arrive when they click an affiliate referral link.
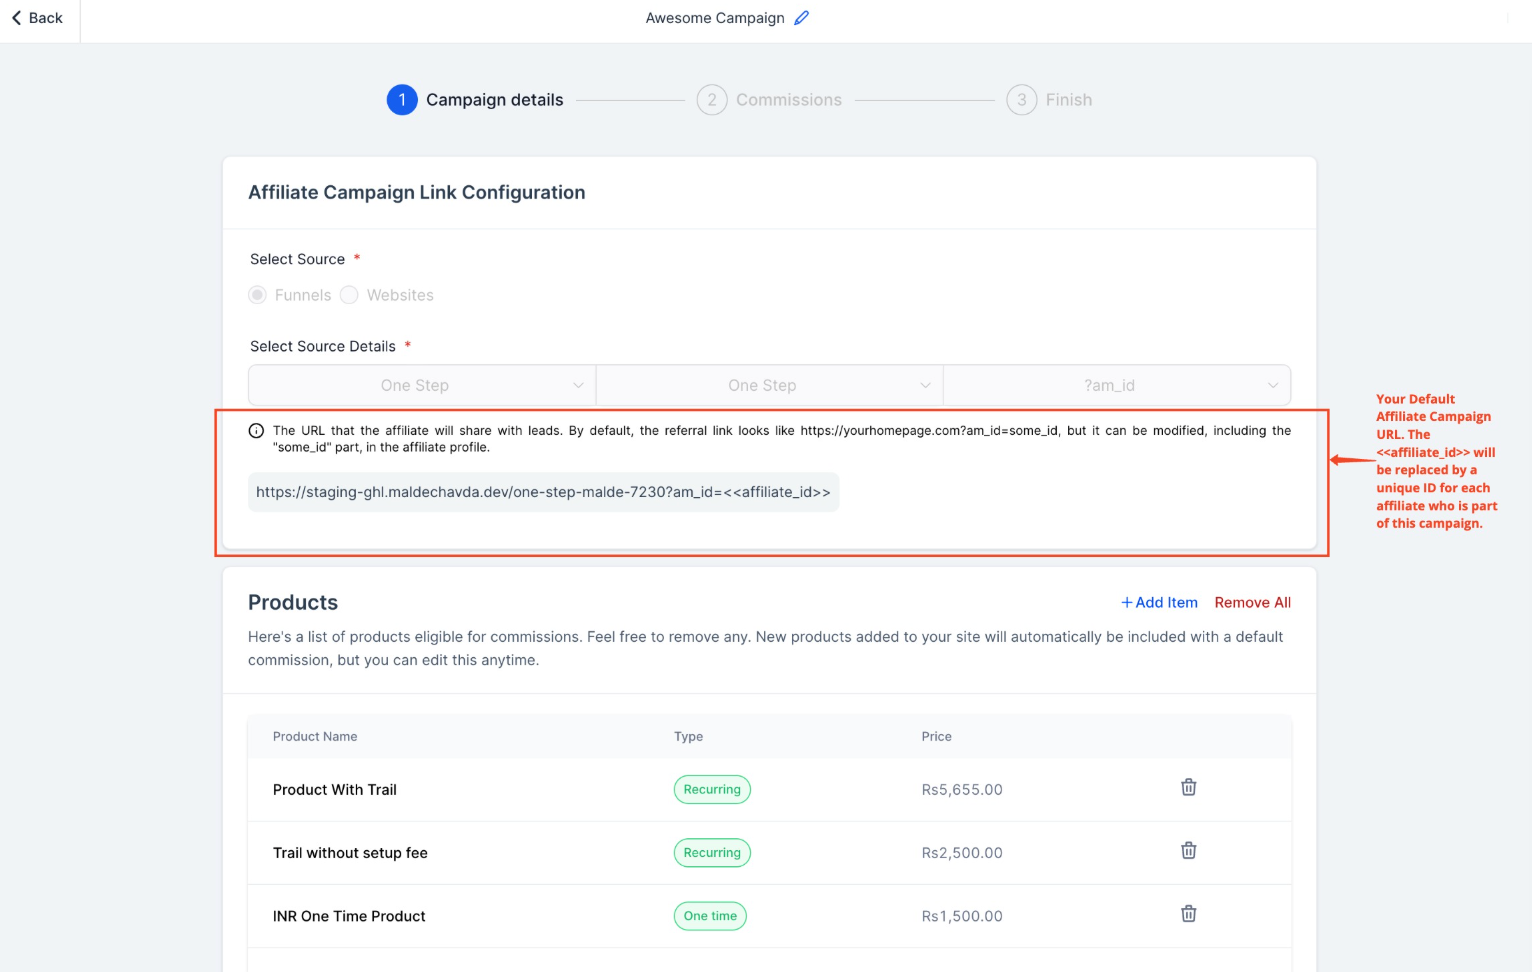
Once configured, the system generates a default campaign URL containing the <<affiliate_id>> placeholder. This placeholder is automatically replaced with each affiliate's unique ID.
Please Note:
Funnels, websites, and stores support product sales through affiliate campaigns.
You can also track leads and reward affiliates for generating leads through forms, surveys, and calendars.
Landing page selection determines where potential customers arrive. Affiliate tracking applies to the entire selected source, not only the landing page.
Step 4: Review Your Product List
Review the products associated with your selected campaign source.
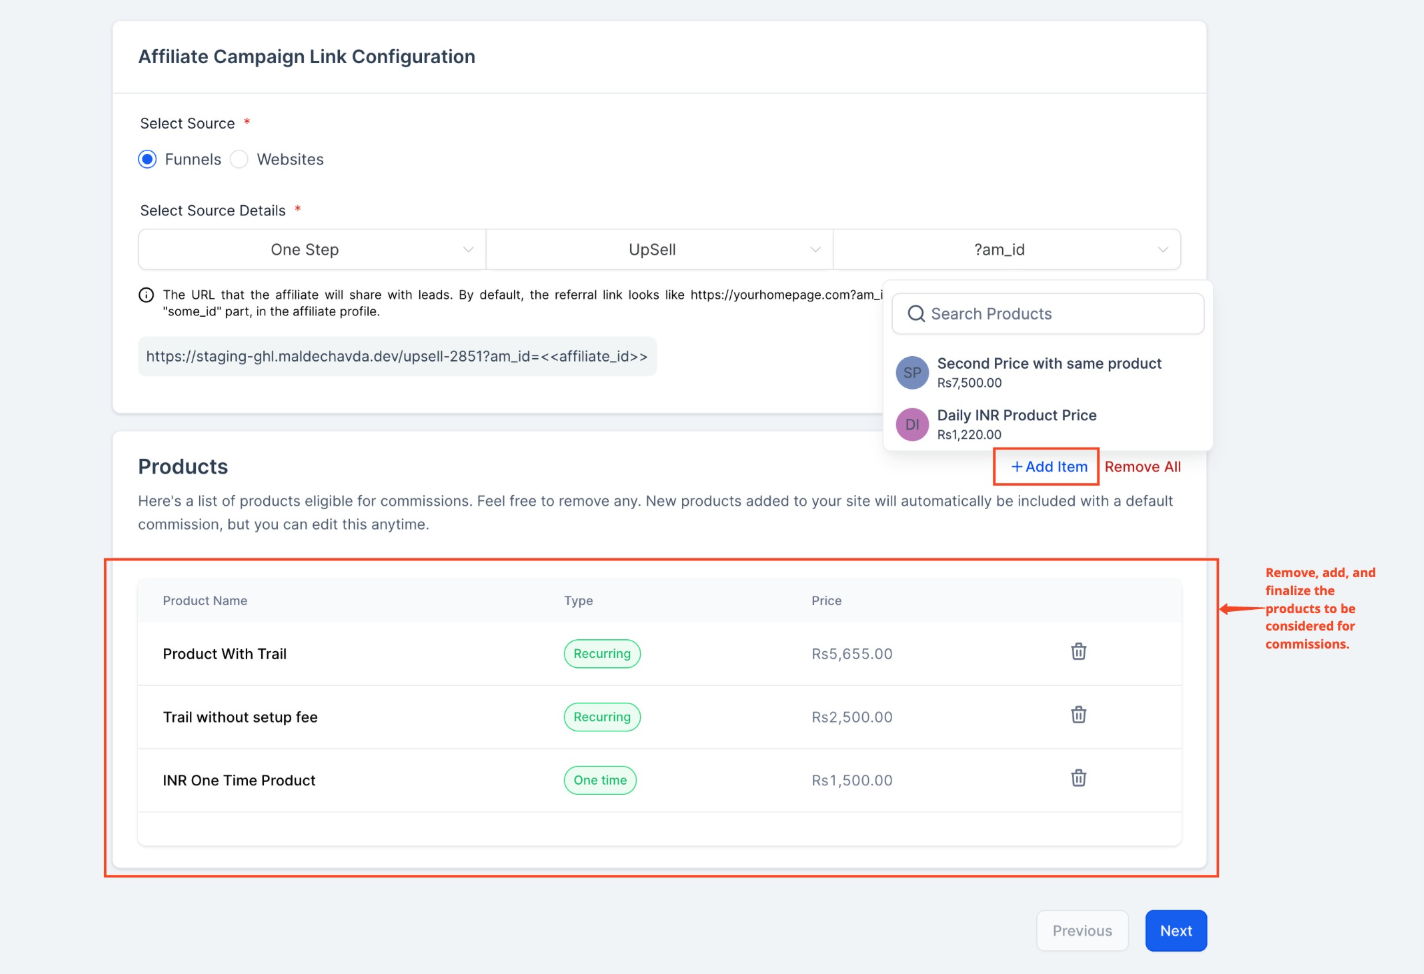
Add or remove products to ensure the campaign includes only the products eligible for affiliate commissions.
Step 5: Set the Default Commission
Configure the default commission for your affiliate campaign.
Choose one of the following commission types:
Flat Fee: Assign a fixed commission amount.
Percentage: Calculate the commission as a percentage of the product price.
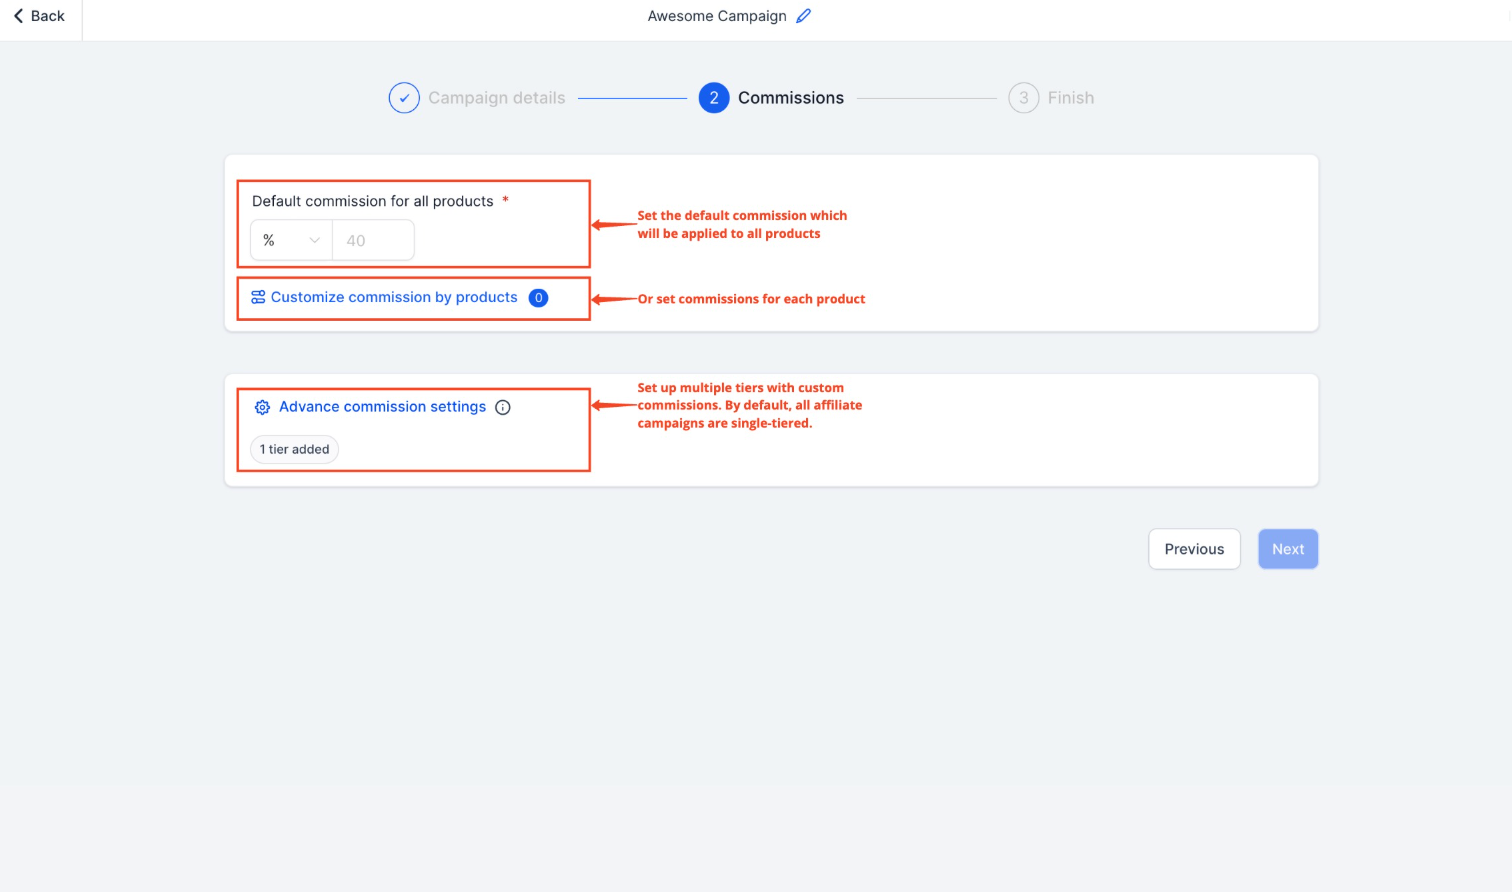
The default commission applies unless you configure a different commission for a specific product.
Step 6: Customize Product-Level Commissions (Optional)
Configure individual product commissions when you need different commission structures for specific products.
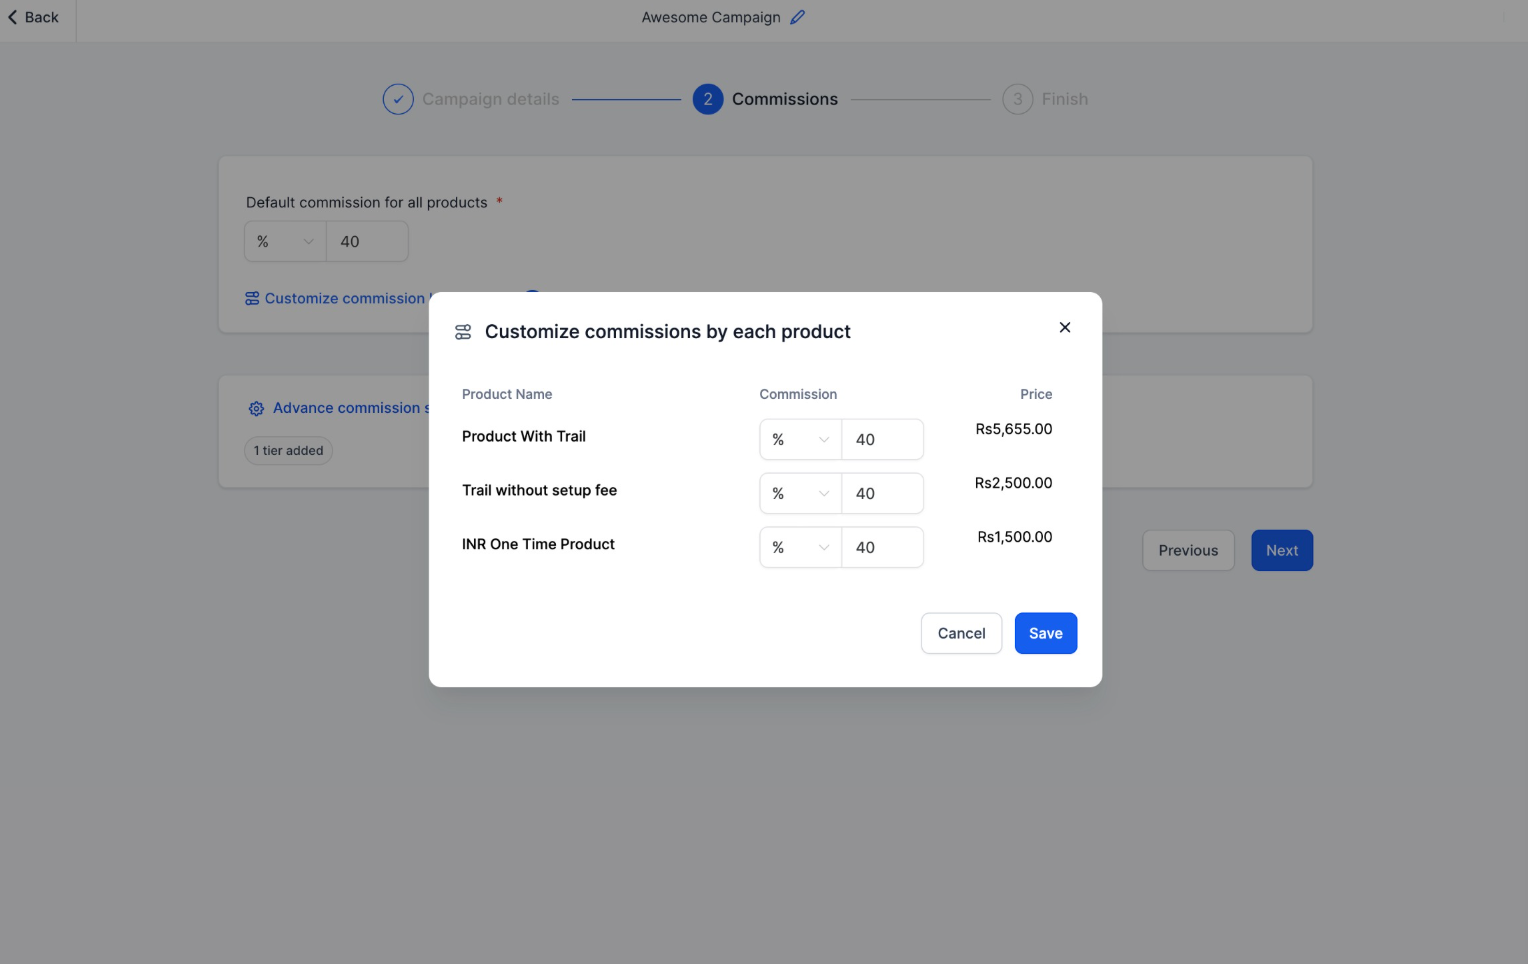
Product-level commissions allow you to customize affiliate rewards based on the products being promoted.
Step 7: Enable Multi-Tier Commissions
Open Advanced Commissions to configure multi-tier commissions.
Enable Multi-Tier Commissions to reward affiliates across multiple referral levels.
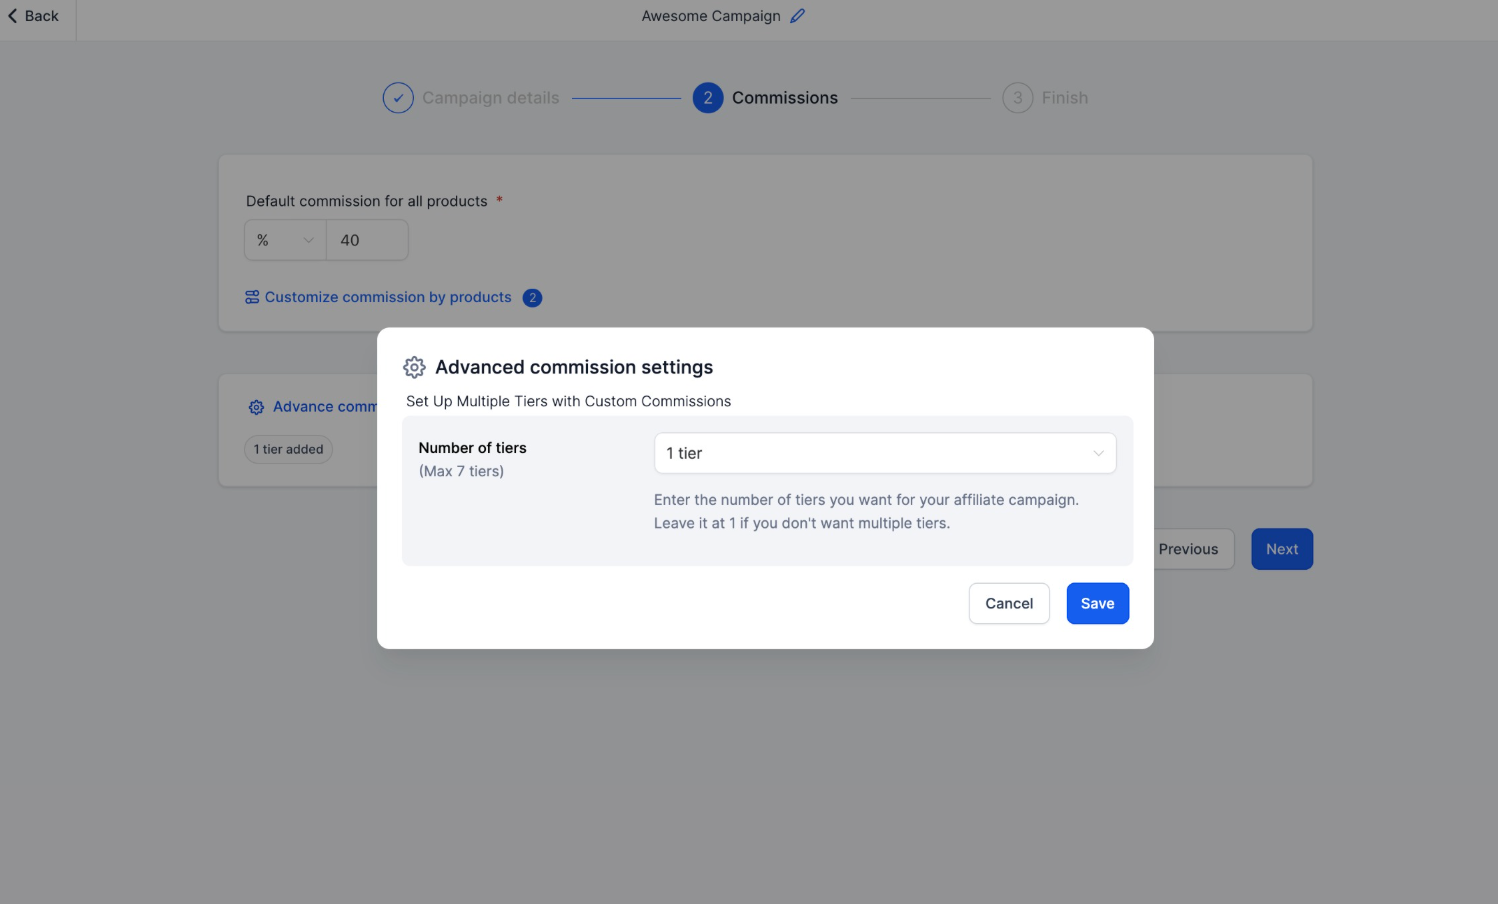
You can configure up to seven commission tiers within a single campaign.
Step 8: Configure Tier-Specific Commissions
Set the commission for each tier in your affiliate campaign.
You can apply the default commission or customize the commission for individual tiers.
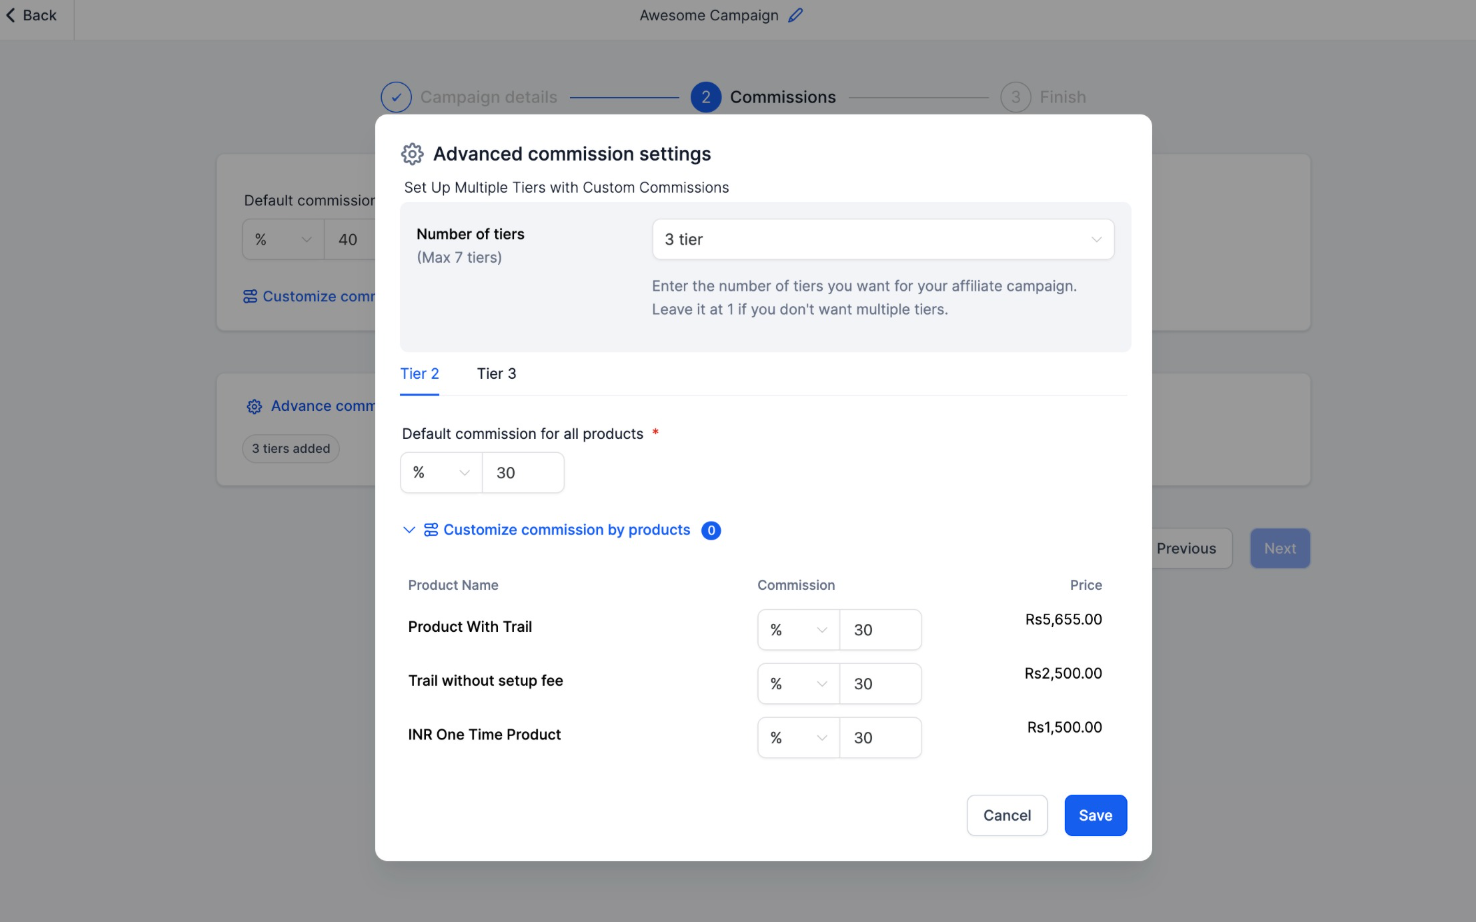
Review each tier's configuration before proceeding.
Step 9: Add a Campaign Description (Optional)
Enter a description explaining the purpose of your affiliate campaign.
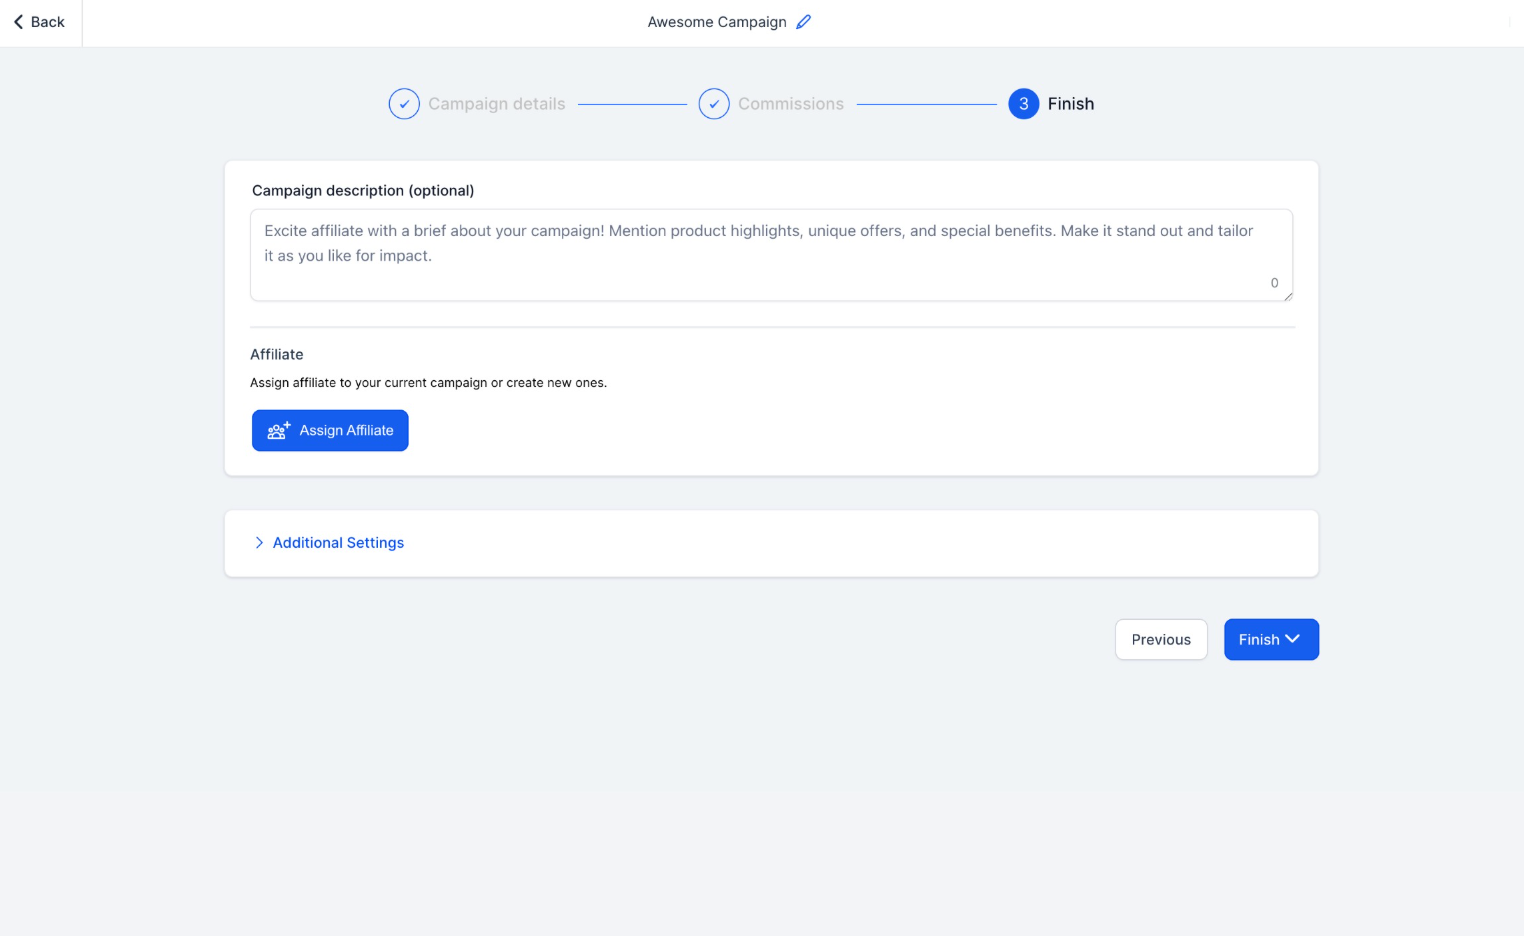
A clear description helps potential affiliates understand the campaign.
Step 10: Assign Affiliates Directly
Review the available affiliates and assign them to your campaign.
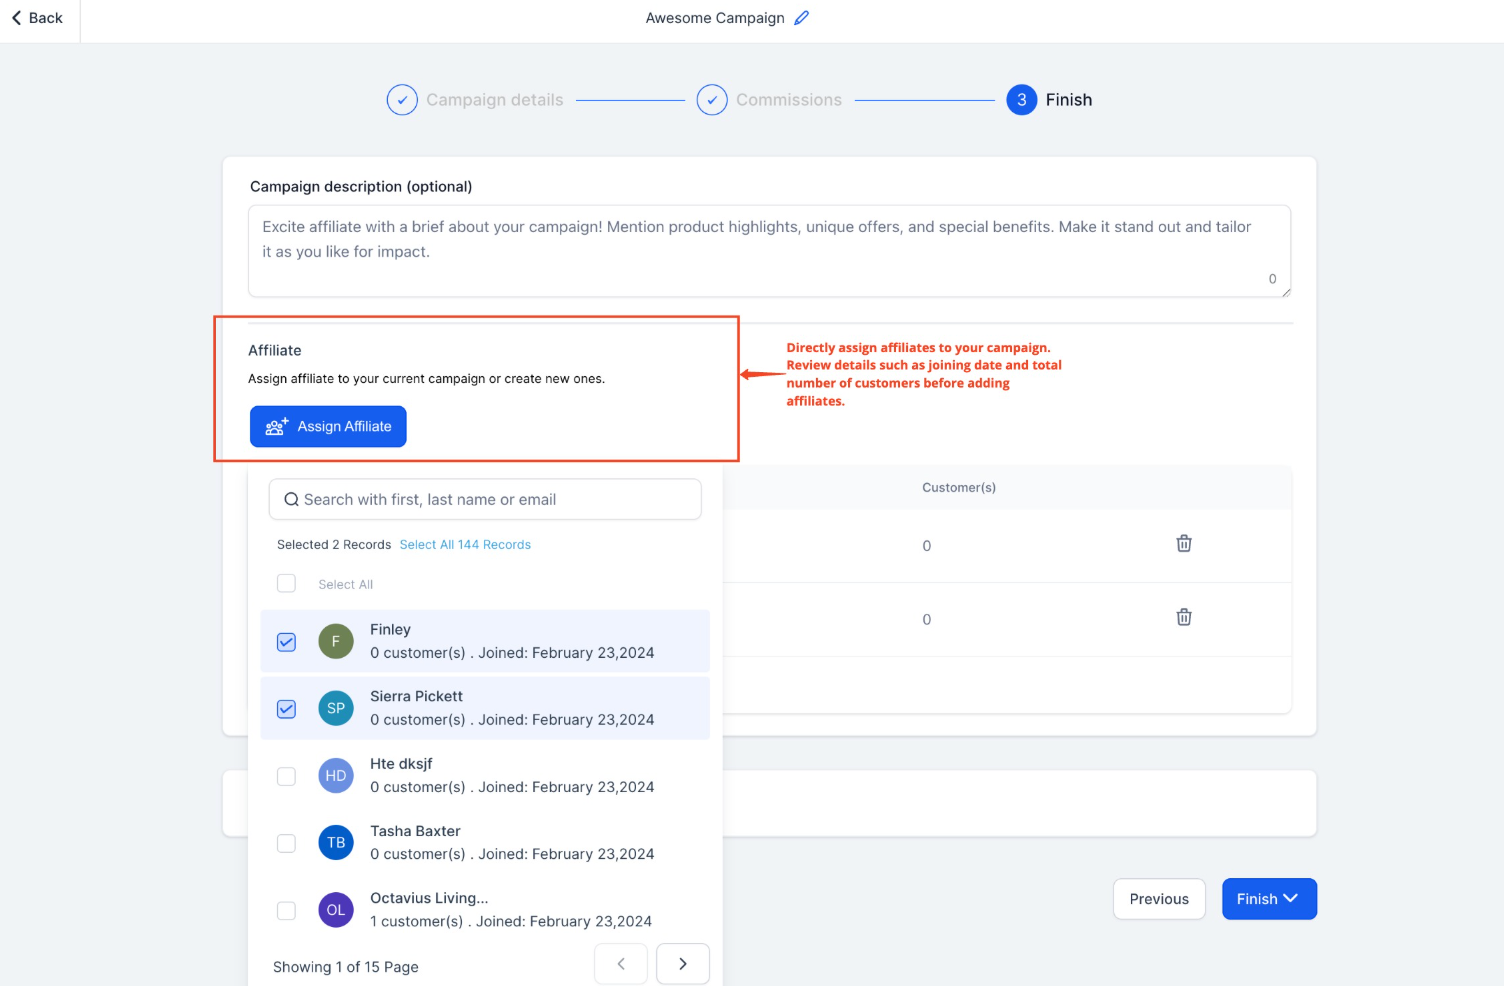
You can review affiliate information, including join dates and affiliate counts, before making assignments.
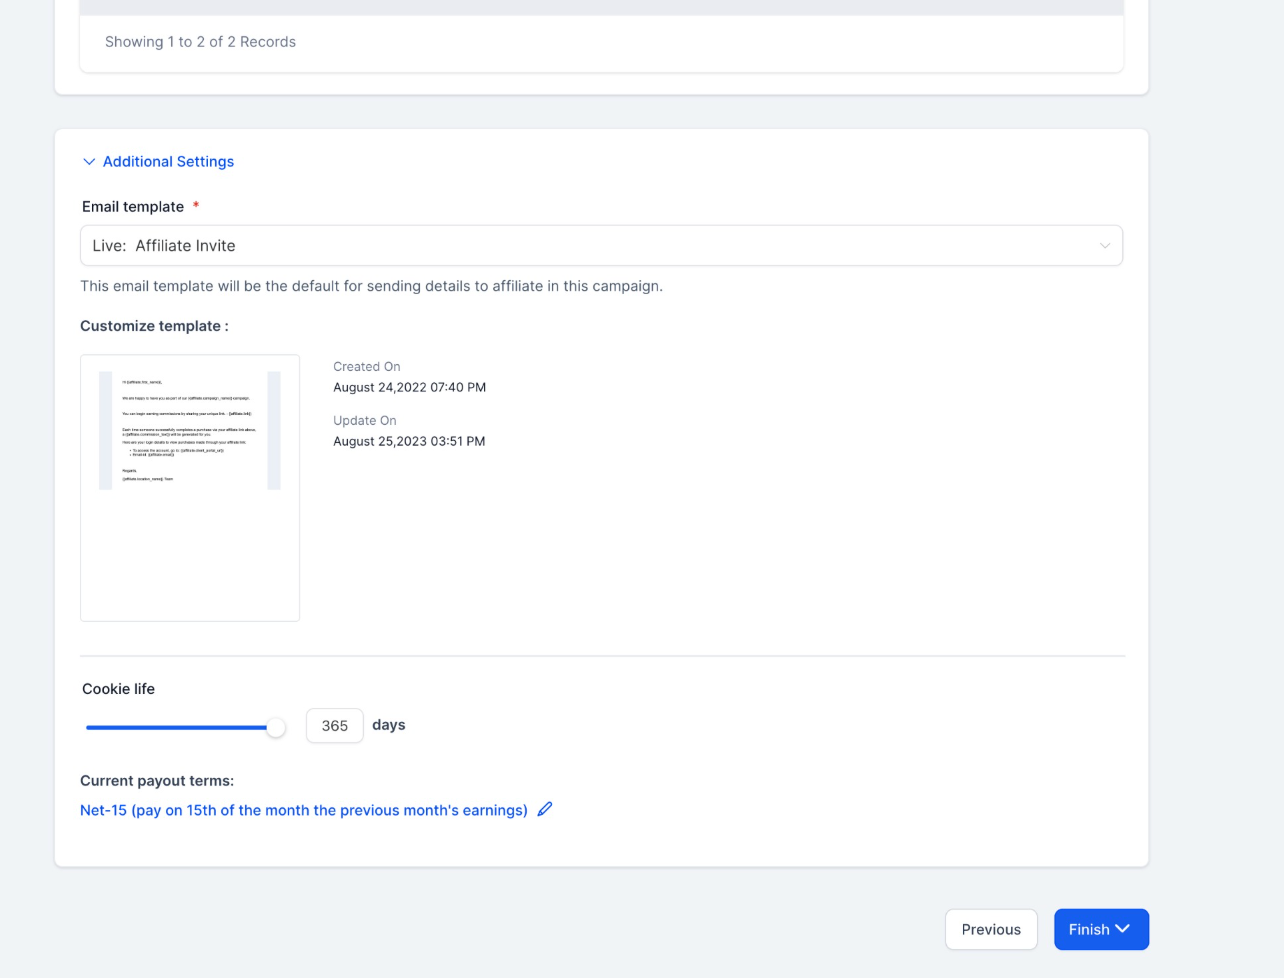
Step 11: Adjust Additional Settings
Customize your affiliate campaign using the available settings.
These settings include:
Email Templates: Configure email templates for affiliate onboarding.
Cookie Duration: Define the tracking duration for affiliate activity.
Payout Terms: Configure the campaign's payout terms.
Setup Fees: Choose whether setup fees are included in commission calculations.
Sub-Affiliate Signups: Enable sub-affiliate registration.
Auto-Enroll New Customers as Sub-Affiliates: Automatically enroll new customers as sub-affiliates when enabled.
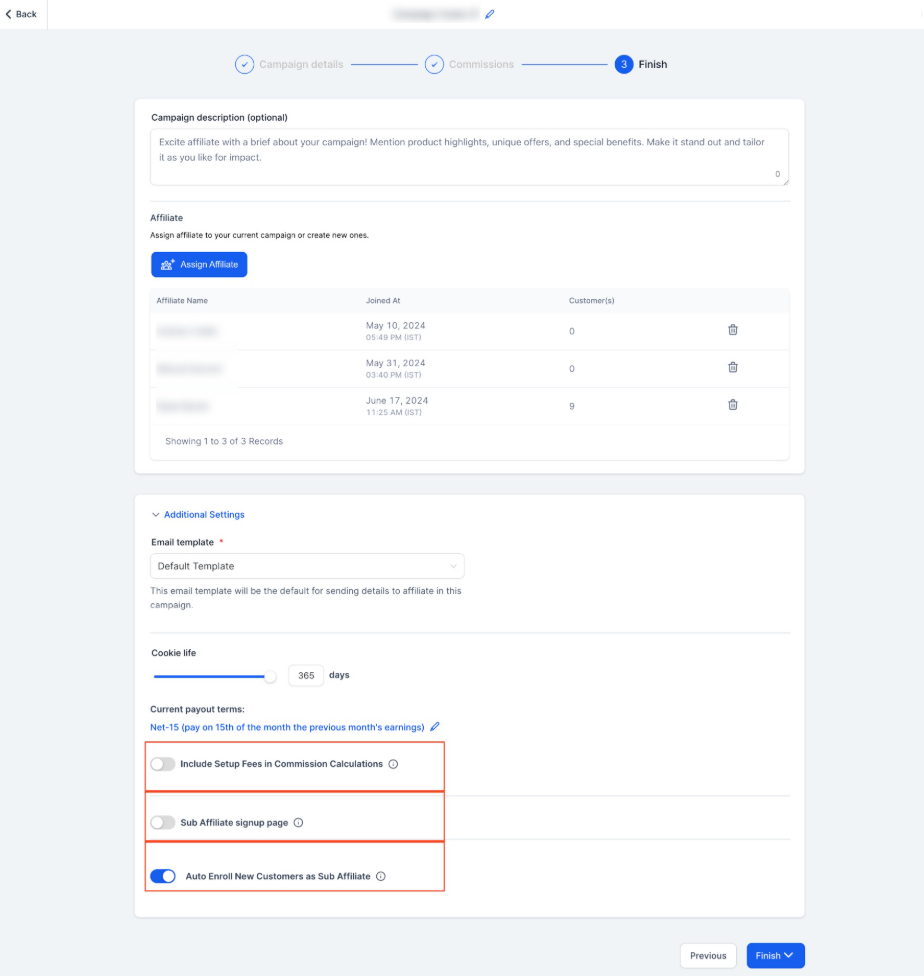
Review these settings based on your affiliate campaign requirements.
Step 12: Publish or Save as Draft
Once you finish configuring your campaign, review the settings.
Choose one of the following options:
Publish: Activate your affiliate campaign.
Save as Draft: Save your configuration and continue editing later.
After publishing, your affiliate campaign is ready for affiliates to promote your products or services.
Changing the Source in an Existing Campaign
You can change the source of an existing affiliate campaign, even after publishing it.
For example, you may need to update the campaign source if its associated funnel, course, or website has been deleted or changed.
Important: Changing the campaign source also changes the affiliate referral URL.
The previous referral URL stops tracking affiliate activity.
Only the new referral URL works after the change.
All other campaign settings and historical performance data remain unaffected.
What to Do After Changing the Campaign Source
Notify your affiliates that their referral URLs have changed.
Share the updated referral links with the affected affiliates.
Ask affiliates to replace previously shared referral URLs with the new links.
Updating referral links helps prevent tracking issues and missed affiliate commissions.