Inbound Webhooks enable seamless CRM integration by allowing external systems to automatically send data using various HTTP request methods like GET, POST, and PUT. This real-time data transfer capability enhances CRM functionality and streamlines workflows, facilitating efficient communication and collaboration across various platforms and tools.
Covered in this Article:
What is an Inbound Webhook?
What are some excellent usage cases for this?
How to use the Inbound Webhook Workflow Trigger?
Step 1
Step 2
Step 3
In your communication Actions:
In If/Else Actions:
Important points to be considered:
What is an Inbound Webhook?
An Inbound Webhook is a robust feature that facilitates the automatic data transfer from external systems to your CRM, improving integration and interoperability. When an event occurs in an external system, an HTTP request (POST, GET, or PUT) is sent to a specific URL linked to a trigger within your CRM, initiating a workflow. This real-time data transfer capability enhances your CRM's functionality and streamlines workflows across various platforms and tools.
By leveraging Inbound Webhooks, businesses can automate processes, reduce manual tasks, and minimize human error, increasing efficiency and productivity. Furthermore, it enables better collaboration between teams, as critical data is readily available and synchronized between different systems. This seamless integration ultimately improves decision-making, customer satisfaction, and business performance.
What are some excellent usage cases for this?
Inbound Webhooks can be used in various scenarios to enhance CRM functionality and automate workflows. Here are a few practical usage cases with examples:
eCommerce Order Integration:
Suppose you have an online store and want to update your CRM with new order information when a customer orders. You can set up an Inbound Webhook in your CRM to receive data from your eCommerce platform whenever a new order is created.
Example: Your eCommerce platform sends an HTTP POST request to the webhook URL with order details such as customer name, email, phone number, and order value. Your CRM then creates or updates the customer's contact information and adds the order details to their record.
Customer Support Ticketing System Integration:
Your company may use a separate support ticketing system to handle customer issues. When a customer creates a support ticket, you can use an Inbound Webhook to send the ticket details to your CRM, ensuring the support team has all the necessary information.
Example: Your support ticketing system sends an HTTP POST request to the webhook URL with the ticket details, including customer email, ticket title, and description. Your CRM then associates the ticket with the corresponding customer record, allowing your support team to access the ticket information directly from the CRM.
Event Registration Integration:
If you host events and use an event registration platform, you can use an Inbound Webhook to send attendee registration information to your CRM.
Example: Your event registration platform sends an HTTP POST request to the webhook URL with attendee information such as name, email, phone number, and event name. Your CRM then creates or updates the attendee's contact information and adds the event registration details to their record, allowing your event team to manage and communicate with attendees effectively.
Lead Capture from Web Forms:
Inbound Webhooks can capture leads from web forms on your website or landing pages and send the data to your CRM.
Example: When a visitor submits a form on your website, your web form sends an HTTP POST request to the webhook URL with the lead's information, such as name, email, and phone number. Your CRM then creates a new lead or updates an existing contact, allowing your sales team to follow up with the lead promptly.
These are just a few examples of how Inbound Webhooks can automate workflows, streamline processes, and enhance CRM functionality in different business scenarios.
How to use the Inbound Webhook Workflow Trigger?
Briefly, bring your data to the system in 3 simple steps using the Inbound Webhook Trigger.

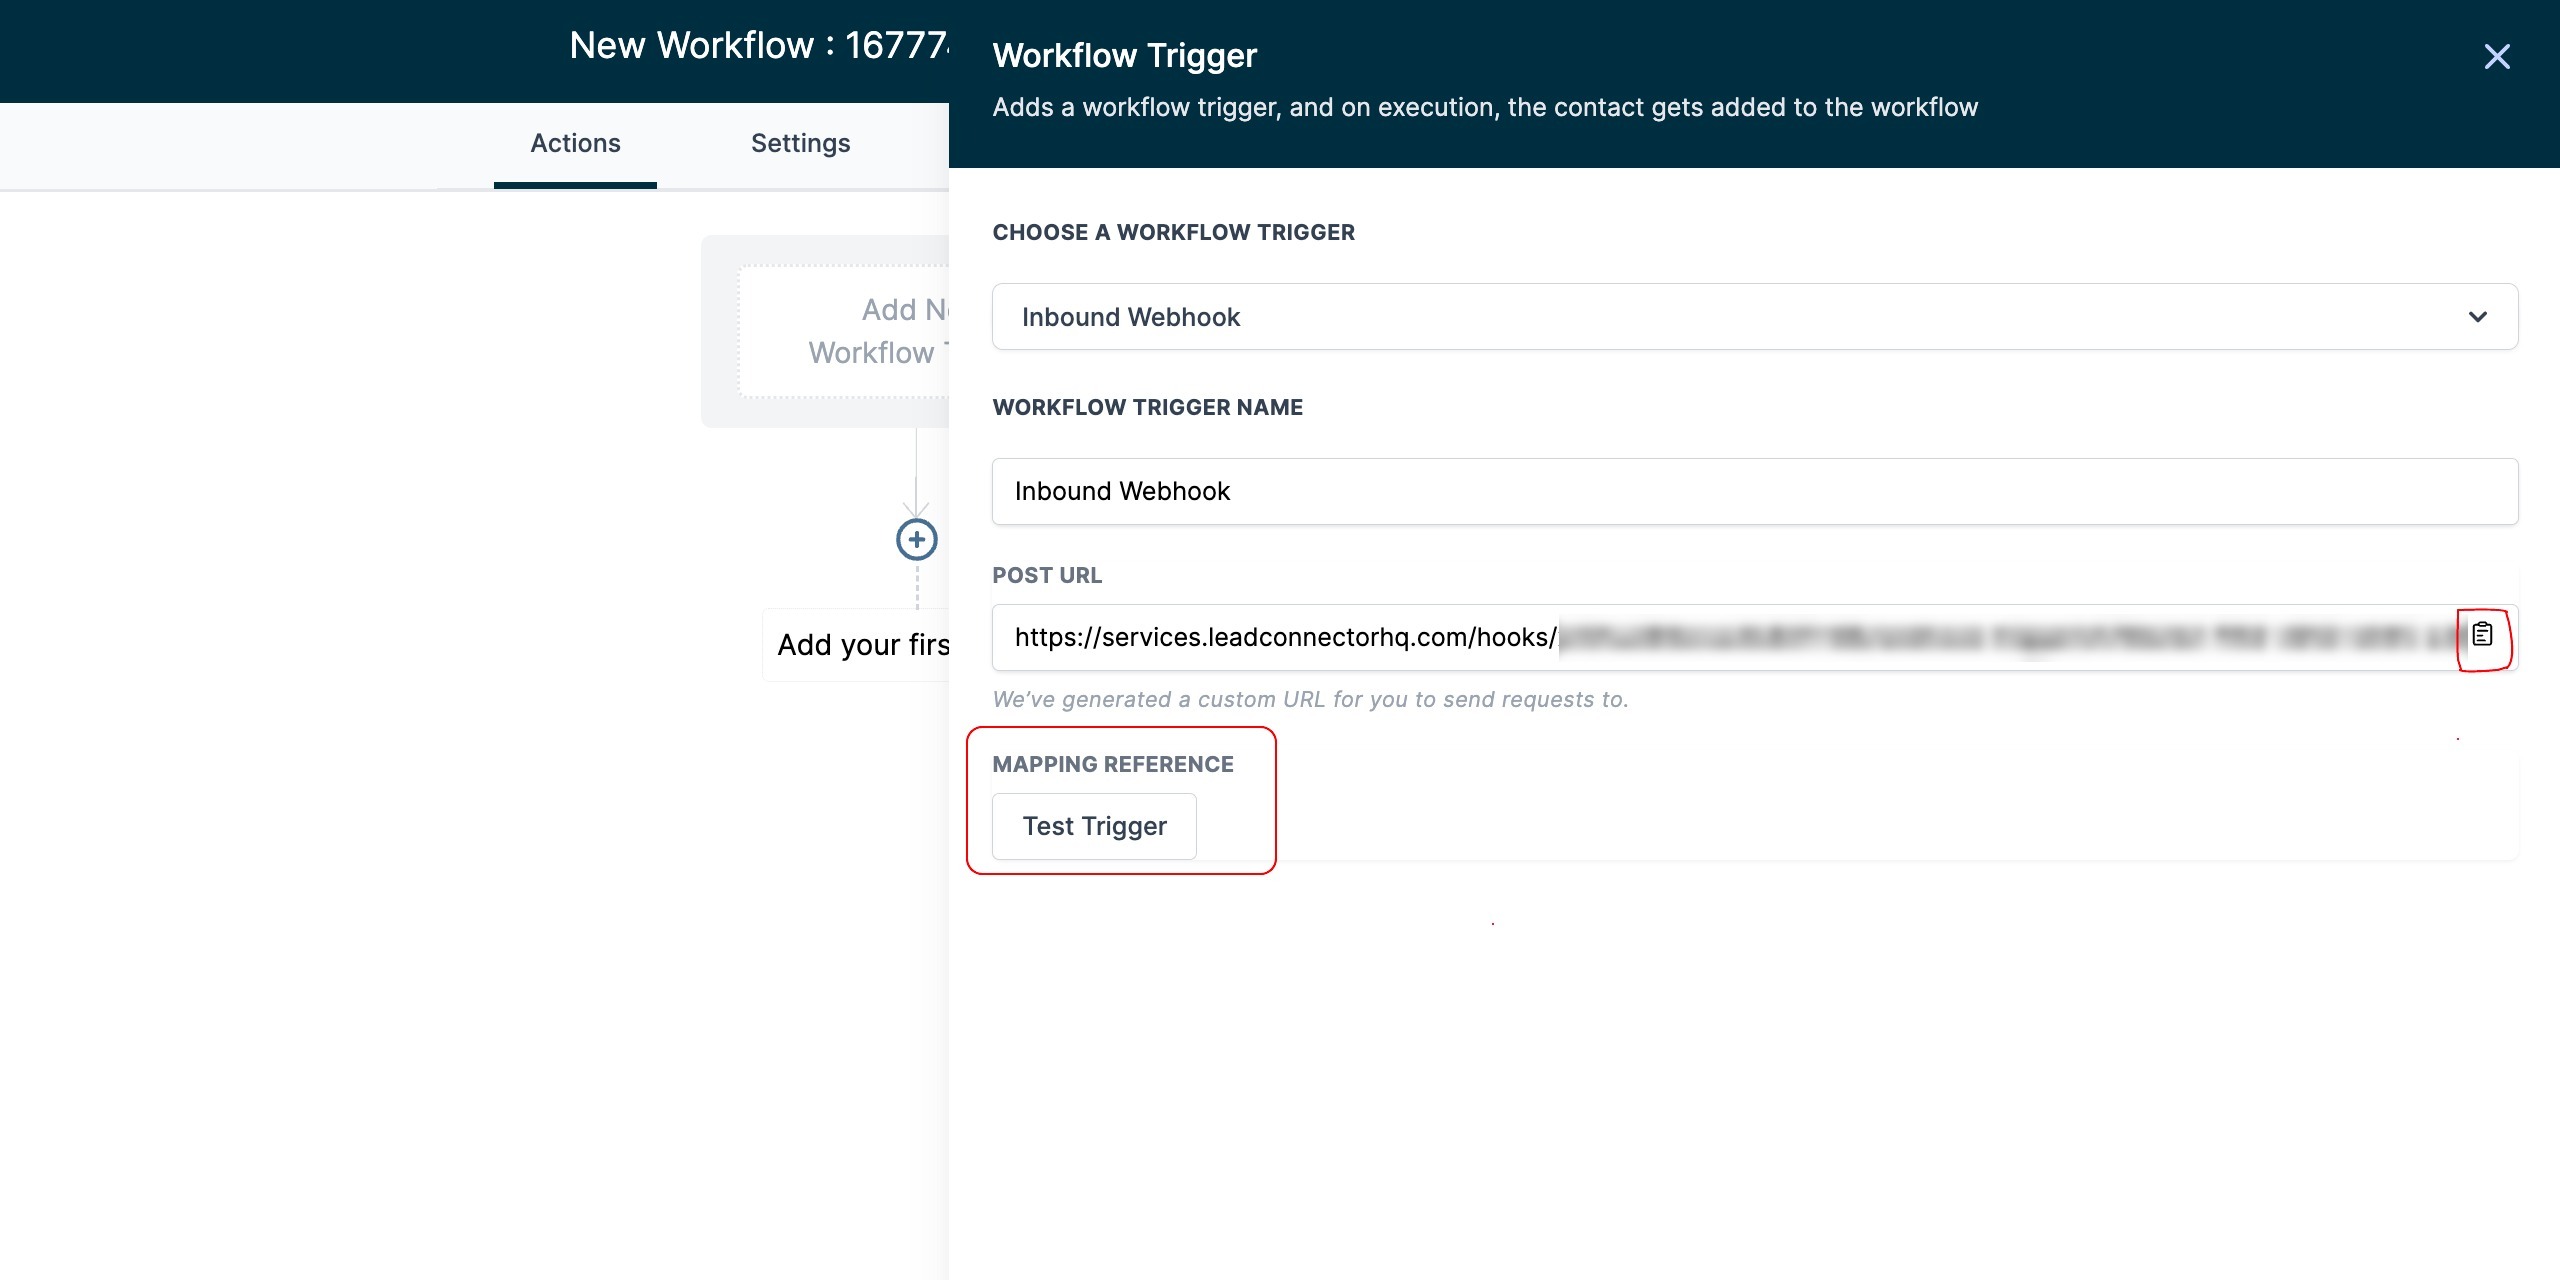
Step 1
Retrieve the webhook URL and use it in your application or system. Next, send the data to the webhook URL using the appropriate HTTP request method (POST, GET, or PUT) and click the "Test Trigger" button.
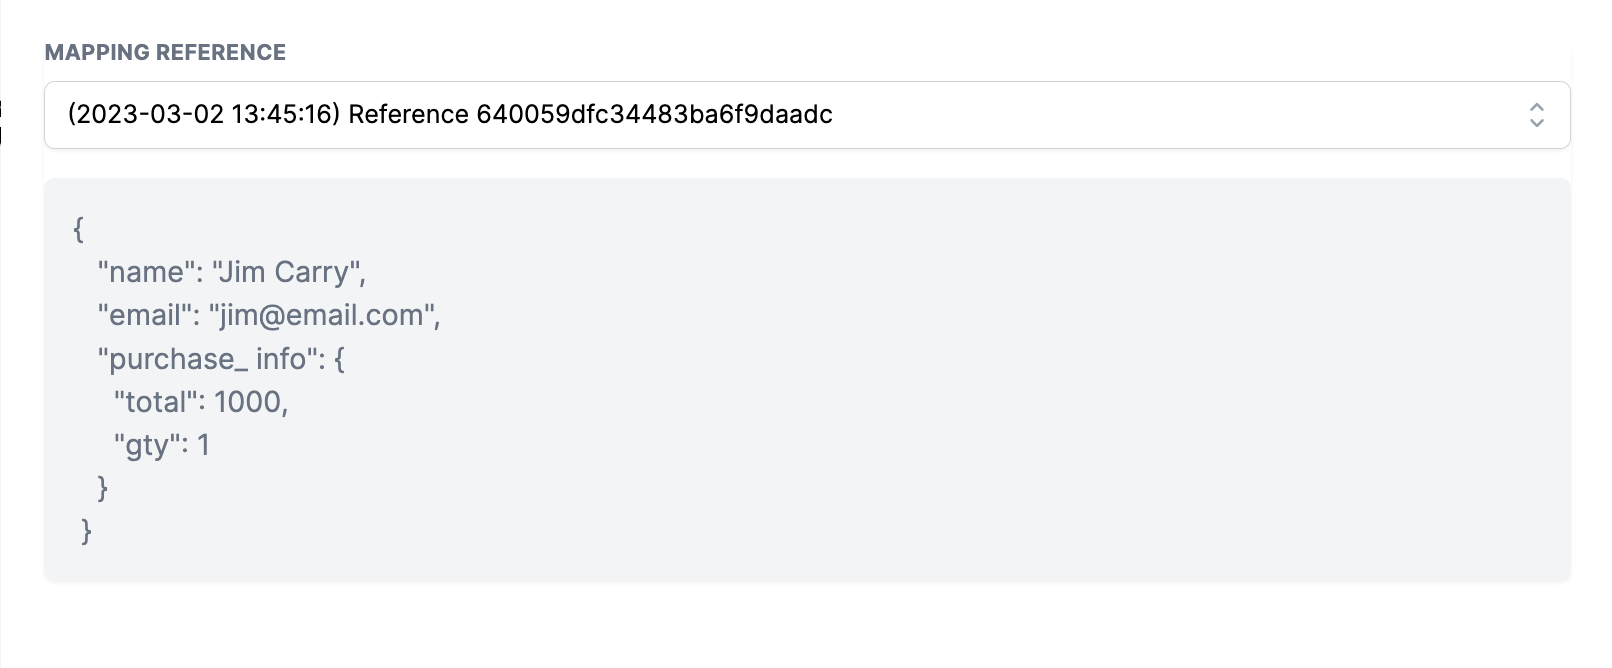
Step 2
Choose the data received from your application or system using the supported HTTP request method (POST, GET, or PUT) and save it as sample data for future reference. Click on "Load More" to view additional recent data. Once you've selected the desired data, save the trigger.
In this step, you can save the data reference for custom variables, which can be treated similarly to other contact custom fields or Location Custom Variables.
The next step and examples below provide more information on utilizing this reference.
Step 2.1: Send a supported HTTP request (POST, GET, or PUT) to the copied webhook URL and copy the ID in the response.

Step 2.2: Copy the unique ID obtained from the supported HTTP request (POST, GET, or PUT) and use it to search for the relevant mapping reference within your webhook trigger.
Please note that the most recent request will always be at the top of the list.
Step 2.3: Select the correct reference and verify the body.
Step 3
You will be directed to the "Create Update Contact" action after saving the trigger. From there, you can select the necessary fields and map the incoming data you received from the trigger. Please note that to create a new contact or map data to an existing one, you must provide either an email or phone field.

By completing the above steps, you can now use the data you received within the workflow as custom values in email, sms, if/else, etc.

Example:
The custom values of Inbound Webhook can be utilized in all of the actions within your workflow. Some examples of how to do this are provided below.
In your communication Actions:
In If/Else Actions:
As shown above, you can use the values from the Inbound Webhook inside all other actions as you see fit.
Responses:
- When mapping request is Sent
Status code - 200
- When you execute actual trigger
Status code - 200
Important points to be considered:
- Always send the request using a supported method (POST, GET, or PUT) when interacting with the webhook.
- Ensure the data is sent as a JSON object, the only supported data format.
- To compile correctly, keys must be a single string without space separations; consider using CamelCase or snake_case instead of separating key names with spaces.
- Providing an Email or Phone number in the payload is mandatory, as the workflow requires contact information. An Email or Phone is required to Find or Create the Contact.
- Arrays are not supported in custom values. You can send them in the request but cannot use them inside actions.
- If your data structure changes, re-select the Mapping Reference inside the Inbound Webhook Trigger setup to address those fields in other actions correctly.
- If your Inbound Webhook Trigger URL gets compromised or leaked and you want to prevent unwanted requests, Delete the existing Inbound Webhook Trigger and Add a New Inbound Webhook Trigger. A new URL with a different ending ID will be generated; update your integrations to match the new URL. Once saved, incoming requests from the old URL won't enter your workflow; only requests from the new URL will.