
Bulk Import Companies via CSV
This article explains how to use the Bulk Import feature to create and update company records in your CRM using CSV files. You'll learn how to enable the feature, configure field mappings, handle duplicates, and monitor import progress.
Whether you're migrating data from another system or performing regular updates, this guided workflow streamlines the process and provides detailed import statistics.
This feature is currently available through LeadConnector Labs. To access it, navigate to your account settings, select Labs, and enable "Company and Custom Object Import."
What is Bulk Import for Companies?
Bulk Import for Companies is a CSV-based import tool that enables you to create and update company records in your CRM at scale. The feature uses a guided, four-step workflow to help you upload data, map fields, handle duplicates, and verify information before finalizing the import.
This tool is designed for scenarios where you need to migrate company data from another system, perform regular updates to existing records, or add multiple companies without manual entry. The workflow includes smart field mapping with data preview, duplicate detection based on Company ID, and detailed import statistics.
Key Benefits
The Bulk Import feature delivers several advantages for managing company data in your CRM:
Enabling Company Import in Labs
Before you can use the Bulk Import feature, you must enable it through the Labs section of your account. Labs features are experimental capabilities that may be in active development.
Open your account settings and select the Labs section from the navigation menu.
Locate the toggle for Company and Custom Object Import and turn it on. The feature will be immediately available in your CRM.
How to Import Companies
Once the feature is enabled, you can access the import workflow directly from the Companies section of your CRM. The following steps outline the process from start to completion.
Navigate to Companies in your CRM and click the Import button in the top navigation bar.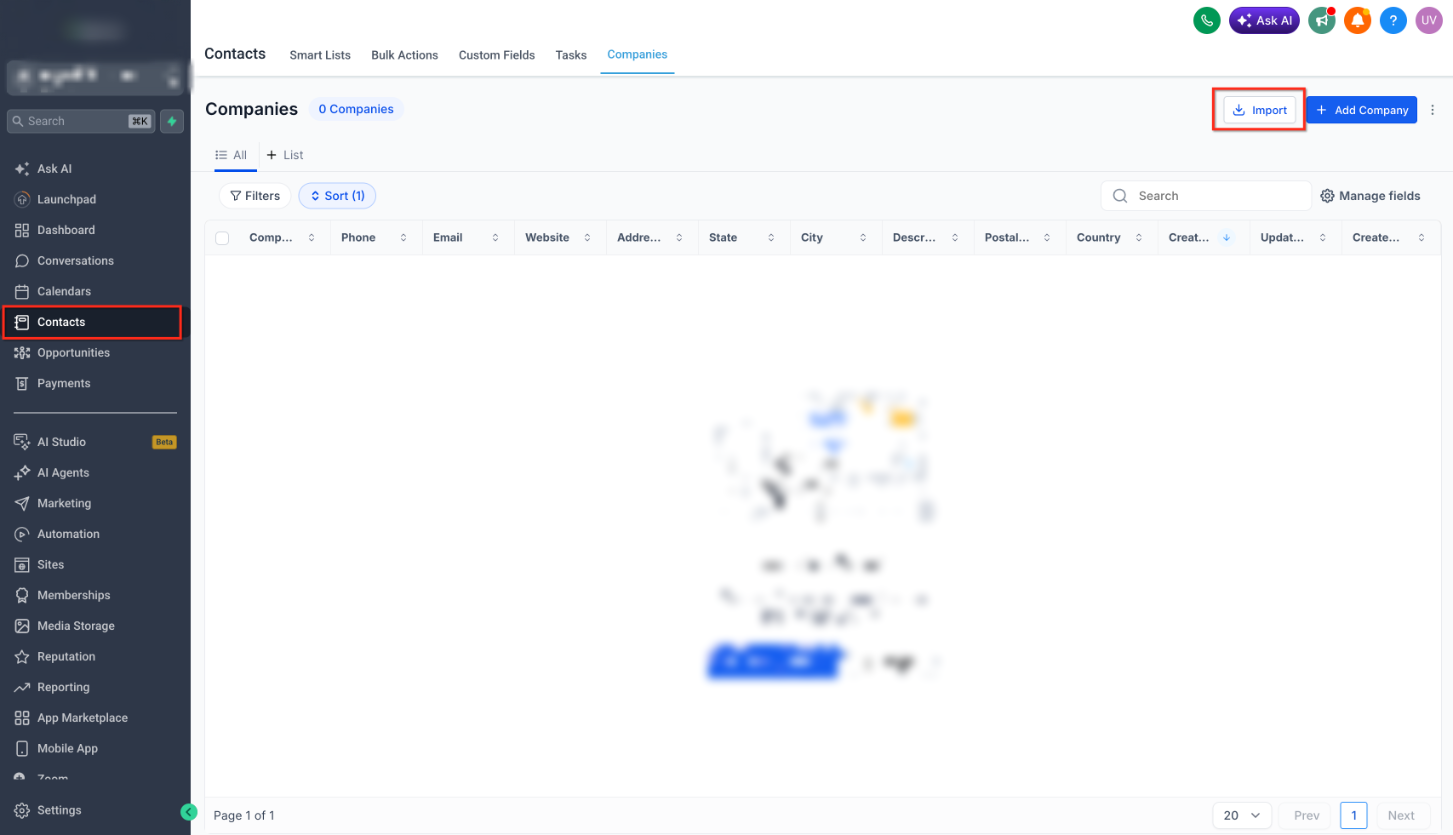
On the object selection screen, choose Companies to begin the import workflow.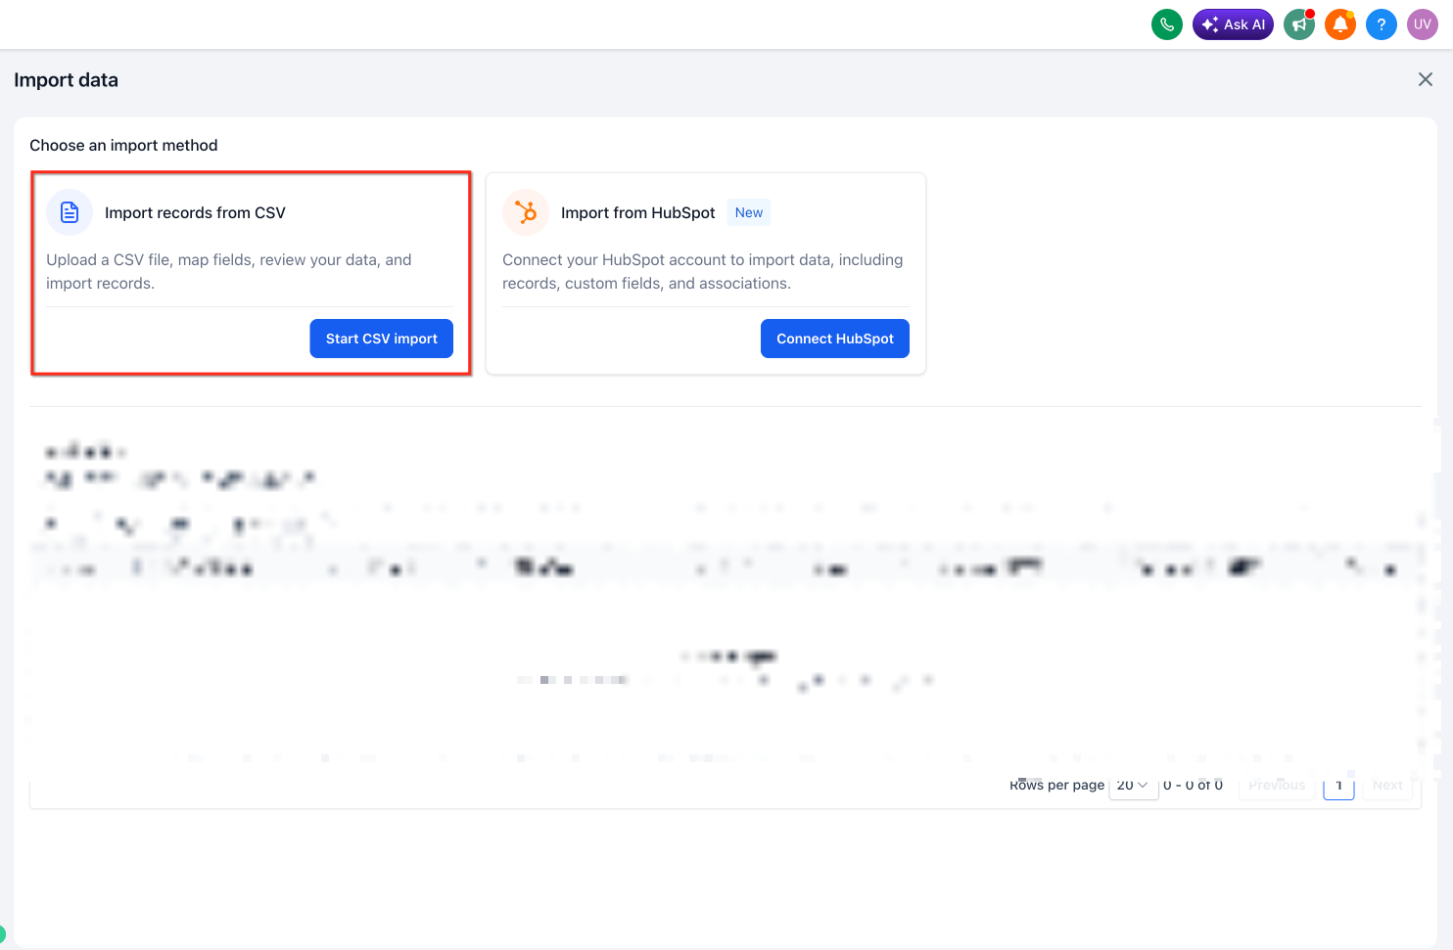
Click Upload CSV and select your prepared file from your computer. The system will validate the file format and display a preview.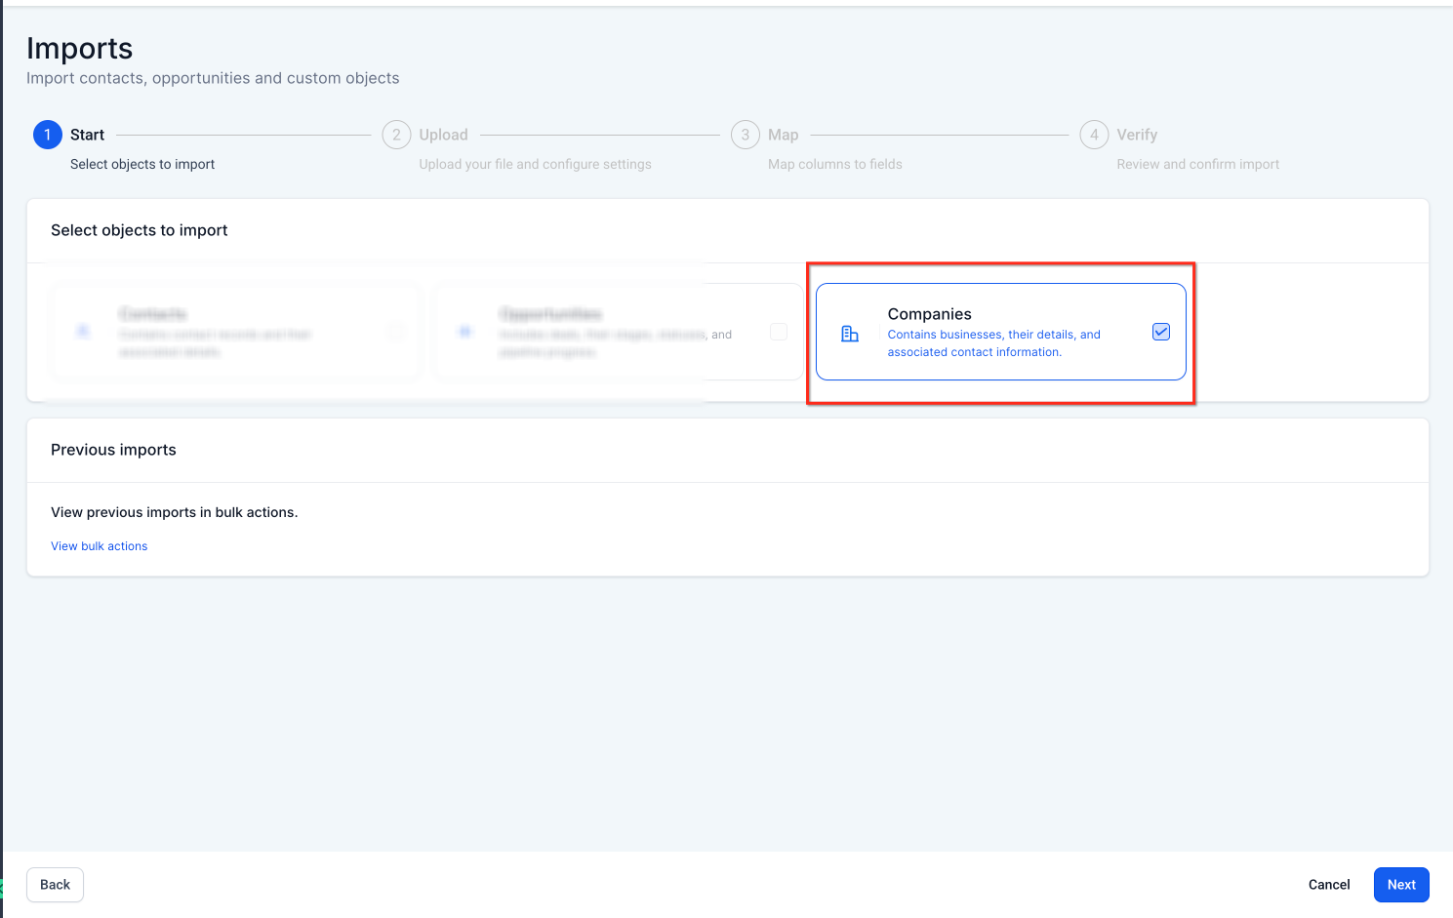
Select whether to Create companies, Update companies, or Create & update companies based on your needs.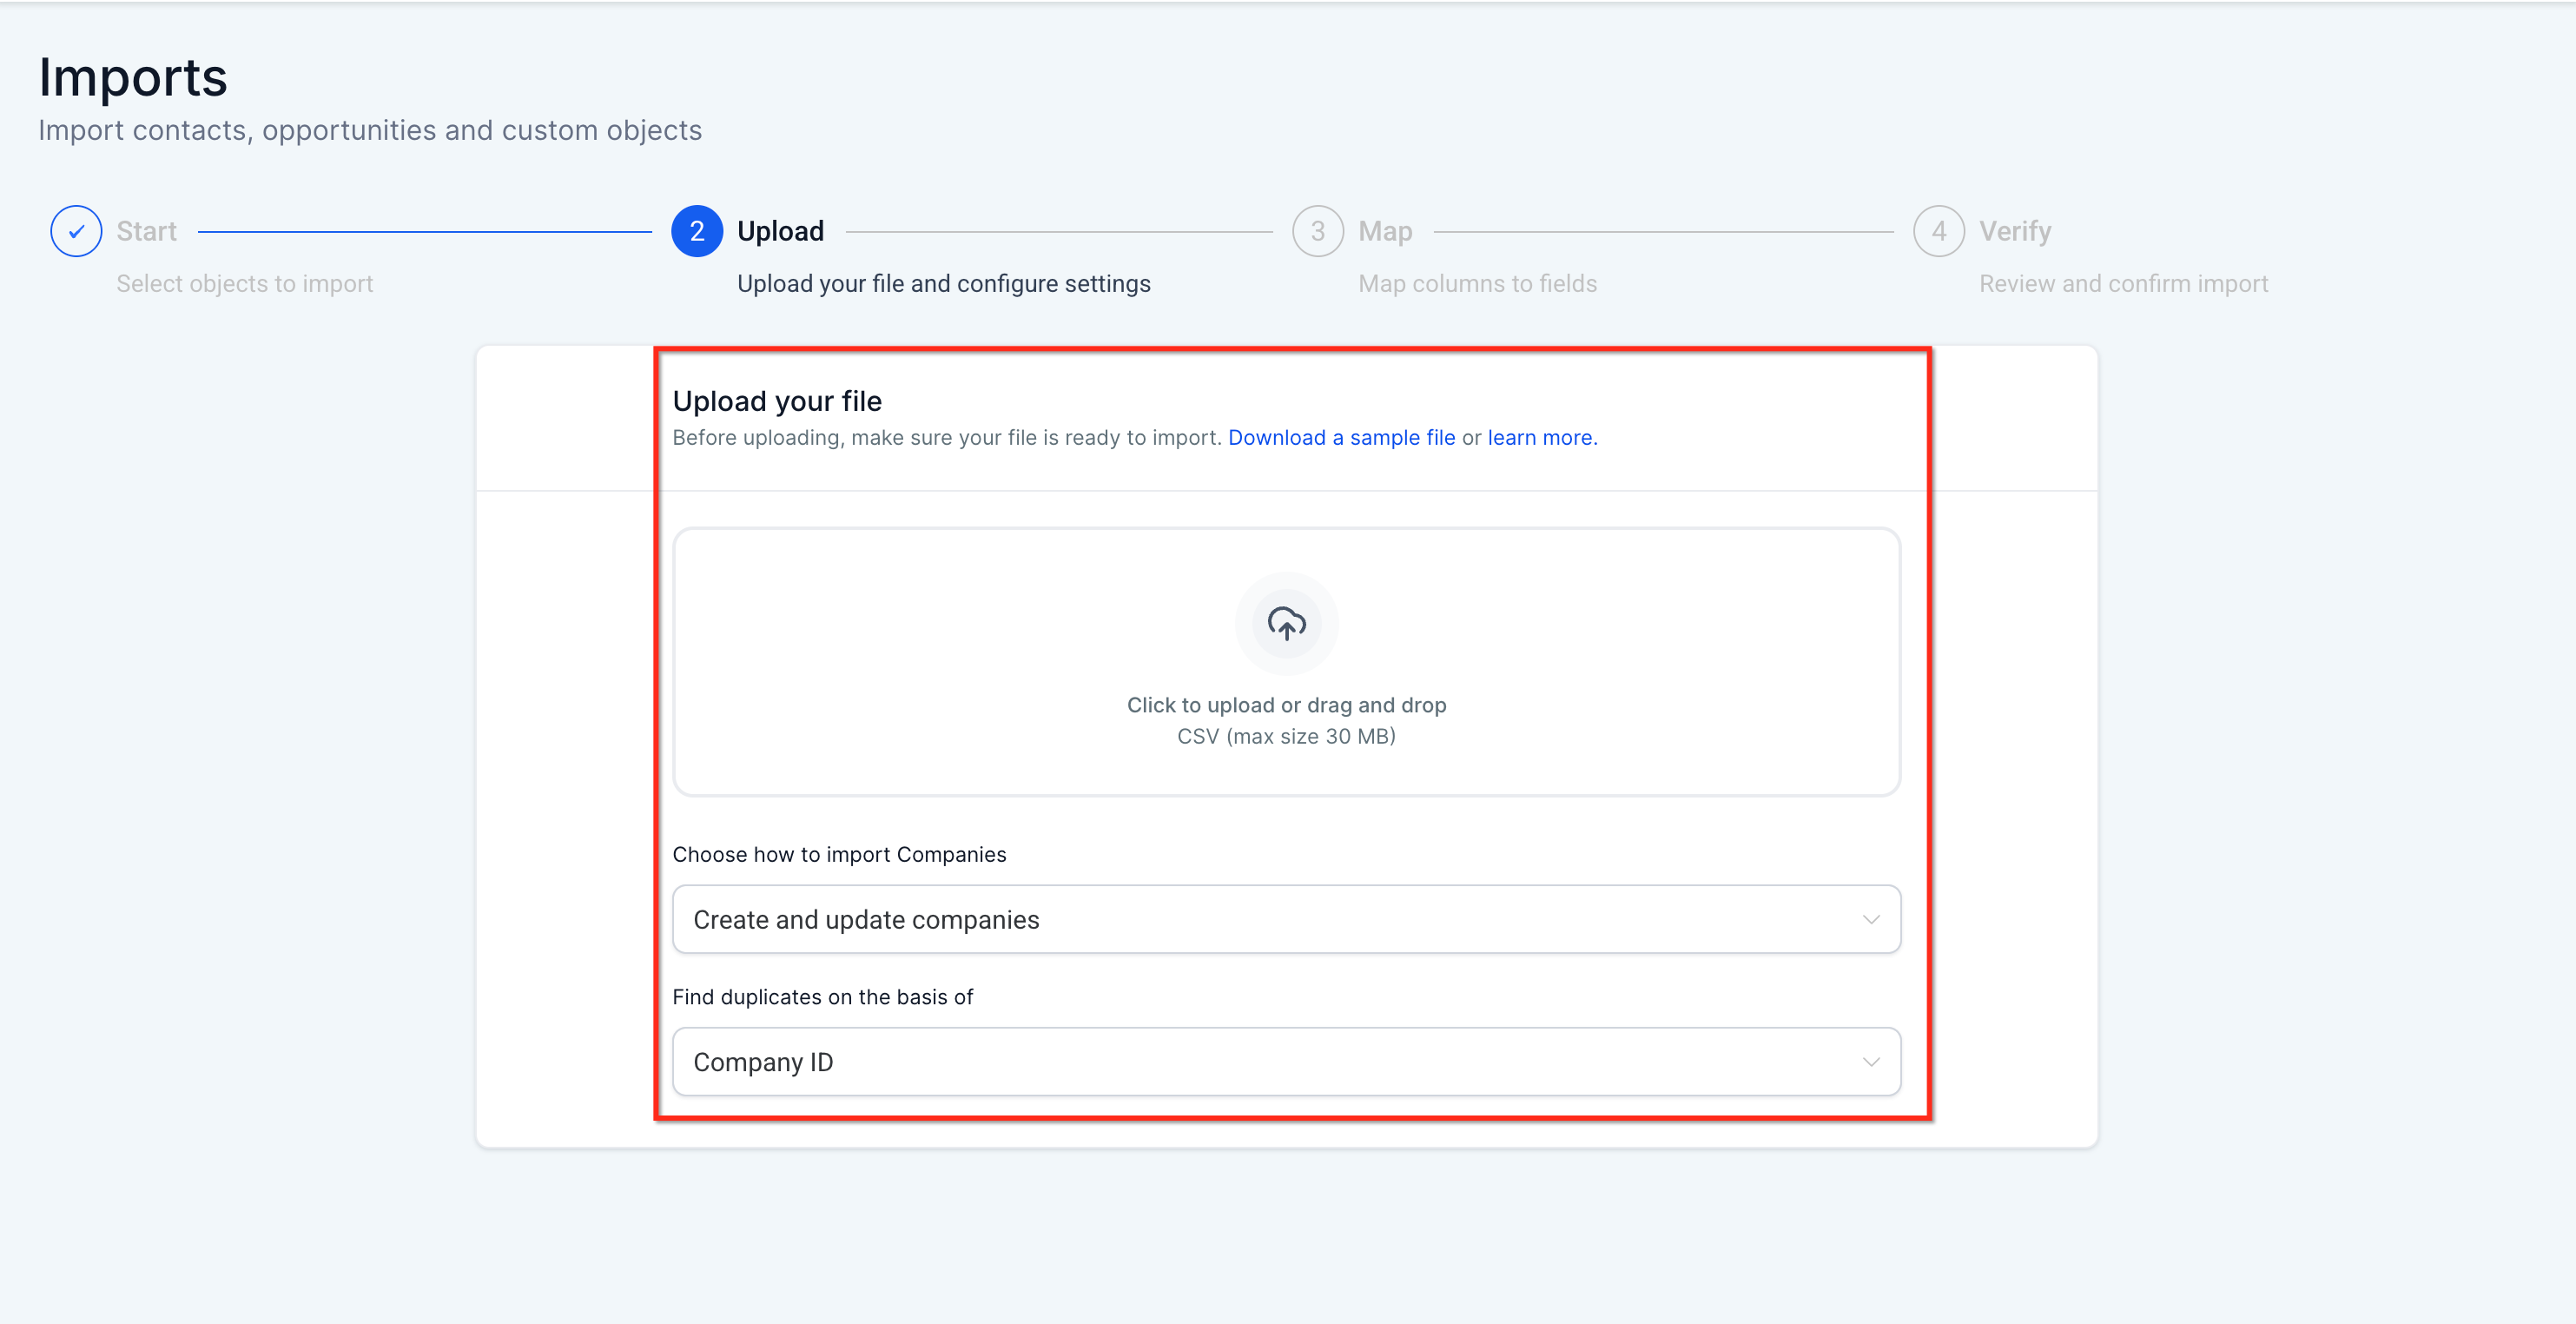
Select Company ID as the duplicate detection criteria to prevent creating duplicate records during the import.
Match each column in your CSV to the corresponding company field in LeadConnector. The system displays preview data to help confirm correct mapping.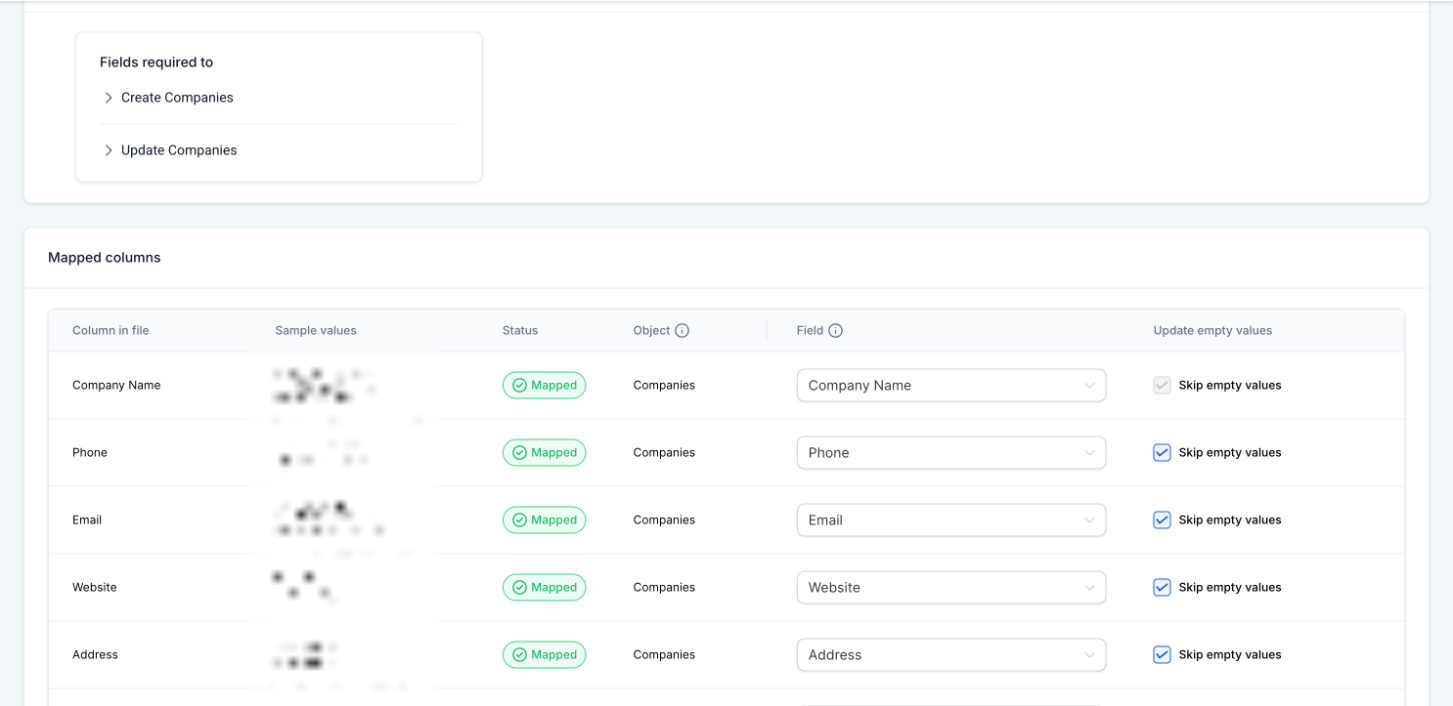
On the verification screen, review all mapped data and settings. Enable Don't update to empty value if you want to preserve existing field data when the CSV contains blank values.
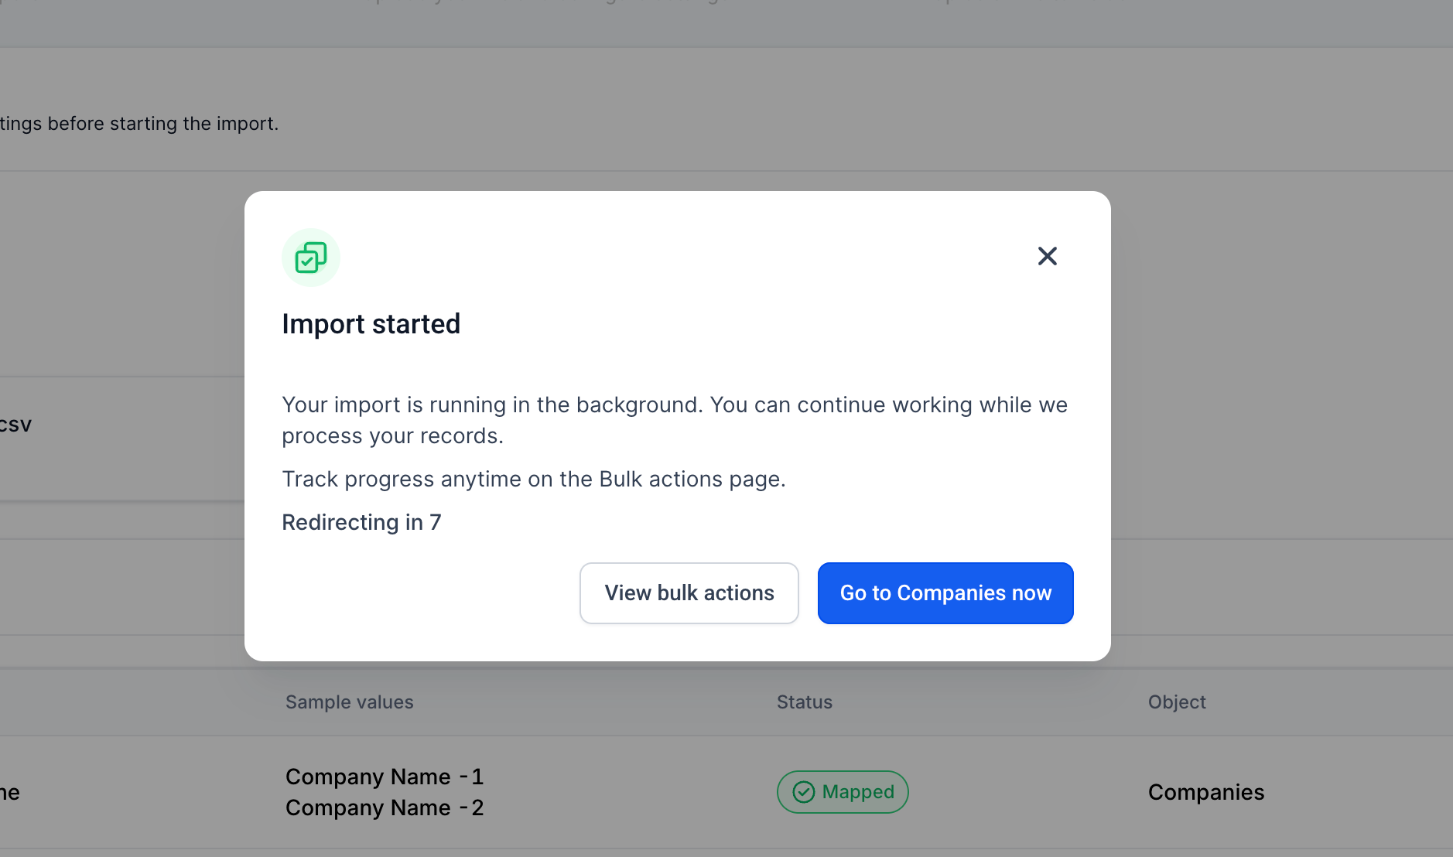
Click Start Bulk Import to begin processing. The system will display progress updates and redirect you to the Bulk Actions page when complete.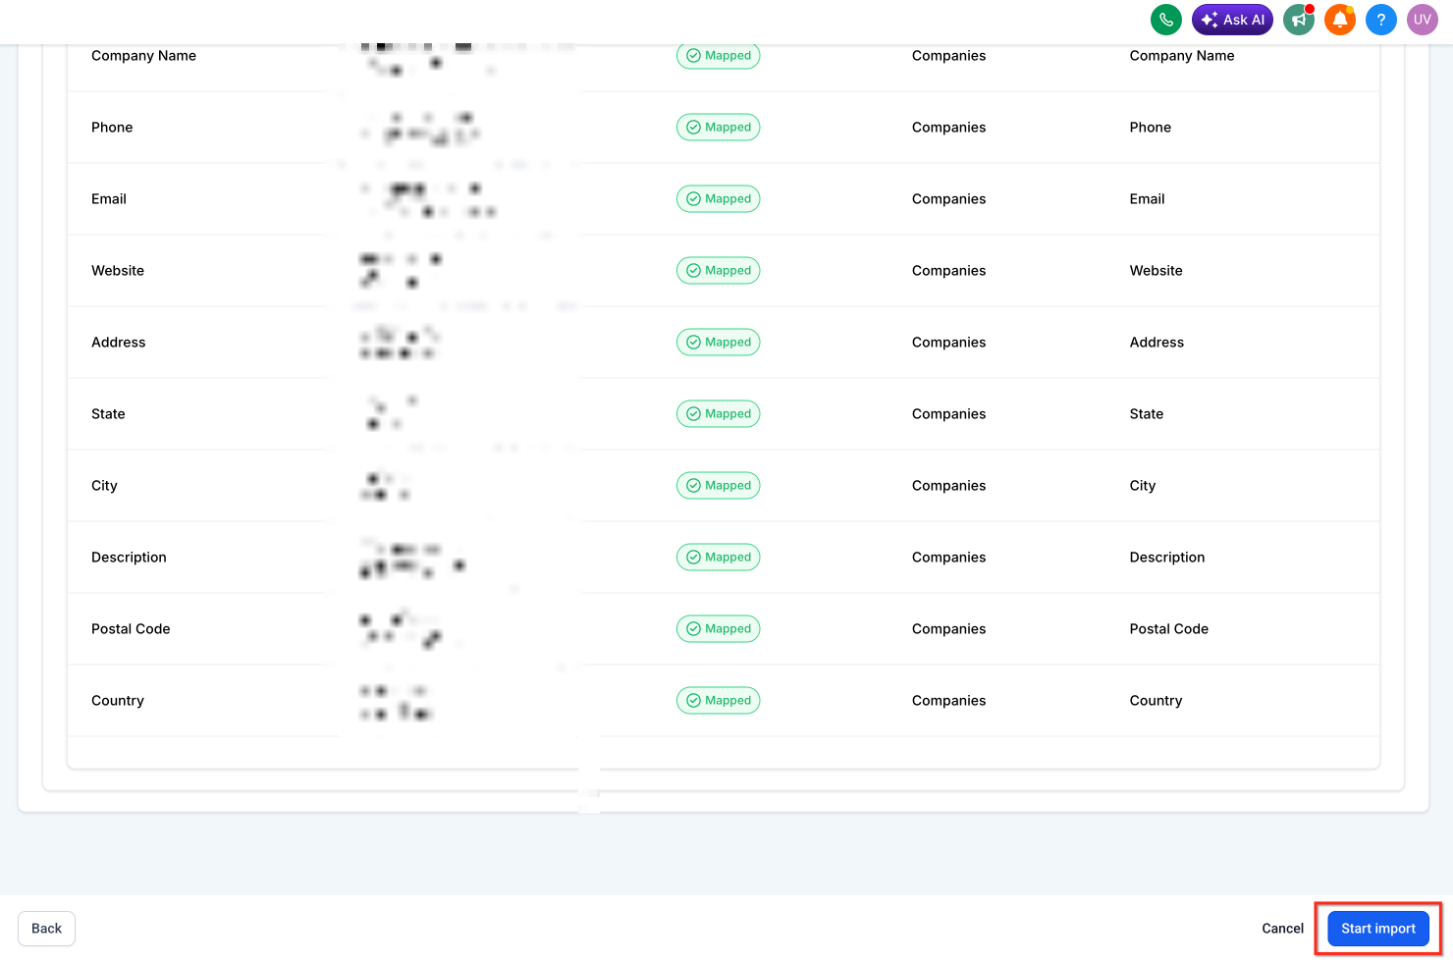
Import Workflow Steps
The import process follows a four-step guided workflow designed to minimize errors and ensure data accuracy. Each step builds on the previous one to deliver a complete import experience.
Select the object type (Companies) and define import behavior. You can choose to create only, update only, or perform both actions during the import.
Upload your CSV file and configure duplicate detection rules. The system validates the file format and checks for basic structural issues before proceeding.
Match CSV columns to company fields using the smart mapping interface. The system displays preview data from your CSV to help verify correct field assignments.
Review all settings, field mappings, and sample data before starting the import. This final step allows you to catch any mapping errors and adjust protection settings for existing data.
Always review the verification screen carefully before starting the import. Field mapping errors are easier to correct before processing begins.
Tracking Import Progress
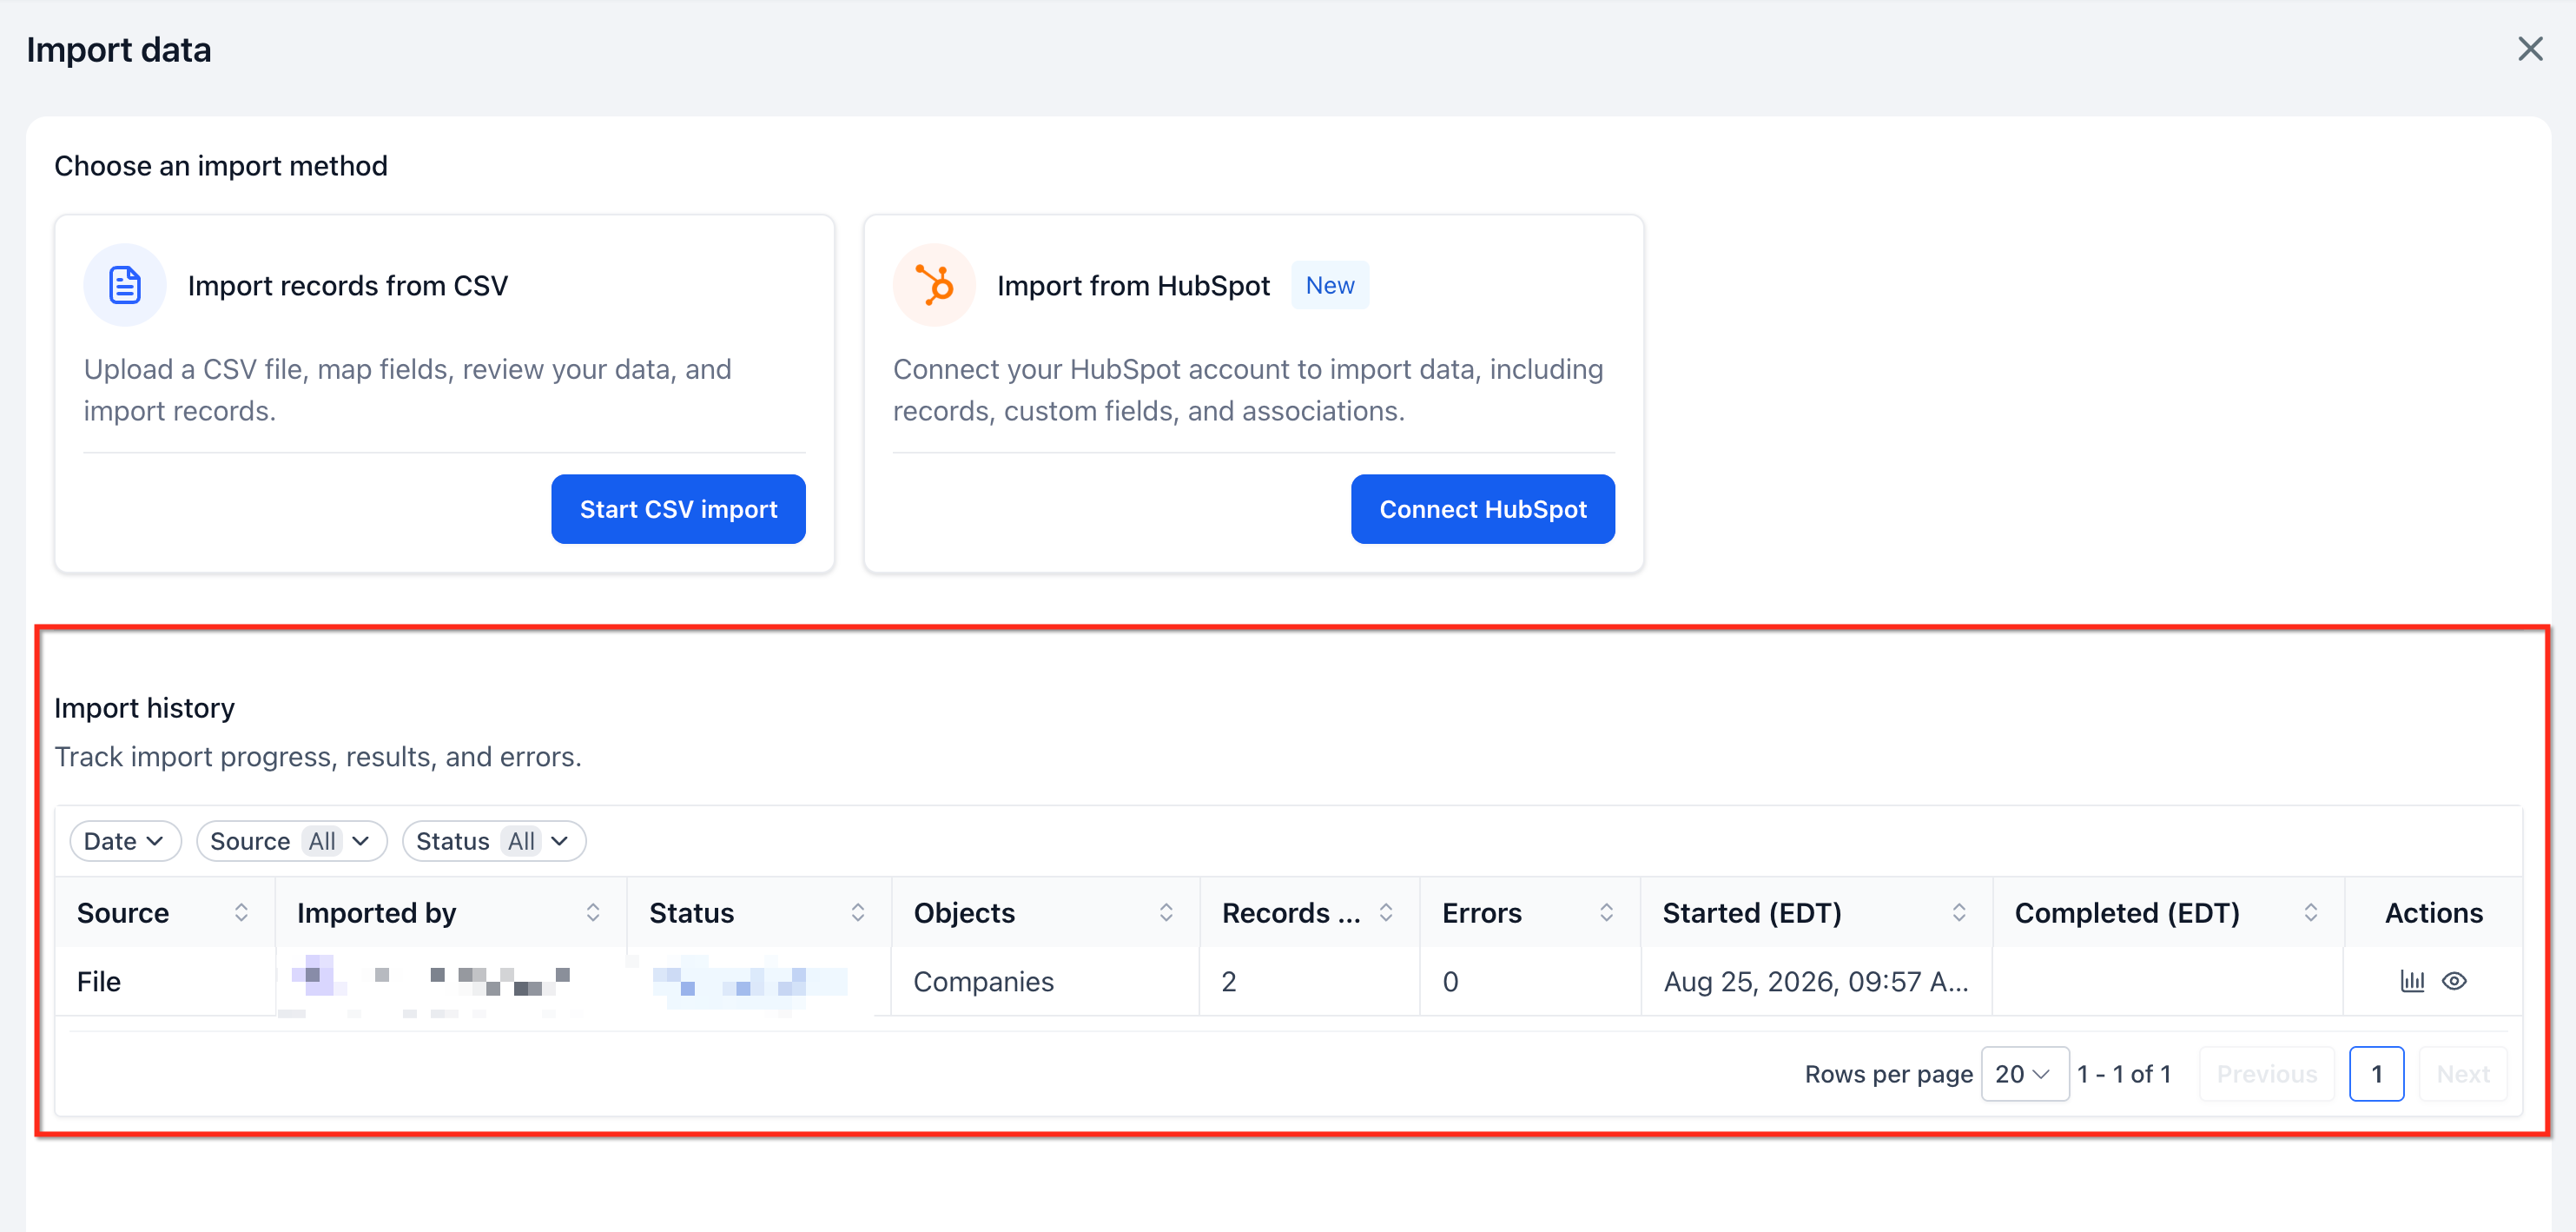
After starting an import, you can monitor its progress and review detailed statistics through the Bulk Actions – Companies page. This dedicated tracking interface provides real-time updates and historical records of all imports.
To access your import history, navigate to Companies and select Bulk Actions – Companies from the menu. This page displays:
Always download the import report after completion. The detailed error log helps you identify and correct data issues before attempting another import.
Best Practices for CSV Import
Following these guidelines will help you achieve clean, accurate imports with minimal errors or data loss.
Ensure your CSV uses standard formatting with properly quoted fields and consistent delimiters. Remove any special characters or formatting that might cause parsing errors.
Always double-check your field mappings during the Map step. Use the preview data to confirm each CSV column is matched to the correct company field.
When updating existing companies, turn on "Don't update to empty value" to prevent accidental data wipes. This setting preserves existing field values when your CSV contains blank cells.
Select Company ID as your duplicate detection field to ensure existing records are updated rather than duplicated during imports.
After each import, download the detailed report from Bulk Actions – Companies. Review errors and warnings to identify data quality issues before your next import.
For large imports, test the workflow with a small subset of data first. Verify field mappings and settings work correctly before processing the full dataset.
The import process cannot be reversed once started. Always verify your data and settings carefully during the Review step before clicking Start Bulk Import.
If you encounter issues during the import process or have questions about field mappings, consult these resources:
- Review the import report after completion to identify specific error messages and affected records.
- Navigate to Companies → Bulk Actions – Companies to access historical import logs and statistics.
- Check the verification screen before starting an import to confirm field mappings match your CSV structure.
- Contact LeadConnector support if you need assistance interpreting error codes or resolving import failures.