
Create a ticket manually when your team records a request, or connect a support email address so incoming customer emails become tickets. This guide covers manual creation, the default email system, Gmail, sender controls, and how email replies stay associated with a request.
TABLE OF CONTENTS
- Before you begin
- Create a ticket manually
- Choose your email provider
- Connect the default email system and add support addresses
- Connect or reconnect Gmail
- Block unwanted senders
- Understand email-created tickets
- Confirm that your setup works
- Troubleshooting
- Frequently asked questions
- Related guides
Before you begin
Use a user with permission to manage tickets. An administrator should configure email integrations and the ticket form.
Review Ticket configuration first if you need to change the fields, order, or required information on the creation form. The fields in your account may differ from the examples shown here.
Create a ticket manually
- Open Tickets in the sub-account.
- Select New ticket.
- Enter a clear Ticket name that describes the request.
- Under Raised by, select the customer contact.
- Add the description and complete the fields shown on your form, such as status, priority, category, assignee, and due date.
- Use Attachment to add supporting files when that field is included.
- Select Create ticket, or Create & add new to save this ticket and continue with another.
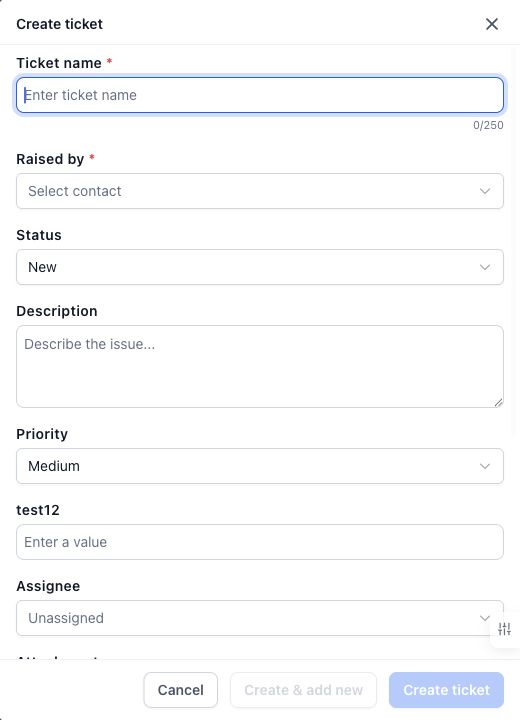
The creation form uses your sub-account's saved ticket configuration.
Ticket name and Raised by identify the request and the contact. Complete any other fields marked as required. The form can preselect the defaults configured for your account; review them before saving.
If the contact does not exist and the picker does not offer contact creation, create the contact in Contacts, then return to the form. Use Cancel to close an unused form; if you have entered information, review the discard prompt.
Choose your email provider
Open Tickets → Settings → Integrations. The built-in email service appears under Default email system, and Gmail appears under Additional providers.
| Option | What you need | How it is used |
|---|---|---|
| Default email system | A dedicated domain you own and have verified in Email services | Configure support addresses on the domain for receiving requests and sending ticket replies. |
| Gmail | A supported Google Workspace account and permission to authorize it | Connect the mailbox through Google's authorization flow. |
The current integration screen can disable Gmail connection controls while the default email system is active and explain that the current provider must be disconnected to switch. Follow the state shown in your account; do not assume both provider types can be active together.
Connect the default email system and add support addresses
Select a verified domain
- Open Settings → Integrations.
- In Default email system, review the dedicated-domain configuration.
- Choose your domain under Verified domain.
- If no suitable domain is available, use Add a domain in Email services and complete that service's domain setup and verification.
- Return to Ticketing and check the connection state.
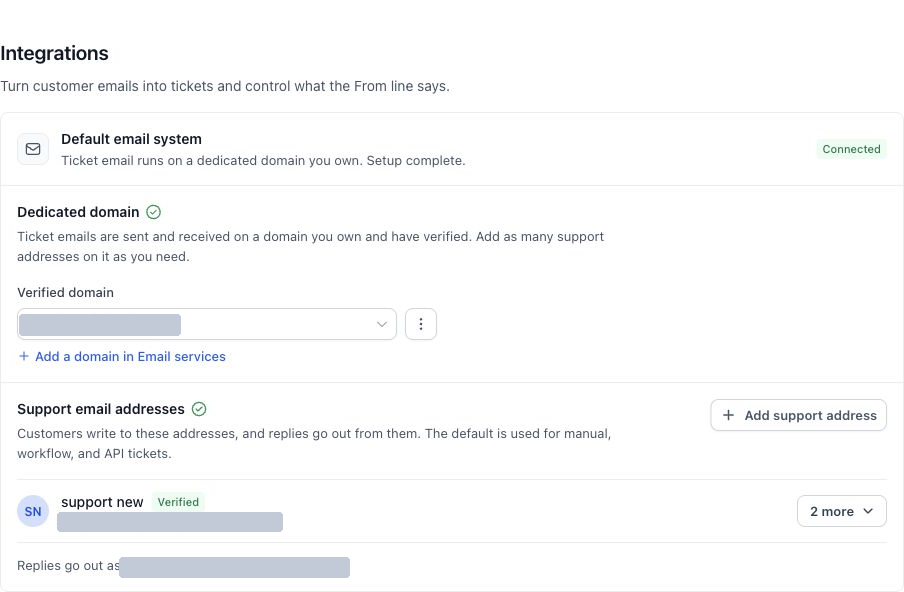
The connected domain supplies the addresses customers write to and the sender addresses used for replies.
Add a support address
- Select Add support address.
- Confirm the displayed domain.
- Enter the local part of the Support email address, such as support or billing. The domain is added by the form.
- Enter a recognizable Display name, such as Acme Support.
- Select Save address, or Save and add another to continue adding addresses.
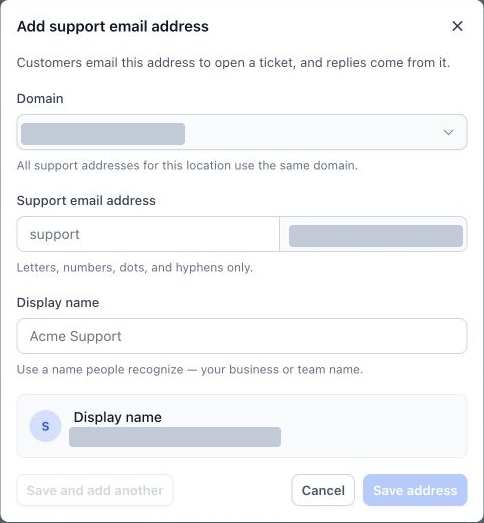
All support addresses shown in this setup use the location's selected domain.
Review the resulting address list and the Replies go out as information. The integration screen identifies the default support address as the sender used for manual and workflow-created tickets. Email-created tickets retain the relevant source mailbox for replies.
Connect or reconnect Gmail
- Open Settings → Integrations and expand Additional providers.
- Review the Gmail — Google Workspace · OAuth option and any provider-switching message.
- If available, select Add and follow Google's sign-in and authorization steps for the intended support account.
- Return to Ticketing and confirm that the connection is active.
- If a connection is expired, use Reconnect when it is available and complete authorization again.
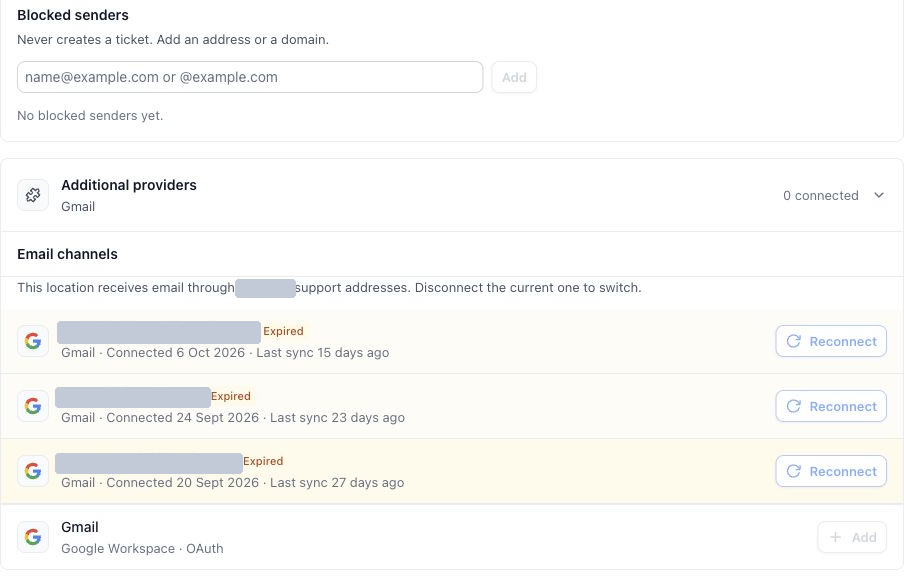
Connection state and provider restrictions explain whether Add or Reconnect is available.
Choose the support mailbox deliberately during authorization. If the control is disabled, resolve the reason shown in the integration screen before repeating the sign-in flow.
Block unwanted senders
- In Integrations, find Configuration → Blocked senders.
- Enter an email address or a domain in the format shown by the field, such as name@example.com or @example.com.
- Select Add and review the resulting entry.
Blocked senders do not create tickets. Blocking a domain affects mail from that domain, so use an individual address when that is the intended scope.
The integration also filters automated replies, spam, and mail loops. These protections mean that every email reaching a mailbox will not necessarily produce a new ticket.
Understand email-created tickets
When an eligible new customer email creates a ticket, its subject identifies the request and the email content becomes part of the ticket history. The sender's email is used to associate the request with an existing contact or create a contact when needed.
The ticket also carries its source information and the relevant mailbox. Review these details when multiple support addresses are configured.
| Situation | What happens to the email exchange |
|---|---|
| The customer emails a connected support address | An eligible new request can create a ticket. |
| The agent replies to an email-created ticket | The reply continues the customer's original email thread. |
| The agent sends the first reply from a manually created ticket | A new outbound email thread begins. Subsequent matching replies stay with the ticket. |
| An existing ticket is renamed | Its internal name can change without changing the established email subject. |
| A message matches an existing ticket thread | It is associated with that ticket instead of being treated as an unrelated request. |
Continue replies from the ticket so the request history remains together. Different requests from the same customer can have separate tickets.
Confirm that your setup works
Send a simple test request from a customer-side email address to the configured support address. Confirm that the ticket appears, is linked to the correct contact, and shows the expected subject and source.
Open the ticket and send a test reply only to the intended test recipient. Check the From address and confirm that a customer reply returns to the same ticket. Use this check after setting up or reconnecting a mailbox.
Troubleshooting
| Issue | What to check |
|---|---|
| New ticket cannot be saved | Complete the name, contact, and other required fields. Review validation messages beside the fields. |
| A custom field is missing | Review the saved ticket form layout. |
| An incoming email does not create a ticket | Confirm the exact destination address, provider connection, blocked senders, and whether the message belongs to an existing thread. Check whether it is automated or filtered mail. |
| Gmail Add or Reconnect is disabled | Read the provider-switching message and connection state. Repeated authorization will not resolve a disabled provider control. |
| Replies use an unexpected sender | Review the ticket's source mailbox and the default support address for manually created tickets. |
| Older emails are missing after reconnection | Verify the mailbox and received dates with your administrator. Do not assume reconnection imports the entire mailbox history. |
Frequently asked questions
Can I create tickets without an email integration?
Yes. Manual creation is available independently of connecting an inbox. Configure a sending integration before relying on public email replies.
Can I have more than one support address on the default email system?
The integration provides Add support address and supports multiple addresses on the selected domain.
Does creating a manual ticket itself send an email?
Use the public reply composer when you intend to contact the customer. Check your configured workflows for any automatic creation acknowledgments.
Can I import old tickets in this workflow?
CSV import is outside this guide and is not part of the documented creation screens. Connecting email should not be treated as a historical ticket migration.
Related guides
- Set Up and Configure Ticketing
- Work with the Ticket Details Page
- Automate Ticketing with Workflows